Sony STR-SE501: Recording Naming Preset Stations and Program Sources
Recording Naming Preset Stations and Program Sources: Sony STR-SE501
Table of contents
- WARNING Precautions
- About This Manual T ABLE OF CONTENTS Additional Information
- Hooking Up the Components Unpacking
- Antenna Hookups
- Audio Component Hookups
- Video Component Hookups
- Digital Component Hookups
- 5.1CH Input Hookups
- Other Hookups
- CONTROL A1 hookup (STR-DE545 and STR-SE501 only) AUX AUDIO IN hookup Connecting the AC power cord
- Hooking Up and Setting Up the Speaker System
- Speaker System Hookup
- Speaker System Hookup
- Performing Initial Setup Operations
- Multi Channel Surround Setup
- Center speaker size ( Rear speaker size (
- Multi Channel Surround Setup
- Adjusting the speaker volume
- Before turning on the receiver Checking the connections Before You Use Your Receiver Multi Channel Surround Setup
- There is no sound no matter which component is selected. No sound is heard from one of the front speakers.
- Front Panel Parts Descriptions Location of Parts and Basic Operations ? 1 switch Function buttons
- INPUT MODE button
- Front Panel Parts Description
- 25
- Front Panel Parts Description
- Enjoying Surround Sound
- Selecting a Sound Field
- Sound field information
- Use the buttons on the front panel to operate the following modes Selecting a Sound Field
- Understanding the Multi-Channel Surround Displays
- Understanding the Multi-Channel Surround Displays
- Customizing Sound Fields
- Adjusting the level parameters Customizing Sound Fields
- Adjusting the bass/treble Resetting customized sound fields to the factory settings
- Customizing Sound Fields Adjustable parameters for each sound field
- Receiving Broadcasts
- Brief descriptions of buttons used to receive broadcasts
- Storing FM Stations Automatically Direct Tuning
- Preset Tuning Presetting radio stations Automatic Tuning
- Tuning to preset stations Receiving RDS broadcasts Displaying the RDS Information Using the Radio Data System (RDS)
- Using the Radio Data System (RDS) Monitoring traffic, news, or information programmes (EON) Locating a station by programme type
- Description of program types
- Other Operations
- Recording Naming Preset Stations and Program Sources
- Recording on a video tape Using the Sleep Timer Recording
- Adjustment Using the SET UP Button
- Troubleshooting Additional Information
- Reference sections for clearing the receiver’s memory
- Specifications Amplifier section
- FM tuner section AM tuner section Video section General
- Glossary
- Settings Using SUR, LEVEL, BASS/TREBLE, and SET UP buttons
- Remote Button Description (STR-DE445 only)
- Changing the factory setting of a function button
- Remote Button Description (STR-DE445 only)
- Index
45
GB
Other Operations
Recording
Your receiver makes it easy to record to and from the
components connected to it. You don’t have to connect the
playback and recording components directly to each
other: once you select a program source on the receiver,
you can record and edit as you normally would using the
controls on each component.
Before you begin, make sure you’ve connected all
components properly.
ç
: Audio signal flow
c
: Video signal flow
Recording on an audio tape or MiniDisc
You can record on a cassette tape or MiniDisc using the
receiver. Refer to the instruction manual of your cassette
deck or MD deck if you need help.
1
Select the component to be recorded.
2
Prepare the component for playing.
For example, insert a CD into the CD player.
3
Insert a blank tape or MD into the recording deck
and adjust the recording level, if necessary.
4
Start recording on the recording deck, then start
playback on the playback component.
Notes
• You cannot record a digital audio signal using a component
connected to the analog MD/TAPE REC OUT jacks.
• Sound adjustments do not affect the signal output from the
MD/TAPE REC OUT jacks.
RDS EON RDS PTY
SOUND FIELD
MULTI CHANNEL DECODING
MASTER VOLUME
DISPLAY
INPUT MODE
VIDEO
MD/TAPE
CD
TUNER
AUX
DVD/LD
TV/SAT 5.1CH INPUT
CINEMA STUDIO
LEVEL
I
–
i
+
SET UP
BASS BOOST
TONE
FM/AM
MUTING
TONE
BASS
BOOST
SHIFT
MEMORY
FM MODE
– TUNING +
NAME
ENTER
SUR
BASS/
TREBLE
SOUND FIELD
A. F. D.
A
B
C
2CH
MODE
DIMMER
SPEAKERS
R
ON
r
OFF
A
PHONES
B
?
/
1
PRESET/
– PTY SELECT +
Naming Preset Stations and
Program Sources
You can enter a name (index name) of up to 8 characters
for preset stations and program sources. These names (for
example, “VHS”) appear in the receiver’s display when a
station or program source is selected.
Note that no more than one name can be entered for each
preset station or program source.
This function is useful for distinguishing components of
the same kind. For example, two VCRs can be specified as
“VHS” and “8MM”, respectively. It is also handy for
identifying components connected to jacks meant for
another type of component, for example, a second CD
player connected to the MD/TAPE jacks.
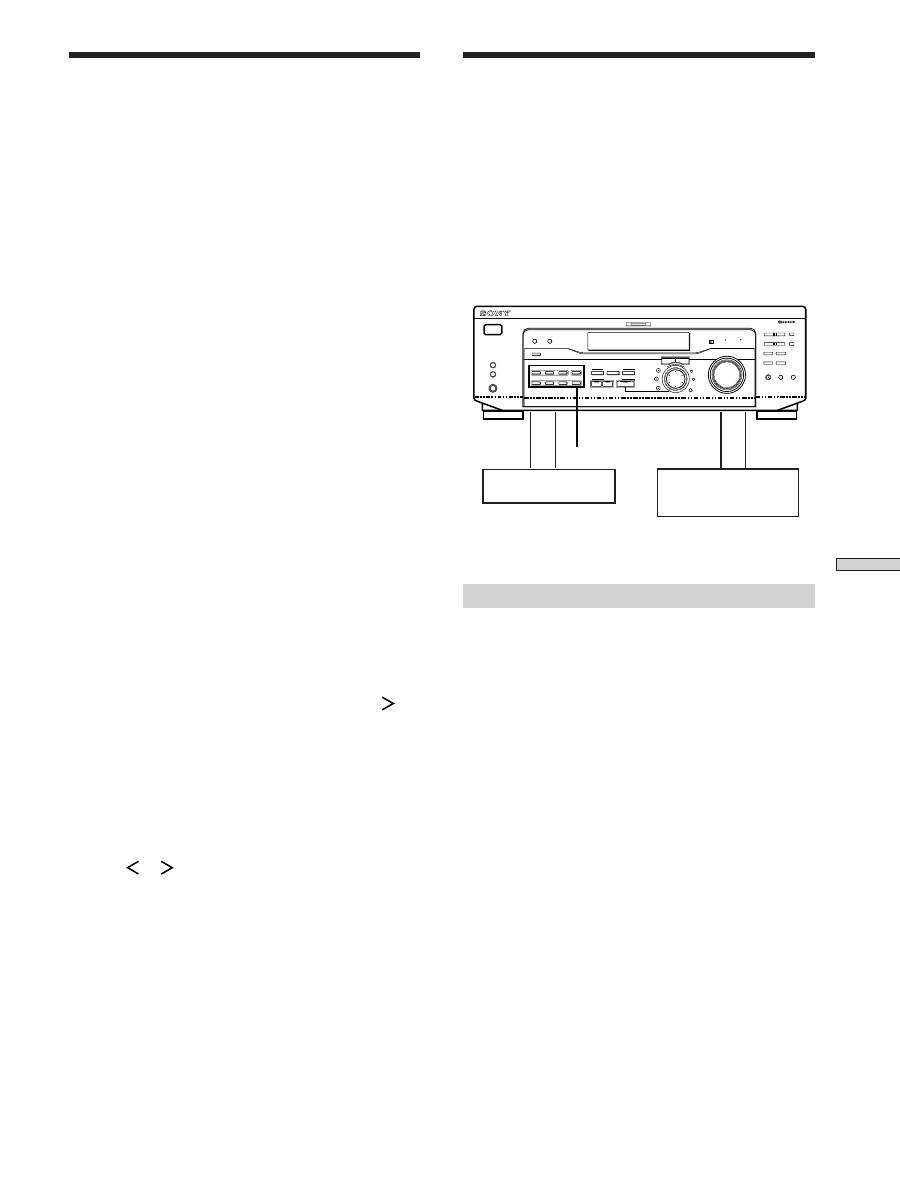
1
To name a preset station
Press TUNER.
The last station you received is tuned in.
To name a program source
Select the program source (component) to be
named, then go to Step 3.
2
Tune in the preset station you want to create an
index name for.
If you are not familiar with how to tune in preset
stations, see “Tuning to preset stations” on page 41.
3
Press NAME.
4
Create an index name by using the jog dial and
cursor buttons:
Turn the jog dial to select a character, then press
to
move the cursor to the next position.
To insert a space
Turn the jog dial until a blank space appears in the
display (you can find the space character between “
]
”
and “A”).
If you’ve made a mistake
Press
or
repeatedly until the character to be
changed flashes, then turn the jog dial to select the
right character.
5
Press ENTER.
To assign index names to other stations
Repeat Steps 2 to 5.
Note
You cannot change the name of an RDS station.
Playback component
(program source)
c
ç
ç
c
Recording component
(tape deck, MD deck,
VCR)
Function buttons


