Sony CPD-E500E: Step 3:Turn on the monitor and Selecting the on-screen menu computer language (LANG)
Step 3:Turn on the monitor and Selecting the on-screen menu computer language (LANG): Sony CPD-E500E
Table of contents
- Owner’s Record
- Table of Contents
- Precautions
- Identifying parts and controls
- Setup Step 1:Connect your monitor to your computer Step 2:Connect the power cord
- Step 3:Turn on the monitor and Selecting the on-screen menu computer language (LANG)
- Customizing Your Monitor Navigating the menu
- Adjusting the brightness and contrast
- Adjusting the size of the picture Adjusting the shape of the picture (SIZE) (GEOM) Adjusting the centering of the picture (CENTER) Enlarging or reducing the picture (ZOOM)
- Adjusting the convergence (CONV) Adjusting the quality of the picture (SCREEN)
- Adjusting the color of the picture (COLOR)
- Additional settings (OPTION)
- Resetting the adjustments Technical Features Preset and user modes Power saving function
- Troubleshooting
- Trouble symptoms and remedies Symptom Check these items
- Symptom Check these items
- Self-diagnosis function Specifications
Step 3:Turn on the monitor and
Selecting the on-screen menu
computer
language (LANG)
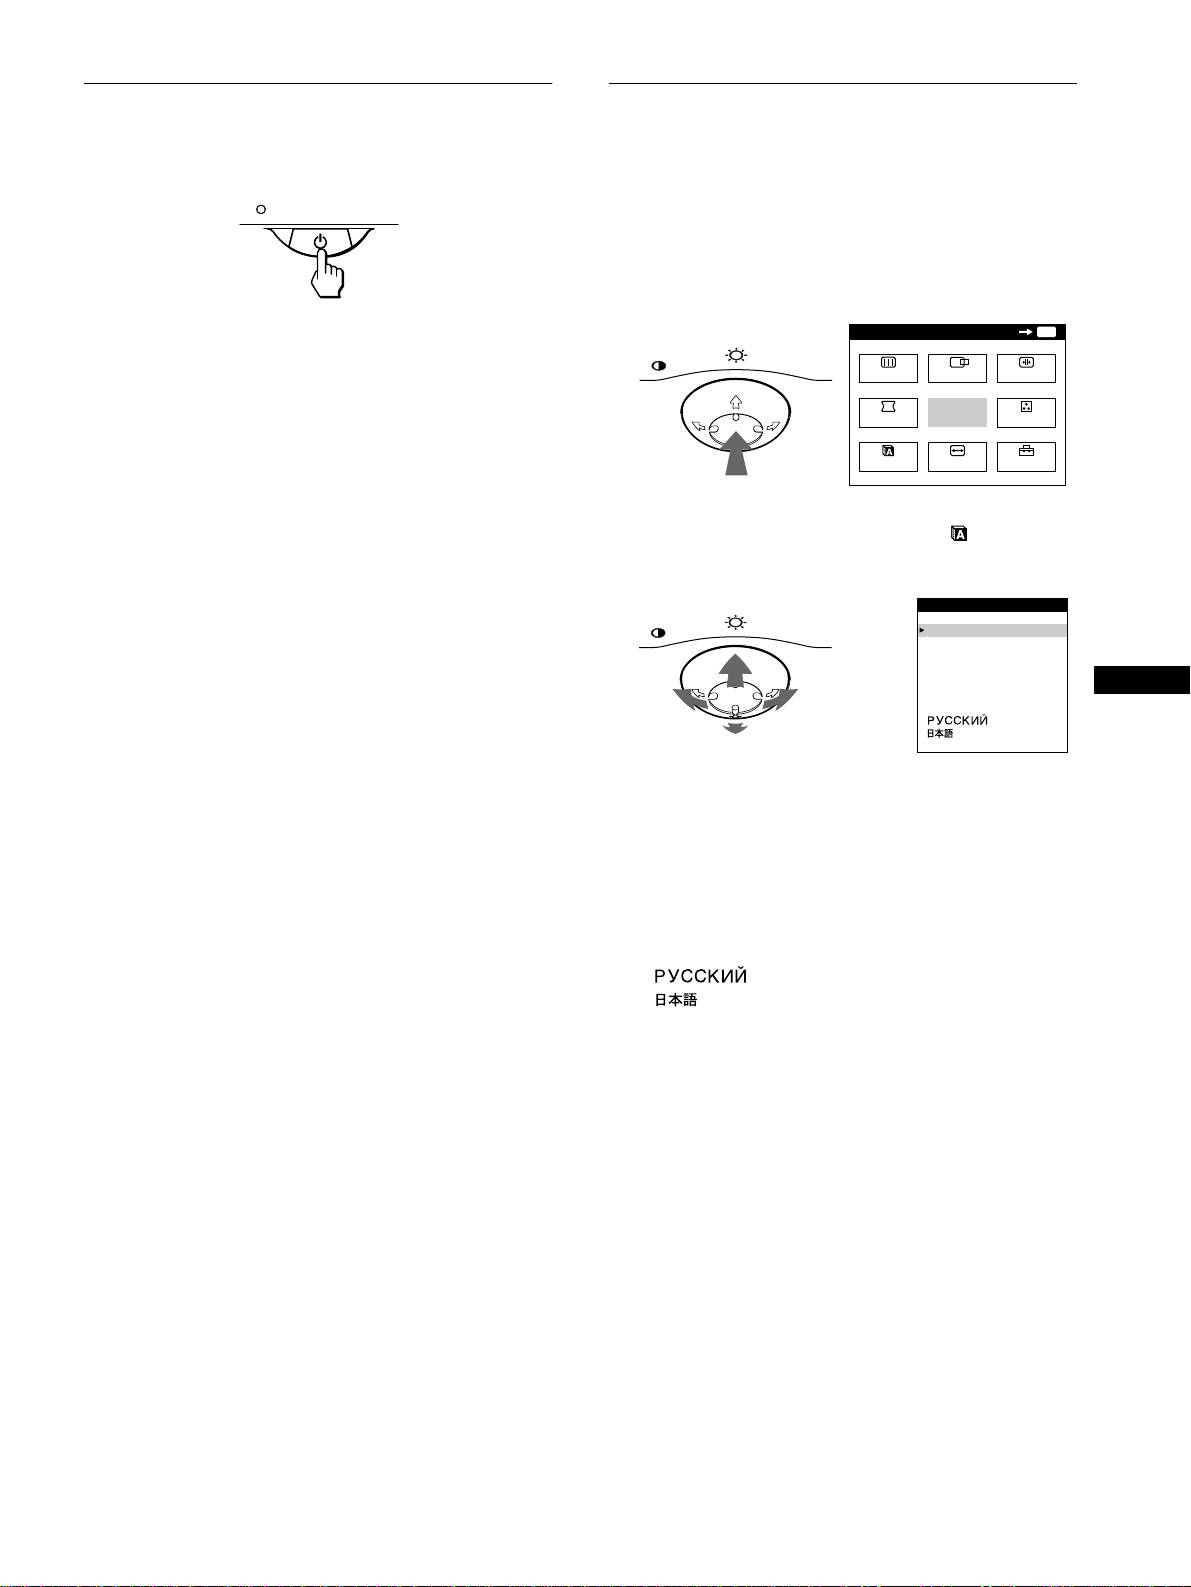
First turn on the monitor, then turn on the computer.
English, French, German, Spanish, Italian, Dutch, Swedish,
Russian and Japanese versions of the on-screen menus are
available. The default setting is English.
1
Press the center of the control button.
See page 9 for more information on using the control button.
The installation of your monitor is complete.
MENU
OK
MENU
If necessary, use the monitor’s controls to adjust the picture.
MENU
SCREEN
CENTER
CONV
If no picture appears on your screen
• Check that the monitor is correctly connected to the computer.
GEOM
EXIT
COLOR
• If NO INPUT SIGNAL appears on the screen, confirm that
your computer’s graphic board is completely seated in the
LANG
SIZE
OPTION
correct bus slot.
• If you are replacing an old monitor with this model and OUT
OF SCAN RANGE appears on the screen, reconnect the old
2
Move the control button to highlight LANG and
monitor. Then adjust the computer’s graphic board so that the
press the center of the control button again.
horizontal frequency is between 30 – 109 kHz, and the vertical
frequency is between 48 – 160 Hz.
MENU
LANGUAGE
For more information about the on-screen messages, see “Trouble
ENGL I SH
FRANÇA I S
symptoms and remedies” on page 16.
DEUTSCH
ESPAÑOL
ITALIANO
GB
NEDERLANDS
SVENSKA
For customers using Windows 95/98
To maximize the potential of your monitor, install the new model
information file from the supplied Setup Disk onto your PC.
This monitor complies with the “VESA DDC” Plug & Play standard. If
your PC/graphics board complies with DDC, select “Plug & Play Monitor
3
Move the control button m/M to select a language.
(VESA DDC)” or this monitor’s model name as the monitor type in the
• ENGLISH
“Control Panel” of Windows 95/98. If your PC/graphics board has
• FRANÇAIS: French
difficulty communicating with this monitor, load the Setup Disk and
• DEUTSCH: German
select this monitor’s model name as the monitor type.
• ESPAÑOL: Spanish
• ITALIANO: Italian
For customers using Windows NT4.0
• NEDERLANDS: Dutch
Monitor setup in Windows NT4.0 is different from Windows 95/98 and
• SVENSKA: Swedish
does not involve the selection of monitor type. Refer to the Windows
• : Russian
NT4.0 instruction manual for further details on adjusting the resolution,
• : Japanese
refresh rate, and number of colors.
To close the menu
Press the center of the control button once to return to the main MENU,
and twice to return to normal viewing. If no buttons are pressed, the menu
closes automatically after about 30 seconds.
To reset to English
Press the RESET button while the LANGUAGE menu is displayed on the
screen.
7
