Beurer WL 70: G ENGLISH
G ENGLISH: Beurer WL 70

G ENGLISH
Read these instructions for use carefully and keep them for later use, be
sure to make them accessible to other users and observe the information
they contain.
Table of contents
1. Getting to know your device ......................................................................................................... 10
2. Signs and symbols ......................................................................................................................... 10
3. Intended use ................................................................................................................................... 10
4. Warning notices/safety notes ....................................................................................................... 10
5. Device description ......................................................................................................................... 11
6. Initial use ........................................................................................................................................ 11
7. Basic settings ................................................................................................................................. 11
7.1 Setting the time .......................................................................................................................... 11
7.2 Setting the alarm properties ...................................................................................................... 12
7.3 Setting the display brightness ................................................................................................... 12
7.4 Setting the snooze duration ....................................................................................................... 12
7.5 Switching the button tone on/o ............................................................................................... 12
8. Device functions ............................................................................................................................ 12
8.1 Setting the alarm ........................................................................................................................ 12
8.1.1 Switching the alarm on (ON) ............................................................................................. 12
8.1.2 Setting an alarm for each day (DAY) ................................................................................. 13
8.1.3 Permanently deactivating the alarm (OFF) ........................................................................ 13
8.2 Switching o the alarm .............................................................................................................. 13
8.2.1 Switching off the alarm during sunrise: ............................................................................. 13
8.2.2 Snooze mode (Snooze) for the alarm ................................................................................ 13
8.2.3 Switching off the alarm when the alarm tone sounds ....................................................... 13
8.3 AUX mode .................................................................................................................................. 13
8.4 USB mode ................................................................................................................................. 13
8.5 Radio mode ............................................................................................................................... 13
8.6 Good night function (radio sleep timer) ...................................................................................... 14
8.7 Light functions ........................................................................................................................... 14
8.7.1 Reading lamp .................................................................................................................... 14
8.7.2 Sunset function ................................................................................................................. 14
8.7.3 Mood light with change of colour ..................................................................................... 14
8.8 Resetting the device to factory settings .................................................................................... 14
9. Cleaning and storage .................................................................................................................... 14
10. Disposal .......................................................................................................................................... 15
11. Technical data ................................................................................................................................ 15
•
AUX cable
Included in delivery
•
Instructions for use
•
Wake-up light with cable antenna
•
Holder for smartphone/MP3 player
•
Mains adapter
9
Dear customer,
4. Warning notices/safety notes
Thank you for choosing one of our products. Our name
stands for high-quality, thoroughly tested products for
WARNING
applications related to heating, weight, blood pressure,
body temperature, pulse, gentle therapy, massage, air
•
Only operate the device with the mains adapter
and beauty.
provided and at the mains voltage specified on the
mains adapter.
With kind regards,
•
Before use, inspect the device and accessories for
Your Beurer team
visible damage. If you have any doubts, do not use
the device and contact your retailer or the specified
1. Getting to know your device
Customer Services address.
The Beurer WL 80 wake-up light wakes you from sleep
•
The device is only intended for domestic/private use,
in a gentle and natural manner. The LED light gradually
not for commercial use.
becomes brighter like a rising sun, allowing you to slowly
•
This device may be used by children over the age of
become accustomed to the light conditions and your
eight and by people with reduced physical, sensory
body to gently prepare itself for waking up. You can also
or mental skills or a lack of experience or knowledge,
set an alarm tone that is sounded following the simulated
provided that they are supervised or have been
sunrise and provides an acoustic aid to help you wake
instructed on how to use the device safely and are fully
up. You can choose between the radio or various sounds.
aware of the consequent risks of use.
The Beurer WL 80 wake-up light provides a rested and
pleasant start to your day.
•
Children must not play with the device.
•
Cleaning and user maintenance must not be performed
2. Signs and symbols
by children unless supervised.
•
If the mains connection cable of this device is damaged,
Warning notice indicating a risk
it must be replaced by the manufacturer, its customer
WARNING
of injury or damage to health.
service department or a similarly qualified person to
Safety note indicating possible
avoid any risk.
IMPORTANT
damage to the device/accessory.
•
In the case of defects or operational faults, switch the
device o immediately and disconnect the device from
Note on important information.
Note
the mains socket.
Disposal in accordance with the
•
Never plug in or unplug the mains adapter when you
Waste Electrical and Electronic
have wet hands.
Equipment EC Directive – WEEE
•
Keep packaging material away from children (risk of
suocation).
Manufacturer
•
Arrange the mains cable so that it is not a trip hazard.
•
Keep the device, mains adapter and mains cable away
This product satisfies the
from water.
requirements of the applicable
European and national
IMPORTANT
directives.
•
Protect the device from impacts, humidity, dirt, marked
3. Intended use
temperature fluctuations and direct sunlight.
•
Do not drop the device.
WARNING
The device must only be used for the purpose for
which it is designed and in the manner specified in the
instructions for use. Any improper use can be dangerous.
The manufacturer is not liable for damage resulting from
improper or careless use.
10
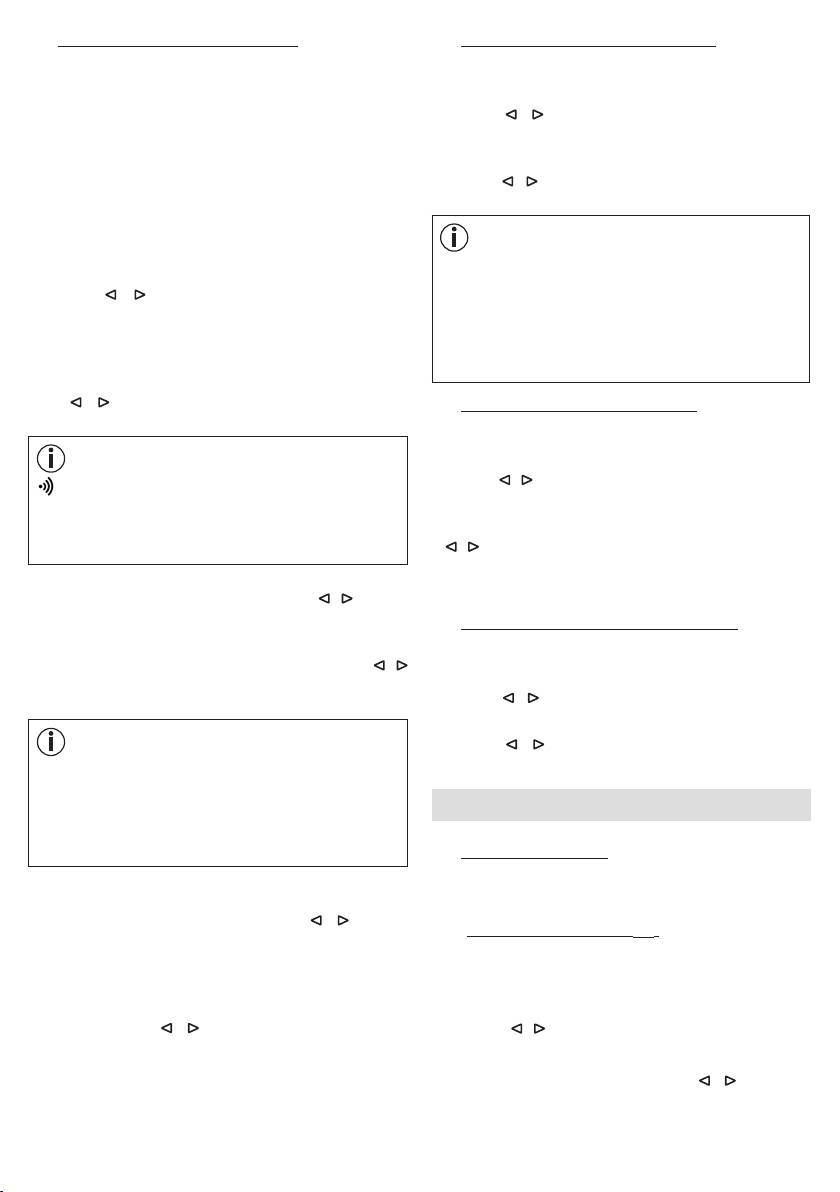
Securing the smartphone holder
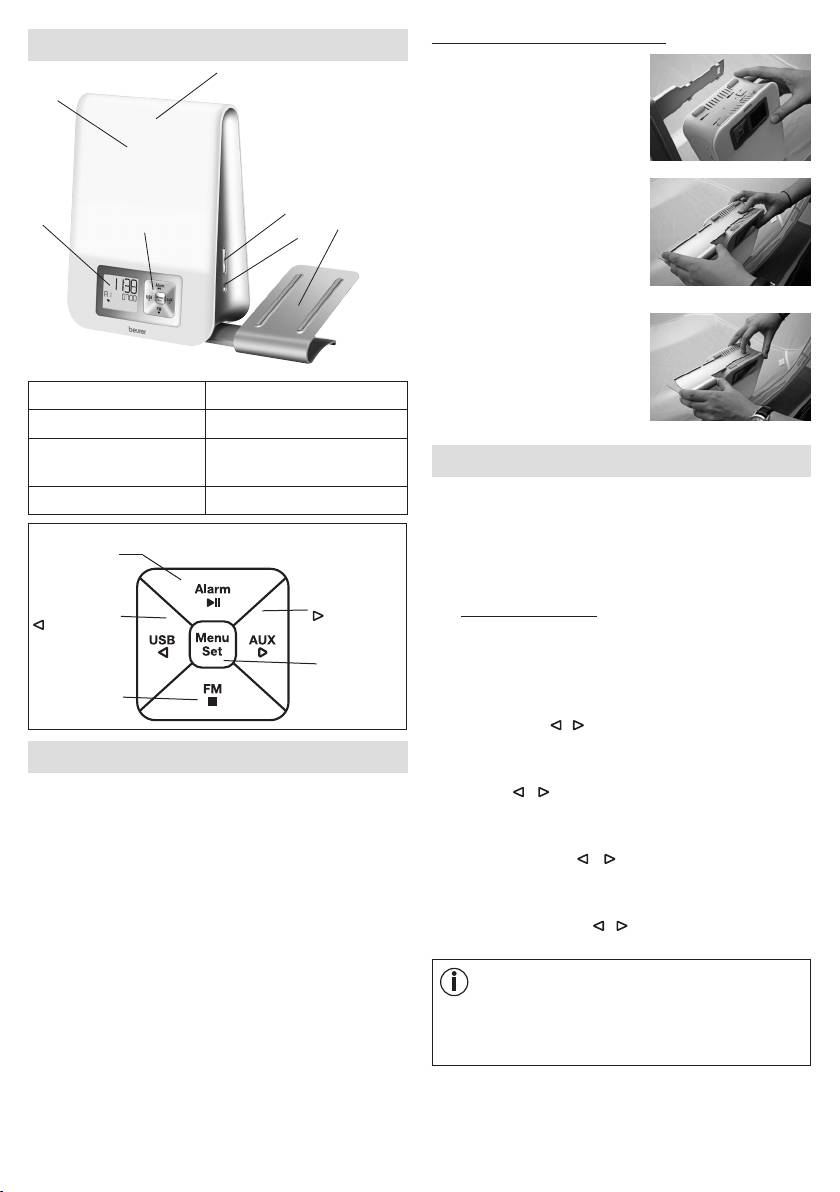
5. Device description
3
1.
Position the four latching
2
hooks of the holder onto the
four rectangular openings on
the wake-up light.
2.
Press down the holder
5
with your right index finger
1
4
7
6
and use your left hand to
carefully slide the holder in
the direction of the arrow until
you hear and see it engage.
3. To remove, press the release
on the wake-up light and
carefully slide the holder in
1 Display 5 +/- buttons
the direction of the arrow.
2 Light area 6 Light button
3 Snooze function
7 Holder for smartphone /
7. Basic settings
(taplight area)
MP3 player
In the basic settings, you can set the time (
TIME
), the alarm
4 Keypad
properties for the set alarm times (
ALARM 1, ALARM 2,
ALARM 3
), the display brightness (
DISPLAY
), the
Alarm button /
snooze duration (
SNOOZE
) and the button tone (
BEEP
)
►ǁ button
in the order stated here.
AUX button /
USB button /
7.1 Setting the time
button
button
•
When the device is switched on, press the
Menu/Set
Menu/Set button. "
TIME
" flashes in the display. Press
button
the Menu/Set button again.
Radio button /
■ button
•
The hour mode "
24 Hr
" flashes in the display. Set hour
mode using the / buttons (24-hour mode or 12-hour
mode). Confirm using the Menu/Set button.
6. Initial use
•
The hour display flashes in the display. Set the hours
•
Remove the packaging material.
using the / buttons. Confirm using the Menu/Set
button.
•
Check that all parts listed are present
.
•
The minute display flashes in the display. Set the
•
Check the device, mains adapter and mains cable for
minutes using the / buttons. Confirm using the
damage.
Menu/Set button.
•
Place the device on a firm, even surface.
•
The weekday display flashes in the display. Set the day
•
Insert the mains adapter connector into the mains
of the week using the / buttons. Confirm using the
adapter socket on the rear of the device.
Menu/Set button.
•
Insert the mains adapter into a suitable socket.
•
The time is shown on the device display.
Note
MON
= Monday,
TUE
= Tuesday,
WED
= Wednesday,
•
Route the cable antenna of the device to the rear.
THU
= Thursday,
FRI
= Friday,
SAT
= Saturday,
SUN
= Sunday.
11
7.2 Setting the alarm properties
7.3 Setting the display brightness
You can choose to wake up with one of the 8 wake-up
•
When the device is switched on, press the Menu/Set
melodies, an alarm tone, the radio or your own music
button. "
TIME
" flashes in the display.
via a USB stick.
•
Use the / buttons to select
DISPLAY
. Confirm
For the alarm times that have been set (see section 8.1),
using the Menu/Set button.
you can configure the following alarm properties: alarm
tone, volume, sunrise, duration of sunrise, brightness of
•
The current display brightness flashes (
3 DISPLAY
).
sunrise.
Use the / buttons to select the desired brightness
(OFF, 1, 2, or 3). Confirm using the Menu/Set button.
To configure the alarm properties, proceed as follows:
•
When the device is switched on, press the Menu/Set
Note
button. "
TIME
" flashes in the display.
Once the setting is made, it takes approx. 10 seconds
for the currently configured display brightness to
•
Use the / buttons to select the desired alarm
appear. This is because the display is automatically
storage location (
ALARM 1, ALARM 2
or
ALARM 3
)
illuminated at the highest setting for 10 seconds
for which you wish to configure the functions
.
Confirm
each time a button is pressed (including the snooze
using the Menu/Set button.
function).
•
The currently set alarm tone (e.g.
BUZZ
) flashes. Use
the / buttons to select the desired alarm tone.
7.4 Setting the snooze duration
Confirm using the Menu/Set button.
•
When the device is switched on, press the Menu/Set
button. "
TIME
" flashes in the display.
Note
•
Use the / buttons to select
SNOOZE
. Confirm using
BUZZ
= acoustic signal
the Menu/Set button.
SOUND 1-8
= 8 dierent wake-up melodies
•
The snooze duration flashes (
5 MIN SNOOZE
). Use the
RADIO
= radio
/ buttons to select the desired snooze duration (1,2,
USB
= via connected USB stick
5, 10, 20 or 30 minutes). Confirm using the Menu/Set
button.
•
The alarm volume (
VOL
) flashes. Use the / buttons
to set the desired volume (
1
to
10
). Confirm using the
7.5 Switching the button tone on/o
Menu/Set button.
•
When the device is switched on, press the Menu/Set
•
The sunrise function flashes (
SUNRISE
). Use the /
button. "
TIME
" flashes in the display.
buttons to switch the sunrise function on (
ON
) or o
•
Use the / buttons to select
FEEDBACK
. Confirm
(
OFF
). Confirm using the Menu/Set button.
using the Menu/Set button.
•
Use the / buttons to switch the button tone on
Note
(
ON
) or o (
OFF
). Confirm using the Menu/Set button.
You can also choose to be woken up by a sunrise
function in addition to the alarm tone. The sunrise
function is a simulated sunrise. In the process, the LED
8. Device functions
light slowly turns brighter prior to the actual alarm time
that is set.
8.1 Setting the alarm
The device features three alarm memory spaces that can
be configured individually.
•
If the sunrise function is switched on, the duration of
the sunrise flashes (
10
MIN
). Use the / buttons
8.1.1 Switching the alarm on (
ON
)
to select the duration of the sunrise prior to the alarm
1.
When the device is switched on, keep pressing the
time (1, 2, 5, 10, 20 or 30 minutes). Confirm using the
ALARM button until the desired alarm memory space
Menu/Set button.
appears in the display (
A1, A2
or
A3
).
•
The brightness of the sunrise flashes (
20 LI
) in the
display. Use the / buttons to select the desired
2.
Press the / buttons until
ON
appears in the display.
brightness of the sunrise at the alarm time (5, 10, 15
3.
Press the Menu/Set button. The hour display of the
or 20). Confirm using the Menu/Set button. If you are
alarm flashes in the display. Use the / buttons to
woken up by light relatively quickly, then we recommend
set the hour and confirm using the Menu/Set button.
reducing the brightness.
12
4. The minute display of the alarm flashes in the display.
8.2.3
Switching o the alarm when the alarm tone sounds
Use the / buttons to set the minute and confirm
When the alarm sounds, press any button apart from
using the Menu/Set button.
Snooze. The alarm is now switched o and will only
sound again at the set alarm time.
5.
END
is briefly shown in the display.
The set alarm is
now activated and appears in the display.
8.3 AUX mode
You can connect an external audio source (e.g. MP3
8.1.2 Setting an alarm for each day (
DAY
)
player, smartphone or CD player) to the wake-up light
For each alarm that has been set, you can use the
DAY
via the AUX input.
function to specify the days of the week on which the
1. Connect the supplied AUX cable to an audio source.
alarm should sound.
2.
Insert the other end of the AUX cable into the AUX input
1.
When the device is switched on, keep pressing the
on the rear of the device.
ALARM button until the desired alarm memory space
appears in the display (
A1, A2 or A3).
3.
Press the AUX button on the device. The external audio
source is now connected to the wake-up light.
2.
Press the / buttons until
DAY
is shown in the
display.
4. Use the +/- buttons on the side to adjust the volume.
3.
Press the Menu/Set button.
MON
(Monday) and
off
5. Press the ■ button to exit AUX mode again.
appear in the display.
6. Disconnect the AUX cable after use.
4.
Use the / buttons to activate (
on
) or deactivate
8.4 USB mode
(
off
) the alarm for Monday. Confirm using the
You have the option of connecting a USB stick (up to
Menu/Set button.
32 GB) to the wake-up light via the USB connection,
5.
TUE
(Tuesday) appears in the display. Make the settings
enabling you to listen to music. The device can play the
for the other days of the week in the same way as for
following file formats: MP3, WMA and WAV.
Monday, as described in the previous point. Then set
the alarm time as described in section 8.1.1.
Note
8.1.3 Permanently deactivating the alarm (
OFF
)
The device can only play music files that are stored
To permanently deactivate a set alarm, proceed as
inthe root directory. Music files that are stored in sub-
follows:
directories cannot be played.
1.
When the device is switched on, keep pressing the
If you wish to use USB mode, proceed as follows:
ALARM button until the desired alarm memory space
appears in the display (
A1, A2 or A3).
1.
Insert the USB stick into the USB connection on the
wake-up light (located on the rear of the device).
2.
Press the / buttons until OFF appears in the display.
2. If the USB stick is already inserted: when the device
3. Confirm using the Menu/Set button.
is switched on, press the USB button.
4.
END appears in the display. The alarm is now
"USB", the current song number and the song length
permanently deactivated.
appear in the display.
3.
To switch to the next song, press the button. To switch
8.2 Switching o the alarm
to the previous song, press the button. To pause
playback, press the ►ǁ button. To switch between
8.2.1 Switching o the alarm during sunrise:
"Standard playback", "Repeat" (P) and "Repeat all
When the sunrise function is switched on, the device
songs" ( P
ALL
), press the Menu/Set button.
slowly begins to light up prior to the set alarm time and
"SUNRISE" is shown in the display. You can switch o
4. Use the +/- buttons on the side to adjust the volume.
this sunrise by pressing any button. However, the alarm
5. To end USB mode, press the ■ button.
tone will still sound at the set alarm time.
8.5 Radio mode
8.2.2 Snooze mode (Snooze) for the alarm
You can also use the device to listen to the radio.
The device features a snooze mode (Snooze).
If you wish to use radio mode, proceed as follows:
If the alarm sounds and you press the Snooze function
1. When the device is switched on, press the FM button.
(by tapping the light area), the alarm will sound again once
The current station frequency and programme number
the set snooze duration has elapsed (see section 7.4).
(e.g.
P1
) appear in the display.
13
2.
Use the / buttons to select the desired programme
function is then activated automatically and a small
number (e.g.
P1
or
P2
) under which a station is to be
icon appears in the display. The light will now go
saved.
out automatically once the configured duration of the
sunset has elapsed.
3.
Press and hold the button to start the automatic
station search. To save a station under the selected
programme number (e.g.
P1), press the
Menu/Set
Note
button.
Sunset with music
The device can also be used to simulate a sunset while
4. To switch between the saved stations, press the
/
you listen to music. In the process, the light slowly
buttons.
turns darker after a set duration. The music is switched
8.6 Good night function (radio sleep timer)
o automatically after the set duration has elapsed.
If radio mode is switched on, you can also enable a good
To start a sunset with music on the device, proceed
night function.
as follows:
You can use the good night function to set the number
1. When the device is switched on, select the desired
of minutes after which the radio should automatically
music source (USB, radio (FM) or AUX).
switch o.
2.
Perform the subsequent steps as in "8.7.2 Sunset
If you wish to use the good night function, proceed as
function".
follows:
1. When the device is switched on, press the FM button
8.7.3 Mood light with change of colour
to access radio mode.
The wake-up light can also be used as a mood light with
change of colour.
2.
Press the Menu/Set button;
2 MIN sleep
appears
in the display.
1.
When the device is switched on, press the Light button
3x.
3. Use the Menu/Set button to set the desired time after
which the radio should automatically switch o (2, 5,
2.
LIGHT change
appears in the display.
10, 15, 20, 30, 45 or 60 minutes). Wait 5 seconds to
3.
If you wish to have a coloured light permanently
confirm the selection. A small icon will subsequently
displayed, this can be set by pressing the Light button
appear in the display.
while the colour-change operation is in progress.
LIGHT
fixed
appears in the display.
8.7 Light functions
4.
To fully switch o the light, press the Light button again.
8.7.1 Reading lamp
8.8 Resetting the device to factory settings
1.
When the device is switched on, press the Light button.
If you wish to reset all settings on the wake-up light to
2.
The light turns on and
20 light
appears in the display.
the factory settings, proceed as follows:
Use the +/- buttons to set the desired brightness for the
1.
Remove the mains adapter of the wake-up light from
light (can be selected between 1-20).
the socket.
3.
To switch the light o again, keep pressing the Light
2.
Press and hold both the Menu/Set button and the Light
button until "
LIGHT off
" appears in the display.
button on the device, which is now switched o, and
8.7.2 Sunset function
reinsert the mains adapter of the wake-up light into
The device can also be used to simulate a sunset. In the
the socket. Keep pressing the buttons about 10 sec..
process, the light slowly turns darker after a set duration.
3. The device has now been reset to the factory settings.
To simulate a sunset with the device, proceed as follows:
9. Cleaning and storage
1.
When the device is switched on, press the Light button
on the side.
•
Clean the device with a dry cloth.
2.
The light turns on and
20 light
appears in the
•
Do not use any abrasive cleaning products.
display; immediately afterwards, use the +/- buttons
•
Ensure that no water enters the device. If this should
on the side to set the desired brightness of the light
happen, reuse the device only when it has fully dried
(can be selected between 1-20). Use the Light button
out.
to confirm.
10 sunset
appears in the display.
•
Never immerse the device or mains part plug in water
3.
Use the +/- buttons on the side to select the desired
or other liquids.
duration of the sunset (2, 5, 10, 15, 20, 30, 45 or
60 minutes), then wait for 5 seconds. The sunset
14
•
Protect the device from impacts, humidity, dust,
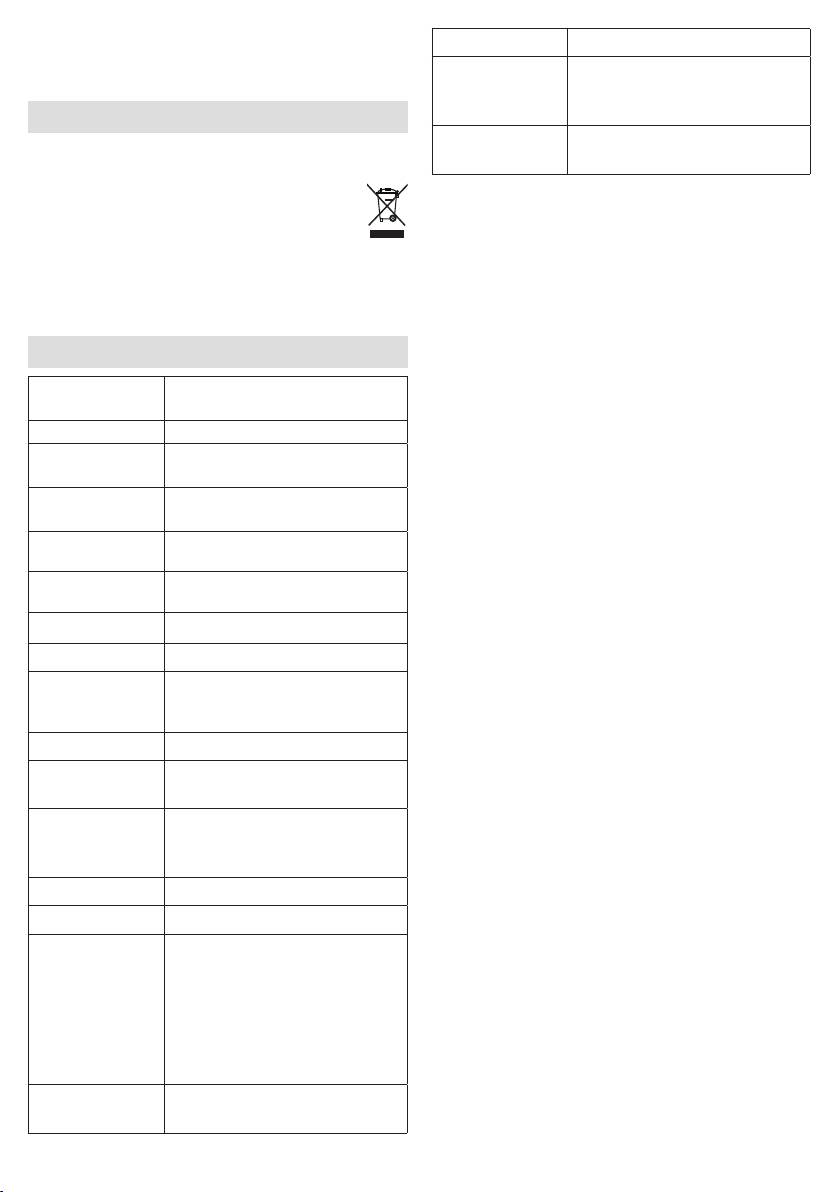
Speaker 2 Watt
chemicals, marked temperature fluctuations and nearby
Input: 110-240 V, AC, 50/60 Hz,
sources of heat (ovens, heaters).
Mains part
0.5 A
voltage supply
Output: 9 V, DC, 1500 mA
10. Disposal
Mains part
For environmental reasons, do not dispose of the device
Protection class II
protection class
in the household waste at the end of its useful life.
Dispose of the device at a suitable local collection
Subject to technical changes.
or recycling point. Observe the local regulations
for material disposal. Dispose of the device in
accordance with EC Directive – WEEE (Waste
Electrical and Electronic Equipment). If you have any
questions, please contact the local authorities responsible
for waste disposal.
11. Technical data
Max. approx. 2500 lux
Illuminance
(atdistance of 15 cm)
Light LED technology
20 light levels with simulation
Light levels
ofdawn
Automatic RGB colour change,
Mood light
option of setting individual colour
Wake-up light
O, 2, 5, 10, 15, 20, 30, 45,
function
60minutes prior to alarm
Maximum light intensity up to
Sunrise function
alarm: Light level 5, 10, 15, 20
Snooze duration 1, 2, 5, 10, 20, 30 minutes
Sunset function
2, 5, 10, 15, 20, 30, 45, 60 minutes
Good night
function
2, 5, 10, 15, 20, 30, 45, 60 minutes
(sleepradio)
LCD backlighting O, 1, 2, 3
Toggle 12h/24h mode, 15 minute
Time
buer in event of power failure
3 alarm times (O, On, Day)
Alarm
Alarm tone, 8 sounds, radio,
MP3 via USB stick
Button tone O, On
AUX Line-in, 3.5 mm jack plug
Playback via USB stick, max.
32 GB.
File formats: MP3, WMA, WAV,
USB
max. 9999 files, can only be read
in root directory, subdirectories
are not supported. 5 V output
voltage
Frequency range VHF 87.5-108
Radio
MHz, 10 memory spaces
15
