Beurer BM 40: ENGLISH
ENGLISH: Beurer BM 40
ENGLISH
Dear Customer,
2. Important information
Thank you for choosing one of our products. Our name
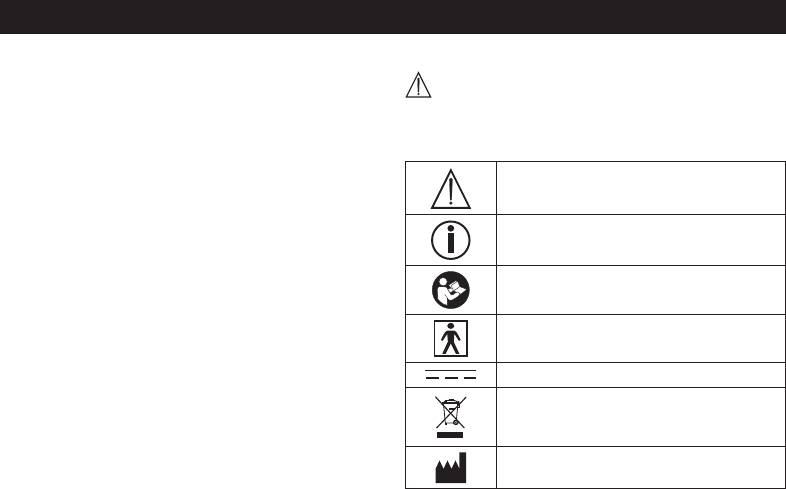
Signs and symbols
stands for high-quality, thoroughly tested products
for the applications in the areas of heat, weight, blood pres-
The following symbols are used in these instructions for use,
sure, body temperature, pulse, gentle therapy, massage and
on the packaging and on the type plate for the device and ac-
air.
cessories:
Please read these instructions for use carefully and keep
Caution
them for later use, be sure to make them accessible
to other users and observe the information they contain.
Best regards,
Note
Your Beurer Team
Note on important information
1. Getting to know your instrument
Follow instructions for use
The upper arm blood pressure monitor is used for non-invasive
measurement and monitoring of adults’ arterial blood pressure.
You can use it to measure your blood pressure quickly and eas-
Type BF applied part
ily, storing the results and displaying the progression of read-
ings together with the average.
A warning is issued for anyone suffering from cardiac arrhythmia.
Direct current
The values determined are classified and graphically evaluated
Disposal in accordance with EC Directive
according to WHO guidelines.
2002/96/EC – WEEE (Waste Electrical and
Keep these instructions carefully for further use and also let
Electronic Equipment).
other users have access to them.
Manufacturer
13

•
Do not use the blood pressure monitor on newborns, preg-
Storage
Permissible storage temperature and
55°C
nant women or patients with preeclampsia.
humidity
-20°C
RH ≤85%
•
Cardiovascular diseases may lead to incorrect measure-
ments or have a detrimental effect on measurement ac-
Operating
Permissible operating temperature and
40°C
curacy. The same also applies to very low blood pressure,
humidity
10°C
diabetes, circulatory disorders and arrhythmias as well as
RH ≤85%
chills or shaking.
Keep dry
•
The blood pressure monitor must not be used in connection
with a high-frequency surgical unit.
•
Only use the device on people who have the specified upper
SN Serial number
arm measurement for the device.
The CE labelling certifies that the product
•
Please note that when inflating, the functions of the limb in
complies with the essential requirements of
question may be impaired.
0483
Directive 93/42/EEC on medical products.
•
During the blood pressure measurement, blood circulation
must not be stopped for an unnecessarily long time. If the
device malfunctions, remove the cuff from the arm.
Advice on use
•
Avoid any mechanical restriction, compression or bending of
•
In order to ensure comparable values, always measure your
the cuff line.
blood pressure at the same time of day.
•
Do not allow sustained pressure in the cuff or frequent meas-
•
Before every measurement, relax for about five minutes.
urements. The resulting restriction of the blood flow may
•
If you want to perform several measurements on the same
cause injury.
person, wait five minutes between each measurement.
•
Ensure that the cuff is not placed on an arm in which the
•
Do not take a measurement within 30 minutes after eating,
arteries or veins are undergoing medical treatment, e.g. intra-
drinking, smoking or exercising.
vascular access or therapy, or an arteriovenous (AV) shunt.
•
Repeat the measurement if you are unsure of the measured
•
Do not use the cuff on people who have undergone a mas-
value.
tectomy.
•
The measurements taken by you are for your information
•
Do not place the cuff over wounds as this may cause further
only – they are not a substitute for a medical examination!
injury.
Discuss the measurements with your doctor, and never base
•
You can either use the blood pressure monitor with batteries
any medical decisions on them (e.g. medicines and their
or with a mains part. Please note that data transfer and data
administration)!
storage is only possible when your blood pressure monitor is
14

supplied with power. As soon as the batteries are empty or
•
Batteries should not be charged or reactivated with any other
the mains part is disconnected from the power supply, the
means, nor should they be taken apart, thrown in the fire or
blood pressure monitor loses the date and time.
short-circuited.
•
To conserve the batteries, the monitor switches off automati-
•
Remove the batteries from the instrument if they are worn
cally if no buttons are pressed for 3 minutes.
out or if you are not going to use the instrument for any
•
The device is only intended for the purpose described in
length of time. This prevents any damage as a result of leak-
these instructions for use. The manufacturer is not liable for
age. Always replace all the batteries at the same time.
damage resulting from improper or careless use.
•
Never use different types of battery, battery brands or bat-
teries with different capacities. You should preferably use
Storage and Care
alkaline batteries.
•
The blood pressure monitor is made up of precision electron-
Repair and disposal
ic components. Accuracy of readings and the instrument’s
•
Batteries do not belong in domestic refuse. Used batteries
service life depend on careful handling.
should be disposed of at the collection points provided.
– You should protect the device from impact, moisture, dirt,
major temperature fluctuations and direct exposure to the
•
Never open the instrument. If these instructions are not
sun’s rays.
heeded, the warranty will be null and void.
– Never drop the device.
•
Never attempt to repair the instrument or adjust it yourself.
– Do not use near strong electromagnetic fields, i.e. keep it
We can no longer guarantee perfect functioning if you do.
away from any radio systems and mobile phones.
•
Repairs may only be performed by Customer Service or
– Only ever use the cuffs provided with the monitor or origi-
authorized dealers. However, always check the batteries and
nal replacement cuffs. Otherwise erroneous results will be
replace them if necessary prior to making any complaint.
recorded.
•
The appliance should be disposed of according to
•
Do not press any buttons until the cuff is in position.
Regulation 2002/96/EC-WEEE (Waste Electrical and
•
If the instrument is not used for any length of time, we
Electronic Equipment). In case of queries, please con-
recommend removing the batteries.
tact the municipal authorities responsible for waste disposal
in your area.
Advice on batteries
•
Batteries can be fatal if swallowed. You should therefore
store the batteries and products where they are inaccessible
to small children. If a battery has been swallowed, call a doc-
tor immediately.
15
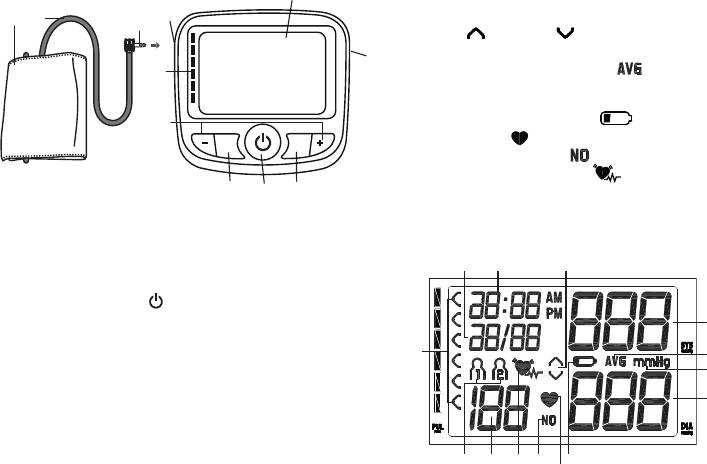
3. Unit description
1. Cuff
2. Cuff tube
3. Cuff connector
4. Display
5. Connection for mains part
6. Memory button M
7. START/STOP button
8. SET button
9. Function buttons
16
-/+
Icons in the display:
4
1. Date
11
1
2
2. Time
3
3. Inflate
, release air
4. Systolic pressure
5
10
5. Memory display, average value
6. Unit in mmHg
7. Diastolic pressure
9
8. Battery replacement symbol
9. Pulse symbol
SET M
10. Memory space number
11. Cardiac arrhythmia symbol
8
7
6
12. Calculated pulse value / memory space number / memory
display, average value (AL), morning (A), evening (P)
13. User memory
14. WHO classification
1
23
4
-/+
10. WHO scale
14
5
11. Connection for cuff connector (left-hand side)
6
7
13
12 11
10
8
9

4. Prepare measurement
It is essential to set the date and time. Otherwise, you will not
be able to save your measured values correctly with a date and
Inserting battery
time to retrieve them later.
•
Remove the battery cover from the
The time is displayed in the 24-hour format.
back of the monitor.
•
Insert four AA 1.5 V alkaline
If you press and hold the function buttons
batteries. Making absolutely
sure that you insert them with
the correct polarity as marked.
Never use rechargeable bat teries.
•
Replace the battery cover carefully.
If 4 warning tones have been sounded and the symbol
appears simultaneously on the display, it is no longer possible
to perform a measurement and all batteries must be replaced.
Once the batteries have been removed from the device, the
date and time must be set again. Any saved measurements are
retained. Used batteries should not be disposed of in normal
household waste. Dispose of them via your electronics retailer
or your local recycling point. You are legally obligated to do so.
Note: Batteries containing pollutant substances
are marked as follows: Pb = Battery contains lead,
Cd = Battery contains cadmium, Hg = Battery
contains mercury.
Setting the user memory, date and time
This menu allows you to set the following functions, one after
another.
User memory Date Time
➔➔
17
-/+
-/+, you can set
the values more quickly.
•
Press the SET button.
The user memory symbol flashes on the display.
•
Select the desired user memory by pressing the
function buttons
User memory
-/+
-/+.
You have two memories, each with 60 memory spaces,
to store the measurements of two different people
separately.
•
Confirm using the SET button.
The year flashes on the display.
•
Set the year with the function buttons
Date/time
-/+
4 x 1,5V AA (LR6)
-/+ and con-
firm with the SET button.
•
Set the month, day, hour and minute and confirm
each setting with the SET button.
When making settings, you can use the START/STOP
button
at any time to switch the device off. The set-
tings that have already been performed will be retained.
Operation with the mains part
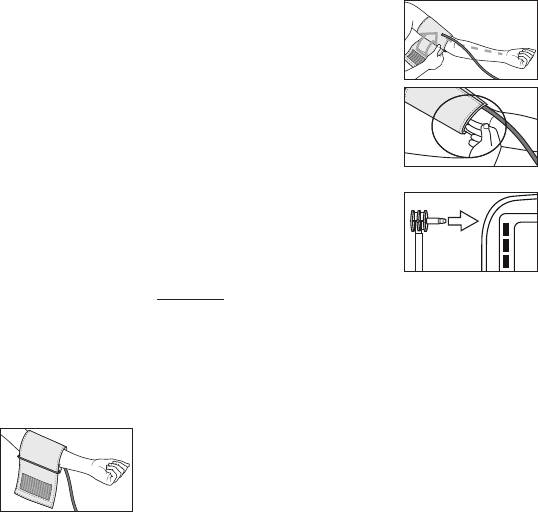
The cuff should be placed on the upper
You can also operate this device with a mains part. When do-
arm so that the lower edge is 2 to 3 cm
ing so, there must not be any batteries in the battery compart-
above the bend of the elbow and
ment. The mains part can be obtained from specialist retailers
above the artery. The tube should be in
or from the service address using order number 071.19.
line with the centre of the palm.
•
To prevent possible damage to the device, the blood pres-
Now place the free end of the cuff
sure monitor must only be used with the mains part de-
snugly, but not too tightly, around the
scribed here.
arm, and fix it with the Velcro fastener.
•
Insert the mains part into the connection provided for this
The cuff should be fitted tight enough
purpose on the right-hand side of the blood pressure moni-
to allow just two fingers to fit beneath
tor. The mains part must only be connected to the mains
the cuff.
voltage that is specified on the type plate.
Insert the cuff tubing into the socket
•
Then insert the mains plug of the mains part into the mains
for the cuff attachment.
socket.
•
After using the blood pressure monitor, unplug the mains
part from the mains socket first and then disconnect it from
the blood pressure monitor. As soon as you unplug the
Important: The instrument should only be operated with the
mains part, the blood pressure monitor loses the date and
original cuff. The cuff is suitable for an arm circumference of
time setting but the saved measured values are retained.
22 to 35 cm.
A larger cuff for upper arm circumferences from 30 to 42 cm is
5. Measuring blood pressure
available from retailers or the service address under order no.
Please ensure the device is at room temperature before meas-
162.973.
uring.
Positioning cuff
Fit the cuff round your bare left upper
arm. Blood circulation in the arm
should not be restricted by tight cloth-
ing or other objects.
18

Correct posture
Measuring can be cancelled at any time by pressing
the START/STOP button .
•
Systolic pressure, diastolic pressure and pulse read-
ings are displayed.
•
appears if the measurement has not been per-
formed properly. Observe the chapter on error mes-
•
Rest for approx. 5 minutes before each measurement. Other-
sages/trouble-shooting in these instructions for use
wise there may be divergences.
and repeat the measurement.
Measurement
•
You can perform the measurement either sitting or lying down.
•
The measurement is automatically stored.
Always make sure that the cuff is on a level with your heart.
•
The device switches off automatically after 3 minutes.
•
To carry out a blood pressure measurement, make sure you
Wait at least 5 minutes before taking another measure-
are sitting comfortably with your arms and back leaning on
ment!
something. Do not cross your legs. Place your feet flat on the
ground.
6. Evaluating results
•
In order not to distort the result, it is important to keep still
Cardiac arrhythmia:
during the measurement and not talk.
This instrument can identify possible cardiac arrhythmia
Performing the blood pressure measurement
disorders during measurement and if necessary indicates the
measurement with the flashing icon
.
•
As described above, attach the cuff and adopt the pos-
This may be an indicator for arrhythmia. Arrhythmia is a condi-
ture in which you want to perform the measurement.
tion where the heart rhythm is abnormal as a result of defects
•
Start the device with the START/STOP button .
in the bioelectrical system controlling the heart beat. The
Following the display check, during which all numbers
symptoms (omitted or premature heart beats, slow or exces-
light up, the cuff inflates automatically.
sively fast heart rate) may be caused, among other things,
•
The cuff is inflated to 190 mmHg. The cuff’s air pres-
by heart disease, age, physical predisposition, excessive use
sure is slowly released. If you already recognise a ten-
of stimulants, stress or lack of sleep. Arrhythmia can only be
Measurement
dency for high blood pressure, you should reinflate the
ascertained through examination by your doctor.
cuff and increase the cuff’s pressure again. As soon
Repeat the measurement if the flashing icon is displayed
as a pulse is detected, the pulse symbol
flashes.
after the measurement. Please note that you should rest for
5 minutes between measurements and not talk or move dur-
19

ing the measurement. If the icon appears often, please
However, these standard values serve only as a general guide-
contact your doctor. Any self-diagnosis and treatment based
line, as the individual blood pressure varies in different people
on the test results may be dangerous. It is vital to follow your
and different age groups etc.
doctor’s instructions.
It is important to consult your doctor regularly for advice. Your
doctor will tell you your individual values for normal blood pres-
WHO classification:
sure as well as the value above which your blood pressure is
In accordance with the guidelines/definitions of the World
classified as dangerous.
Health Organization and the latest findings, the measurements
can be classified and assessed according to the following table.
The bar graph in the display and the scale on the unit indicate
7. Saving, displaying and deleting measured
the range of the blood pressure which has been recorded.
values
If the values for systolic and diastolic pressure are in two dif-
ferent WHO ranges (e.g. systolic in the high-normal range and
The results of every successful measurement are stored
diastolic pressure in the normal range) the graphic WHO clas-
together with the date and time. If there are more than 60
sification on the unit indicates the higher range (high-normal in
measurements, the oldest measurements are lost.
the example described).
•
Select the desired user memory ( ) by pressing
the SET button and the function buttons
User memory
20
-/+
Range of blood pressure values
Systolic (in mmHg)
Diastolic (in mmHg)
Measure
Grade 3: Severe hypertension > = 180 > = 110 Seek medical advice
Grade 2: Moderate hypertension 160 – 179 100 – 109 Seek medical advice
Grade 1: Mild hypertension 140 – 159 90 – 99 Have it checked regularly by doctor
High-normal 130 – 139 85 – 89 Have it checked regularly by doctor
Normal 120 – 129 80 – 84 Check it yourself
Optimal < 120 < 80 Check it yourself
Source: WHO, 1999
-/+. Confirm
your selection with the START/STOP button .
•
Press the memory button M. The average value of all
saved measured values in this user memory is dis-
played first AL.
•
If you press the memory button M again, the average
value of the morning measurements for the last 7 days
will be displayed (morning: 5.00 a.m. – 8.59 a.m., dis-
play A ).
•
If you press the memory button M again, the average
value of the evening measurements for the last 7 days
Average values
will be displayed (evening: 6.00 p.m. – 7.59 p.m., dis-
play P ).
If there is no measurement in the memory, the de-
vice displays - - - .
•
If you press the function buttons
Individual measured
21
-/+
-/+, the most recent
individual measured values are displayed in turn with
the date and time. By pressing the function button
+
the most recent measurements are displayed; by
pressing the function button
-
•
To clear the memory of the relevant user memory, you
must first select a user memory. Start a request for ei-
ther average values or individual measured values and
press and hold the SET button for approx. 3 seconds.
All the values in the current user memory are deleted
after 3 brief beeps are output.
•
You have the option to delete individual measured val-
ues by pressing the SET button when the measured
values are displayed after the measurement.
•
To switch off, press the START/STOP button .
Deleting measured values
•
If you forget to switch off the device, it will switch off
automatically after 3 minutes.
8. Cleaning and storing the instrument
•
Clean your device and cuff carefully only with a slightly mois-
tened cloth.
•
Do not use detergents or solvents.
•
On no account must you immerse the computer in water,
, the oldest are dis-
otherwise liquid can enter it and cause demage.
played.
•
When storing the device, make sure that no heavy objects
are placed on top of it. Remove the batteries. The cuff tube
should not have any sharp kinks.
9. Error messages / troubleshooting
In case of faults, the message appears in the display.
Error messages can occur when
•
1: Systolic pressure is not detected,
•
2: Diastolic pressure is not detected,
•
3: The cuff is fastened too tightly or loosely,
•
4:
The pump pressure is higher than 300 mmHg,
Power supply
4 x 1,5 V
AA batteries
•
5:
There is a system or unit error.
Battery life For approx. 250 measurements, depending
In the above cases, you must repeat the measurement. Make sure
on the blood pressure level and/or pump
that the cuff tube is properly inserted and that you do not move or
pressure
talk. Re-insert the batteries if necessary, or else replace them.
Accessories Instruction for use, 4 x 1.5 V AA batteries,
storage pouch
10. Specifications
Classification Internal supply, IPX0, no AP or APG, con-
Model no. BM 40
tinuous operation, type BF applied part
Measurement
Oscillometric, non-invasive blood pressure
method
measurement on the upper arm
Technical information is subject to change without notification
Measurement
Cuff pressure 0 – 300 mmHg,
to allow for updates.
range
systolic 60 – 280 mmHg,
•
This unit is in line with European Standard EN 60601-1-2 and
diastolic 30 – 200 mmHg,
is subject to particular precautions with regard to electro-
Pulse 30 –180 beats/minute
magnetic compatibility (EMC). Please note that portable and
Display accuracy Systolic ± 3 mmHg, diastolic ± 3 mmHg,
mobile HF communication systems may interfere with this
pulse ± 5 % of the value shown
unit. More details can be requested from the stated Customer
Measurement
Max. permissible standard deviation
Service address or found at the end of the instructions for use.
inaccuracy
according to clinical testing:
•
This device is in line with the EU Medical Devices Directive
systolic 8 mmHg /diastolic 8 mmHg
93/42/EC, the „Medizinproduktegesetz“ (German Medical De-
vices Act) and the standards EN1060-1 (non-invasive sphyg-
Memory 2 x 60 memory spaces
momanometers, Part 1: General requirements), EN1060-3
Dimensions L 119 mm x W 109 mm x H 60 mm
(non-invasive sphygmomanometers, Part 3: Supplemen-
Weight Approx. 257 g (without batteries)
tary requirements for electro-mechanical blood pressure
Cuff size 22 to 35 cm
measuring systems) and IEC80601-2-30 (Medical electrical
equipment – Part 2 – 30: Particular requirements for the safety
Permissible oper-
+ 10 °C to + 40 °C, ≤ 85 % relative air humidity
and essential performance of automated non-invasive blood
ating conditions
(non-condensing)
pressure monitors).
Permissible stor-
- 20 °C to + 55 °C, ≤85 % relative air humidity,
•
The accuracy of this blood pressure monitor has been care-
age conditions
800 –1060 hPa ambient pressure
fully checked and developed with regard to a long useful
life. If using the device for commercial medical purposes, it
22
must be regularly tested for accuracy by appropriate means.
Precise instructions for checking accuracy may be requested
from the service address.
11. Mains part
Model No. FW 7575M/EU/6/06
Input 100 – 240 V, 50 – 60 Hz
Output 6 V DC, 600mA, only in connection with
beurer blood pressure monitor
Supplier Friwo Gerätebau GmbH
Protection
This device is double isolated and protected
against short circuit and overload by a pri-
mary thermal fuse.
Make sure to take the batteries out of the
compartment before using the mains part.
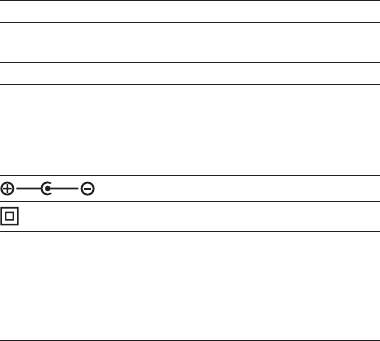
Polarity of the the DC voltage connection
Double isolated / equipment class 2
Enclosures and
Equipment enclosed to protect against
Protective Covers
contact with live parts, and with parts which
can become live (finger, pin, hook test).
The operator shall not contact the patient
and the output plug of DC mains part simul-
taneously.
23


