Sony CPD-G400P: Customizing Your Monitor Navigating the menu
Customizing Your Monitor Navigating the menu: Sony CPD-G400P
Table of contents
- Owner’s Record
- Table of Contents
- Precautions
- Identifying parts and controls RearFront
- Setup Step 1:Connect your monitor to your computer
- Step 2:Connect the power cord Step 3:Turn on the monitor and computer
- Selecting the on-screen menu Selecting the input signal language (LANG)
- Customizing Your Monitor Navigating the menu
- Adjusting the brightness and contrast
- Automatically sizing and centering Adjusting the size of the picture the picture (AUTO) (SIZE) Enlarging or reducing the picture (ZOOM) Adjusting the centering of the picture (CENTER)
- Adjusting the shape of the picture Adjusting the color of the picture (GEOM) (COLOR)
- Adjusting the convergence (CONV) Additional settings (OPTION)
- Helpful hints and information (HELP)
- Resetting the adjustments
- Technical Features Troubleshooting
- Trouble symptoms and remedies Symptom Check these items
- Symptom Check these items
- Specifications
6 CONV (page 13)
CONVERGENCE
Customizing Your Monitor
Selects the CONV menu to adjust
the picture’s horizontal and vertical
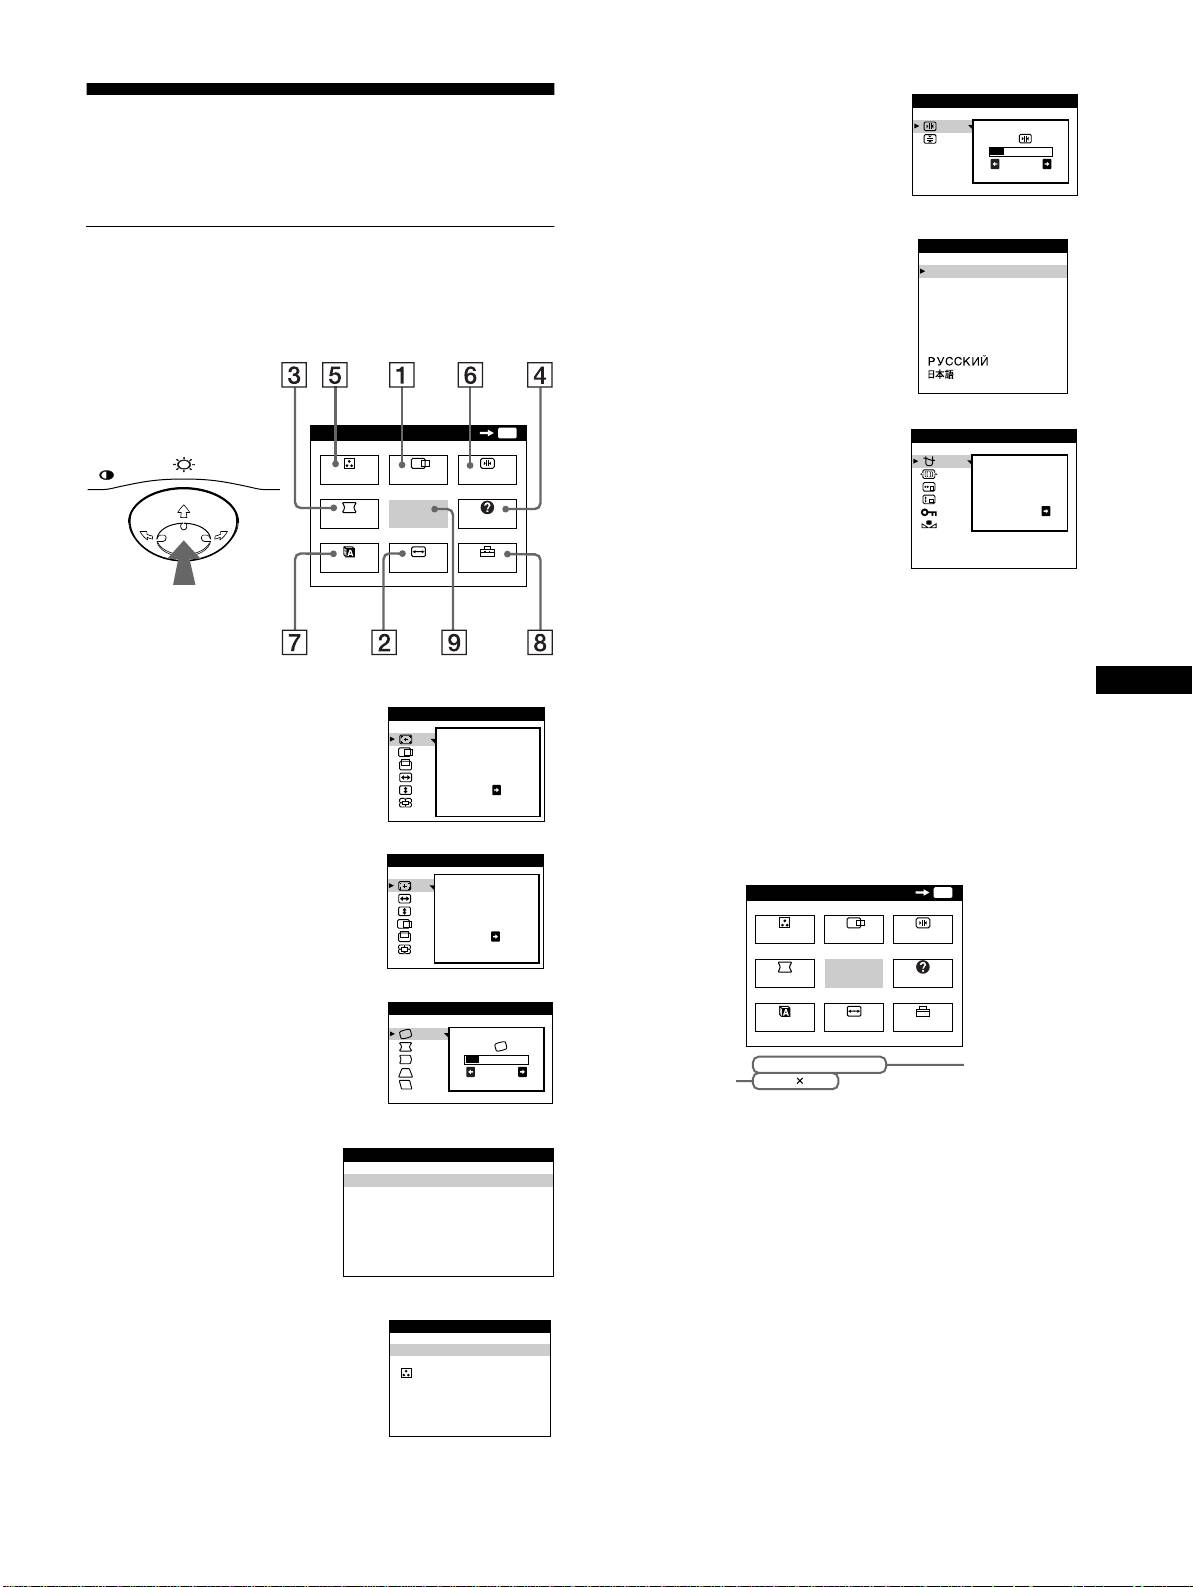
You can make numerous adjustments to your monitor using the
convergence.
26
on-screen menu.
7 LANG (page 8)
LANGUAGE
Navigating the menu
Selects LANG to choose the on-
ENGL ISH
FRANÇA I S
Press the center of the control button to display the main MENU
screen menu’s language.
DEUTSCH
on your screen. See page 10 for more information on using the
ESPAÑOL
ITALIANO
control button.
NEDERLANDS
SVENSKA
MENU
OK
MENU
8 OPTION (page 13)
OPT I ON
MENU
Selects OPTION to adjust the
COLOR
CENTER
CONV
monitor’s options. The options
DEGAUSS
include:
ON
GEOM
EXIT
HELP
• degaussing the screen
• adjusting the moire cancellation
LANG
SIZE
OPTION
level
• changing the on-screen menu
position
• locking the controls
• image restoration
Use the control button to select one of the following menus.
GB
9 EXIT
1 CENTER (page 11)
SI ZE/CENTER
Select EXIT to close the menu.
Selects the CENTER menu to adjust
AUTO
the picture’s centering, size or
zoom.
ON
x
Displaying the current input signal
The horizontal and vertical frequencies of the current input signal
are displayed in the main MENU. If the signal matches one of this
2 SIZE (page 11)
monitor’s factory preset modes, the resolution is also displayed.
SI ZE/CENTER
Selects the SIZE menu to adjust the
AUTO
picture’s size, centering or zoom.
ON
3 GEOM (page 12)
GEOMETRY
Selects the GEOM menu to adjust
the picture’s rotation and shape.
26
4 HELP (page 14)
HELP
Selects the HELP menu to
RETURN TO MA IN MENU
RECOMMENDED RESOLUT ION
display helpful hints and
FLICKER
information about this
TH I N HOR I ZONTAL L I NE
DISTORTED SHAPE
monitor.
OUT OF FOCUS
DI SCOLORAT ION
5 COLOR (page 12)
COLOR
Selects the COLOR menu to adjust
9300K
5000K
the picture’s color temperature. You
sRGB
can use this to match the monitor’s
colors to a printed picture’s colors.
9
MENU
OK
MENU
COLOR
CENTER
CONV
GEOM
EXIT
HELP
LANG
SIZE
OPTION
68.7kHz/ 85Hz
1024
768
the horizontal
the resolutio
n
and vertical
of the current
frequencies of
inpu
t signal
the current
input signal
(continued)
