Sony SU-FL300L: 5 Step 3: Preparing for the installation of the TV 1 2
5 Step 3: Preparing for the installation of the TV 1 2: Sony SU-FL300L
Table of contents
- WARNING On Safety CAUTION
- WARNING
- CAUTION
- Step 1: Checking the parts
- Step 2: Assembling the TV Stand 1 2
- 3 4
- 5 Step 3: Preparing for the installation of the TV 1 2
- Step 4: Installing the TV 1 2 3
- Step 5: Safety measures to prevent toppling over 1 2 3
- Specifications Installing the Center Speaker (For Home Theatre Systems only)
- 1 2
8
(GB)
5
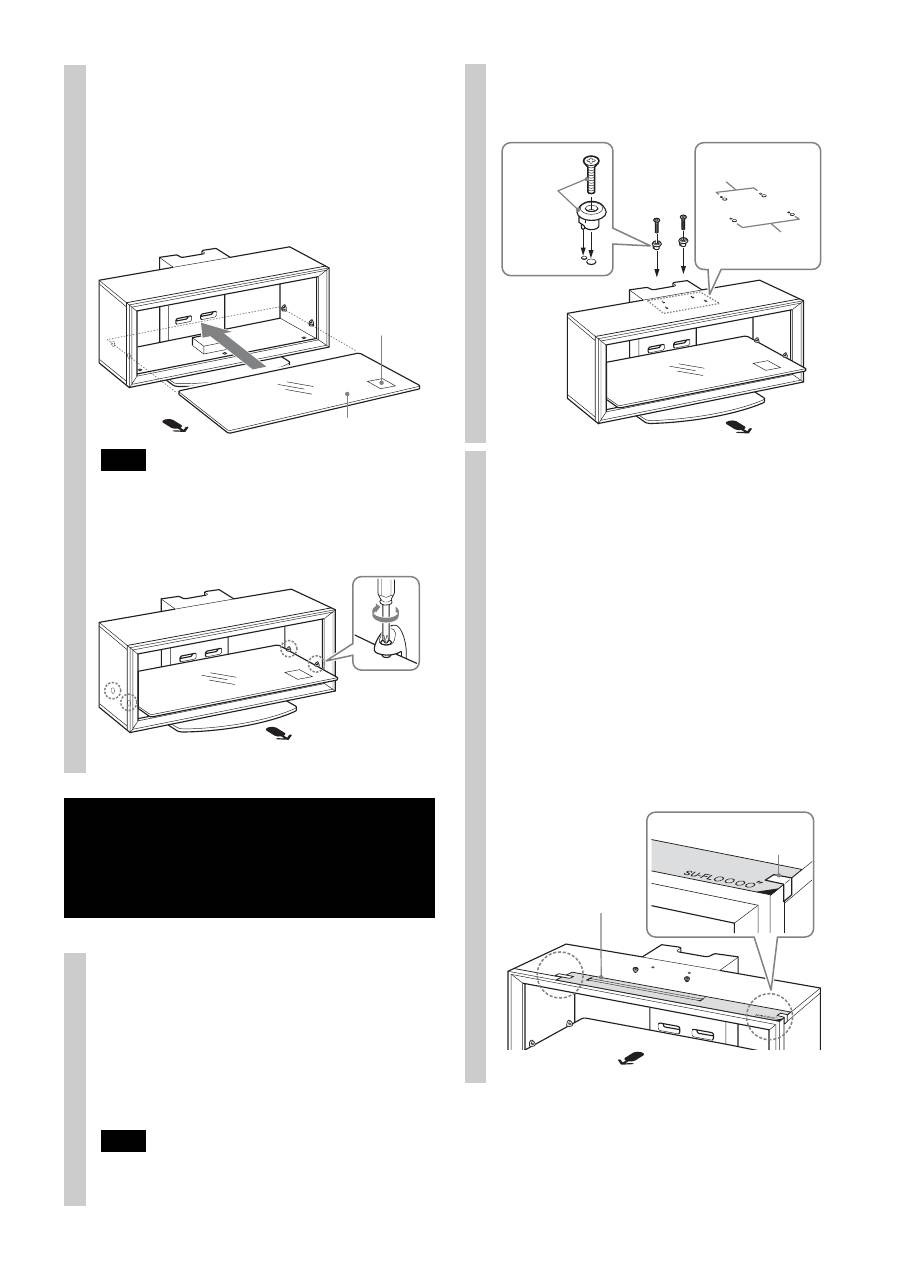
Attach the Glass Shelf.
If you attach the Home Theatre System to the Stand,
attach the Speaker Hooks first. (Refer to “Installing the
Center Speaker (For Home Theatre Systems only)” on
page 11.)
1
Fully insert the Glass Shelf until it touches the Rear
Pillar.
Note
Attach the Glass Shelf to the TV Stand with the Caution label
facing up on the front right, as shown in the illustration.
2
Tighten the four screws on the Side Pillars to secure
the Glass Shelf to the TV Stand.
Step 3: Preparing for the installation of the TV 1
Attach the sleeves to the Top Board.
Attach the sleeves with the supplied screws (+K4 × 20).
For models that are not specified on page 2:
Use the front holes.
For models that are specified on page 2:
For swivel models*, use the rear holes; for non-swivel
models, use the front holes.
Note
Check your TV’s operating instructions as to whether or not
your TV can swivel.
Caution label
Glass Shelf
* The swivel function allows you to adjust the viewing angle
of the TV (left and right).
2
Paste the supplied paper
template on the Top Board.
1
Choose the supplied paper template and align the
right corner edges of the paper template with the
right corner of the Top Board.
For models that are not specified on page 2:
Be sure to refer to the leaflet supplied with your TV,
choose the paper template corresponding to your
TV.
For models that are specified on page 2:
Choose the paper template in black print
corresponding to your TV screen size.
2
Tape the paper template to the Top Board with the
supplied tape.
Rear holes
Front holes
Screw
(+K4 × 20)
+
Sleeve
Tape
Paper template
