Yamaha DVD-S663: Setup Menu
Setup Menu: Yamaha DVD-S663
Setup Menu
Setup Menu
English
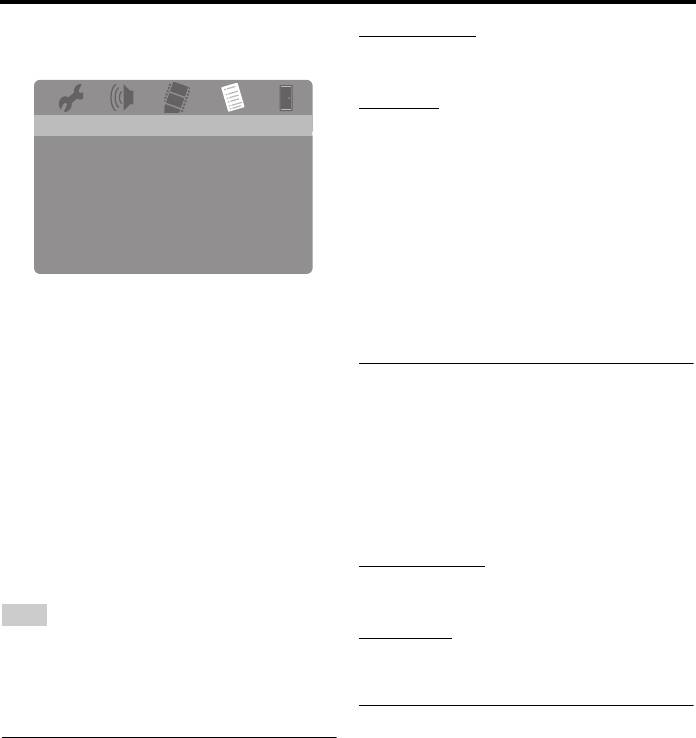
Menu overview
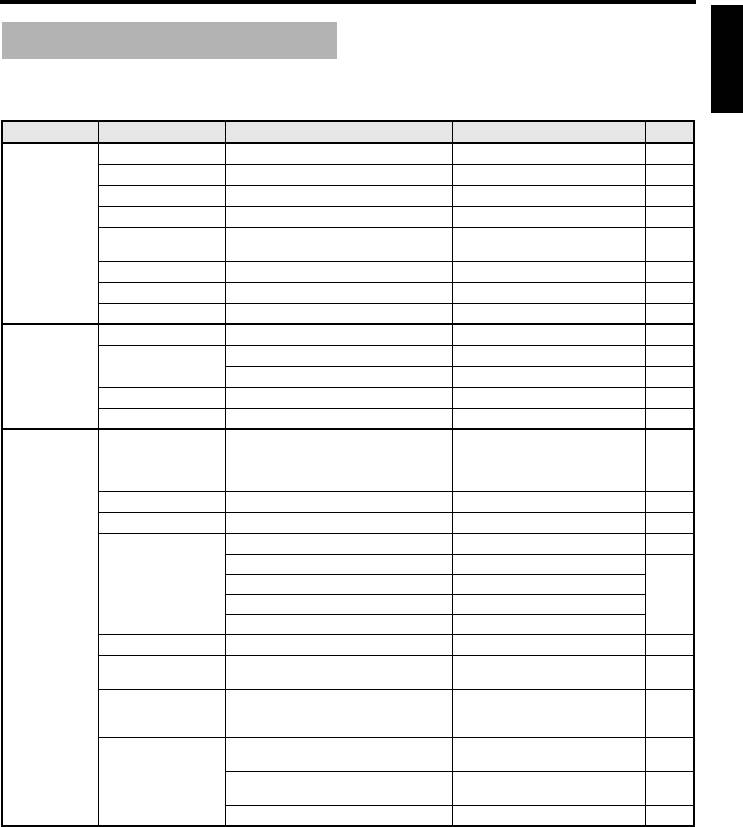
The bold items/parameters listed below are the default settings. The menu items, setting items,
and default settings may change depending on the models.
Setup page Menu item Setting Item/Submenu Setting item/Parameter Page
GENERAL
DISC LOCK LOCK, UNLOCK
28
SETUP PAGE
MP3 RECORD (SETUP is displayed)
28
PROGRAM (INPUT MENU is displayed)
30
DISPLAY DIM 100%, 70%, 40%
30
OSD LANGUAGE
(See “OSD LANGUAGE setting items” on
30
page 26)
SCREEN SAVER ON, OFF
31
SLEEP 30, 60, 90, 120, 150 MINS, OFF
31
DIVX(R) VOD CODE (DivX
®
registration code is displayed)
31
AUDIO SETUP
ANALOG OUTPUT STEREO, LT/RT
31
PAG E
DIGITAL AUDIO DIGITAL OUTPUT OFF, ALL, PCM ONLY
32
LPCM OUTPUT 48KHz, 96KHz
32
HDMI AUDIO ON, OFF
32
NIGHT MODE ON, OFF
33
VIDEO SETUP
TV TYPE PAL
(Europe, Russia, Australia, and Asia
33
PAG E
models)
, NTSC
(U.S.A., Canada, Central
and South America, and Korea models)
,
MULTI
TV DISPLAY 4:3 PAN SCAN, 4:3 LETTER BOX, 16:9
33
PROGRESSIVE OFF, ON
34
PICTURE SETTING STANDARD, BRIGHT, SOFT
34
PERSONAL (BRIGHTNESS) –20 to +20 (0)
34
PERSONAL (CONTRAST) –16 to +16 (0)
PERSONAL (TINT) –9 to +9 (0)
PERSONAL (COLOR) –9 to +9 (0)
BLACK LEVEL ON, OFF
35
CLOSED CAPTION ON
(U.S.A. and Canada models)
, OFF
35
(Other models)
COMPONENT
YUV, RGB
36
(Europe
and Russia
models only)
HDMI SETUP WIDE SCREEN FORMAT SUPERWIDE, 4:3 PILLAR BOX,
36
OFF
HDMI VIDEO 480P, 576P, 720P, 1080I, 1080P,
36
AUTO
HD JPEG ON, OFF
37
25 En
Setup Menu
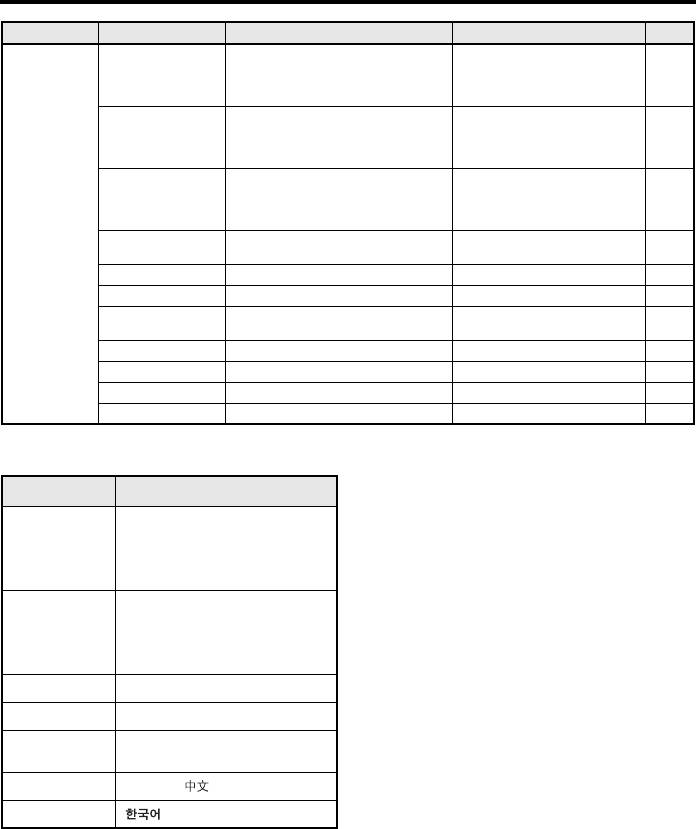
Setup page Menu item Setting Item/Submenu Setting item/Parameter Page
PREFERENCE
AUDIO ENGLISH
(Europe, U.S.A., Canada,
37
PAG E
Central and South America, Australia,
and Asia models)
, RUSSIAN
(Russia
model)
, KOREAN
(Korea model), etc.
SUBTITLE OFF
(Europe, U.S.A., Canada, Central
37
and South America, Australia, and Asia
models)
, RUSSIAN
(Russia model)
,
KOREAN
(Korea model), etc.
DISC MENU ENGLISH
(Europe, U.S.A., Canada,
37
Central and South America, Australia,
and Asia models)
, RUSSIAN
(Russia
model)
, KOREAN
(Korea model), etc.
PARENTAL 1 KID SAFE, 2 G, 3 PG, 4 PG 13,
37
5 PGR, 6 R, 7 NC17, 8 ADULT
VR LIST ORIGINAL LIST, PLAY LIST
38
DATA DISC NAV WITHOUT MENU, WITH MENU
38
DIVX SUBTITLE
GROUP1, GROUP2, GROUP3,
38
(except Korea model)
GROUP4, GROUP5
PBC ON, OFF
39
AUTO STANDBY ON, OFF
39
PASSWORD CHANGE
40
DEFAULT RESET
40
■ OSD LANGUAGE setting items
Model Setting item
Europe ENGLISH, DANSK, DEUTSCH,
ESPAÑOL, FRANÇAIS, ITALIANO,
NEDERLANDS, NORSK, POLSKI,
PORTUGUÊS,
PYCCKИЙ
,
SVENSKA, TÜRKÇE
Russia ENGLISH, DANSK, DEUTSCH,
ESPAÑOL, FRANÇAIS, ITALIANO,
NEDERLANDS, NORSK, POLSKI,
PORTUGUÊS, PYCCKИЙ,
SVENSKA, TÜRKÇE
U.S.A., Canada ENGLISH, FRANÇAIS, ESPAÑOL
Australia ENGLISH, FRANÇAIS, ESPAÑOL
Central and
ENGLISH, ESPAÑOL, PORTUGUÊS
South America
Asia ENGLISH,
Korea
,
ENGLISH
26 En
Setup Menu
English
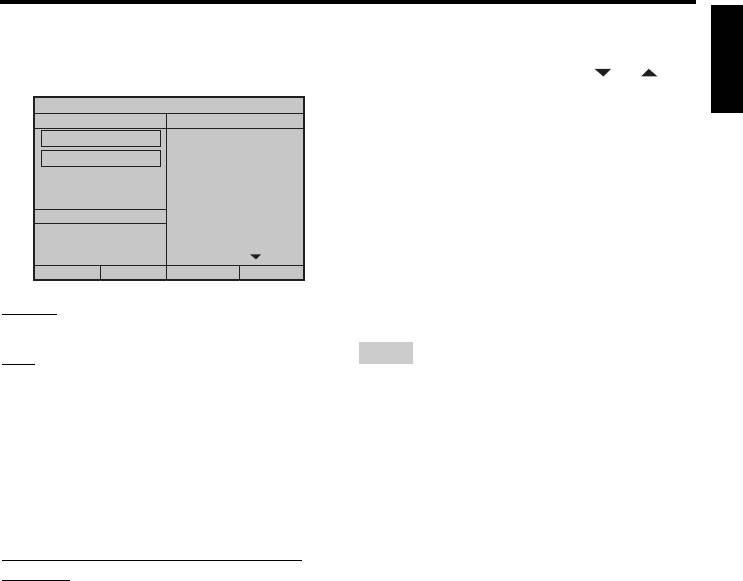
3 Press 5/a to highlight the desired menu
Setup menu operation
item.
➜ Menu items and setting items appear.
Setup is carried out on the TV, enabling you to
customize this unit to suit your own particular
requirements.
Follow the procedures below to
VIDEO SETUP PAGE
start the setup menu operations.
TV TYPE
TV DISPLAY
y
PROGRESSIVE
• To return to the previous menu, press 2.
PICTURE SETTING STANDARD
• The OSDs shown in this section are the examples
BLACK LEVEL BRIGHT
of Europe model. The menu items, setting items,
CLOSED CAPTION SOFT
.......
COMPONENT PERSONAL
and default setting may change depending on the
*
HDMI SETUP
models.
• If the settings you have selected are not
: [COMPONENT] is only for Europe and
appropriate, you can reset all settings to the initial
*
Russia models.
factory settings (see “Resetting the system” on
page 40).
• Refer to the following pages for details of the
➜
If setting items do not appear, the selected
menu that requires a particular operation.
menu item has submenus. In this case,
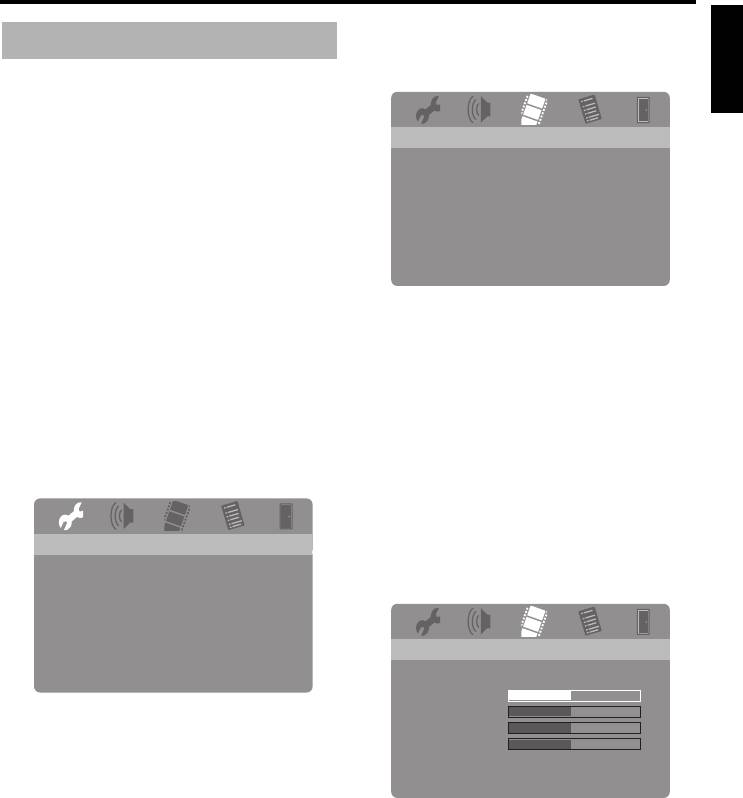
1 Press SET UP.
press
ENTER
, and then repeat step 3.
➜ The setup page and menu items appear
4 Press 3.
on your TV.
5 Press 5/a to select the desired setting
item, and then press ENTER.
➜
If the parameter appears, press
2
/
3
to
GENERAL SETUP PAGE
adjust the setting, and then press
DISC LOCK
MP3 RECORD
ENTER
.
PROGRAM
DISPLAY DIM
OSD LANGUAGE
SCREEN SAVER
PERSONAL PICTURE SETUP
SLEEP
DIVX(R) VOD CODE
BRIGHTNESS
0
CONTRAST
0
2 Press 2 / 3 to select the desired setup
TINT
0
page.
COLOR
0
6 Press SET UP to exit from the menu.
27 En

Setup Menu
Notes
General setup menu
• MP3 files created by this unit are restricted to
your private enjoyment only. Unauthorized use of
copyrighted recordings can be copyright
infringement.
GENERAL SETUP PAGE
• Yamaha and suppliers accepts no liability for the
DISC LOCK
loss of data saved on the USB devices connected
MP3 RECORD
PROGRAM
to this unit. As a precaution, it is recommended
DISPLAY DIM
that the files are made backup copies.
OSD LANGUAGE
• Discs incompatible with CDDA standard are not
SCREEN SAVER
guaranteed to function.
SLEEP
DIVX(R) VOD CODE
• Copy protected music discs incompatible with
CDDA standard are not recordable.
• Tracks protected by SCMS (Serial Copy
Locking/Unlocking the disc for
Management System) are not recordable.
viewing
• If “USB current protection active. Device not
supported” appears on the TV screen, the device
Not all discs are rated or coded by the
is not usable with this unit because the power
manufacturer of the disc. You can prevent
consumption of the device is too high.
playback of a specific disc by locking the disc.
• “Device not supported” or “USB current
You can lock up to 40 discs on this unit.
protection active. Device not supported” appears
• Select [DISC LOCK] in “GENERAL
on the TV screen when you connect the USB
SETUP PAGE”.
device, this unit does not support the USB device.
In this case, use a different USB device.
LOCK
• During recording, do not disconnect your USB
Select this to lock playback of the current disc.
device or set this unit to the standby mode.
Subsequent access to a locked disc requires a
y
six-digit password.
About the USB devices supported by this unit, refer
The default password is “000 000” (see
to “Supported USB devices” on page 23.
“Changing the password” on page 40).
1 Connect your USB device to the USB port
UNLOCK
of this unit (see “USB port” on page 12).
Select this to unlock the disc and allow future
playback.
2 Load a music CD (see “Basic operation”
on page 17).
Recording CD tracks onto your
3 In “GENERAL SETUP PAGE”, press
USB device
5/a to highlight [MP3 RECORD], and
You can record CD tracks onto your USB
then press 3 to select [SETUP].
device connected to this unit.
4 Press ENTER.
The tracks are recorded in MP3 format.
28 En
Setup Menu
English
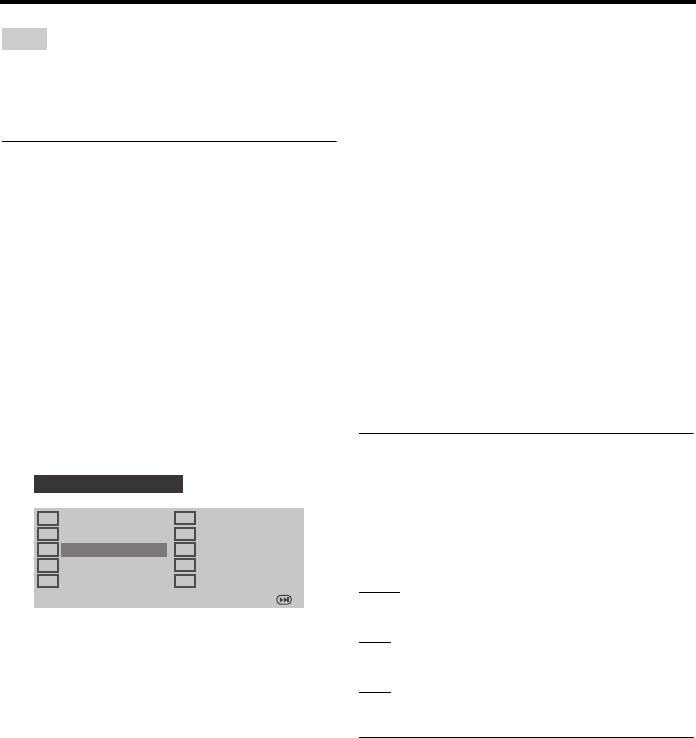
5 In “MP3 RECORD”, press 5/a to
• The tracks may be displayed on more
highlight [SPEED], and then press ENTER
than one page in “TRACK”. In this
repeatedly to select the desired setting.
case, press 5/a to select or ,
and then press ENTER to scroll
MP3 RECORD
OPTION
TRACK
through pages.
SPEED Normal
Track 01 03:34
• You can also select or deselect all the
Track 02 06:42
Bitrate 128 kbps
tracks by selecting [Select All] or
Track 03 03:42
Track 04 03:09
[Deselect All].
Track 05 02:50
SUMMARY
Track 06 00:34
9 Press 2 to return to [SPEED].
Selected 0
Track 07 05:15
10 Press 5/a to highlight [Start], and then
Total Time 00:00
press ENTER.
Start Exit
Select All
Deselect All
• To cancel the recording, highlight
Normal
[CANCEL], and then press ENTER.
Select this to record at normal speed.
Fast
Notes
Select this to record at about 2x speed.
• Recording cannot be started in the following
conditions:
y
– the connected USB device is not supported
When you select [Normal], you can enjoy playback
– no USB device is connected
while the recording.
– when “USB current protection active. Device
6 Press 5/a to highlight [Bitrate], and then
not supported” is shown on the TV screen
press ENTER repeatedly to select the
• During recording, do not press any keys other
desired bit rate.
than ENTER.
96 kbps, 128 kbps, 192 kbps, 256 kbps,
11 When the recording is completed, press
320 kbps
2 / 3/5/a to highlight [Exit] and then
Select a bit rate for the music data.
press ENTER to exit from “MP3
RECORD” menu.
y
Generally, the higher the bit rate, the better the
y
sound quality. However, higher bit rates use more
The created file is named as “TRACKxxx”. In
space on a device.
“xxx”, numbers from 001 to 999 are inserted in
7 Press 3.
order.
8 Press 5/a to highlight the desired track in
“TRACK”, and then press ENTER. Repeat
this step as necessary to select the other
tracks.
➜ The number of selected tracks and total
time are shown in “SUMMARY”.
29 En
Setup Menu
5 Repeat steps 3-4 to input another track/
Note
chapter number.
You cannot edit the files on your USB device
■ To remove a track
connected to this unit by using this unit (for
example, deleting or renaming the files).
6 Use 2 / 3/5/a to select the track you
want to remove.
Programming disc tracks
7 Press ENTER to remove this track from
(except MP3/WMA/WMV/JPEG/
the program menu.
®
DivX
)
■ To start program playback
You can play back the contents of a disc in the
8 Use 2 / 3/5/a to highlight [START] on
desired order by programming the tracks to be
the program menu, and then press ENTER.
played. You can store up to 20 tracks per disc
with a maximum of ten discs.
➜ Playback starts for the selected tracks in
the programmed sequence.
1 In “GENERAL SETUP PAGE”, press
5/a to highlight [PROGRAM], and then
■ To exit from program playback
press 3 to select [INPUT MENU].
9 Use 2 / 3/5/a to highlight [EXIT] on
2 Press ENTER.
the program menu, and then press ENTER.
➜ The input menu appears on the TV
screen.
Dimming the front panel display
You can select different levels of brightness
PROGRAM: TRACK (01-17)
for the front panel display.
1 04
6 _ _
• Select [DISPLAY DIM] in
2 10
7 _ _
3 _ _
8 _ _
“GENERAL SETUP PAGE”.
4 _ _
9 _ _
5 _ _
10 _ _
100%
EXIT START NEXT
Select this for full brightness.
70%
■ To input your favorite tracks/
Select this for medium brightness.
chapters
40%
3 Use the numeric buttons (0-9) to enter a
Select this for dimming display.
valid track/chapter number.
4 Use 2 / 3/5/a to move the cursor to the
OSD language
next position.
This menu contains various options for the on-
• If the track/chapter number is more
screen display (OSD) language. For details,
than ten, press 33l to move to the next
see “Setting the OSD Language” on page 15.
page, and then proceed with
programming.
OR
•Use 2 / 3/5/a to highlight [NEXT]
on the program menu, and then press
ENTER.
30 En
Setup Menu
English
2 Press ENTER to exit.
Setting the screen saver
y
This function is used to turn on or off the
To purchase or rent the videos from DivX
®
VOD
screen saver.
service at https://vod.divx.com/, use the registration
• Select [SCREEN SAVER] in “GENERAL
code and download the video onto a CD-R for
SETUP PAGE”.
playback on this unit.
ON
Notes
Select this to turn off the TV screen when disc
playback is stopped or paused for more than
• All of the downloaded videos from DivX
®
VOD
15 minutes.
can only be played back on this unit.
•For DivX
®
, the time search feature is not
OFF
available.
Select this to disable the screen saver function.
Setting the sleep timer
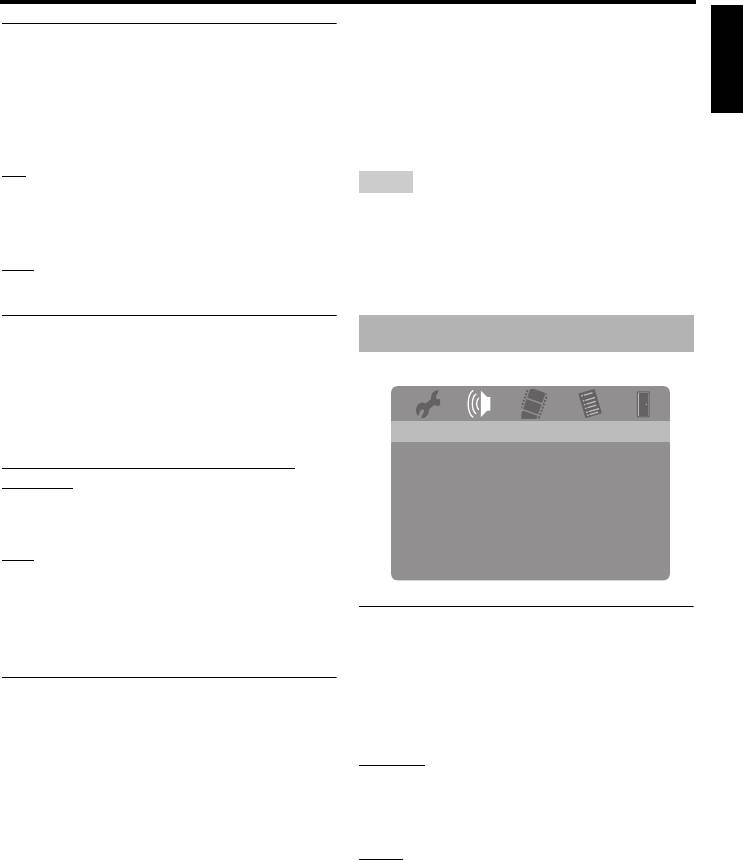
Audio setup menu
This feature automatically sets this unit to the
standby mode after a certain elapsed period.
• Select [SLEEP] in “GENERAL SETUP
PAGE”.
AUDIO SETUP PAGE
ANALOG OUTPUT
30 MINS, 60 MINS, 90 MINS, 120 MINS,
DIGITAL AUDIO
150 MINS
HDMI AUDIO
Select one of them to set the sleep timer
NIGHT MODE
function.
OFF
Select this to cancel the sleep timer function.
y
Setting the analog output
The sleep timer setting can also be deactivated if this
unit is set to the standby mode.
Set the analog output to match the playback
capability of this unit.
®
Displaying the DivX
VOD
• Select [ANALOG OUTPUT] in
registration code
“AUDIO SETUP PAGE”.
®
Yamaha provides you with a DivX
VOD
STEREO
(Video On Demand) registration code that
Select this to change channel output to stereo,
allows you to rent and purchase videos using
which only delivers sound from the two front
®
the DivX
VOD service.
speakers.
For more information, visit
https://vod.divx.com/.
LT/RT
Select this if this unit is connected to a Dolby
1 In “GENERAL SETUP PAGE”, press
Pro Logic decoder.
5/a to highlight [DIVX(R) VOD CODE],
and then press 3.
➜ The registration code appears.
31 En

Setup Menu
96KHz
Setting the digital output
Select this to play back discs recorded at the
The [DIGITAL AUDIO] options are:
sampling rate of 96 kHz. If the 96 kHz disc is
[DIGITAL OUTPUT] and [LPCM OUTPUT].
copy protected, the digital output is
automatically converted to the sampling rate of
1 In “AUDIO SETUP PAGE”, press 5/a to
48 kHz. 48 kHz PCM data streams are output at
highlight [DIGITAL AUDIO], and then
48 kHz.
press 3.
4 Press 5/a to select a setting, and then
2 Press 5/a to highlight an option.
press ENTER.
3 Press 3.
DIGITAL OUTPUT
Turning the HDMI audio on/off
Set the digital output according to your
When you connect this unit to an HDMI
optional audio component connections.
compatible component via the HDMI jack,
OFF
select to turn on or off the HDMI audio output.
Select this to turn off the digital output.
• Select [HDMI AUDIO] in “AUDIO
ALL
SETUP PAGE”.
Select this if you have connected the digital
audio output jack to a multi-channel decoder/
ON
receiver.
Select this to turn on the HDMI audio output.
PCM ONLY
OFF
Select this only if your receiver is not capable
Select this to turn off the HDMI audio output.
of decoding multi-channel audio signals.
Notes
y
• Even if “ALL” is selected, this unit converts
• If you are not using the HDMI audio output, set
MPEG audio into 2 channel PCM and then
this to [OFF].
outputs to the connected component.
• If the monitor/receiver connected to this unit
• When “PCM ONLY“ is selected, DTS digital
using HDMI does not support HDMI audio signal
signal is muted.
input, set this to [OFF].
• When audio signals are being output by HDMI-
LPCM OUTPUT
compatible components, digital signals output at
Select this if you have connected this unit to a
the coaxial jack of this unit are muted.
PCM-compatible receiver via a digital jack,
• When [DIGITAL OUTPUT] is set to [OFF] on
such as the coaxial jack. In this case, you may
this unit, HDMI audio signal is not output even if
need to adjust [LPCM OUTPUT].
[HDMI AUDIO] is set to [ON] and an HDMI
Discs are recorded at a certain sampling rate.
connection is established between the monitor
The higher the sampling rate, the better the
and receiver.
sound quality.
• When [DIGITAL OUTPUT] is set to [ALL] on
48KHz
this unit, PCM signals are still output if the
monitor and receiver only support the PCM
Select this to play back discs recorded at the
format. However, the HDMI audio signal is
sampling rate of 48 kHz. All 96 kHz PCM data
muted when audio format plays back the DTS
streams (if available) are converted to the
source.
sampling rate of 48 kHz.
32 En
Setup Menu
English
y
TV type
This unit can output the following audio signals
This menu contains the options for selecting
using HDMI: 32/44.1/48 kHz, 2ch linear PCM
signals and bitstream signals (Dolby Digital and
the color system that matches your TV. For
DTS).
details, see “Setting a color system for your
TV” on page 14.
Turning the night mode on/off
Setting the TV display
In the night mode, high volume output is
softened and low volume output is brought
Set the aspect ratio of this unit to match your
upward to an audible level. It is useful when
TV. The format you select must be available
you want to watch your favorite action movie
on the disc. Otherwise, the TV display setting
without disturbing others at night.
will not affect the picture during playback.
• Select [NIGHT MODE] in “AUDIO
• Select [TV DISPLAY] in “VIDEO
SETUP PAGE”.
SETUP PAGE”.
ON
4:3 PAN SCAN
Select this to level out the volume. This
Select this if the aspect ratio of your TV is 4:3
feature is only available for movies with the
and you want both sides of the picture to be
Dolby Digital mode.
trimmed or formatted to fit your TV screen.
When you select this setting, invalidate the
4:3 LETTER BOX
dynamic range compression (DRC) of the
Select this if the aspect ratio of your TV is 4:3.
connected component.
In this case, a wide picture with black bands
OFF
on the upper and lower portions of the TV
Select this when you want to enjoy the full
screen are displayed.
dynamic range of surround sound.
16:9
Select this if you have a widescreen TV.
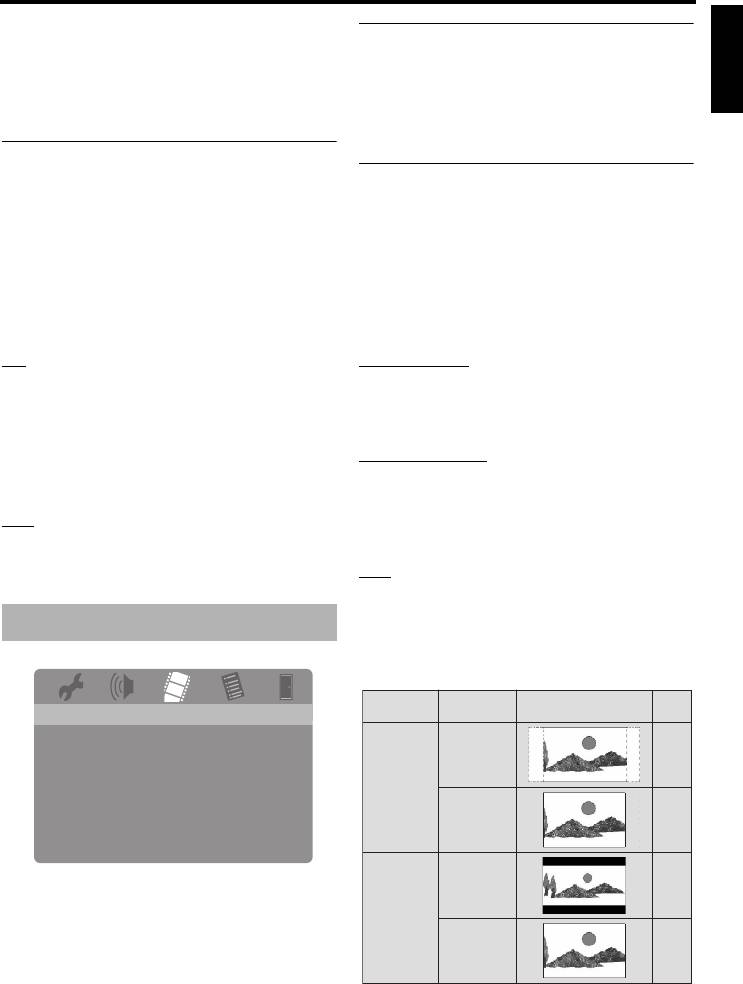
■ The relationship between the setting
Video setup menu
of this unit and the TV display
When the aspect ratio of your TV is 4:3:
Playback
Setting
TV display
VIDEO SETUP PAGE
disc
TV TYPE
TV DISPLAY
16:9
1
*
PROGRESSIVE
4:3 PAN
PICTURE SETTING
SCAN
BLACK LEVEL
CLOSED CAPTION
4:3
.......
COMPONENT
*
HDMI SETUP
16:9
: [COMPONENT] is only for Europe and
*
Russia models.
4:3 LETTER
BOX
4:3
33 En
Setup Menu
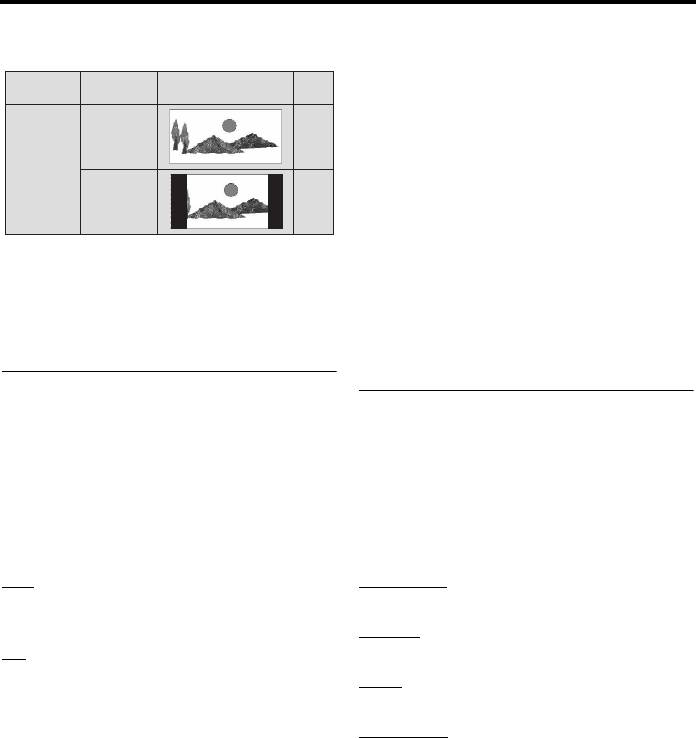
When the aspect ratio of your TV is 16:9
Notes on activating progressive scan:
(widescreen):
• Ensure that your TV is equipped with
progressive scan.
Playback
Setting
TV display
disc
• Connect using a component video cable.
• When making HDMI connections, you
16:9
cannot select [PROGRESSIVE].
• (Europe and Russia models only) When
16:9
[COMPONENT] is set to [RGB] (see
4:3
2
page 36), you cannot select
*
[PROGRESSIVE].
• You can turn off the progressive scan
*1: If the disc is not assigned to playback in
without using the setup mode if no picture is
panscan, it is played in letterbox.
displayed. See “No picture is displayed
*2: The side of the picture may be stretched
when you do not use progressive scan
depending on the TV. In this case, check the
connections (using the component video
screen size and aspect ratio of your TV.
jacks)” in “Troubleshooting” on page 43.
Turning the progressive scan
Adjusting picture settings
function on/off
This unit comes with three predefined sets of
This feature is only available if you have
picture color settings and one personal setting
connected this unit to a progressive scan TV
that you can define yourself.
through the component video jacks (see
“Component video jacks <A>” on page 10).
1 In “VIDEO SETUP PAGE”, press 5/a to
•Select [PROGRESSIVE] in “VIDEO
highlight [PICTURE SETTING], and then
SETUP PAGE”.
press 3.
OFF
STANDARD
Select this to disable the progressive scan
Select this for the standard picture setting.
function.
BRIGHT
ON
Select this to make the TV picture brighter.
Select this to enable the progressive scan
SOFT
function.
Select this to make the TV picture softer.
PERSONAL
Select this to personalize your picture color by
adjusting the brightness, contrast, tint and
color (saturation).
2 Press 5/a to select a setting, and then
press ENTER.
3 If you select [PERSONAL] in step 1,
proceed to steps 4-7.
34 En

Setup Menu
English
➜ The “PERSONAL PICTURE SETUP”
Turning the black level on/off
menu appears.
When [TV TYPE] is set to [NTSC] (see
page 14), this menu is effective for improving
the visibility of the black color in the dark area
PERSONAL PICTURE SETUP
on the screen. The black level setting has no
effect if [TV TYPE] is set to [PAL].
BRIGHTNESS
0
CONTRAST
0
• Select [BLACK LEVEL] in “VIDEO
TINT
0
SETUP PAGE”.
COLOR
0
ON
Select this to improve the visibility of the
black color.
4 Press 5/a to select one of the following
OFF
options.
Select this for the standard black level setting.
BRIGHTNESS
Adjust the brightness of the picture. Zero (0) is
Note
the average brightness setting value.
This function is only available for composite video /
CONTRAST
S-video output.
Adjust the contrast of the picture. Zero (0) is
the average contrast setting value.
Turning the closed caption on/off
TINT
Closed captions are data hidden in the video
Adjust the balance of red and green of the
signals of specific discs and are invisible
picture. Zero (0) is the average tint setting
without the use of a special decoder. The
value.
difference between subtitles and captions is
COLOR
that subtitles are intended for hearing persons
Adjust the color level of the picture. Zero (0) is
and captions are for the hearing impaired.
the average color setting value.
Subtitles rarely show all of the audio. For
5 Press 2 / 3 to adjust the setting that best
example, captions show sound effects (e.g.,
suits your personal preference.
“phone ringing”, “footsteps”), while subtitles
6 Repeat steps 4-5 to adjust other color
do not.
features.
Before you select this function, ensure that the
disc contains closed caption information and
7 Press ENTER.
your TV also supports this function.
• Select [CLOSED CAPTION] in
“VIDEO SETUP PAGE”.
ON
Select this to enable the closed caption
function.
OFF
Select this to disable the closed caption
function.
35 En

Setup Menu
SUPERWIDE
Note
Select to display a 4:3 image on the 16:9 screen
This function is only available for NTSC video
with non-linear stretching (center position of
format and composite video / S-video output.
screen is stretched less than the sides).
4:3 PILLAR BOX
Switching YUV/RGB
Select to display a 4:3 image on the 16:9 screen
without stretching.
When playing a disc
(Europe and Russia models only)
recorded in the 16:9 image, the image is
This setting allows you to toggle the output of
displayed in its original aspect ratio (16:9)
the video signal between YUV (on VIDEO
without pillar boxes.
OUT - COMPONENT) and RGB (on
OFF
SCART).
No aspect ratio adjustment is made when this
• Select [COMPONENT] in “VIDEO
option is selected.
SETUP PAGE”.
Note
YUV
When the video signal is 480p or 576p, you cannot
Select this for the component video
select [WIDE SCREEN FORMAT], and no aspect
connection.
ratio adjustment is made even if [SUPERWIDE] or
RGB
[4:3 PILLAR BOX] is selected.
Select this for SCART connection.
HDMI VIDEO
Setting the HDMI video
Set the resolution depending on the monitor
you are using. This unit is compatible with the
When you connect this unit to an HDMI
following video formats:
compatible component via the HDMI jack,
480p/60Hz, 576p/50Hz, 720p/50Hz, 60Hz,
select the following video output settings
1080i/50Hz, 60Hz, and 1080p/50Hz, 60Hz
depending on the connected component.
480P
1 In “VIDEO SETUP PAGE”, press 5/a to
480 progressive-scan video
highlight [HDMI SETUP], and then press
576P
3.
576 progressive-scan video
2 Press 5/a to highlight an option.
720P
3 Press 3 to enter a submenu.
720 progressive-scan video
1080I
WIDE SCREEN FORMAT
1080 interlaced video
Set the aspect ratio of the projected images on
the screen. This feature is only available when
1080P
1080 progressive-scan video
making HDMI connections and [TV
DISPLAY] is set to [16:9] (see page 33) when
AUTO
playing back 4:3 image.
The resolution is automatically selected to
match the monitor you are using.
36 En

Setup Menu
English
Notes
Preference setup menu
• For the settings other than [AUTO], images may
Press
7
twice to stop playback (if necessary)
not be displayed properly if a resolution output
before pressing SET UP.
setting is not supported by the HDMI component
you are using. In that case, follow the steps below
to return to [AUTO].
1 Press OPEN/CLOSE ( ) on the front panel
PREFERENCE PAGE
to open the disc tray.
AUDIO
2 Press 2.
SUBTITLE
3 Press SUBTITLE.
DISC MENU
PARENTAL
• You cannot set [TV TYPE], [PROGRESSIVE],
VR LIST
and [COMPONENT] (Europe and Russia
DATA DISC NAV
models) when making HDMI connections.
.......
DIVX SUBTITLE
*
• When disconnecting the HDMI cable, the setting
PBC
of [TV TYPE] may be changed. If the component
video, S-video, or composite video signal is not
: [DIVX SUBTITLE] is available for the
*
models other than Korea model.
output correctly, see “Completely distorted
picture, black/white picture, or no picture” in
“Troubleshooting” on page 43 to set the correct
TV type again.
Audio, subtitle and disc menu
These menus contain various language options
HD JPEG
This unit can display High-Definition JPEG
for the audio, subtitles, and disc menus
images when connecting to an HDMI
recorded on the DVD-Video. For details, see
component using HDMI cable.
“Setting the audio, subtitle, and disc menu
languages (DVD-Video only)” on page 16.
ON
Displays JPEG pictures with high quality.
Restricting playback with parental
OFF
Displays JPEG pictures with standard quality.
control
Some DVDs may have a parental level
Notes
assigned to the complete disc or to certain
• You can select [HD JPEG] when the HDMI video
scenes on the disc. This feature lets you set a
signals with 720p, 1080i, and 1080p are output.
playback limitation level.
• You cannot select [HDMI SETUP] when JPEG
The rating levels are from 1 to 8 and are
(including HD JPEG) pictures are displayed.
country dependent. You can prohibit playback
of certain discs that are not suitable for your
children or play certain discs in alternative
scenes.
37 En
Setup Menu
1 In “PREFERENCE PAGE”, press 5/a to
ORIGINAL LIST
highlight [PARENTAL], and then press 3.
Select this to play the originally recorded titles
on the disc.
PLAY LIST
PREFERENCE PAGE
Select this to play the edited version of the
AUDIO 1 KID SAFE
disc. This feature is only available when a play
SUBTITLE 2 G
list has been created.
DISC MENU 3 PG
PARENTAL 4 PG 13
2 Press 5/a to highlight a setting, and then
VR LIST 5 PGR
press ENTER.
DATA DISC NAV 6 R
.......
DIVX SUBTITLE 7 NC17
*
■ To play back a disc in VR format
PBC
8 ADULT
3 Press SET UP to close the setup menu.
: [DIVX SUBTITLE] is available for the
*
models other than Korea model.
4 Press 3 / 8 to begin to play back the disc
with the setting you selected.
2 Press 5/a to highlight a rating level for
Selecting the data disc menu
the inserted disc, and then press ENTER.
Data disc navigator can be set only if the disc
• To disable parental controls and have
was recorded with a menu. It allows you to
all discs play, select [8 ADULT].
display folder menus when playing back a disc
3 Use the numeric buttons (0-9) to enter
with folder structure.
the six-digit password (see “Changing the
• Select [DATA DISC NAV] in
password” on page 40).
“PREFERENCE PAGE”.
➜ DVD discs that are rated above the
level you selected do not play unless
WITHOUT MENU
you enter your six-digit password.
Select this to display all the files contained in
the data disc.
Note
WITH MENU
Some DVD discs are not encoded with a rating
Select this to display only the folder menu of
though the movie rating may be printed on the disc
the data disc.
cover. The rating level feature does not work for
such discs.
®
Selecting DivX
external subtitle
group (except Korea model)
Selecting playback of VR format
The font sets listed below are available for
There are two ways to play back a disc in VR
®
DivX
external subtitle files. This setting
(Video Recording) format: ORIGINAL and
allows you to see the proper font set on-screen
PLAY LIST.
to match the subtitle file.
1 In “PREFERENCE PAGE”, press 5/a to
• Select [DIVX SUBTITLE] in
highlight [VR LIST], and then press 3.
“PREFERENCE PAGE”.
38 En

Setup Menu
English
GROUP1:
Selecting the PBC (playback
Albanian (sq), Basque (eu), Catalan (ca),
control) function
Danish (da), Dutch (nl), English (en),
You can set playback control (PBC) to on or
Faroese (fo), Finnish (fi), French (fr),
off. This function is available only on Video
German (de), Icelandic (is), Irish (ga),
CD 2.0 with the playback control (PBC)
Italian (it), Norwegian (no),
feature.
Portuguese (pt), Rhaeto-Romanic (rm),
Scottish (gd), Spanish (es), Swedish (sv)
• Select [PBC] in “PREFERENCE
GROUP2:
PAGE”.
Albanian (sq), Croatian (hr), Czech (cs),
ON
Hungarian (hu), Polish (pl), Romanian (ro),
Select this to display a disc menu.
Slovak (sk), Slovenian (sl)
OFF
GROUP3:
Select this not to display a disc menu.
Bulgarian (bg), Byelorussian (be),
Playback starts from the beginning of a disc.
Macedonian (mk), Russian (ru), Serbian (sr),
Ukrainian (uk)
y
You can also use the MENU button on the remote
GROUP4:
control to turn on or off the playback control (PBC)
Hebrew (iw), Yiddish (ji)
function (see “Using the playback control (PBC)
GROUP5:
menu” on page 20).
Turkish (tr)
Setting the auto standby function
Notes
You can set auto standby function to on or off.
• Some external subtitle files may be displayed
• Select [AUTO STANDBY] in
incorrectly or not at all.
“PREFERENCE PAGE”.
• Some discs cannot be played depending on disc
characteristics or recording conditions.
ON
• The number of external subtitle files that can be
Select this to set this unit to the standby mode
switched for the same movie file is limited to a
automatically when disc playback is stopped
maximum of ten.
or paused for more than 30 minutes.
y
OFF
• For external subtitle files, the following subtitle
Select this to disable the auto standby
format filename extensions are supported (note
function.
that these files are not shown within the disc
menu): .srt, .sub, .ssa, .smi
• The filename of the movie file has to be repeated
at the beginning of the filename for the external
subtitle file.
39 En

Setup Menu
4 Enter the new six-digit password.
Changing the password
5 Enter the new six-digit password again to
The same password is used for both parental
confirm the password.
control and disc lock. Enter your six-digit
password when prompted on the screen. The
6 Press ENTER to confirm your new
default password is 000 000.
password.
➜ The new six-digit password is now
1 In “PREFERENCE PAGE”, press 5/a to
valid.
highlight [PASSWORD], and then press 3
to select [CHANGE].
Resetting the system
You can reset all options and your personal
PREFERENCE PAGE
settings to the initial factory settings,
PARENTAL
excluding [PASSWORD], [PARENTAL], and
VR LIST
[DISC LOCK].
DATA DISC NAV
.......
DIVX SUBTITLE
*
1 In “PREFERENCE PAGE”, press 5/a to
PBC
highlight [DEFAULT], and then press 3
AUTO STANDBY
PASSWORD CHANGE
to select [RESET].
DEFAULT
2 Press ENTER.
: [DIVX SUBTITLE] is available for the
*
➜ All settings are reset to the initial
models other than Korea model.
factory settings.
2 Press ENTER to enter the “Password
Change Page”.
OLD PASSWORD
NEW PASSWORD
CONFIRM PWD
OK
3 Use the numeric buttons (0-9) to enter
your old six-digit password.
• When doing this for the first time, enter
“000 000”.
• If you forget your old six-digit
password, enter “000 000”.
40 En
Оглавление
- Contents Contents
- Contents
- Introduction
- Functional Overview
- Connections
- Getting Started
- Playback Operation
- Setup Menu
- Language Codes
- Troubleshooting
- Glossary
- Specifications
- Содержание Содержание
- Содержание
- Введение
- Функциональный обзор
- Подключения
- Подготовка к эксплуатации
- Управление воспроизведением
- Меню настройки
- Языковые коды
- Устранение неисправностей
- Справочник
- Технические спецификации


