Sony BRAVIA KDL-26S2000: Set-up menu
Set-up menu: Sony BRAVIA KDL-26S2000
Table of contents
- WARNING Introduction Notice for Digital TV function
- Table of Contents
- Start-up Guide 1: Checking the 2: Connecting an aerial/ accessories VCR
- 3: Bundling the cables 5: Selecting the language and country/ region 4: Preventing the TV from toppling over
- 6: Auto-tuning the TV
- Safety information
- GB
- GB
- Precautions
- Overview of the remote
- Overview of the TV buttons and indicators
- Watching TV
- To access Text Picture Freeze To change the screen mode manually to suit the broadcast Using the Tools menu
- Checking the Digital Electronic Programme Guide To Do this
- To Do this
- Using the Favourite list * To Do this
- Viewing pictures from connected equipment
- Navigating through menus Menu Description
- Picture menu
- Noise Reduction Advanced Settings
- Sound menu
- Dual Sound
- Screen menu
- Set-up menu
- All Reset
- PC Settings menu
- Analogue Set-up menu (Analogue mode only)
- Manual Programme Preset
- Digital Set-up menu Digital Tuning
- Digital Set-up
- Connecting optional equipment Connecting to the TV (side)
- Connecting to the TV (rear)
- Using the Tools menu in PC input mode
- Specifications
- PC Input Signal Reference Chart
- Troubleshooting Picture Problem Cause/Remedy
- Sound Channels General
- Index
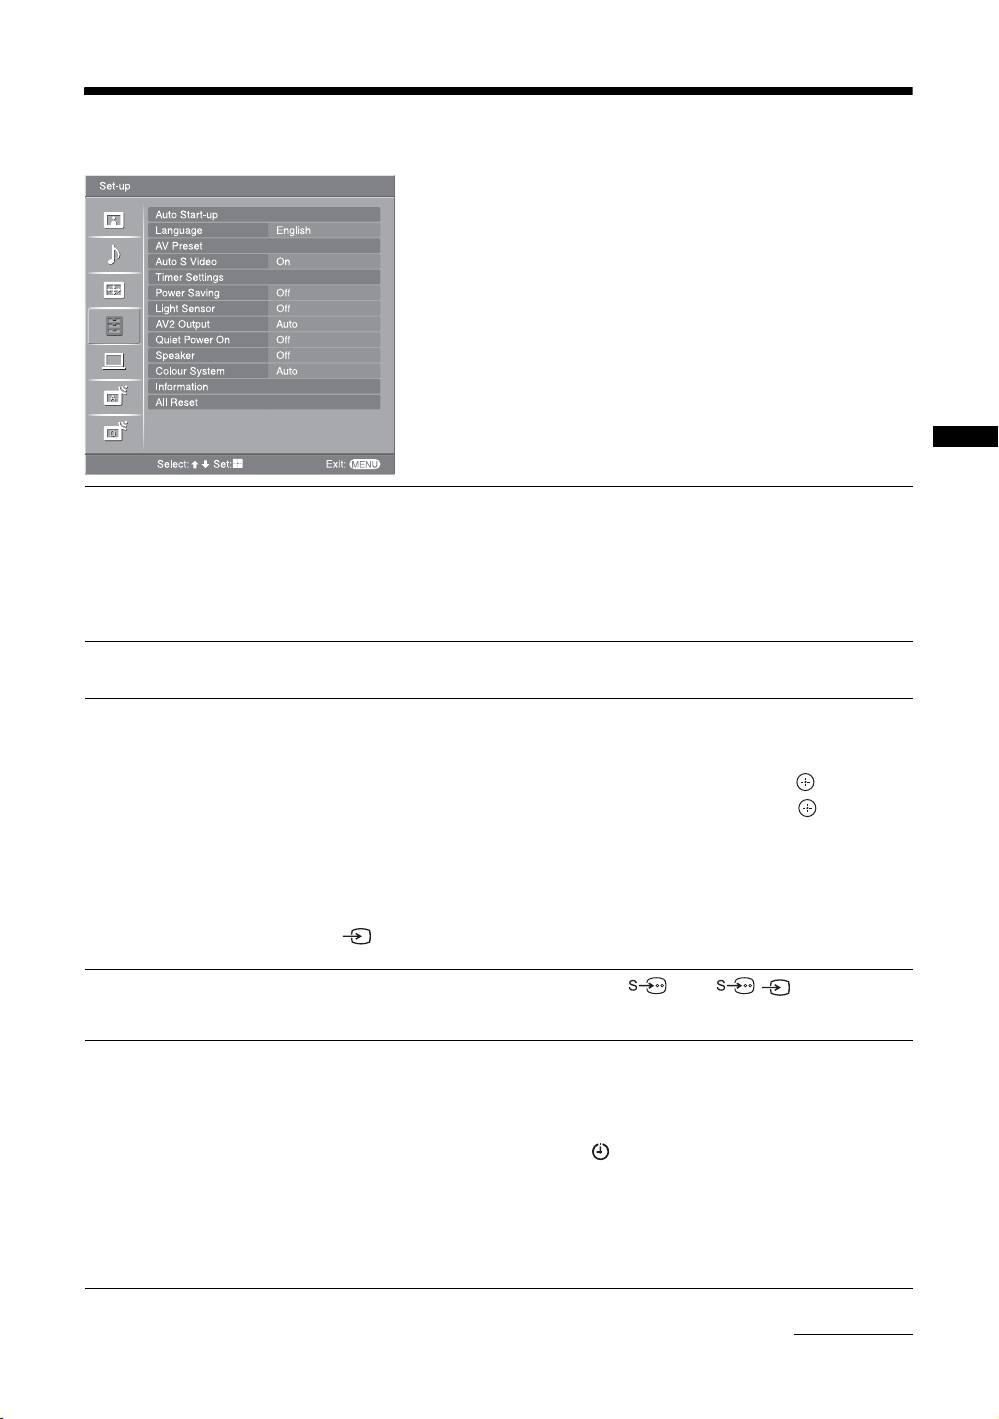
Set-up menu
You can select the options listed below on the Set-up
menu. To select options in “Settings”, see “Navigating
through menus” (page 19).
Using MENU Functions
Auto Start-up
Starts the “first time operation menu” to select the language and country/region, and
tune in all available digital and analogue channels. Usually, you do not need to do
this operation because the language and country/region will have been selected and
channels already tuned when the TV was first installed (page 5, 6). However, this
option allows you to repeat the process (e.g., to retune the TV after moving house,
or to search for new channels that have been launched by broadcasters).
Language
Selects the language in which the menus are displayed.
AV Preset
Assigns a name to any equipment connected to the side and rear sockets. The name
will be displayed briefly on the screen when the equipment is selected. You can skip
an input source that is not connected to any equipment.
1 Press
F/f to select the desired input source, then press .
2 Press
F/f to select the desired option below, then press .
Equipment labels: Uses one of the preset labels to assign a name to connected
equipment.
“Edit”: Creates your own label. Follow steps 2 to 4 of “Programme Labels”
(page 28).
“Skip”: Skips an input source that is not connected to any equipment when you press
to select the input source.
Auto S Video
Selects the input signal from S video sockets 5 when / 5 sockets are both
connected.
Timer Settings
Sets the timer to turn on/off the TV.
Sleep Timer
Sets a period of time after which the TV automatically switches itself into standby
mode.
When the Sleep Timer is activated, the (Timer) indicator on the TV (front) lights
up in orange.
Tips
• If you switch off the TV and switch it on again, “Sleep Timer” is reset to “Off”.
• “TV will soon turn off by sleep timer.” appears on the screen one minute before the TV
switches to standby mode.
Continued
GB
25
