Sony VPL-HW55ES: Projecting Step 5
Projecting Step 5: Sony VPL-HW55ES
Table of contents
- About the Quick Reference Manual
- WARNING
- For the Customers in Brazil only
- Precautions On preventing internal heat build- up On repacking On watching 3D video images On LCD Projector On condensation
- Notes on Installation and Usage
- Unsuitable Conditions
- Safety precautions for installing the unit on a ceiling
- Preparing Step 1 Checking the Supplied Accessories Inserting the Batteries into the Remote Control Using the CD-ROM manual
- a b Installing the Unit Step 2
- c
- Connecting the Unit Step 3 Connecting to a VCR
- To connect to equipment with component video output connectors
- Connecting to a Computer
- Connecting to a 3D Sync Transmitter
- Selecting the Menu Language Step 4
- Projecting Step 5
- Selecting the Picture Viewing Mode
- Error Handling Warning Indicators
- 1 2 Maintenance Replacing the Lamp
- 3 6
- 7 14
- Cleaning the Air Filter
17
US
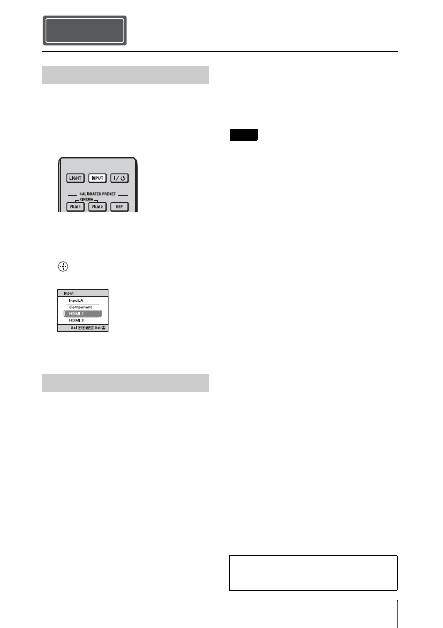
1
Power on both the projector and the
equipment connected to the unit.
2
Press INPUT to display the input
palette on the screen.
3
Select the equipment from which you
want to display images.
Press INPUT repeatedly or press
M
/
m
/
(enter) to select the equipment from
which to project.
1
Press the
?
/
1
(ON/STANDBY)
switch.
A message “POWER OFF?” appears on
the screen.
2
Press the
?
/
1
(ON/STANDBY) switch
again before the message disappears.
The ON/STANDBY indicator flashes in
green and the fan continues to run to
reduce the internal heat. First, the ON/
STANDBY indicator flashes quickly,
during which you will not be able to
light up the lamp with the
?
/
1
(ON/
STANDBY) switch.
The fan stops and the ON/STANDBY
indicator changes from flashing green to
remaining red.
The power is turned off completely, and you
can disconnect the AC power cord.
Never disconnect the AC power cord while the
indicator is flashing.
You can turn off the projector by holding the
?
/
1
(ON/STANDBY) switch for about 1 second,
instead of performing the above steps.
Projecting Step 5
Projecting the Picture
Turning Off the Power
Example: To view the picture from the
video equipment connected to the HDMI
1 connector of this unit.
Note
For more information, refer to
“Projecting” in the Operating Instructions
contained in the supplied CD-ROM.
