Sony Bravia KDL-32D3010: To change the screen format manually to suit the broadcast Using the Tools menu
To change the screen format manually to suit the broadcast Using the Tools menu: Sony Bravia KDL-32D3010
Table of contents
- Introduction Notice for Digital TV function Disposal of the TV set
- Start-up Guide 1: Checking the 2: Connecting an aerial/ accessories cable/VCR
- 3: Preventing the TV 5: Performing the initial from toppling over setup 4: Bundling the cables Selecting the language and country/ region
- To tune the TV for digital cable connection Auto-tuning the TV Detaching the Table- Top Stand from the TV
- Safety information
- Prohibited Usage Precautions Broken pieces: When not in use For children If the following problems occur...
- Overview of the remote
- Overview of the TV buttons and indicators
- Watching TV Additional operations
- To change the screen format manually to suit the broadcast Using the Tools menu
- Checking the Digital Electronic Programme Guide (EPG) * To Do this
- To Do this
- Using the Digital Favourite list *
- Connecting optional equipment
- Sockets Input symbol on Description screen
- Viewing pictures from the connected equipment
- Using HDMI control
- Navigating through menus
- Picture menu
- Colour Temperature
- Sound menu
- Dual Sound
- Screen menu
- Set-up menu
- AV Set-up
- HDMI Set-up
- All Reset
- PC Settings menu
- Analogue Set-up menu
- Manual Programme Preset
- Skip
- Digital Set-up menu
- Digital Set-up
- Specifications
- PC Input Signal Reference Chart
- Troubleshooting
To access Text
~
• You cannot select “4:3” or “14:9” for HD signal source
Press /. Each time you press /, the display changes
pictures.
cyclically as follows:
• You cannot use this function while the digital banner is
Text t Text over the TV picture (mix mode) t No
displayed.
Text (exit the Text service)
• Some characters and/or letters at the top and the bottom of
To select a page, press the number buttons or / .
the picture may not be visible in “Smart”. In such a case,
To hold a page, press / .
you can select “Vertical Size” using the “Screen” menu
To reveal hidden information, press / .
and adjust vertical size to make it visible.
z
• When “Auto Format” is set to “On”, the TV will
z
automatically select the best mode to suit the broadcast
When four coloured items appear at the bottom of the Text
(page 25).
page, Fastext is available. Fastext allows you to access pages
• You can adjust the position of the picture when selecting
quickly and easily. Press the corresponding coloured button
“Smart” (50Hz), “Zoom” or “14:9”. Press
F/f to move
to access the page.
up or down (e.g. to read subtitles) (except 720p and
1080i).
• Select “Smart” or “Zoom” to adjust for 720p or 1080i
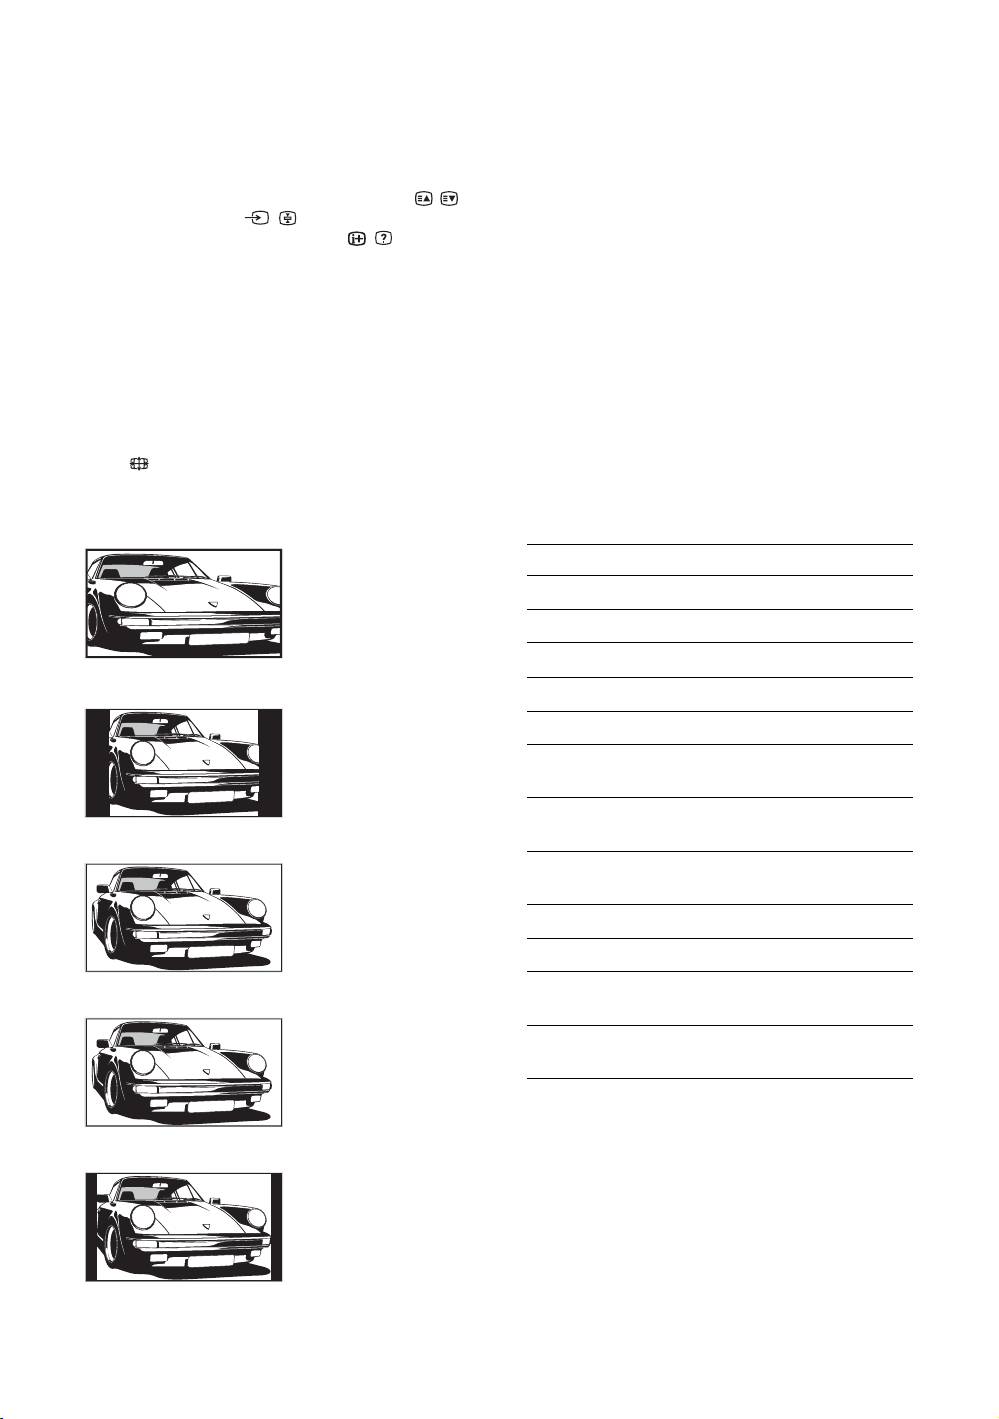
To change the screen format manually to
source pictures with edge portions cut off.
suit the broadcast
Press repeatedly to select the desired screen
format.
Using the Tools menu
Press TOOLS to display the following options when
viewing a TV programme.
Smart*
Displays conventional
Options Description
4:3 broadcasts with an
Close Closes the Tools menu.
imitation wide screen
effect. The 4:3 picture
Picture Mode See page 21.
is stretched to fill the
screen.
Sound Mode See page 23.
4:3
Motion Enhancer See page 26.
Displays conventional
Speaker See page 27.
4:3 broadcasts (e.g.
non-wide screen TV) in
Audio Language (in
See page 35.
the correct proportions.
digital mode only)
Subtitle Setting (in
See page 35.
digital mode only)
Wide
Displays wide screen
i Volume Adjusts the volume of the
headphones.
(16:9) broadcasts in the
correct proportions.
Sleep Timer See page 28.
Power Saving See page 28.
Auto Clock Set (in
Allows you to switch to digital
Zoom*
analogue mode only)
mode and obtain the time.
Displays cinemascopic
System Information (in
Displays the system
(letter box format)
digital mode only)
information screen.
broadcasts in the
correct proportions.
14:9*
Displays 14:9
broadcasts in the
correct proportions. As
a result, black border
areas are visible on the
screen.
* Parts of the top and bottom of the picture may be cut off.
GB
12
