Sony Bravia KDL-32D3010: Screen menu
Screen menu: Sony Bravia KDL-32D3010
Table of contents
- Introduction Notice for Digital TV function Disposal of the TV set
- Start-up Guide 1: Checking the 2: Connecting an aerial/ accessories cable/VCR
- 3: Preventing the TV 5: Performing the initial from toppling over setup 4: Bundling the cables Selecting the language and country/ region
- To tune the TV for digital cable connection Auto-tuning the TV Detaching the Table- Top Stand from the TV
- Safety information
- Prohibited Usage Precautions Broken pieces: When not in use For children If the following problems occur...
- Overview of the remote
- Overview of the TV buttons and indicators
- Watching TV Additional operations
- To change the screen format manually to suit the broadcast Using the Tools menu
- Checking the Digital Electronic Programme Guide (EPG) * To Do this
- To Do this
- Using the Digital Favourite list *
- Connecting optional equipment
- Sockets Input symbol on Description screen
- Viewing pictures from the connected equipment
- Using HDMI control
- Navigating through menus
- Picture menu
- Colour Temperature
- Sound menu
- Dual Sound
- Screen menu
- Set-up menu
- AV Set-up
- HDMI Set-up
- All Reset
- PC Settings menu
- Analogue Set-up menu
- Manual Programme Preset
- Skip
- Digital Set-up menu
- Digital Set-up
- Specifications
- PC Input Signal Reference Chart
- Troubleshooting
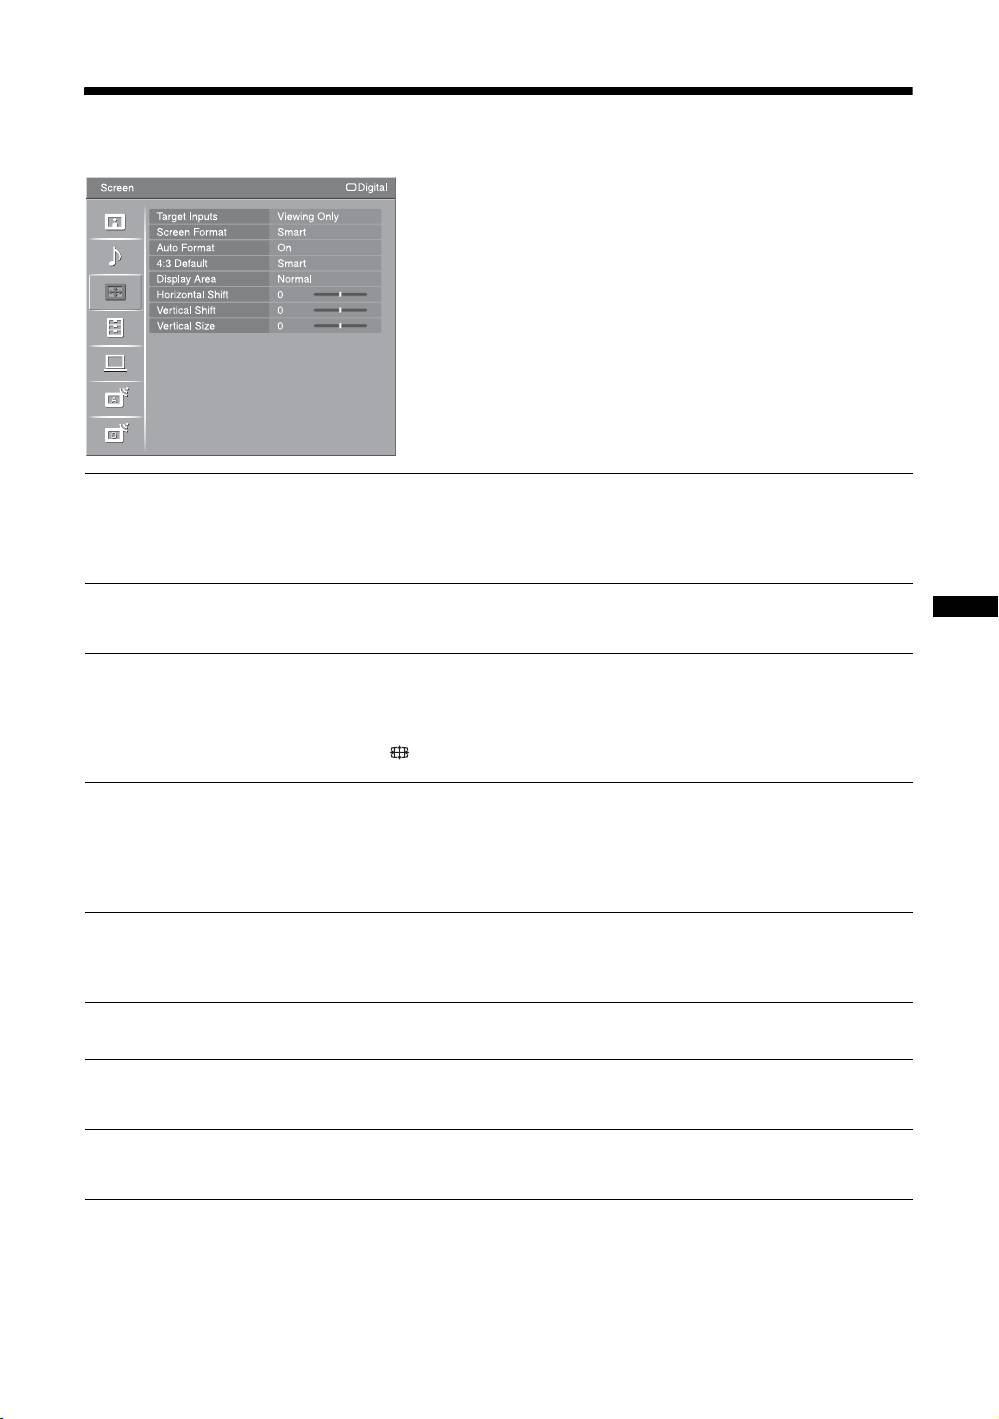
Screen menu
You can select the options listed below on the
“Screen” menu. To select options in “Settings”, refer
to “Navigating through menus” (page 20).
Target Inputs
Selects whether to apply settings made in the “Screen” menu to all inputs, or only to
the input currently being watched.
“All”: Applies settings to all inputs.
“Viewing Only”: Applies settings only to the current input.
Screen Format
For details about the screen format, see “To change the screen format manually to
suit the broadcast” on page 12.
Using MENU Functions
Auto Format
Automatically changes the screen format according to the broadcast signal. To keep
your setting, select “Off”.
z
Even if “Auto Format” is set to “On” or “Off”, you can always modify the format of the screen
by pressing repeatedly.
4:3 Default
Selects the default screen format for use with 4:3 broadcasts.
“Smart”: Displays conventional 4:3 broadcasts with an imitation wide screen effect.
“4:3”: Displays conventional 4:3 broadcasts in the correct proportions.
“Off”: Keeps the current “Screen Format” setting when the channel or input is
changed.
Display Area
Adjusts the screen area for displaying the picture.
“Normal”: Displays the picture in the original size.
“-1”/“-2”: Enlarges the picture to hide the edge of the picture.
Horizontal Shift
Adjusts the horizontal position of the picture.
Vertical Shift
Adjusts the vertical position of the picture when “Screen Format” is set to “Smart”
(50 Hz), “Zoom” or “14:9”.
Vertical Size
Adjusts the vertical size of the picture when “Screen Format” is set to “Smart”,
“Zoom” or “14:9”.
GB
25
