Indesit W 84 TX – страница 2
Инструкция к Стиральной Машине Indesit W 84 TX
U¿yteczne porady, by unikn¹æ b³êdów w praniu
Nigdy nie pierz w pralce...
Ile wa¿y?
Wakacje: wy³¹cz wtyczkê.
Bielizny o niewykoñczonych
1 przecierad³o 400-500 gr.
Gdy wyje¿d¿asz na wakacje, wy³¹cz
brzegach, podartej czy strzêpi¹cej
1 pow³oczka na poduszkê 150-200 gr.
wtyczkê, zakrêæ kurek dop³ywu
siê. Jeli musisz j¹ wypraæ, pierz j¹
1 obrus 400-500 gr.
wody i zostaw uchylone lub otwarte
w³o¿on¹ do p³óciennego woreczka.
1 szlafrok 900-1.200 gr.
drzwiczki pralki. Dziêki temu bêben
Bielizny kolorowej razem z bia³¹.
1 rêcznik 150-250 gr.
i uszczelka pozostan¹ suche i
wewn¹trz nie bêd¹ siê tworzyæ
Zwróæ uwagê na wagê bielizny!
Kolorowe koszulki, koszulki z
nieprzyjemne zapachy.
Aby uzyskaæ optymalne rezultaty
nadrukami oraz koszule mniej siê
prania, nie przekraczaj zalecanego
niszcz¹, jeli prane s¹ wywrócone na
Przed wlozeniem do pralki stanika
maksymalnego za³adunku suchej
lew¹ stronê.
nalezy sprawdzic czy fizbina nie
bielizny:
Koszulki oraz bluzy z nadrukami
wypadnie w czasie prania. Niepewne
prasowaæ nale¿y z lewej strony.
miejsce nalezy zabezpieczyc nicia
- Tkaniny wytrzyma³e:
lub wyjac fizbine na czas prania.
maksymalnie 5 kg
Uwaga na ogrodniczki.
- Tkaniny syntetyczne:
Bardzo rozpowszechnione
CYKL PRANIA WELNY
maksymalnie 2,5 kg
kombinezony typu ogrodniczek
W celu uzyskania lepszych
- Tkaniny delikatne:
maj¹ szelki z klamerkami, które mog¹
rezultatów stosuj zawsze
maksymalnie 2 kg
uszkodziæ bêben pralki oraz inne
- Czysta ¿ywa we³na:
specjalny rodek pior¹cy
ubrania podczas prania. Unikniesz
maksymalnie 1 kg
tego, jeli wsuniesz klamerki do
do we³ny i nie przekraczaj
przedniej kieszeni i przymocujesz je
1 kg za³adunku.
agrafkami.
Jak wypraæ niemal wszystko
Firanki.
Poduszki i kurtki.
Tenisówki.
Bardzo ³atwo siê gniot¹. Aby
Równie¿ i poduszki oraz kurtki, jeli
Tenisówki nale¿y najpierw
zmniejszyæ t¹ niedogodnoæ,
wype³nione s¹ pierzem gêsim lub
wyczyciæ z b³ota, a nastêpnie
radzimy Ci praæ je starannie z³o¿one
kaczym, mog¹ byæ prane w pralce.
mo¿na je praæ razem z d¿insami oraz
i w³o¿one do pow³oczki na poduszkê
Nie za³adowuj przy tym pralki do
z a bardziej wytrzyma³ymi
lub siatkowatego worka. Pierz je
pe³na ( 5 kg), lecz najwy¿ej do 2-3
ubraniami. Nie nale¿y ich praæ razem
same, tak, by ich ca³kowity ciê¿ar
kg, powtórz p³ukanie jeden lub dwa
z bia³¹ bielizn¹.
nie przekracza³ po³owy za³adunku.
razy i nastaw odwirowanie delikatne.
Pamiêtaj o wybraniu przewidzianego
.
do firanek programu 9, który
automatycznie wy³¹cza
odwirowywanie.
Instrukcja instalacji i obs³ugi
18

Aby lepiej praæ
Sekrety szufladki rodków pior¹cych
Pierwszy sekret jest najprostszy: aby dostaæ siê
do szufladki rodków pior¹cych, nale¿y obróciæ j¹
Przedzia³ 1:
rodek pior¹cy do prania
na zewn¹trz.
4
wstêpnego (w proszku)
Wsypuj rodki pior¹ce oraz
Pamiêtaj, ¿e rodki pior¹ce w p³ynie
Przedzia³ 2:
rodek pior¹cy do prania
ewentualne rodki dodatkowe,
nadaj¹ siê zw³aszcza do prania przy
w³aciwego (w proszku lub w p³ynie)
stosuj¹c siê do zaleceñ producenta:
temperaturach nie przekraczaj¹cych
3
Przedzia³ 3:
zazwyczaj informacje te znajduj¹ siê
60 stopni oraz do tych programów
2
rodki dodatkowe (zmiêkczaj¹ce,
na opakowaniu. Dozowanie rodka
prania, które nie przewiduj¹ prania
1
perfumuj¹ce itp.)
pior¹cego zale¿y od iloci
wstêpnego.
Przedzia³ 4:
za³adowanej bielizny, od twardoci
W handlu istniej¹ równie¿ rodki
Wybielacz zwyk³y lub delikatny
wody oraz od stopnia zabrudzenia.
pior¹ce p³ynne i w proszku
Z czasem nauczysz siê dozowaæ
sprzedawane wraz ze specjalnymi
rodki pior¹ce w sposób niemal
pojemnikami, które wk³ada siê
automatyczny: stanie siê to Twoim
bezporednio do bêbna, wed³ug
Cykl wybielaj¹cy oraz przycisk
sekretem.
napisanych na opakowaniu
Zanim wsypiesz rodek pior¹cy do
instrukcji.
przedzia³u prania wstêpnego 1
Nigdy nie u¿ywaj do pralki rodków
odplamiania
sprawd, czy nie jest wstawiony
pior¹cych przeznaczonych do prania
pojemniczek dodatkowy 4 na rodek
rêcznego, gdy¿ tworz¹ one zbyt
Jeli konieczne jest wybielenie
wybielaj¹cy.
wiele piany, która mo¿e uszkodziæ
bielizny, musisz wstawiæ
Gdy wlewasz rodek zmiêkczaj¹cy
pralkê.
pojemniczek dodatkowy 4 (w dotacji
do przedzia³u 3, uwa¿aj by nie
Wyj¹tek stanowi¹ rodki pior¹ce
do pralki) do przedzia³u 1 szufladki
wylewa³ siê on poza kratkê.
przeznaczone zarówno do prania
rodków pior¹cych.
Pralka pobiera automatycznie rodek
rêcznego jak i do pralek
Gdy wlewasz wybielacz, uwa¿aj by
zmiêkczaj¹cy przy ka¿dym
automatycznych.
nie przekroczyæ poziomu
programie prania.
Ostatni sekret: gdy pierzesz w zimnej
maksymalnego max wskazanego
P³ynny rodek pior¹cy nale¿y wlaæ
wodzie, zawsze zmniejsz iloæ
na rodkowej osi (zobacz rysunek).
do przedzia³u 2 na krótko przed
rodka pior¹cego; w zimnej wodzie
U¿ycie dodatkowego pojemniczka na
uruchomieniem pralki.
rozpuszcza siê on bowiem gorzej ni¿
wybielacz wyklucza mo¿liwoæ
w ciep³ej, a wiêc jego nadmiar
wykonania prania wstêpnego.
zmarnowa³by siê.
Tradycyjnego wybielacza u¿ywaæ
Nie mo¿na dokonaæ wybielania przy
mo¿na wy³¹cznie do bia³ych tkanin
programie Jedwab oraz przy
wytrzyma³ych, podczas gdy
programach specjalnych (zobacz
wybielacz delikatny stosowany byæ
str. 16).
mo¿e do tkanin kolorowych,
U¿ywaj przycisku odplamiania
Szufladka rodków pior¹cych mo¿e byæ
syntetycznych oraz do we³ny.
zawsze gdy dokonujesz wybielania.
wyjêta i aby j¹ umyæ, wystarczy j¹ wysun¹æ,
Jeli chcesz to zrobiæ oddzielnie,
poci¹gaj¹c na zewn¹trz w sposób pokazany
musisz wlaæ wybielacz do
na rysunku, a nastêpnie pozostawiæ na
pojemniczka dodatkowego 4,
pewien czas pod bie¿¹c¹ wod¹.
przycisn¹æ przycisk G
(odplamianie), w³¹czyæ pralkê, a
Wskazówki dla oszczêdnego i
nastêpnie wybraæ jeden z symbolów
Oszczêdnoæ inteligentna
ekologicznego korzystania ze
w zale¿noci od rodzaju tkaniny.
sprzêtu domowego u¿ytku
Gdy wybielasz w trakcie
MAKSYMALNE ZA£ADOWANIE
normalnego cyklu prania, wlej
Najlepszym sposobem, by nie trwoniæ wody, energii, rodka pior¹cego oraz czasu, jest
rodek pior¹cy oraz ewentualne
u¿ywanie pralki z pe³nym zalecanym ³adunkiem maksymalnym.
rodki dodatkowe do odpowiednich
Jedno za³adowane do pe³na pranie, zamiast dwóch za³adowanych do po³owy, pozwala na
przedzia³ów, przycinij przycisk G
ZAOSZCZÊDZENIE a¿ do 50% energii.
(odplamianie), nastaw pozadany
program i wlacz pralke.
PRANIE WSTÊPNE JEST ZAWSZE POTRZEBNE?
Tylko wówczas, gdy bielizna jest naprawdê bardzo brudna.
Zaprogramowanie prania BEZ prania wstêpnego w przypadku bielizny ma³o lub rednio
zabrudzonej pozwala na ZAOSZCZÊDZENIE rodka pior¹cego, czasu, wody oraz od 5 do
15% energii.
PRANIE W GOR¥CEJ WODZIE JEST NAPRAWDÊ KONIECZNE?
Usuniêcie plam odplamiaczem lub zmoczenie suchych plam w wodzie przed praniem
pozwala na zmniejszenie temperatury prania.
Stosowanie programu prania o temp. 60° pozwala na ZAOSZCZÊDZENIE a¿ do 50%
energii.
ZANIM W£¥CZYSZ PROGRAM SUSZENIA ...
Jeli bielizna ma byæ suszona w suszarce, zaprogramuj silne odwirowanie o du¿ej
szybkoci. Niewielka zawartoæ wody w upranej bielinie pozwala na ZAOSZCZÊDZENIE
czasu i energii w trakcie suszenia.
19
Instrukcja instalacji i obs³ugi
Problemy i ich rozwi¹zanie
Zanim wezwiesz technika, przeczytaj to
Mo¿e siê zdarzyæ, ¿e pralka nie dzia³a. W wielu przypadkach s¹ to
problemy, które ³atwo rozwi¹zaæ, bez wzywania technika. Zanim
wezwiesz serwis techniczny, sprawd zawsze, co nastêpuje.
Pralka nie uruchamia
siê.
Przycisk w³¹czania/wy³¹czania
Gdzie jest woda?
jest wciniêty?
Przy nowej technologii Indesit wystarcza jej mniej ni¿ po³owa, by
Czy wtyczka jest dobrze
Jeli tak, nastaw uruchomienie
dwa razy lepiej praæ!
w³o¿ona do kontaktu? Przy
zaprogramowane w czasie.
Dlatego nie widzisz wody przez szklane drzwiczki pralki:
okazji porz¹dków mog³a siê
potrzeba jej niewiele, bardzo niewiele, z po¿ytkiem dla
wysun¹æ.
Pokrêt³o uruchomienia
rodowiska, lecz nie rezygnuj¹c z maksymalnej czystoci.
zaprogramowanego w czasie,
Zaoszczêdzasz ponadto równie¿ energiê elektryczn¹.
Czy w domu jest dop³yw pr¹du?
w modelach pralek, gdzie jest
Móg³ zadzia³aæ bezpiecznik, na
ono przewidziane, ustawione
przyk³ad poniewa¿ w³¹czy³a za du¿o
jest we w³aciwej pozycji?
sprzêtu elektrycznego jednoczenie.
Albo móg³ zostaæ czasowo przerwany
Kurek dop³ywu wody jest
dop³yw pr¹du w ca³ej Twojej dzielnicy.
otwarty? Ze wzglêdów
bezpieczeñstwa pralka nie
Czy drzwiczki pralki s¹ dobrze
rozpoczyna prania, jeli nie mo¿e
zamkniête?
pobraæ wody.
Ze wzglêdów bezpieczeñstwa
pralka nie dzia³a, jeli drzwiczki s¹
otwarte lub le zamkniête.
stop/reset
, a nastêpnie w³¹cz
ponownie pralkê. Jeli pokêt³o
nadal siê obraca, wezwij serwis
techniczny, gdy¿ sygnalizuje to
nieprawid³owe funkcjonowanie
pralki.
Pralka nie pobiera
NALE¯Y
NIE NALE¯Y
wody.
Zamkn¹æ kurek
Czyciæ pralkê przy
W¹¿ dop³ywu wody jest dobrze
dop³ywu wody po
w³¹czonej wtyczce.
pod³¹czona do kurka?
ka¿dym praniu.
Wtyczkê nale¿y wy³¹czaæ w
Zapobiega to
Brak wody w sieci
trakcie czynnoci
zu¿ywaniu siê
wodoci¹gowej? Mo¿e w³anie
konserwacyjnych.
instalacji
prowadzone s¹ prace hydrauliczne
U¿ywaæ rozpuszczalników i
hydraulicznej pralki
w budynku lub na ulicy.
Pralka pobiera i usuwa
silnych rodków
oraz zapobiega
niebezpieczeñstwo
cieraj¹cych.
Czy cinienie wody jest
wodê bez ustanku.
zalania mieszkania,
Nigdy nie nale¿y u¿ywaæ
wystarczaj¹ce? Mo¿e jest defekt
gdy w domu nikogo
rozpuszczalników ani
autoklawu.
W¹¿ odprowadzaj¹cy znajduje
nie ma.
silnych rodków
siê za nisko? Rura ma byæ
Czy filtr kurka jest czysty? Jeli
cieraj¹cych do
pod³¹czona na wysokoci od 60
Zostawiaæ zawsze
czyszczenia obudowy i
woda zawiera du¿o wapnia lub
drzwiczki pralki
do 100 cm.
gumowych czêci pralki.
jeli niedawno prowadzone by³y
uchylone.
roboty wodoci¹gowe, ró¿ne
Zapobiega to
Zaniedbywaæ szufladkê
Wylot wê¿a odprowadzaj¹cego
tworzeniu siê
rodków pior¹cych.
nieczystoci mog³y zatkaæ filtr
zanurzony jest w wodzie?
kurka dop³ywu wody.
nieprzyjemnych
Szufladka ta jest
zapachów.
wyjmowalna i aby j¹ umyæ,
Czy w¹¿ gumowy jest zagiêty?
Instalacja kanalizacyjna w cianie
wystarczy pozostawiæ j¹ na
Delikatnie myæ
Przebieg rury gumowej, która
pewien czas pod bie¿¹c¹
wyposa¿ona jest w odpowietrznik?
obudowê pralki.
doprowadza wodê do pralki,
wod¹.
Jeli po skontrolowaniu tych
Do czyszczenia
powinien byæ mo¿liwie prosty.
elementów problem nadal siê
obudowy oraz czêci
Wyjechaæ na wakacje,
Sprawd, czy w¹¿ nie jest zagiêty
zapomniawszy o pralce.
utrzymuje, zamknij kurek dop³ywu
gumowych pralki
lub ciniêty.
u¿ywaj zawsze
Przed wyjazdem na
wody, wy³¹cz pralkê i wezwij serwis
ciereczki zmoczonej
wakacje sprawd zawsze,
Pokrêt³o programów
techniczny. Jeli mieszkasz na
w letniej wodzie z
czy wtyczka pralki jest
stale siê obraca?
wysokim piêtrze, mo¿e zaistnieæ
myd³em.
wy³¹czona z kontaktu i czy
efekt syfonu. Aby mu zapobiec,
kurek dop³ywu wody jest
Odczekaj kilka minut, a¿ pom-
nale¿y zainstalowaæ odpowiedni
zamkniêty.
pa opró¿ni bêben z wody, wy³¹cz
zawór.
pralkê, wybierz jeden z symboli
Instrukcja instalacji i obs³ugi
20
instrukcji zawartych na stronie 23
nieznacznie przesun¹æ.
lub wezwaæ serwis techniczny.
Wyregulowaæ wypoziomowanie
przy pomocy nó¿ek, kontroluj¹c
W¹¿ odprowadzaj¹cy jest
poziomnic¹.
zagiêty? Przebieg wê¿a powinien
byæ jak najbardziej prosty.
Pralka stoi wciniêta miêdzy
Sprawd, by w¹¿ nie by³ zagiêty
meblami a cian¹? Jeli nie jest
lub ciniêty.
to model do zabudowy, pralka w
trakcie wirowania powinna nieco
Zatkany jest w¹¿ odprowadzaj¹cy
oscylowaæ. Dobrze jest zostawiæ
wodê? Ewentualne przed³u¿enie
wokó³ niej trochê wolnego
Pralka nie usuwa wody i
rury usuwania wody jest
miejsca (kilka centymetrów).
Tworzy siê zbyt wiele
nie odwirowuje.
nieregularne i utrudnia swobodny
piany.
przep³yw wody?
Wybrany program przewiduje
Czy rodek pior¹cy
usuwanie wody? Przy niektórych
przeznaczony jest do pralek
programach prania nale¿y
automatycznych? Sprawd, czy
manualnie uruchomiæ opró¿nienie
na opakowaniu znajduje siê napis
z wody.
do pralek lub do prania
rêcznego oraz pralek, lub
Zosta³a nastawiona funkcja
podobny.
“Program przeciw gnieceniu
tkanin” - w pralkach, gdzie jest
Czy iloæ rodka pior¹cego jest
ona przewidziana ? Funkcja ta
Z pralki przecieka
w³aciwa? Nadmiar rodka
przewiduje manualne
woda.
tworzy zbyt wiele piany, a ponadto
uruchomienie opró¿nienia pralki z
Pralka mocno wibruje
le pierze i prowadzi do tworzenia
wody.
w fazie odwirowywania.
Nasadka wê¿a doprowadza-
siê nalotów na wewnêtrznych
j¹cego wodê jest dobrze
czêciach pralki.
Zatkana jest pompa usuwania
Czy podczas instalacji zosta³y
dokrêcona? Zamknij kurek,
wody? W celu skontrolowania
usuniête wszystkie ruby
wy³¹cz wtyczkê i spróbuj
pompy nale¿y zamkn¹æ kurek
Jeli, mimo skontrolowania
blokuj¹ce zespó³ bêbna?
dokrêciæ j¹ jednak¿e nie na si³ê.
dop³ywu wody, wy³¹czyæ
wszystkiego, pralka nadal nie
Informacje na temat procedury
wtyczkê i postêpowaæ wed³ug
pracuje i nadal zachodzi zauwa¿ona
instalacji pralki podane s¹ na
Szufladka rodków pior¹cych
nieprawid³owoæ, wezwij najbli¿szy
nastêpnej stronie.
jest zatkana? Spróbuj j¹ wyj¹æ i
upowa¿niony serwis techniczny i
Zwracaj siê wy³¹cznie
umyæ pod bie¿¹c¹ wod¹.
podaj mu nastêpuj¹ce dane:
do upowa¿nionych
Pralka ustawiona jest
techników i zawsze
- rodzaj defektu
dok³adnie w poziomie? Powinno
W¹¿ odprowadzaj¹cy wodê jest
domagaj siê
siê okresowo kontrolowaæ
le przymocowany?
Zamknij
- model(Mod….)
zainstalowania
wypoziomowanie urz¹dzenia. Z
kurek, wy³¹cz wtyczkê i spróbuj
oryginalnych czêci
- numer seryjny (S/N ....)
czasem pralka mo¿e siê bowiem
j¹ lepiej przymocowaæ.
zamiennych.
Informacje te znajdziesz na
przymocowanej z ty³u pralki
tabliczce.
Dane techniczne
Model
W 84 TX
Wymiary
szerokoæ cm 59,5
wysokoæ cm 85
g³êbokoæ cm 53,5
Pojemnoæ
Od 1 do 5 Kg
Dane pr¹du
Napiêcie 220/230 Volt 50 Hz
elektrycznego
maksymalna moc pobierana 2300 W
Dane sieci
Maksymalne cinienie 1 MPa (10 barów)
wodoci¹gowej
cinienie minimalne 0,05 MPa (0,5 barów)
pojemnoæ bêbna 42litrów
Szybkoæ wirowania
Do 800 obrotów na minutê
Programy kontrolne
program 3; temperaturê
60°C;
wykonane przy za³adunku 5 Kg .
zgodnie z przepisami
IEC456
Urz¹dzenie to zosta³o wyprodukowane zgodnie z nastêpuj¹cymi przepisami EWG:
- 73/23/CEE z dn. 19/02/73 (o Niskim Napiêciu) wraz z kolejnymi zmianami
- 89/336/CEE z dn. 03/05/89 (o Kompatybilnoci Elektromagnetycznej) wraz z kolejnymi zmianami
21
Instrukcja instalacji i obs³ugi
Instalacja i przeprowadzka
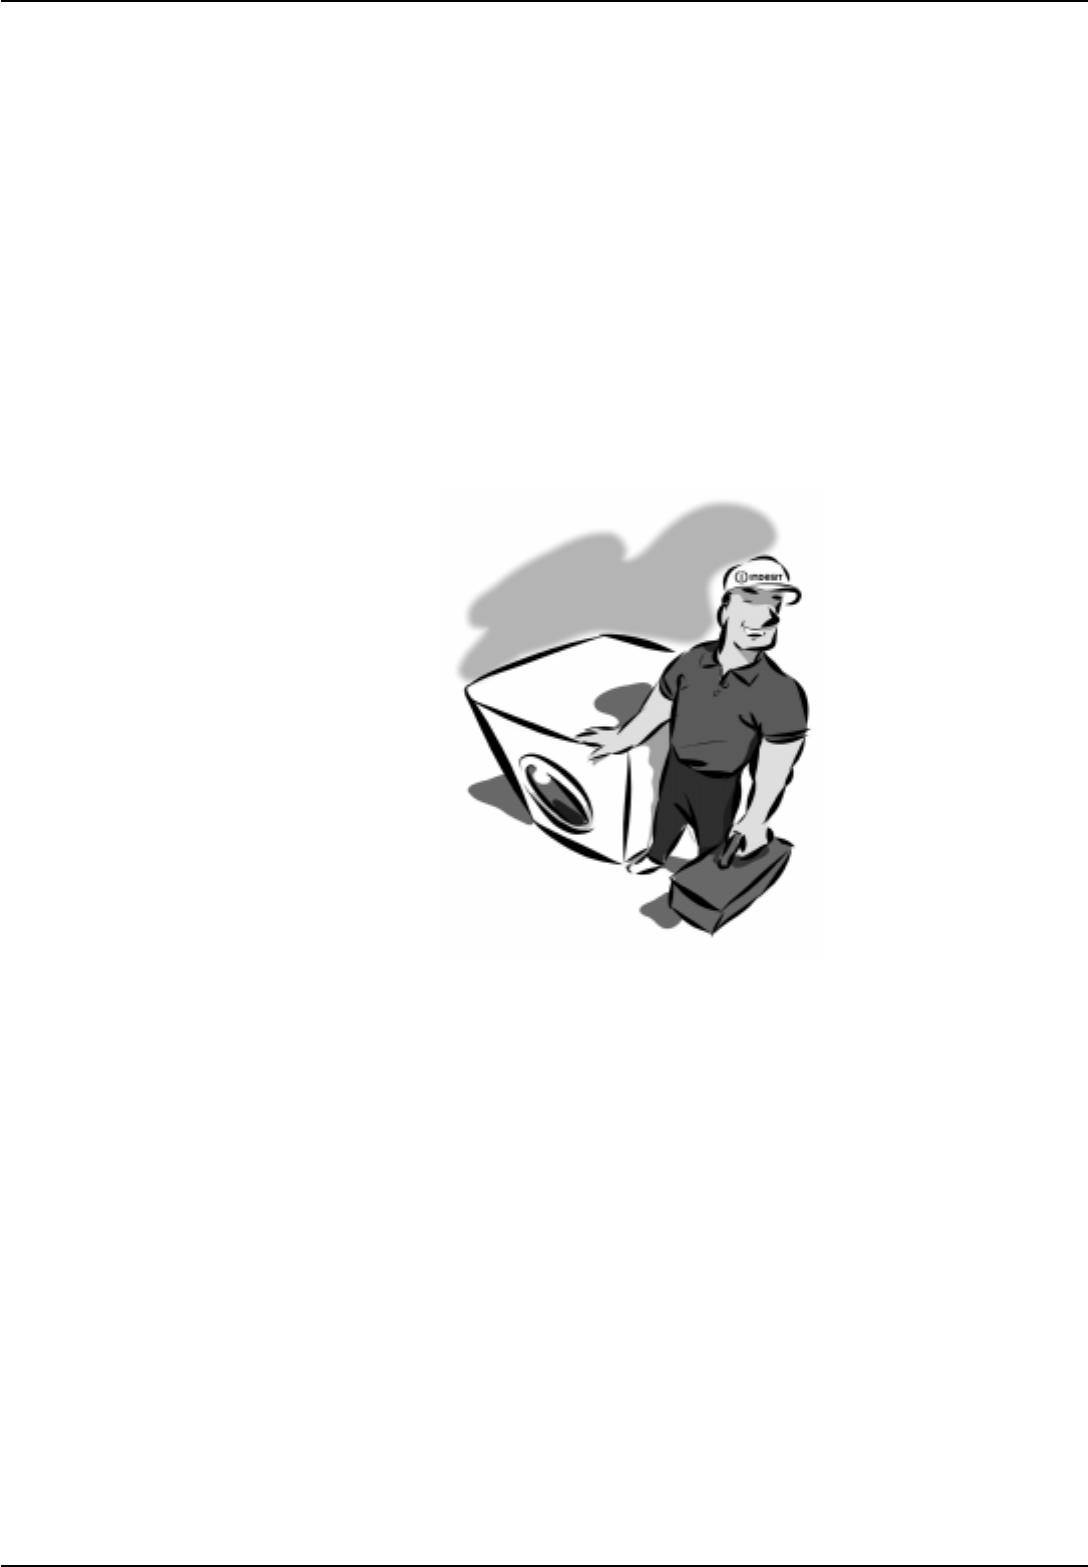
Gdy do domu
przybywa pralka
Czy pralka jest nowa, czy te¿ przeniesiona z jednego do
drugiego mieszkania, instalacja stanowi chwilê bardzo wa¿n¹
dla dobrego funkcjonowania pralki.
Po rozpakowaniu pralki sprawd,
czy jest ona w nienaruszonym stanie.
W razie w¹tpliwoci wezwij
niezw³ocznie wykwalifikowanego
technika. Ze wzglêdu na wymogi
transportu wnêtrze pralki jest
zablokowane od ty³u czterema
rubami.
umywalce lub na wannie, unikaj¹c
czego pralka nieustannie pobiera i
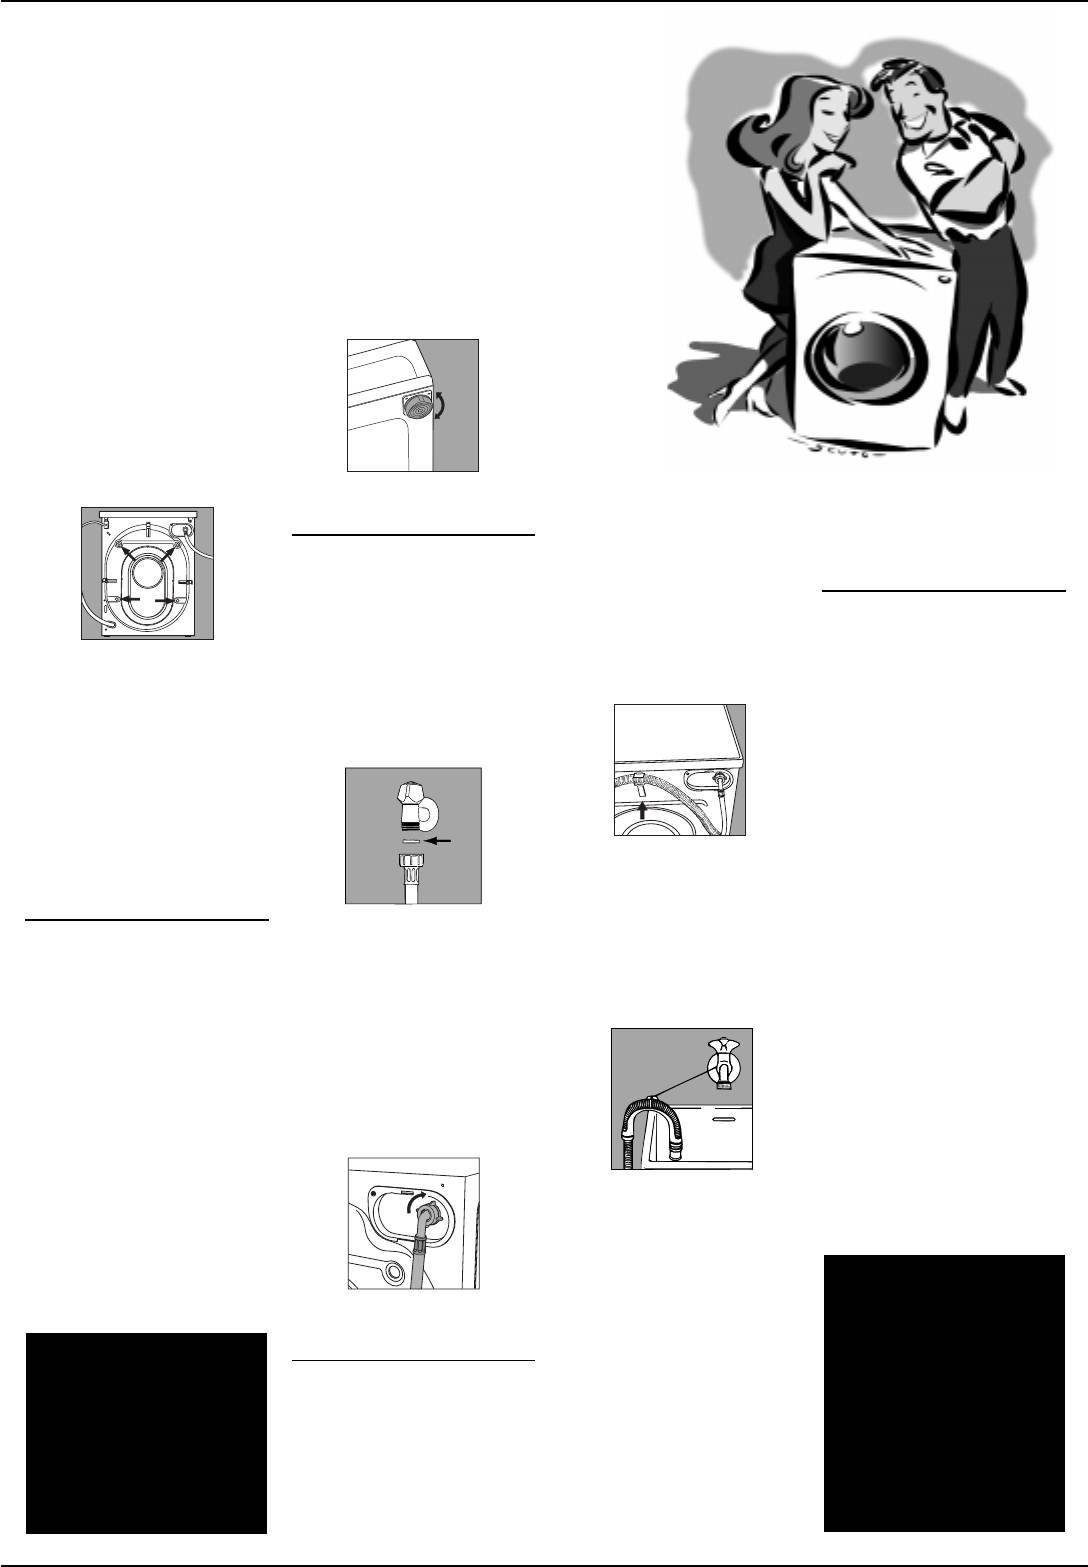
Przednie nó¿ki mo¿na regulowaæ.
nadmiernych zgiêæ i zwê¿eñ. Wa¿ne
usuwa wodê. W celu wyeliminowania
jest, by koniec wê¿a znajdowa³ siê na
tej niedogodnoci w handlu dostêpne
Pod³¹czenie wê¿a
wysokoci miêdzy 60 a 100 cm. Jeli
s¹ specjalne zawory.
doprowadzaj¹cego wodê
konieczne jest przymocowanie koñca
Cinienie wody w sieci powinno
wê¿a na wysokoci mniejszej ni¿ 60
Pod³¹czenia elektryczne
odpowiadaæ wielkociom
cm od pod³ogi, w¹¿ musi zostaæ
wskazanym na umieszczonej z ty³u
umocowana w odpowiednim zaczepie,
Przed pod³¹czeniem pralki do sieci
pralki tabliczce. Pod³¹czyæ w¹¿
znajduj¹cym siê w górnej czêci
elektrycznej nale¿y upewniæ siê,
Przed uruchomieniem pralki usuñ te
doprowadzaj¹cy wodê do przy³¹cza
pleców pralki.
czy:
ruby, wyjmij gumkê wraz z
zimnej wody o otworze
1) gnaizdko elektryczne jest w stanie
odpowiedni¹ podk³adk¹ (zachowaj
gwintowanym drobnozwojnym 3/4,
wytrzymaæ maksymaln¹ moc
wszystkie te czêci) i zatkaj otwory
wstawiaj¹c gumow¹ uszczelkê.
urz¹dzenia podan¹ na tabliczce
dostarczonymi wraz z pralk¹
danych technicznych i czy
plastykowymi zatyczkami.
odpowiada ono obowi¹zuj¹cym
Wa¿ne: zatkaj specjalnym korkiem
przepisom;
(w dotacji do pralki) 3 otwory, w
2) napiêcie elektryczne w sieci
których tkwi wtyczka; znajduj¹ siê
A
odpowiada wartociom podanym
one z prawej strony na dole z ty³u
Zaczep, którego u¿ywa siê, jeli koñcówka
na tabliczce danych technicznych;
pralki.
rury usuwania wody znajduje siê na
3) domowe instalacje elektryczne
wysokoci mniejszej ni¿ 60 cm.
nale¿y wyposa¿yæ w
Filtr rury gumowej.
uziemnienie.
Wypoziomowanie
Jeli w¹¿ odprowadza wodê do
Dla dobrego funkcjonowania pralki
Jeli rury sieci wodnej s¹ nowe lub
wanny lub umywalki, nale¿y u¿yæ
niezbêdne jest jej ustawienie
pozostawa³y przez d³u¿szy czas
plastykowej podpórki i przymo-
dok³adnie w poziomie. Pralkê
nieu¿ywane, przed pod³¹czeniem
cowaæ do kranu.
poziomuje siê przy pomocy
pralki nale¿y przez pewien czas
przednich nó¿ek; k¹t pochylenia
spuciæ wodê, a¿ bêdzie ona zupe³nie
pralki, zmierzony na górnym blacie,
czysta i wolna od nieczystoci.
nie powinien przekraczaæ 2°. Jeli
Pod³¹czyæ w¹¿ do urz¹dzenia w
pralka stoi na wyk³adzinie
miejscu pobierania wody przez
dywanowej, nale¿y sprawdziæ, czy
pralkê z prawej strony u góry.
wyk³adzina nie utrudnia wentylacji w
strefie oparcia pralki.
Podpórka do usuwania wody do wanien i
umywalek.
W¹¿ nie powinien nigdy pozostawaæ
zanurzony w wodzie. Odradza siê
Uwaga!
stosowanie wê¿y przed³u¿aj¹cych.
Producent uchyla siê od
Jeli s¹ one niezbêdnie konieczne, w¹¿
Pobieranie wody z prawej strony u góry.
wszelkiej odpowiedzialnoci,
przed³u¿aj¹cy powinien mieæ tê sam¹
Zachowaj ruby blokuj¹ce
jeli nie przestrzega siê
rednice, co w¹¿ oryginalny i nie
oraz podk³adki. W razie
powy¿szych zasad.
Pod³¹czenie wê¿a odprowadzaj¹cego
powinien przekraczaæ 150 cm
przeprowadzki mog¹ siê one
wodê
d³ugoci. W przypadku usuwania
Worki plastykowe, styropian,
przydaæ, aby ponownie
Z ty³u pralki znajduj¹ siê dwa zaczepy
wody bezporednio do cieku w
gwodzie oraz inne elementy
zablokowaæ wewnêtrzne
(prawy lub lewy), do których nale¿y
cianie, nale¿y sprawdziæ jego dzia³anie
opakowania pralki nie nadaj¹
czêci pralki, chroni¹c j¹ w ten
przymocowaæ w¹¿ odprowadzaj¹cy
przez wykwalifikowanego technika.
siê do zabawy dla dzieci, jako
sposób przed ewentualnymi
wodê. Drugi koniec wê¿a nale¿y
Jeli mieszkanie znajduje siê na
potencjalne ród³a
uszkodzeniami w trakcie
wprowadziæ do rury odp³ywowej
najwy¿szych piêtrach budynku, mo¿e
niebezpieczeñstwa.
transportu.
instalacji kanalizacyjnej lub oprzeæ na
zaistnieæ efekt syfonu, w wyniku
Instrukcja instalacji i obs³ugi
22
Konserwacja i utrzymanie pralki
Dbaj o ni¹, a bêdzie zawsze Twoj¹
Pralka jest Tw¹ wiern¹ towarzyszk¹ w ¿yciu i w pracy. Utrzymanie jej w
dobrej formie jest bardzo wa¿ne. Równie¿ i dla Ciebie samej.
przyjació³k¹
Twoja pralka zaprojektowana jest na
wiele lat bezproblemowej pracy.
Nale¿y okresowo myæ
Kilka prostych zasad utrzyma j¹ w
wyjmowaln¹ szufladkê
dobrej formie i przed³u¿y jej ¿ycie.
rodków pior¹cych.
Przede wszystkim powinna zawsze
Aby zapobiec odk³adaniu siê na
po ka¿dym praniu zamykaæ kurek
niej nalotów, wystarczy
dop³ywu wody, gdy¿ sta³e cinienie
pozostawiæ j¹ na pewien czas
wody w instalacji mo¿e uszkodziæ
pod bie¿¹c¹ wod¹.
niektóre czêci pralki.
Zamykaj¹c kurek zapobiegasz
ponadto niebezpieczeñstwu
Nigdy nie przesadzaj w
przecieków zalania, gdy w domu nie
dozowaniu rodka.
ma nikogo.
Ju¿ sam rodek pior¹cy zawiera
Jeli woda w Twoim rejonie jest
normalnie rodek odwapniaj¹cy.
bardzo twarda, stosuj produkt
Jedynie jeli woda jest bardzo twarda,
odwapniaj¹cy (woda jest twarda jeli
to znaczy bardzo bogata w wapñ,
³atwo zostawia bia³e lady wokó³
zalecamy Ci stosowanie przy
kurków lub wokó³ ujæ wody,
ka¿dym praniu specjalnego produktu.
zw³aszcza w wannie.
Po¿yteczne jest wykonanie od czasu
W celu uzyskania dok³adniejszych
do czasu jednego cyklu prania bez
informacji na temat wody w Twojej
rodka pior¹cego i bez bielizny, a
sieci wodoci¹gowej mo¿esz zwróciæ
tylko z jedn¹ dawk¹ rodka
siê do miejscowej S³u¿by
odwapniaj¹cego.
wodoci¹gowej lub do rejonowego
¯adnych rodków pior¹cych ani
hydraulika).
dodatkowych nie nale¿y stosowaæ w
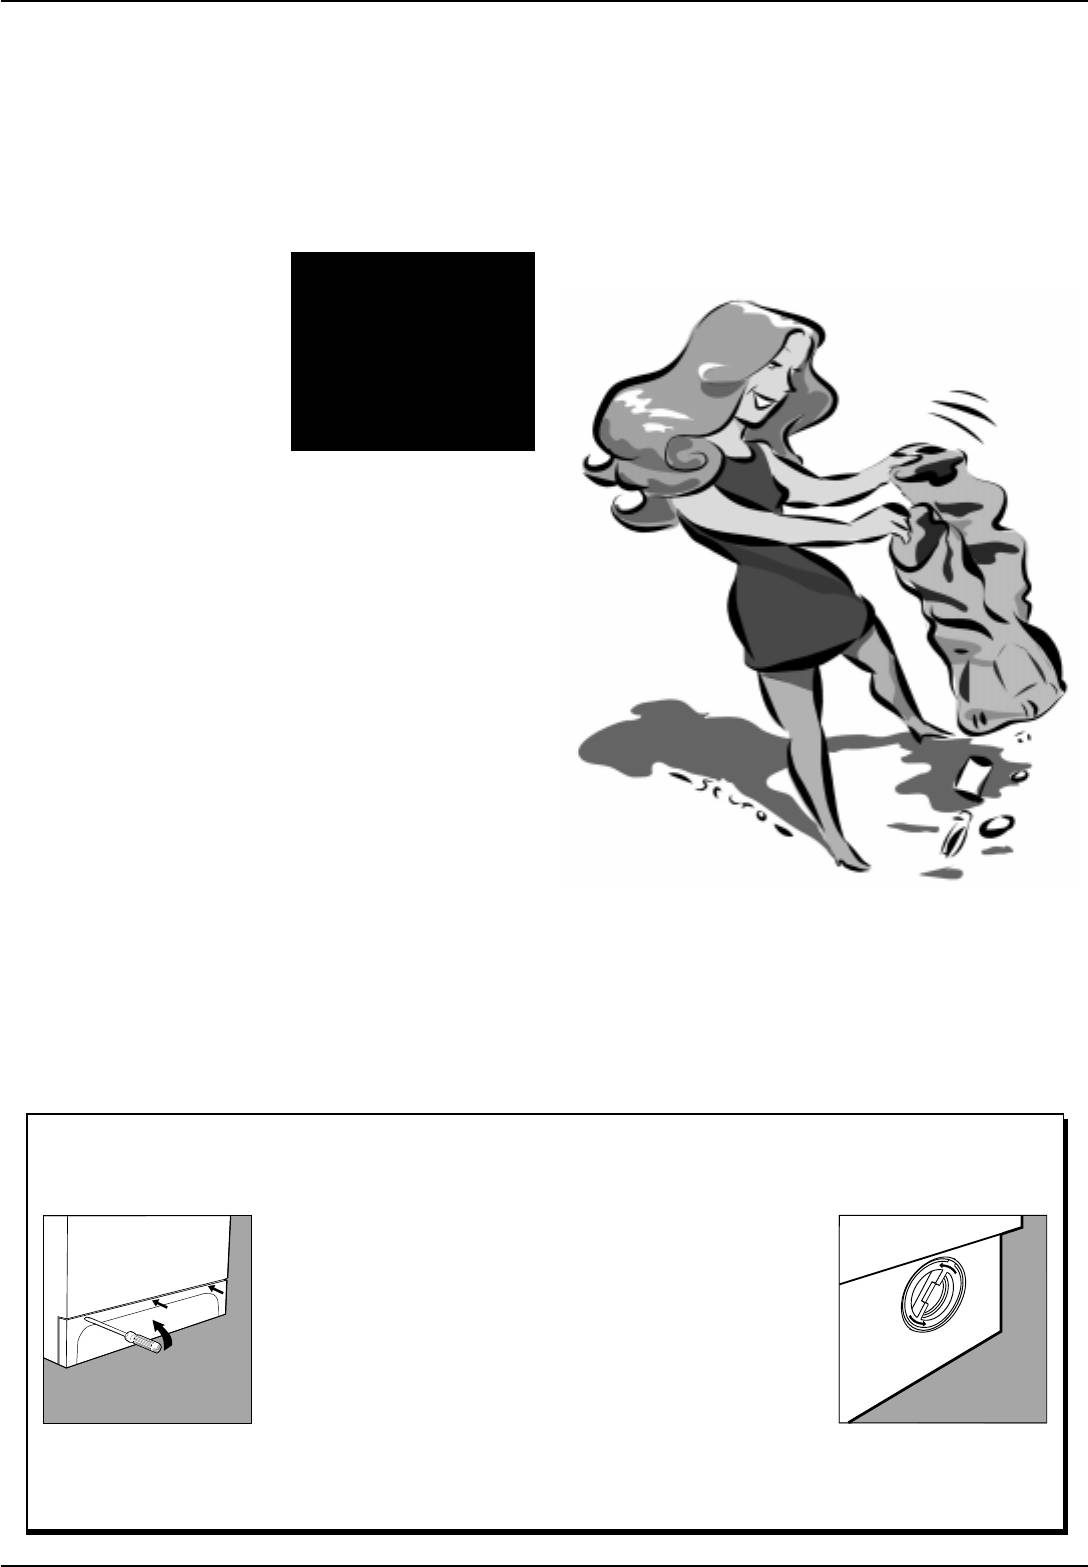
Nale¿y zawsze opró¿niæ kieszenie, a
nadmiarze, gdy¿ mog¹ one zbytnio
tak¿e odpi¹æ szpilki, metalowe
siê pieniæ, a tak¿e tworzyæ naloty,
znaczki, broszki oraz wszelkie
co mo¿e prowadziæ do uszkodzenia
twarde przedmioty.
pralki.
Obudowê pralki nale¿y myæ szmatk¹
zmoczon¹ w letniej wodzie z
myd³em.
Zawsze starannie oprózniaj kieszenie: drobne przedmioty
moga uszkodzic pralke.
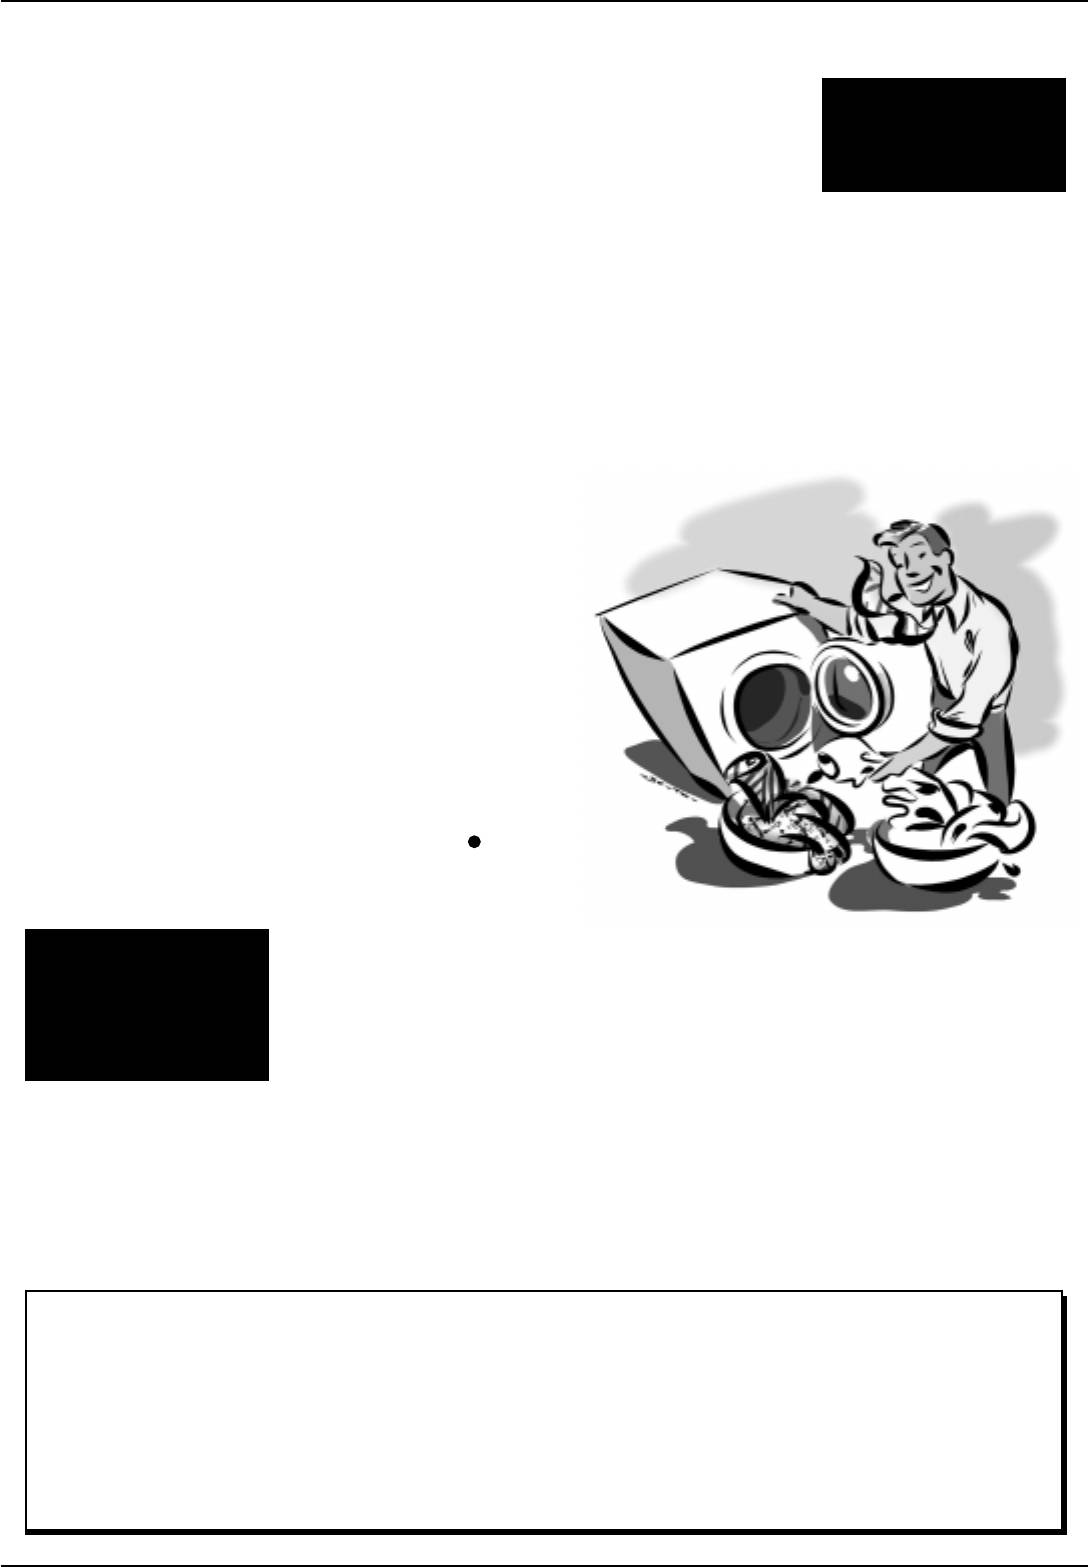
W razie potrzeby skontroluj pompê i w¹¿ doprowadzaj¹cy wodê.
Pralka wyposa¿ona jest w pompê samooczyszczaj¹c¹, która nie wymaga czyszczenia i konserwacji. Mo¿e siê jednak zdarzyæ,
¿e drobne przedmioty, jak monety, spinki, oderwane guziki i inne drobiazgi, dostan¹ siê przypadkowo do pompy. Aby zapobiec
uszkodzeniom, przedmioty te zatrzymywane s¹ w specjalnej, usytuowanej w dolnej czêci pompy komorze wstêpnej, któr¹
³atwo jest skontrolowaæ.
Aby dostaæ siê to tej komory, wystarczy delikatnie podwa¿yæ rubokrêtem i
odj¹æ panel przykrywaj¹cy, który znajduje siê w dolnej czêci pralki (rys. 1);
a nastêpnie zdj¹æ przykrywkê, obracaj¹c j¹ w kierunku przeciwnym do ruchu
wskazówek zegara (rys. 2) i dok³adnie skontrolowaæ wnêtrze.
W¹¿ doprowadzaj¹cy wodê
Przynajmniej raz do roku skontroluj w¹¿ doprowadzaj¹cy wodê. Jeli
widoczne s¹ na nim pêkniêcia i rysy, nale¿y go natychmiast wymieniæ,
poniewa¿ w trakcie prania poddany on jest wysokim cinieniom, które
mog³yby spowodowaæ jego nag³e rozerwanie.
Rys. 1
Rys. 2
Uwaga: przed zdjêciem przykrywy, jak te¿ i przed zaczêciem jakiejkolwiek czynnoci konserwacji, sprawd, czy cykl prania zosta³
zakoñczony i wyjmij wtyczkê z kontaktu. Fakt, ¿e po zdjêciu przykrywki wyp³ynie niewielka iloæ wody, jest zjawiskiem normalnym. Montuj¹c
ponownie panel przykrywaj¹cy, sprawd, by znajduj¹ce siê w dolnej czêci zaczepy wesz³y do odpowiednich otworów, zanim dociniesz
panel.
23
Instrukcja instalacji i obs³ugi
Najwa¿niejsze jest zawsze
Bezpieczeñstwo Twoje
Pralka zosta³a skonstruowana wed³ug najsurowszych
miêdzynarodowych przepisów bezpieczeñstwa. Maj¹c na
wzglêdzie bezpieczeñstwo Twoje i Twojej rodziny.
i Twoich dzieci
Przeczytaj uwa¿nie ostrze¿enia i
6.Nie u¿ywaj przed³u¿aczy
8. Nigdy nie ci¹gnij za przewód
drzwiczki pralki nagrzewaj¹ siê
wszystkie informacje zawarte w
elektrycznych ani wtyczek
elektryczny ani tym bardziej nie
podczas prania; trzymaj dzieci od
niniejszej ksi¹¿eczce: jest to wa¿ne,
wielokrotnych, niebezpiecznych
ci¹gnij za pralkê, aby wyj¹æ
nich z dala. Nigdy nie otwieraj
gdy¿ obok licznych u¿ytecznych
zw³aszca w rodowiskach
wtyczkê z kontaktu w cianie: jest
drzwiczek na si³ê, poniewa¿
porad zawiera ona wa¿ne informacje
wilgotnych. Przewód zasilania
to bardzo niebezpieczne.
mog³oby to uszkodziæ znajduj¹cy
dotycz¹ce bezpieczeñstwa,
elektrycznego nie powinien mieæ
9. Podczas pracy pralki nie dotykaj
siê na zamku mechanizm
u¿ytkowania i konserwacji.
zgiêæ ani niebezpiecznych
usuwanej wody, poniewa¿ osi¹ga
zabezpieczaj¹cy, którego zadaniem
1. Nie nale¿y instalowaæ pralki na
zgnieceñ.
ona wysok¹ temperaturê Okr¹g³e
jest chronienie przed
otwartym powietrzu, nawet jeli
przypadkowym otwarciem
7. Nie otwieraj szufladki rodków
miejsce to jest chronione
drzwiczek.
pior¹cych, podczas pracy
daszkiem, gdy¿ wystawienie pralki
urz¹dzenia; nie u¿ywaj
10.W razie awarii przede
na dzia³anie deszczu i burz, jest
rodków do prania rêcznego,
wszystkim zamknij kurek
bardzo niebezpieczne.
poniewa¿ nadmierna piana mo¿e
dop³ywu wody i wyjmij wtyczkê
2. Pralka powinna byæ u¿ywana
uszkodziæ niektóre czêci pralki.
z kontaktu; w ¿adnym wypadku
wy³¹cznie przez doros³ych i
nie próbuj sama reperowaæ
Chcê wy³¹cznie
wy³¹cznie w celu prania bielizny
wewnêtrznych mechanizmów
upowa¿nionego i
wed³ug zawartych w niniejszej
pralki.
wykwalifikowanego technika
ksi¹¿eczce instrukcji.
oraz oryginalnych czêci
11.Urz¹dzenie musi byæ pod³¹czone
zamiennych firmy Indesit!
3. Jeli trzeba j¹ przenieæ w inne
do gniazda zasilaj¹cego z bolcem
miejsce, róbcie to bardzo ostro¿nie
ochronnym. W razie uszkodzenia
w kilka osób. Nigdy nie rób tego
przewodu naprawy dokonuje
sama, gdy¿ pralka jest bardzo
autoryzowany serwis.
ciê¿ka.
4.Przed w³o¿eniem bielizny sprawd,
czy bêben jest pusty.
5. Nie dotykaj pralki, stoj¹c przy
niej boso lub maj¹c rêce czy
stopy mokre czy wilgotne.
Jak wymieniæ przewód zasilania elektrycznego
Wymiana kabla zasilania elektrycznego mo¿e byæ dokonana wy³¹cznie przez upowa¿nionych techników.
Instrukcja instalacji i obs³ugi
24
Quick guide
Here are the 11 topics explained in this manual. Read, learn and
have fun: you will discover many secret ways to get a better
wash, more easily and making your washing machine last longer.
1.
Installation and removal (p. 34)
Installation, after delivery or transport, is the most important operation
for the correct functioning of your washing machine. Always check:
1. That the electric system conforms to regulations;
2. That the inlet and draining pipes are connected correctly.
Never use pipes that have already been used;
3. That the washing machine is levelled properly; something
worth checking to aid the performance of your
washing machine;
4. That the drum's fixing screws have been removed from
the back of the washing machine.
8. Care and maintenance (p. 35)
2. What goes in your washing machine and how
to start it (p. 26)
With just a bit of care, it will repay you with loyalty and devotion.
With the necessary upkeep, it will wash for years and years to
come.
A correct distribution of your laundry is vital to the successful
outcome of the wash and the life of the washing machine. Learn all
the tips and secrets to dividing your linen: colour, type of fabric.
9.
Problems and solutions (p. 32 and 33)
3.
Guide to understanding labels (p. 29)
Before calling a technician, read these pages: immediate solutions
may be found for a number of problems. If the problem persists,
call your local Indesit customer services who will be pleased to
The symbols on the labels of your garments are easy to understand
help. Any failure will be repaired, as soon as possible.
and equally important for the success of your wash. The guide
includes simple instructions to help you choose the right tempera-
ture, wash cycles and ironing methods.
10.
Technical characteristics (p. 33)
4.
Useful tips to avoid mistakes (p. 30)
Herein are the technical features of your washing machine: model
type number, electric and water specifications, size, capacity,
speed of the spin cycle and compliance with Italian and European
Years back, our grandmothers were the ones who gave us good
regulations.
advice - and in those days synthetic fibres did not exist: washing
was easy. Today, your washing machine offers you helpful advice
allowing you to wash wool even better than an expert laundress
11. Safety for you and your family (p. 36)
would by hand.
Here you will find the necessary safety guidelines, and it is
5.
The detergent dispenser (p. 31)
important for you to read this section carefully.
How to use the detergent dispenser and the bleach compartment.
6.
Understanding the control panel (p. 27)
Washing machine’s control panel is very simple. It has only a few
essential buttons to help you choose any type of wash cycle,
ranging from the most energetic, capable of cleaning a mechanic’s
overalls, to the most delicate for wool. Familiarising yourself with it
will help you get the best out of your wash while helping your
washing machine last longer. It’s easy.
7. Guide to the wash programmes (p. 28)
Herein is an easy table to help you choose the right programme,
temperature, detergents and possible additives. Choose the right
programme and you will get better results with your wash while
saving time, water and energy, day after day.
25
Instructions for installation and use
M
Dividing your garments
What goes in your washer?
according to fabric and
colour, is very important
for good results
Before washing, you can do a great deal to ensure better results. Divide your garments
according to fabric and colour. Read the labels, follow their guidelines.
Before washing.
The labels say it all.
Big and small happily
Divide your washing according
Always look at the labels: they
together.
to the type of fabric and colour
tell you everything about your
This washing machine has a
fastness.
garment and how to wash it in
special electronic control device
Empty all pockets (coins, paper,
the best possible way.
for even distribution: before the
money and small obejects) and
The table on page 29 shows all
spin cycle starts, this device
ensure all loose buttons are
meanings behind these
allows the garments to positions
repaired or removed prior to
symbols. Their recom-
themselves, to minimise noise
loading.
mendations are important to
and vibrations during the spin
achieve better wash results.
cycle.
Starting the washer
After installing your new washing machine, start a wash
cycle by setting programme "1" at 90 degrees.
Starting your washing machine
1. The door is closed correctly.
in the right way is important for
2. The plug is secured in the
the quality of your wash, to help
socket.
prevent future problems and
3. The water supply is turned
enhance life expectancy of your
on.
appliance. Once you have
4. Selector knob A is positioned
loaded your washing machine
on one of the symbols
(Stop/
and added the detergent
Reset).
together with any fabric
conditioner, always check that:
Choose the desired programme
The programme is selected
For more delicate
according to the type of garments
Remember that, if you want to
freshly cleaned washing, leave
garments:
that need to be washed. To choose
use it, the "programmed start"
the door open to allow air
protect underwear, tights
a programme, refer to the table on
should be set before the wash
circulation inside the drum.
and stockings and delicate
page 28. Turn knob A until the
cycle.
Always disconnect electricity at
items by placing them in a
selected programme is aligned
the socket and turn off the water
canvas pouch
with the mark on the knob, turn
At the end of the wash cycle...
supply.
knob B to the desired temperatu-
The L lamp to extinguish: it will
Remember that, in the event
re settings, check that knob C is
take about three minutes.
of a power failure, or should
in the desired position, if
Then turn the washing machine
the washing machine switch
necessary use buttons E, F and
off by pressing on-off button
itself off, the programme
G, and lastly, press on/off button
H(O position). You can now open
chosen will remain in its
H (I position).
the washing machine door
memory.
safely. After having removed the
How to eliminate the most common stains
Ink and biro Dab with a wad of cotton soaked in methyl alcohol or alcohol at 90°.
Tar Dab with fresh butter, rub in turpentine then wash immediately.
Wax Scrape away, then run a hot iron between two sheets of absorbent paper. Then rub in cotton with turpentine or
methyl alcohol.
Chewing gum Rub in nail polish remover and wipe with a clean rag.
Mold Cotton and white linen should be placed in a solution of 5 parts water, one bleach and a spoon of vinegar, then
washed immediately. For other white fabrics, use hydrogen peroxide at 10 volumes and wash immediately.
Lipstick Dab with ether on wool or cotton. Use tricloroetilene for silk.
Nail polish Place a sheet of absorbent paper on the side of the stain, wet it with nail polish remover, shifting the
garment as the sheet gradually changes colour.
Grass Dab with a wad of cotton soaked in methyl alcohol.
Instructions for installation and use
26
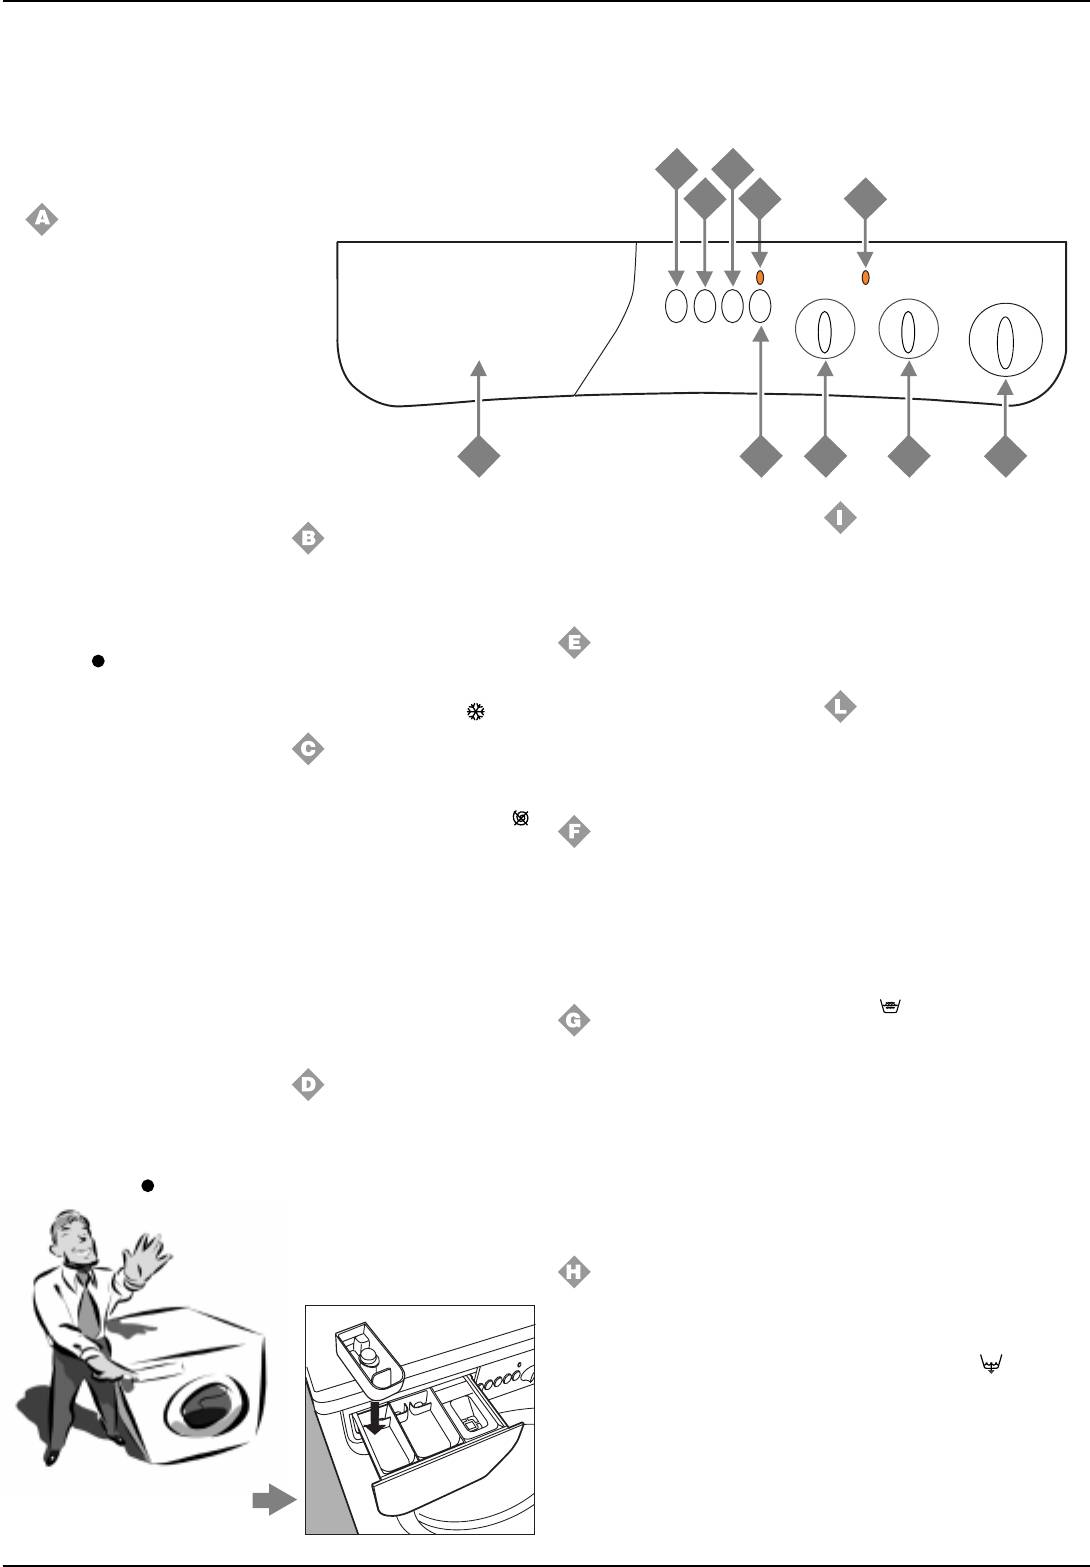
Understanding the control panel
Here I’m in command
Making the right choice is important. And it’s easy.
GE
F
I
L
Programme selector knob
and programmed start
Use this knob to select the wash
programme.
Turn this knob clockwise only.
To select a programme, you
should turn the knob so that the
symbol/number of the desired
programme is in line with the
pointer on the knob.
Now press on/off button H
D
H
C
B
A
(position I), pilot lamp I will start
flashing.
After 5", the setting will be
The washing machine is
accepted, pilot lamp I will stop
equipped with an extra
The on-off lamp
flashing (staying lit) and the wash
Temperature control knob
compartment 4 (provided as an
Lamp I flashes when the
cycle will begin.
It is used to set the wash tempe-
accessory) for the bleach, to be
appliance is switched on and
Should you wish to interrupt the
rature in the recommended
inserted in compartment 1.
awaiting a programme to be set.
programme in progress or set a
programme table on pag. 28. It
A steady light means the
new one, select one of the
also allows you to reduce the tem-
appliance has accepted the
symbols
(Stop/Reset) and wait
perature recommended for the
Extra Economy
selected programme.
5" : when the cancellation has
selected programme, and even to
Reduces water consumption
been accepted, pilot lamp I
set a cold wash cycle (
).
during the rinse cycles. We
flashes, and you can then turn the
recommend that you use this
The door block lamp
appliance off.
function only with small laundry
The safety lamp indicates that the
You can use this knob to delay
Spin exclusion knob
loads, dosing the detergent
washing machine door is locked
the appliance's operation.
It is used to exclude the spin
proportionally.
to prevent it from being opened
Select one of the four delay time
cycle (by choosing symbol
)
accidentally. To avoid any
positions, press the on/off button
or to reduce the spin speed of
damages to lock mechanism,
H (position I) and wait 5". The
the selected programme. The
Rapid wash
you must wait for the lamp to
setting has now been accepted
maximum speed for the four
This button reduces the length
extinguish, before attempting to
(pilot lamp I stays lit) and you can
types of fabric are:
of the wash programme by
open the door which takes around
select the programme you desire.
Fabric Speed
about 30%. It cannot be used
three minutes.
Pilot lamp I has a particular
Cotton 800 rpm
with special programmes (see
flashing motion (2" on and 4" off)
Synthetics 800 rpm
page 28) or those for wool and
Anti-crease
to indicate that a delayed start
Wool 600 rpm
silk.
This function (represented by the
has been set.
Silk no
symbol
) interrupts the wash
During this phase, you can open
Note: distribution phase will be
programme, keeping the washing
the appliance door and change
carried out at low speed.
Stain removal (see page 31)
soaking in water before draining.
the washing load, should you
Thanks to this command, the
It is only enabled in programmes
wish to do so.
washing machine will carry out
for synthetic fabrics, silk and
After the wash cycle has been set
Detergent dispenser
a more intensive wash that
curtains. It is very useful,
and accepted by the washing
It is divided into three
optimises the effectiveness of the
because it prevents delicate and
machine, turning the knob will
compartments:
liquid additives, thus allowing
synthetic fabrics from creasing
have no effect (except for when
1.Detergent for pre-wash;
more resistant stains to be
(for example, when you cannot
it is on position
Stop/Reset).
2.Detergent for the main cycle
removed. When you press the
take the washing out at the end
wash;
stain removal button, you cannot
of the wash cycle but only a few
3. Fabric conditioner.
activate the pre-wash.
hours later). The programme can
be completed by turning knob A
one notch. In the case of
On-off
synthetic fabrics, should you
When button H is pressed, the
prefer draining rather than a spin
4
washing machine is switched
cycle, turn knob A until you have
on, when it is not the machine
selected the symbol
(Drain).
is switched off.
Turning the appliance off
3
does not cancel the selected
2
programme.
1
The detergent dispenser with the
additional bleach compartment
is here.
27
Instructions for installation and use
What are you washing today?
A programme for all seasons
Type of fabric and degree of soil Programme
Temperature
Detergent
Fabric
Stain rem.
Length of
Description of wash cycle
knob
knob
for wash
softener
button/
the cycle
Bleach
(minutes)
COTTON
Exceptionally soiled whites
Prewash cycle, wash cycle at 90°C, rinse
1 90°C
◆◆
165
(sheets, tablecloths, etc.)
cycles, intermediate and final spin cycles
Exceptionally soiled whites
Wash cycle at 90°C, rinse cycles,
2 90°C
◆◆
Del./Trad.
145
(sheets, tablecloths, etc.)
intermediate and final spin cycles
Heavily soiled whites and fast colours
Wash cycle at 60°C, rinse cycles,
3 60°C
◆◆
Del./Trad.
130
intermediate and final spin cycles
Slightly soiled whites and delicate
Wash cycle at 40°C, rinse cycles,
4 40°C
◆◆
Del./Trad.
95
colours (shirts, jumpers, etc.)
intermediate and final spin cycles
Rinse cycles/Bleach
◆
Del./Trad.
Rinse cycles, intermediate and final spin cycles
Spin cycle Draining and final spin cycle
Stop/Reset
Interrupts/Cancels the selected programme
SYNTHETICS
Heavily soiled fast colour synthetics
Wash cycle at 60°C, rinse cycles, anti-
5 60°C
◆◆
Delicate
100
(baby linen, etc.)
crease or delicate spin cycle
Delicate colour synthetics
Wash cycle at 40°C, rinse cycles, anti-
6 40°C
◆◆
Delicate
70
(all types of slightly soiled garments)
crease or delicate spin cycle
Delicate colour synthetics
Wash cycle at 30°C, rinse cycles and
7 30°C
◆◆
30
(all types of slightly soiled garments)
delicate spin cycle
Rinse cycles/Bleach
Rinse cycles, anti-crease or delicate spin
◆
Delicate
cycle
Fabric softener
Rinse cycles with automatic introduction of
◆
softener, anti-crease or delicate spin cycle
Spin cycle Draining and delicate spin cycle
Stop/Reset
Interrupts/Cancels the selected programme
DELICATES
Hand wash
Wash cycle at 40°C, rinse cycles and
8 40°C
◆◆
60
delicate spin cycle
Particularly delicate garments and
Wash cycle at 30°C, rinse cycles, anti-
9 30°C
◆◆
50
fabrics (curtains, silk, viscose, etc.)
crease or draining
Rinse cycles
◆
Rinse cycles, anti-crease or draining
Spin cycle Draining and delicate spin cycle
Draining Draining
Stop/Reset
Interrupts/Cancels the selected programme
PROGRAMMED START
12 - 9 - 3 - 1 hour delay Start is delayed by 12 - 9 - 3 - 1 hours
Stop/Reset
Interrupts/Cancels the selected programme
Important: to cancel the wash programme you have just set, select one of the symbols (Stop/Reset) and wait for at least 5 seconds.
The data found in the table is purely indicative, and can vary according to the quantity and type of washing, the water system temperature and
the room temperature.
Special programme
Daily wash Your washer has a programme available for the washing of lightly soiled garments in a short amount of time.
By setting programme 7 at a temperature of 30°C, you can wash different types of fabrics together (except for wool and silk), with a
maximum load of 3 kg. This programmes allows you to save on both time and energy as it only lasts around 30 minutes.
We recommend the use of liquid detergent.
Instructions for installation and use
28
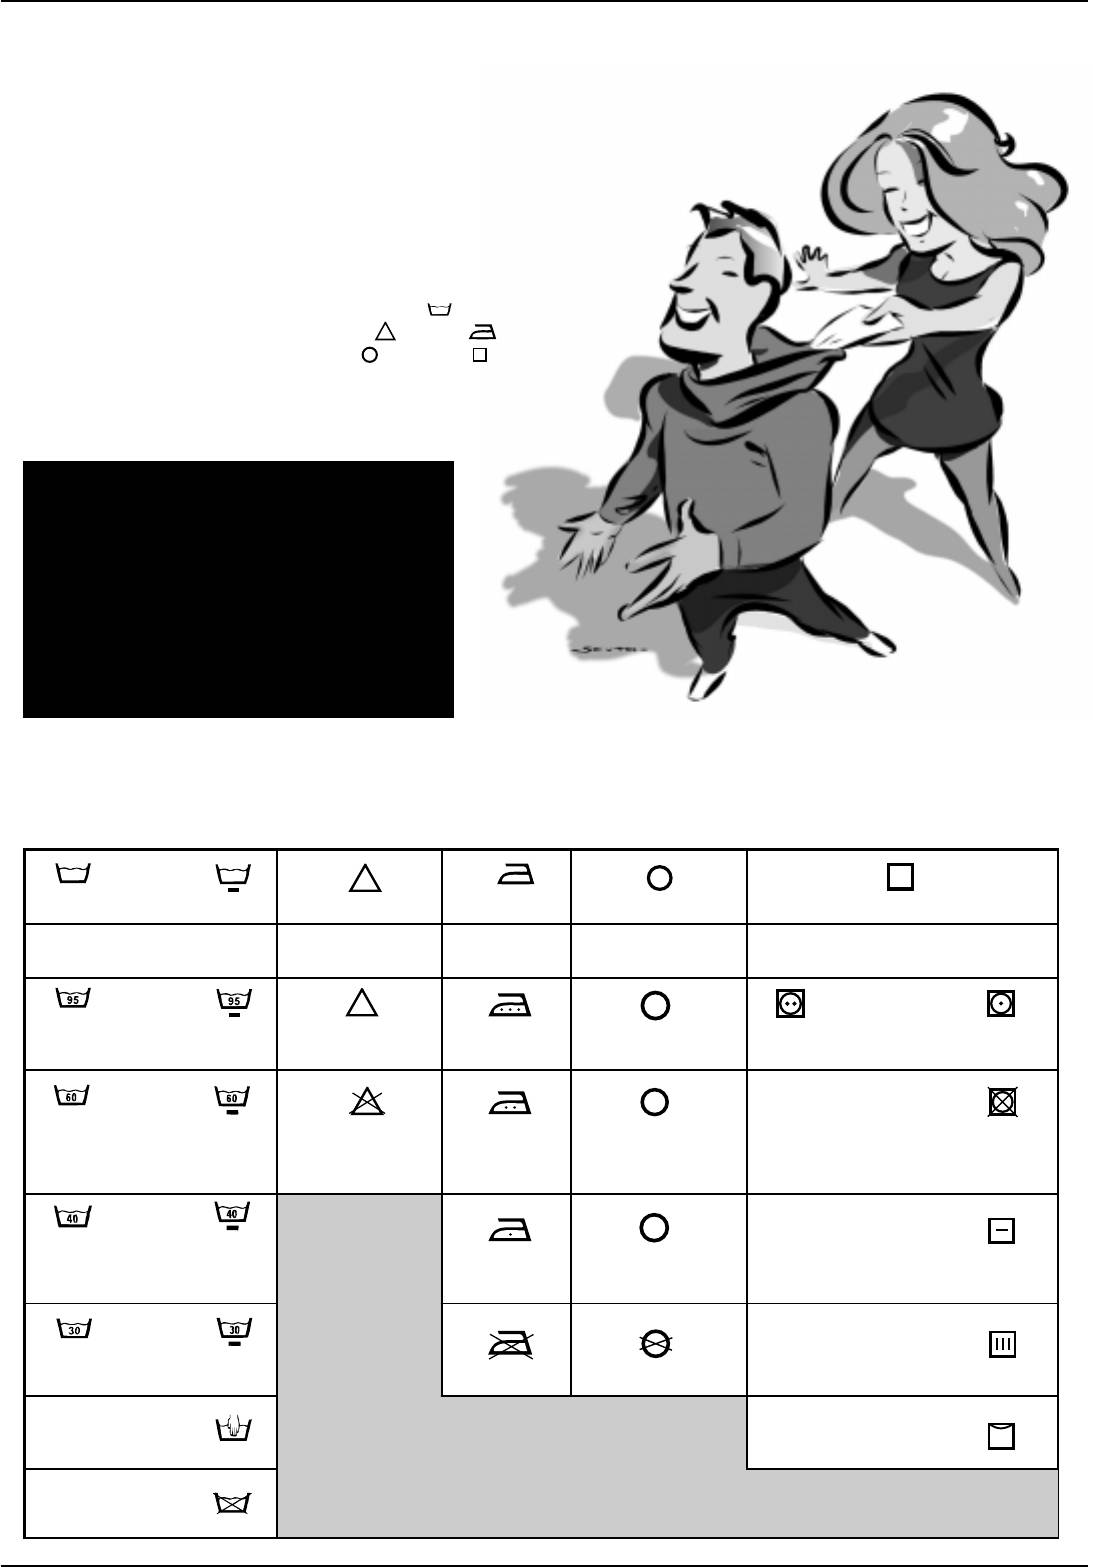
Understanding labels
Learn the meaning of these symbols and you will get better
results, your garments will last longer resulting in an
improved wash.
All over Europe, garment labels
These symbols are divided in
contain messages expressed in
five different categories and
small yet important symbols.
shapes: washing
,
Understanding them is very
bleaching
, ironing , dry
important if you want to get
cleaning
and drying .
better results and treat your
garments the way they deserve
to be treated.
Useful tips
Turn shirts inside out to get better results
and make them last longer.
Always empty pockets of their contents.
Look at the label: it will always give you useful
advice.
When loading your washing, try to have a mixture
of large to small items.
Make sure you select the right
temperature!
Consult and learn the symbols in this table: they will help you
obtain a better wash, treat your clothes properly, and get a
better performance out of your washing machine.
Wash Bleaching Ironing Dry cleaning Drying
Strong
Delicate
High
Low
action
action
Temp.
Temperat.
c
l
A
Wash at
Bleaching only in
Hot iron at max
Dry clean with any
95°C
cold water
200°C
solvent Machine dryable
P
Dry clean only with
Medium hot
perchloride, benzine
Wash at
ironing at
av., pure alcohol,
Do not machine
60°C Do not bleach
max 150°C
R111 and R113
dry
F
Dry clean with av.
Wash at
Iron at max
benzine, pure alcohol
40°C
110°C
and R113 Spread to dry
Hang to dry
Wash at
without spin
30°C Not ironable Do not dry clean
drying
Dry on clothes
Hand wash
hanger
Not
washable in
water
29
Instructions for installation and use

Useful tips
Never use your washing
How much does it weigh?
Holidays: unplug the
machine to wash... torn, fraying
1 sheet 400-500 gr.
appliance.
or non-hemmed linen. If it is
1 pillow case 150-200 gr.
It is recommended that you
absolutely neccessary, place it in
1 tablecloth 400-500 gr.
should unplug the machine from
a bag for protection. Do not wash
1 bathrobe 900-1,200 gr.
the socket and turn off the water
coloured linen with whites.
1 towel 150-250 gr.
supply. Leave the door ajar to
allow air circulation to the draw
Watch the weight!
Coloured T-shirts, printed
and the door gasket area. This will
For best results, do not exceed
ones and shirts last longer if turned
prevent unpleasant odours.
the weight limits stated below
inside out before washing.
(figures show weight of dry
Printed T-shirts and sweatshirts
garments):
should always be ironed inside out.
- Resistant fabrics:
Dungaree alert.
WOOL CYCLE
5 kg maximum
Very popular “salopette” type
- Synthetic fabrics:
For best results, we
overalls have straps with hooks
2.5 kg maximum
recommend you use a
that can damage the drum of your
- Delicate fabrics:
specific detergent, taking
washing machine or other
2 kg maximum
care not to wash more than
garments during the wash. To
- Pure new wool:
1 kg of laundry.
minimise the risk, place hooks in
1 kg maximum
the pocket and fasten with safety
pins.
How to wash almost anything
Curtains.
Quilted coats and anorak.
Trainers.
Curtains tend to crease a great
You can wash quilted coats and
Once you have removed mud
deal. A useful tip to reduce
wind-cheaters, too, if they are
and dirt from trainers, you can
creasing: fold the curtains and
padded with goose or duck
even wash them with jeans or
place them in a pillow case or
down. Do not load more than
any other tough garments. Do
mesh bag. Do not load anything
2-3 kg and never load 5 kg.
not wash trainers with whites.
else inside the appliance, this
Repeat rinse once or twice
will ensure that the overall
using the gentle spin.
weight does not exceed the half
load. Remember to use the
specific programme 9 which
automatically excludes the spin
cycle.
Instructions for installation and use
30
It’s important for a good wash
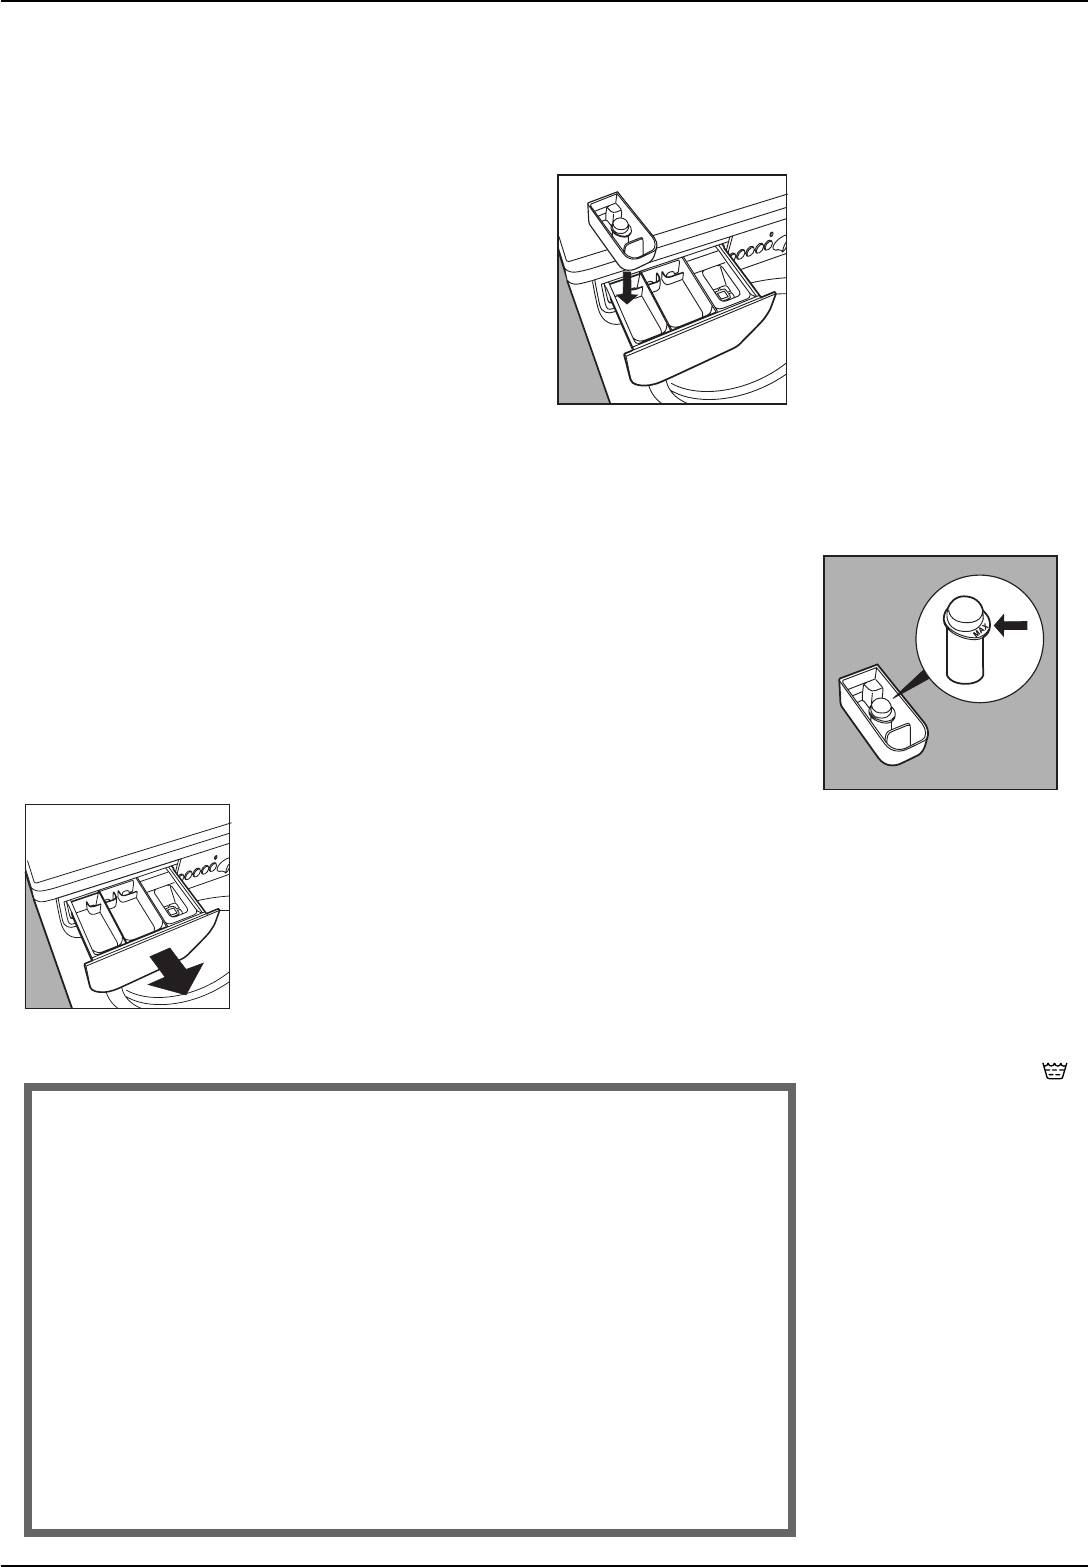
Useful tips about the detergent dispenser
The first secret is the easiest: the detergent dispenser is
In compartment 1:
opened by rotating it outwards.
Detergent for pre-washing (powder)
4
In compartment 2:
You must follow the dosage
Remember that liquid detergent
Detergent for washing
(powder or liquid)
recommendations provided by
is only designed for wash
the manufacturers when adding
cycles of up to 60 degrees on
3
In compartment 3:
Additives (softeners, perfumes, etc.)
detergent or fabric conditioner.
non pre-wash items.
2
Doses will vary according to the
Special containers are sold with
1
In compartment 4:
Bleach and delicate bleach.
wash load, the water hardness
liquid or powder detergents for
and how soiled the washing is.
placing inside the washing
Experience will help you select
machine drum, these are
the right dosage almost
positioned according to the
automatically: it will become your
instructions found in the
secret.
detergent box
Before adding detergent for pre-
Never use hand wash
washing in compartment 1,
detergent, because it may form
Bleach cycle and stain removal
make sure that the extra
too much foam, which could
compartment for bleach 4 has
damage the washing machine.
button
not been inserted.
Detergents that are specifically
If bleaching is necessary, the
Ensure no overfilling when
formulated for both hand and
extra case 4 (provided) must be
adding fabric conditioner in
machine wash are an
inserted into compartment 1 of
compartment 3.
exception.
the detergent dispenser.
The washing machine automa-
One last secret: when washing
When pouring in the bleach, be
tically adds the softener to the
with cold water, always reduce
careful not to exceed the "max"
wash in each programme.
the amount of detergent you use:
level indicated on the central
Liquid detergent is poured into
it dissolves less easily in cold
pivot (see illustration).
compartment 2 just a few
water than in hot water, so part
The use of the additional bleach
seconds before starting the
of it would be wasted.
container excludes the
wash cycle.
possibility of using the pre-wash
cycle. Traditional bleach can
only be used on sturdy white
You cannot bleach with the
fabrics, whereas delicate
“Silk” programme and with the
bleach can be used for
“special programmes” (see
coloured fabrics, synthetics
page 28).
and for wool.
The detergent dispenser can be
Use the stain removal button
removed and cleaned: pull it outwards,
every time you want to bleach.
as indicated in the figure. Then leave it
Should you want to do it
under running water for a few minutes.
separately you must pour the
bleach into the additional
container 4, press button G
(stain removal), start the
washing machine, then select
one of the symbols
according to the type of fabric.
A guide to environmentally
When you bleach during a
Cutting costs efficiently
friendly and economic use
normal wash cycle, pour the
of your appliance.
detergent and any additives in
MAXIMISE THE LOAD SIZE
the special compartments,
Achieve the best use of energy, water, detergent and time by using the recommended
press button G (stain removal),
maximum load size.
set the programme you desire
SAVE up to 50% energy by washing a full load instead of 2 half loads.
and turn the washing machine
on.
DO YOU NEED TO PRE-WASH?
For heavily soiled laundry only!
SAVE detergent, time, water and between 5 to 15% energy consumption by NOT
selecting Prewash for slight to normally soiled laundry.
IS A HOT WASH REQUIRED?
Pretreat stains with stain remover or soak dried in stains in water before washing to
reduce the necessity of a hot wash programme.
SAVE up to 50% energy by using a 60°C wash programme.
BEFORE USING A DRYING PROGRAMME ...
SAVE energy and time by selecting the highest suitable spin speed to reduce the water
content in laundry before using a drying programme.
31
Instructions for installation and use
Troubleshooting
Before calling, read the following
In most cases, when your washing machine fails to work, the problems arising
can be easily solved without having to call for a technician. Before calling for
assistance, always check these points.
But where did all the water go?
The washing machine
if the door is open or not shut
fails to start.
Simple: with the new Indesit technology, you need less than
properly.
half of it, to get good results on twice as much!
This is why you cannot see the water through the door:
Is the plug correctly inserted
Is the On/Off button
because there is little, very little of it, to respect the
into the socket? It could have
pressed?
environment yet without renouncing maximum cleanliness.
been moved whilst cleaning.
If it is, then a programmed start
And, on top of that, you are also saving electricity.
has been set.
Is there electricity in the
house?
Is the programmed start
A circuit breaker may have
knob, in the correct position
switched off as a result of too
for those models
many electrical appliances
concerned?
working at the same time. Or
maybe due to a general failure
Is the water supply turned
in your entire area.
on? For safety reasons, if the
washing machine does not
Is the washing machine
load water, it cannot start a
door closed properly?
wash cycle.
For safety reasons, the
washing machine cannot work
select one of the symbols
stop/reset
, then switch it
back on. If the knob continues
to turn, call for assistance
because it is showing an
anomaly.
The washing machine
fails to fill with water.
Is the hose correctly
connected to the tap?
Is there a water shortage ?
RIGHT WRONG
There could be work in
progress in your building or
The washing machine
Turn off the water
Leave the washing
street.
continuously fills and
supply after use.
machine plugged in while
cleaning.
drains water.
This will eliminate
Is there sufficient water
the possibility of
Even during maintenance,
pressure? The autoclave
Is the drain hose positioned
leakage.
the appliance should
may be malfunctioning.
too low? It must be installed
always be unplugged.
at a height ranging from 60 to
Always leave the
Is the tap filter clean? If the
appliance door ajar
Use solvents and
100 cm.
water is very calcareous, or
to avoid bad odours.
aggressive abrasives.
if work has recently been
Never use solvents or
Is the end of the hose
carried out on the water
Clean the
abrasives to clean the
immersed in water?
appliance’s
external and rubber parts
piping, the tap filter could be
Does the wall drainage
exteriors gently.
of the washing machine.
clogged with particles and
system have a breather
To clean the
debris.
exteriors and the
Neglect the detergent
pipe? If the problem persists
Is the rubber hose kinked?
rubber parts of the
dispenser.
even after these checks, turn
appliance, always
It is removable and can
The tract of the rubber hose
the water supply off the
use a soft cloth
easily be cleaned by
bringing water to washing
machine and call for
dipped in warm and
leaving it under running
machine must be as straight
assistance.
soapy water.
water.
as possible. Make sure it is
If you live on an upper floor of
not squashed or kinked.
Go on holiday without
your building, there may be a
thinking about her.
The programme selector
problem with your drain trap.
Before leaving, always
knob keeps turning?
To solve this problem, a
make sure that the
special valve must be
washing machine is
installed.
unplugged and that the
Wait a few minutes for the
water supply is turned off.
drain pump to empty the
tub, switch the washer off,
Instructions for installation and us
e
32

Is the drain hose kinked?
Is there space between the
The tract of the drain hose
machine and adjacent
must be as straight as
units? If it is not a built-in
possible. Make sure the drain
model, the washing machine
hose is not squashed or
will oscillate a bit during the
kinked.
spin cycle. A few cm of space
should therefore be left
Is the washing machine’s
around it.
drain duct clogged? Is there
an extension of the drain
hose? If so, is it positioned
The washing machine
incorrectly, blocking the
Too much foam.
does not drain or spin.
water flow?
Is the detergent appropriate
Does the selected
for machine washing?
programme incorporates
Check whether the definition
water draining? Some
on its label reads “for machine
programmes stop at the end
wash” or “hand and machine
of the wash cycles and
wash”, or any other similar
draining will have to be
The washing machine
wording.
selected manually.
leaks.
Is the correct amount being
Is the “Anti-crease"
used? An excessive amount
function -where provided -
Is the metal ring of the inlet
of detergent, besides
enabled? This function
hose properly attached?
Excessive vibration
producing too much foam,
requires manual selection for
Turn off the water supply,
during the spin cycle.
does not guarantee a more
draining.
unplug the appliance and try
effective wash, and causes
tightening its attachment
Is the drain pump clogged?
Have all transit screws been
scaling in the internal parts of
without forcing it.
To check it, turn off the water
removed durind instal-
the appliance.
supply, unplug the washing
lation? See the following
Is the detergent dispenser
machine and follow the
page on installation
obstructed? Remove and
If, despite all checks, the
instructions on page 35, or
procedures.
wash it under tap water.
washing machine fails to
call for technical assistance.
function and the problem
Has the washing machine
Is the drain hose well
persists, call your nearest
been levelled correctly? The
attached? Turn off the water
authorised Customer Service
Always get
levelling of the appliance
supply, unplug the appliance
Centre, providing the following
assistance from
should be checked
and try tightening its
information:
authorised
periodically. Adjust the feet
attachment.
- the nature of malfunction
technicians and
and check them with a level.
- the model type no. (Mod. ....)
always insist on
- the serial number (S/N ....)
original spare parts.
This information can be found on
the data plate situated at the
back of the washing machine.
Technical characteristics
Model
W 84 TX
Dimensions
width 59,5 cm
height 85 cm
depth 53,5 cm
Capacity
from 1 to 5 kg
Electrical
voltage 220/230 Volt 50 Hz
connections
maximum absorbed power 2300 W
Water connections
maximum pressure 1 MPa (10 bar)
minimum pressure 0,05 MPa (0,5 bar)
drum capacity 42 litre
Spinning speed
up to 800 rpm
Control programs in
programme 3; temperature 60°C; carried out with 5 kg load.
compliance with
IEC regulation 456
This appliance conforms with the following E.E.C. directives:
- 73/23/EEC of 19/02/73 (Low Voltage) and subsequent modifications
- 89/336/EEC of 03/05/89 (Electromagnetic Compatibility) and subsequent modifications
33
Instructions for installation and use
Installation and removal
When the new
washer arrives
Whether new or just transported to a new house,
installation is extremely important for the correct
functioning of your washing machine.
After removing the appliance from
Connection to the water
its packaging, check that it is
mains
intact. If in doubt, contact a
Water pressure must range within
qualified technician immediately.
the values indicated on the data
The inside of the machine is
plate on the rear of your washing
supported, for transportation, by
machine. If the water pipes are new
four screws on the back panel.
or left unused, then before
connecting the machine run the
water until clear to remove debris.
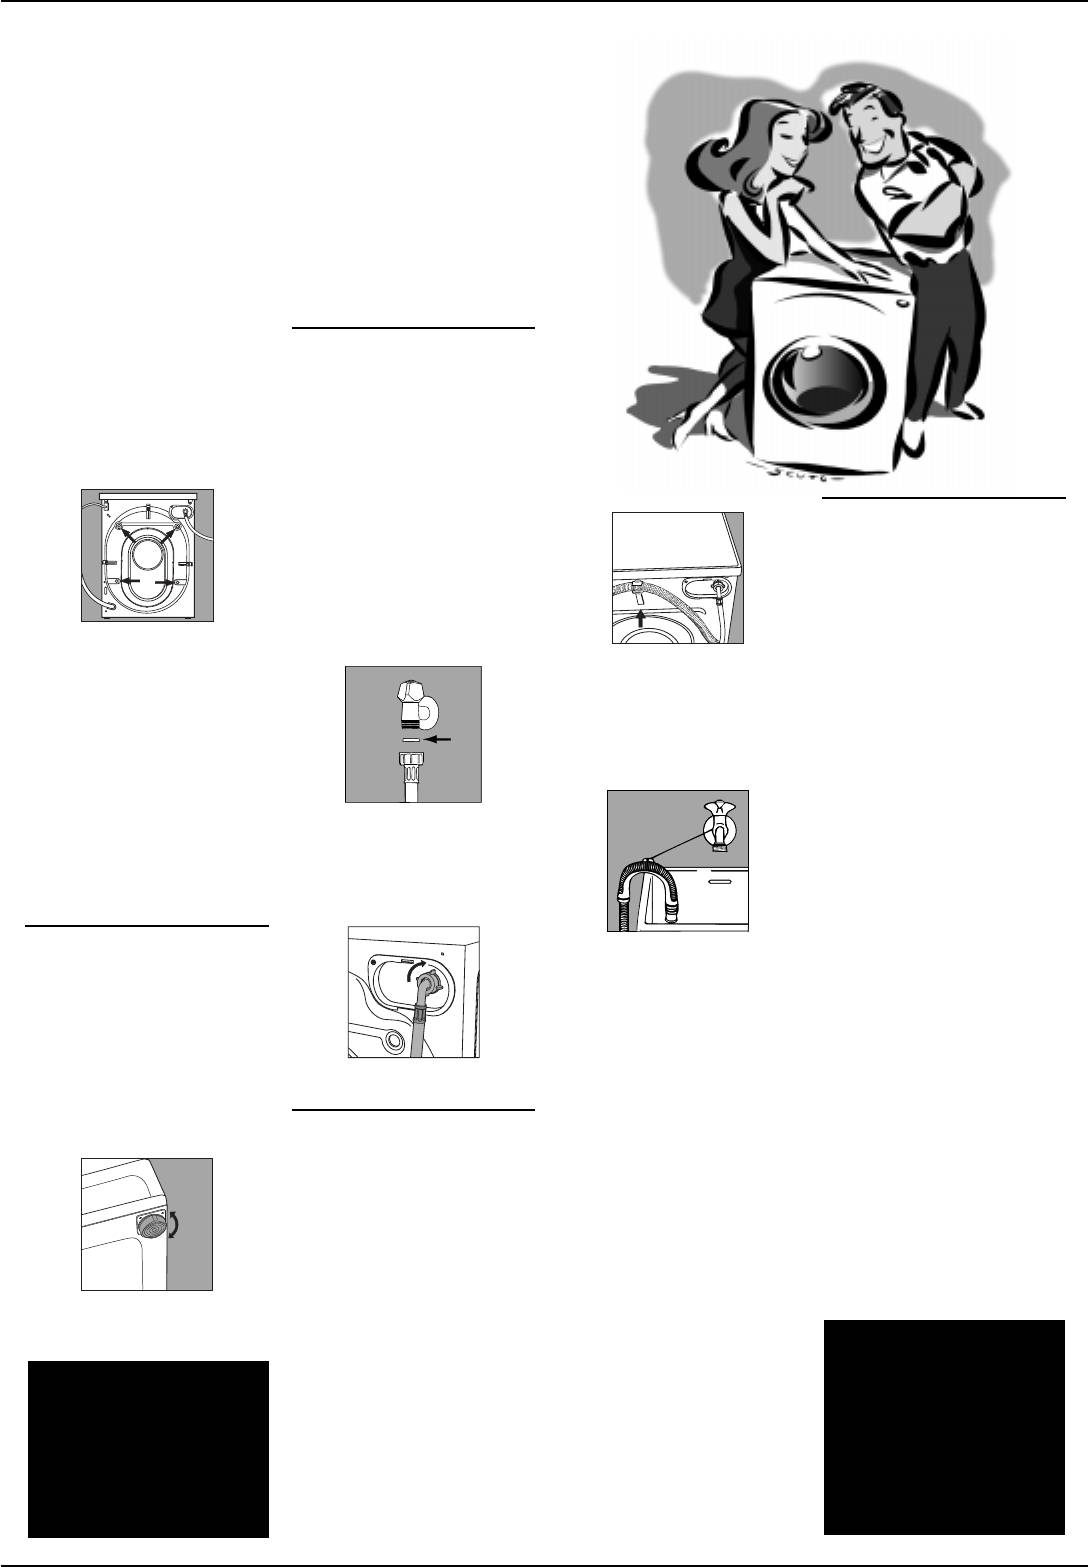
Electric connection
Connect the inlet hose to a cold
Before connecting the appliance
water tap having a ¾ “ BSP thread.
to the electric socket, be sure that:
Ensure that the rubber sealing
1) the electric socket is able to
washers are fitted at each end of
sustain the appliance’s
the inlet hose, with the fitter washer
maximum power load
at the tap end.
indicated on the data plate
Before using the washing
The hook to be used in case the drain
and in compliance with the
machine, remove the screws,
hose ends at a height below 60 cm.
law;
remove the spacers together with
2) the supply voltage is included
the rubber tubes attached to them
If the drains hose empties into a
within the values indicated on
A
(keeping all the parts) and use the
tub or sink then fit the plastic gui-
the data plate;
plastic plugs provided to fill in the
de and secure it to the tap.
3) the socket is compatible with
holes.
the appliance’s plug. If not, do
Important: Use the cap (provided)
not use adapters, but replace
The rubber gasket .
to close the 3 holes which housed
either the socket or the plug;
the stop pin, situated in the right-hand
4) electric household appliances
Connect the inlet hose to the
part of the lower back of the
must be equipped with an
threaded connector on the
washing machine.
“earthing” system.
machine rear.
Levelling
The guide for draining into tubs and
The washing machine must be
sinks.
levelled appropriatey in order to
guarantee its correct functioning. To
The end of the drain hose must
level the appliance, the front feet
be positioned so that it cannot
must be adjusted; the angle of
become submerged.
inclination, measured according to
Extensions are unadvisable. In
Water pipe inlet at the top right.
the worktop, must not exceed 2°.
case of absolute need, the
When placed on carpet, make sure
extension must have the same
the ventilation is not reduced.
Connecting the drain hose
diameter as the original hose and
There are two hooks (right or left)
must not exceed 150 cm. In case
on the rear of your washing
of wall draining pipes, their
machine to which the drain hose
efficiency must be checked by
is to be fixed. Insert the other end
a qualified technician. If the
in a stand pipe or place it on the
dwelling is on one of the upper
edge of a sink or tub avoiding
floors of a building, there may be
excessive kinks and bending. It
drain trap problems causing the
should be placed at a height
washing machine to load and
The front feet are adjustable.
ranging from 60 to 100 cm. If it is
unload water continuously.
necessary to fix the end of the
In order to avoid such an
Warning!
hose at a height below 60 cm from
inconvenience, special anti-drain
The company denies all
Retain the transit screws,
the ground, it must be fixed in the
trap valves are available in
liability if and when these
spacers and washers.
appropriate hook placed on the
shops.
norms are not respected.
Should you move house
upper part of the back panel.
Plastic bags, expanded
then these should be
styrofoam, nails and other
replaced to support the
packaging parts are not
inside of the machine to
children’s toys, and are
prevent damage when
potentially dangerous.
transporting the machine.
Instructions for installation and use
34
Easy Care and Maintenance
Treat your machine well and it will provide
many years of trouble free service
Your washing machine is a reliable companion in life and on the job. It is just as important for you to keep it
in shape.
Your washing machine is
It is important to wash
designed to provide reliable
the detergent dispenser
service over many years. A few
regularly.
simple steps will help to prolong
To prevent dried washing
its life and avoid problems. It is
powder from
advisable, to turn off water taps
accumulating, place the
when the machine is not to be
dispenser under running
used, this protects the hoses,
water for a few minutes.
etc.
If the water in your area is too
hard, use a deliming product
(water is hard if it often leaves
Never exaggerate with doses.
whitish stains around taps or
Normal detergents already
drains, especially of bath tubs.
contain deliming agents. Only if
For more accurate information as
the water is particularly hard,
to the type of water in your
that is, rich in lime content, do
system, call the local water
we recommend the use of a
works or a local plumber).
specific product at every wash.
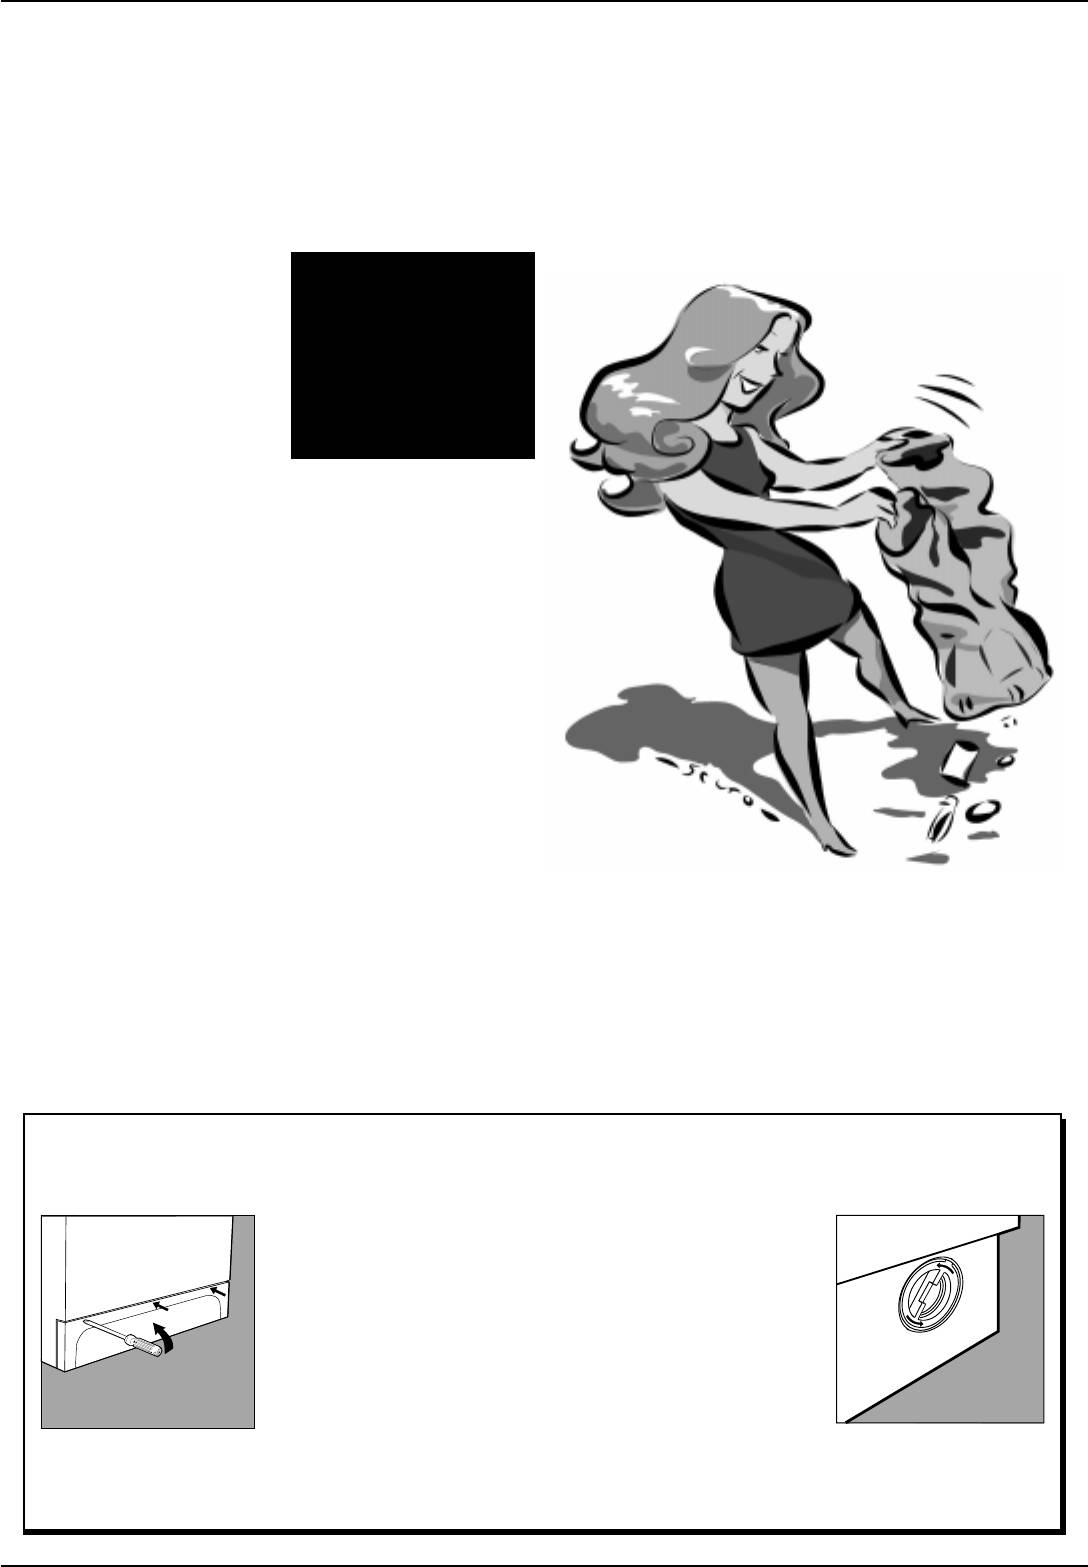
Pockets must always be
A periodical wash cycle with a
emptied removing even pins,
dose of a deliming product,
badges and any other hard
without detergents or washing,
object.
may prove useful.
The washing machine exterior
Never use too much detergent
should be cleaned with a rag
or additives because this could
dipped in lukewarm water and
cause an excess amount of
soap.
foam, scaling and possible
damage to the component parts
of your washing machine.
Do not forget to empty all pockets: small objects can
cause damage to your washer.
When in need, check the pump and the rubber hose.
The washer comes equipped with a self-cleaning pump that does not require any cleaning or maintenance. Small
objects may accidentally fall into the pump: coins, hair clips, loose buttons and other small items. To avoid possible
damage, they are withheld in an accessible pre-chamber, situated at the lower end of the pump.
Attention: Before attempting to examine this pre-chamber, first
ensure that the machine has finished its programme and is empty.
Unplug the machine, as with any maintenance.
To gain access gently ease down the top of the plinth panel situated at
the base of the machine, with a screwdriver etc, to release it. Then
ease the top edge forward to allow it to be lifted clear (Fig. 1). Place
a shallow dish or tray below the cover of the pre-chamber to catch
the small amount of water present. Release the cover by turning anti-
clockwise (Fig. 2). Ensure that the cover is securely replaced.
Fig. 1
Fig. 2
Re-fit the plinth cover by inserting the hooks on its lower edge into
the slots and ease the top edge back into position.
The water inlet hose
Check the rubber hose at least once a year. If you see any cracks, replace it immediately. When you use your washing machine,
water pressure is very strong and a cracked tube could easily split open.
35
Instructions for installation and use
Important for the safe use of your washing machine
Your safety and that of
Your washer has been built in compliance with
the strictest international safety regulations. To
protect you and all your family.
your family
Read these instructions and all
5. Never touch the washing
7. Never open the detergent
8. Never pull on the supply
the information in this manual
machine when barefoot or
dispenser while the
cable or the washing
carefully: they are an important
with wet or damp hands
appliance is functioning;
machine to disconnect it
source, not only of numerous
or feet.
do not use hand wash
from the wall socket: it is
useful tips, but also of vital
detergent because the
extremely dangerous.
6. Never use extensions or
information on safety, use and
abundance of foam could
multiple plugs, which are
9. While the appliance is
maintenance.
damage its internal parts.
particularly dangerous in
functioning, do not touch
1. the machine should not be
humid environments. The
the drain water as it could
installed in an outdoor
power supply cable must
reach very high
environment, not even
never be bent or
temperatures. The
when a roof shelters the
dangerously compressed.
appliance door, during
area, because it may be very
wash cycles, tends to
dangerous to leave it
I only want an authorised
become hot; ensure that
exposed to rain and
specialised technician with
children do no touch it.
original Indesit spare parts!
thunderstorms.
Never force the washing
machine door because
2. It must only be used by
this could damage the
adults and exclusively for
safety lock which prevents
washing clothes following
accidental opening when the
the instructions provided in
nachine is working. Allow a
this manual.
few minutes at the end of the
3. Should it have to be moved,
program for the lock to
proceed with the help of two
release.
or three people and handle
10. In case of malfunctio-ning,
it with the utmost care.
first close the water tap
Never try to do this alone,
and unplug the appliance
because the appliance is
from the wall socket; do
very heavy.
not under any
4. Before loading the washing
circumstances touch
machine, make sure the
internal parts in order to
drum is empty.
attempt repairs.
How to change the power supply cable
The power supply cable must only be replaced by one of our authorised Service Engineers.
Instructions for installation and use
36

Merloni Elettrodomestici
Viale Aristide Merloni 47
60044 Fabriano
Italy
Tel +39 0732 6611
Fax +39 0732 662501
www.merloni.com
Leader for young Europe
10/2002 - 195032869.03 - XEROX BUSINESS SERVICES - DOCUTECH
- 1
- 2


