Sony CDX-GT50UI: Using optional equipment Auxiliary audio equipment CD/MD changer
Using optional equipment Auxiliary audio equipment CD/MD changer: Sony CDX-GT50UI
Table of contents
- Table of Contents
- Welcome ! Resetting the unit Preparing the card remote commander
- Setting the clock Attaching the front panel Detaching the front panel
- Location of controls and basic operations Main unit
- wg Number buttons 7
- CD Radio Storing and receiving stations Display items Storing automatically — BTM Storing manually Repeat and shuffle play Receiving the stored stations Tuning automatically
- Setting AF and TA RDS Overview Display items
- Playing back USB devices Selecting PTY Display items Setting CT
- Listening to music on a Mass Storage Class type audio device Playing back iPod Playing tracks Listening to music on “Walkman” (ATRAC Audio Device)
- Repeat and shuffle Play Scan Selecting Album, Artist or Playlist
- Changing the sound settings Adjusting setup items — SET Adjusting the sound characteristics — BAL/FAD/SUB Customizing the equalizer curve — EQ3
- Using optional equipment Auxiliary audio equipment CD/MD changer
- Precautions Notes on discs
- About USB devices Playback order of MP3/WMA/AAC files
- About MP3 files About ATRAC files About WMA files About iPod About AAC files
- Cleaning the connectors Maintenance Replacing the lithium battery of the card remote commander Removing the unit Fuse replacement
- Specifications
- CD/MD playback Troubleshooting General Radio reception
- RDS USB playback Error displays/Messages
LOCAL (Local Seek Mode)
– “LOCAL-ON” : to only tune into stations with
stronger signals.
– “LOCAL-OFF” (
z): to tune normal reception.
2
MONO*
(Monaural Mode)
AUX
To improve poor FM reception, select monaural
reception mode.
– “MONO-ON” : to hear stereo broadcast in
AUX
monaural.
– “MONO-OFF” (
z): to hear stereo broadcast in
stereo.
2
REG*
(Regional)
To set “REG-ON” (
z) or “REG-OFF” (page 9).
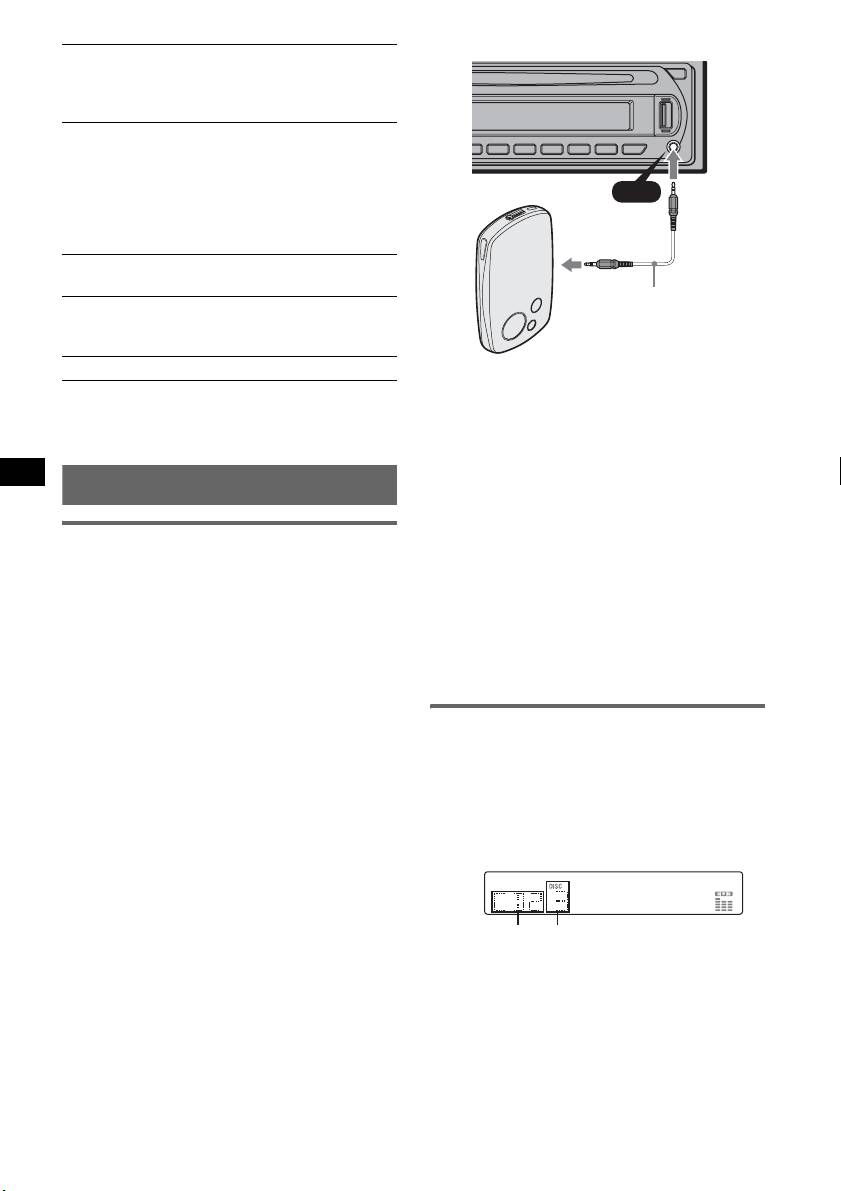
Connecting cord*
3
LPF*
(Low Pass Filter)
(not supplied)
To select the subwoofer cut-off frequency: “LPF
OFF” (
z), “LPF125Hz” or “LPF 78Hz.”
BTM (page 8)
* Be sure to use a straight type plug.
*1 When the unit is turned off.
*2 When FM is received.
Adjust the volume level
*3 When the audio output is set to “SUB.”
Be sure to adjust the volume for each connected
audio device before playback.
Using optional equipment
1 Turn down the volume on the unit.
2 Press (SOURCE) repeatedly until “AUX”
appears.
Auxiliary audio equipment
“AUX FRONT IN” appears.
By connecting an optional portable audio device
3 Start playback of the portable audio device at a
to the AUX input jack (stereo mini jack) on the
moderate volume.
unit and then simply selecting the source, you
can listen on your car speakers.
4 Set your usual listening volume on the unit.
The volume level is adjustable for any difference
5 Press the select button repeatedly until “AUX”
between the unit and the portable audio device.
appears, and rotate the volume control dial to
Follow the procedure below:
adjust the input level (–8 dB to +18 dB).
Connecting the portable audio
device
CD/MD changer
1 Turn off the portable audio device.
Selecting the changer
2 Turn down the volume on the unit.
1 Press (SOURCE) repeatedly until “CD” or
3 Connect to the unit.
“MD” appears.
2 Press (MODE) repeatedly until the desired
changer appears.
Unit number
Disc number
Playback starts.
14


