Sony CPD-E430: Troubleshooting On-screen messages
Troubleshooting On-screen messages: Sony CPD-E430
Table of contents
x Letters and lines show red or blue shadows at the
edges
Troubleshooting
• Adjust the convergence.
x No picture
x A hum is heard right after the power is turned on
If the ! (power) indicator is not lit
• This is the sound of the auto-degauss cycle. When the power is
• Check that the power cord is properly connected.
turned on, the monitor is automatically degaussed for a few seconds.
• Check that the ! (power) switch is in the “on” position.
* If a second degauss cycle is needed, allow a minimum interval of
20 minutes for the best result. A humming noise may be heard, but this is
The ! (power) indicator is orange
not a malfunction.
• Check that the video signal cable is properly connected and all plugs
are firmly seated in their sockets.
• Check that the HD15 video input connector’s pins are not bent or
On-screen messages
pushed in.
• Check that the computer’s power is “on”.
1
• The computer is in power saving mode. Try pressing any key on the
IIONNFORMAT
computer keyboard or moving the mouse.
MON I I I NGS WORKTOR
• Check that the graphic board is completely seated in the proper bus
I
NPUT
:NO
S
GNALI
ACT
I VATE
BY
COMPUTER
W
slot.
2
CHECK
S GNAL CABLEI
R
G
If the ! (power) indicator is green or flashing orange
B
• Use the Self-diagnosis function.
x Picture flickers, bounces, oscillates, or is scrambled
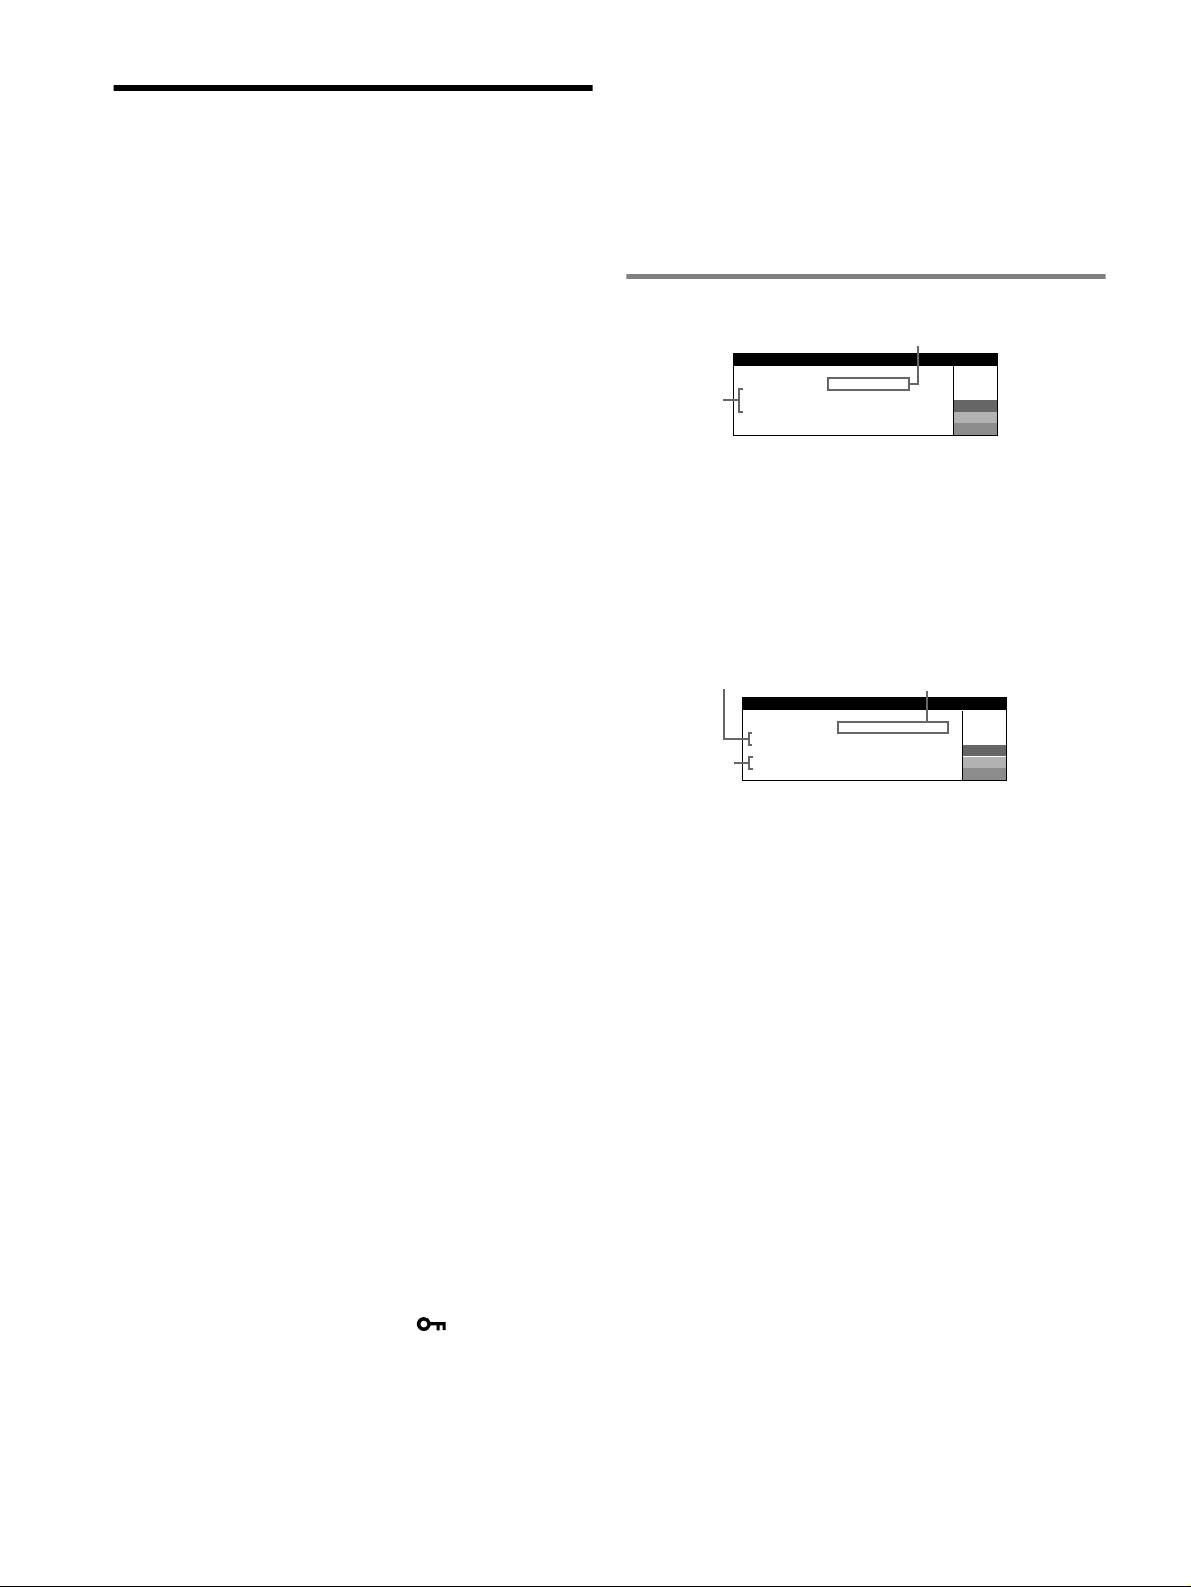
1 If “NO SIGNAL” appears:
• Isolate and eliminate any potential sources of electric or magnetic
This indicates that no signal is input from the connector.
fields such as other monitors, laser printers, electric fans, fluorescent
2 Shows the remedies.
lighting, or televisions.
• If ACTIVATE BY COMPUTER appears on the screen, try
• Move the monitor away from power lines or place a magnetic shield
near the monitor.
pressing any key on the computer or moving the mouse, and
• Try plugging the monitor into a different AC outlet, preferably on a
confirm that your computer’s graphic board is completely seated
different circuit.
in the correct bus slot.
• Try turning the monitor 90° to the left or right.
• If CHECK SIGNAL CABLE appears on the screen, check that
• Check your graphics board manual for the proper monitor setting.
the monitor is correctly connected to the computer.
• Confirm that the graphics mode and the frequency of the input signal
are supported by this monitor (see “Preset mode timing table” on
1
page i). Even if the frequency is within the proper range, some
2
graphics board may have a sync pulse that is too narrow for the
IIONNFORMAT
MON I I I NGS WORKTOR
monitor to sync correctly.
I :200.0kHz/ 85Hz
NPUT
• Adjust the computer’s refresh rate (vertical frequency) to obtain the
OUT OF SCAN
RANGE
W
R
best possible picture.
3
CHANGE
S GNAL TIIINGM
G
B
x Picture is fuzzy
• Adjust the brightness, contrast.
1 If “OUT OF SCAN RANGE” appears:
• Degauss the monitor.*
This indicates that the input signal is not supported by the monitor’s
• Adjust the degree of moire cancellation until the moire is minimal,
specifications.
or set CANCEL MOIRE to OFF.
2 Shows the input signal frequency.
x Picture is ghosting
• Eliminate the use of video cable extensions and/or video switch
3 Shows the remedy.
boxes.
CHANGE SIGNAL TIMING appears on the screen. If you are
• Check that all plugs are firmly seated in their sockets.
replacing an old monitor with this monitor, reconnect the old
x Picture is not centered or sized properly
monitor. Then adjust the computer’s graphic board so that the
• Perform the Auto Size Center function.
horizontal frequency is between 30 – 96 kHz, and the vertical
• Adjust the size or centering. Note that with some input signals and/
frequency is between 48 – 170 Hz.
or graphics board the periphery of the screen is not fully utilized.
• Just after turning on the power switch, the size/center may take a
while to adjust properly.
x Edges of the image are curved
• Adjust the geometry.
x Wavy or elliptical pattern (moire) is visible
• Adjust the degree of moire cancellation until the moire is minimal.
• Change your desktop pattern.
x Color is not uniform
• Degauss the monitor.* If you place equipment that generates a
magnetic field, such as a speaker, near the monitor, or if you change
the direction the monitor faces, color may lose uniformity.
x White does not look white
• Adjust the color temperature.
x Monitor buttons do not operate ( appears on the
screen)
• If the control lock is set to ON, set it to OFF.
6