Sony SU-WTS1: 8 Step 6: Mount the TV to the Mount Wall Brackets Step 7: Adjust Tension
8 Step 6: Mount the TV to the Mount Wall Brackets Step 7: Adjust Tension: Sony SU-WTS1
Table of contents
- For Users For dealers or authorized service personnel
- Step 1: Check the Parts
- 4 Step 2: Remove Stands from the TV
- Step 3: Attach the Mounting Arms to the TV
- 6 Step 4: Fasten Lower Mount Wall Brackets (Example for securing to a wood wall)
- Step 5: Secure Upper Mount Wall Brackets
- 8 Step 6: Mount the TV to the Mount Wall Brackets Step 7: Adjust Tension
- Proper Ventilation
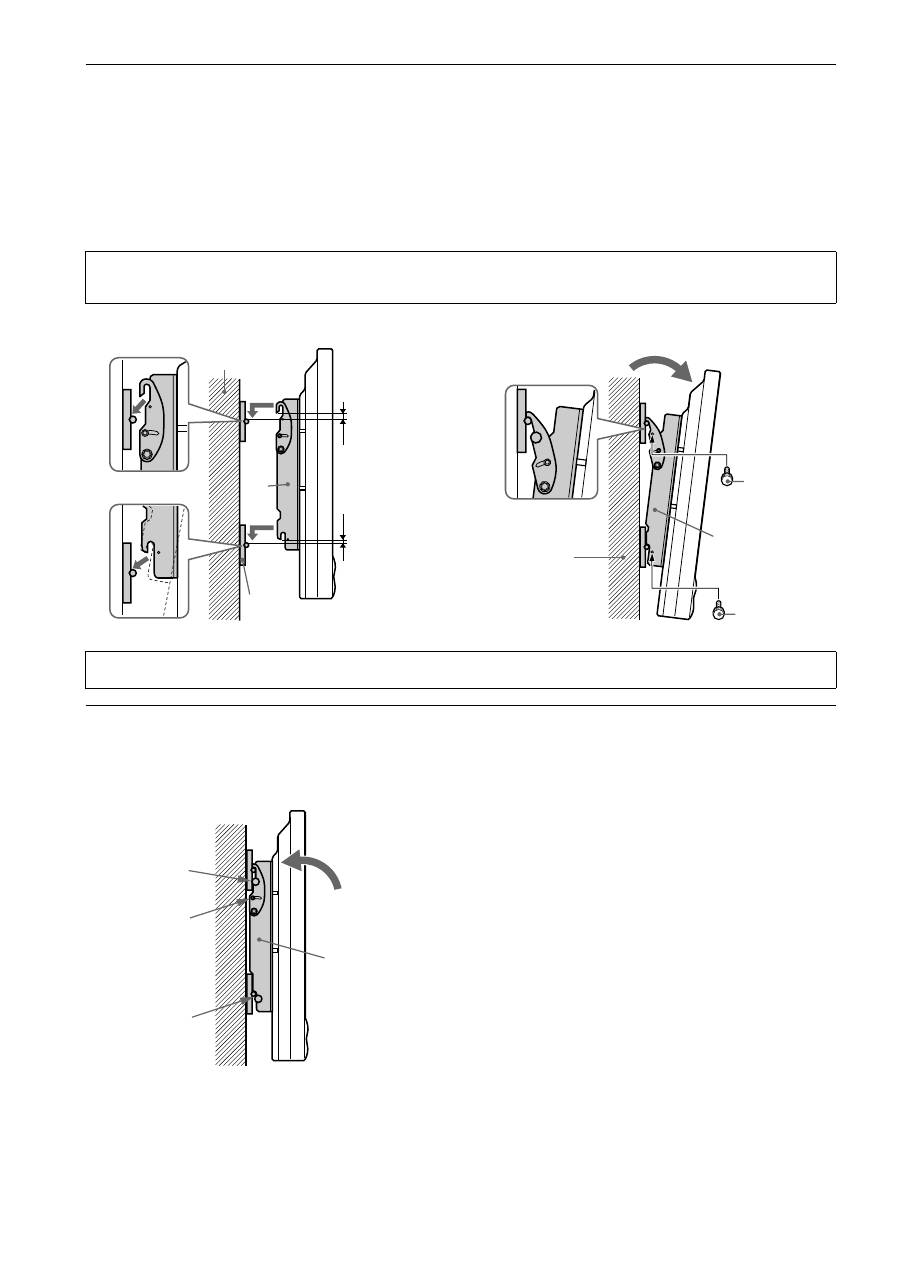
8 Step 6: Mount the TV to the Mount Wall Brackets
1
With the upper tilt hooks on the mounting arms (
A
) in the flat position, raise the TV with mounting arms (
A
)
attached (2 people minimum recommended) and place the TV flat against wall with the upper and lower mounting
arms (
A
) attaching slots slightly higher than the steel receiving rods of the upper and lower mount wall brackets
(
B
).
2
With the TV reasonably level, lower the TV until the mounting arms (
A
) receiving slots are fully installed into the
upper and lower mount wall brackets (
B
) steel rods. Gently pull the left and right upper edges of the TV to extend
the mount to its maximum 10° tilt and install the four 6 mm safety knobs (
D
) on each mounting arm (
A
) for
security.
Step 7: Adjust Tension
Tension:
To adjust the tilting tension, tighten the 5 mm screws on both sides of the brackets.
Note
To remove the TV from the wall, simply extend the TV to its maximum tilt range, remove the four 6 mm safety knobs (
D
) push the TV back to its flat
wall position and lift the unit up and out from the wall.
Wall structure
Cl
e
a
rance
A
B
A
Wall structure
D
Safety knob
D
Safety knob
Caution
Be sure to install the four safety knobs (
D
) to prevent the TV from falling down.
D
M5 tension
screw
D
A
