Sony SU-WH500: Confirm the completion of the installation Other information
Confirm the completion of the installation Other information: Sony SU-WH500
Table of contents
- On Safety
- CAUTION
- Preparation Installation Check the supplied items
- Confirm the completion of the installation Other information
Install the Wire Bracket.
2
Peel the Paper Template M from the wall, and secure the Wire
4 Install your TV on the wall
Bracket A to the wall.
A For thick walls
Remove the Table-Top Stand.
1 Insert the Anchors A F into the holes of the wall.
1
For details, refer to your TV’s operating instructions.
2 Secure the Wire Bracket A with the four Wood Screws
(φ5×65) G to the wall.
Hang your TV on the wire of the Wire Bracket.
B For thin walls
2
Be sure that two or more persons hold the TV, each person using
1 Insert the Anchors B H with the metal parts turned towards
both hands. Hang the axles of both Pulleys B installed to the TV
the holes of the wall.
onto the wire firmly.
2 Pull the Anchors B H and confirm that they do not come out
from the wall.
Adjust the slant of your TV.
3
3 Push the cap of the Anchor B H into the wall.
Move your TV right or left as you look at its front, so as to adjust
4 Shift the upper and lower tips of the Anchor B H to the front
it horizontally.
and back, and then stretch the two handle pieces up and
down until they touch the wall.
Prevent your TV from falling.
5 The two handle pieces are torn out, and the Anchor B H is
4
Tighten the Support Belt E with the Anchor A F and the Wood
fixed in the wall.
Screw (φ5×65) G (for thick walls), or with the Anchor B H and
6 Secure the Wire Bracket A with the four Screws (M5×60)
the Screw (M5×60) I (for thin walls) to the wall.
I to the wall.
Confirm the completion of the installation
3 Prepare for the installation of the TV
Check the following points.
Make sure that your TV has the Table-Top Stand attached, and the
• The axles of both Pulleys B are firmly hung onto the wire.
TV is not tilted (at an angle of 0°). If your TV has a terminal cover
• The cord and the cable are not twisted or pinched.
or a bottom cover attached, remove it before carrying out the
procedure below.
Other information
For details, refer to your TV’s operating instructions.
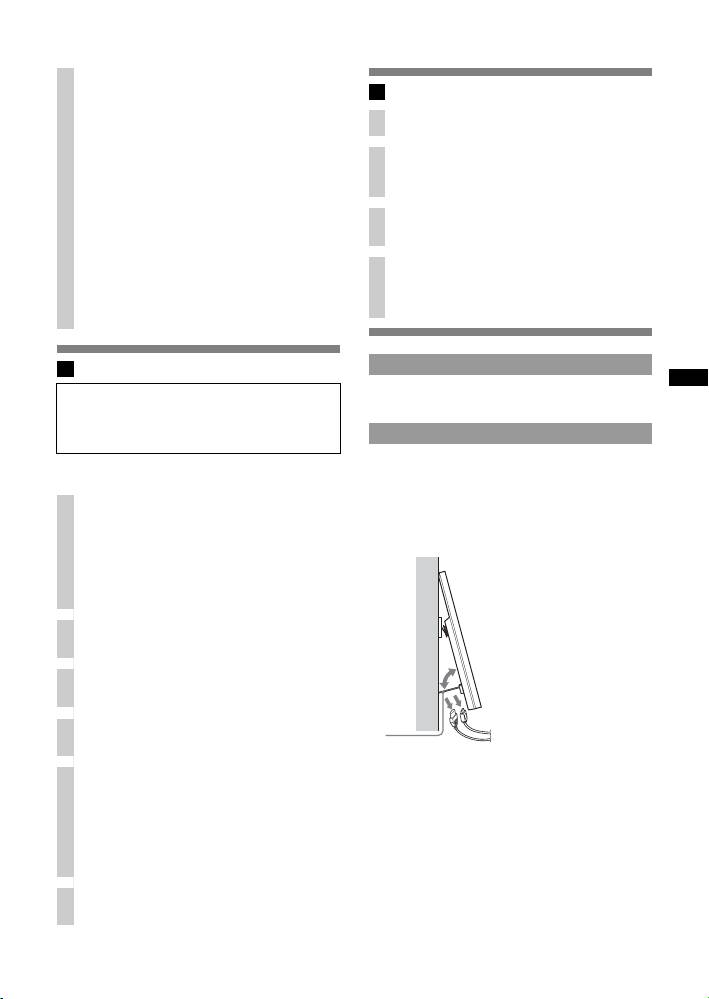
To disconnect the cables
When using an electric screwdriver, set the torque setting to
Use the Tilt-up Bracket C to tilt your TV to the front to easily
approximately 1.5 N•m {15 kgf•cm}.
disconnect the cord and cables with the TV still hung to the wall.
~
Attach the Cushions.
If your TV is XBR-60LX90s* or KDL-60LX90s*/60NX80s*, the
1
Attach one Cushion A K to each Pulley B, and attach two
Tilt-up Bracket C cannot be tilted.
Cushions B L each to the Tilt-up Bracket C and the Belt
* In the actual model names, the “s” indicates numbers and/or
Bracket D, respectively.
characters specific to each model.
If you use the Home Theatre System HT-CT350
Also attach the remaining Cushions to each Cushion that has
already been attached to the two Pulleys, Tilt-up Bracket, and
Belt Bracket respectively.
Remove screws from the rear of your TV.
2
If your TV has four screws tightened on the rear, remove all of
them. Refer to your TV’s operating instructions for details.
Attach the Pulleys.
3
Tighten the Pulleys B with Screws (M6×18) J to the upper two
screw holes on the rear of your TV.
Attach the Tilt-up Bracket.
4
Tighten the Tilt-up Bracket C with Screw (M6×18) J to the
C
bottom right screw hole on the rear of your TV.
Attach the Support Belt.
5
Align the Support Belt E* between the two sides of the Belt
Bracket D, and adjust the position of the Support Belt E so that
at least one hole of it hangs down below the bottom edge of the
TV.
Tighten it with Screw (M6×18) J to the bottom left screw hole
on the rear of your TV.
* Installation of the Support Belt E on the wall is recommended
for safety.
Connect the AC power cord and connecting cables.
6
For details, refer to your TV’s operating instructions.
5 (GB)
