Sony SU-B461S: 4 6 7 5
4 6 7 5: Sony SU-B461S
Table of contents
- NOTICE FOR CUSTOMERS IN THE UNITED KINGDOM CAUTION On Safety WARNING
- AC power cord (mains lead) NOTE ON AC adapter (mains adaptor)
- CAUTION PRECAUTIONS
- Step 1: Checking the parts
- Step 2: 2 Installing the TV 1 3
- 4 6 7 5
- 8 Step 3: Safety measures to prevent toppling over
- Step 4: Connecting the TV and Player
- Step 5: Step 6: Connecting the AC Performing the TV power cord (mains lead) settings
- Troubleshooting Specifications Indicator
- HDMI section General
4
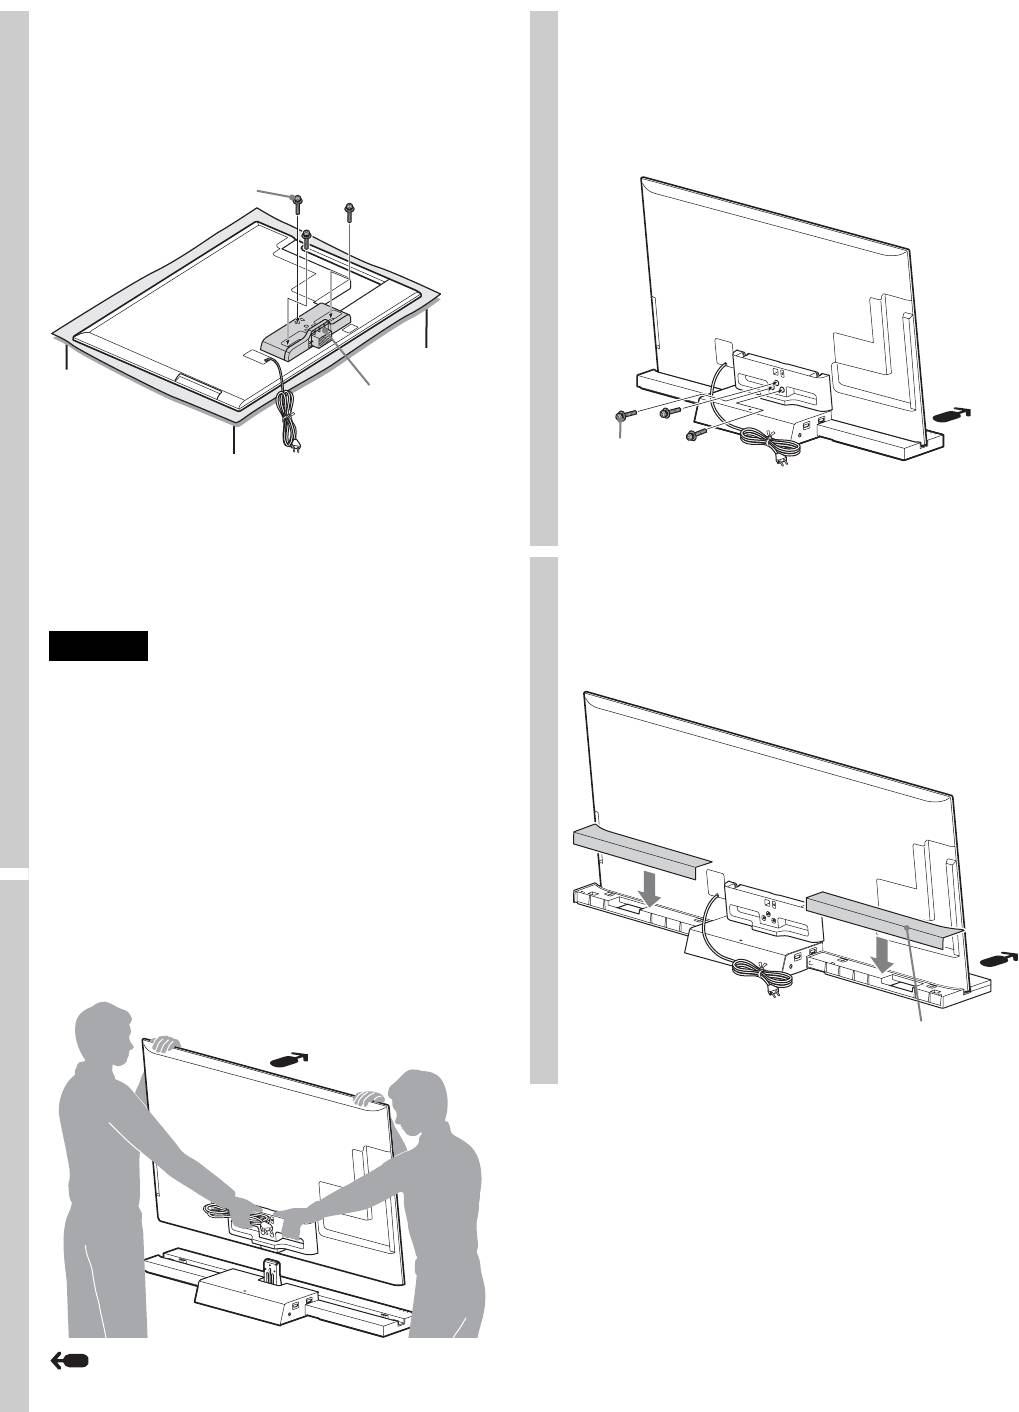
Attach the supplied Joint to the
6
Secure the TV and the TV Stand
rear of the TV with the three
with the three TV Stand Neck
screws (PSW5 × 16) (supplied).
Attachment Screws (PSW5 × 16)
Slide the supplied Joint up to attach.
(supplied).
Joint Screw
(PSW5 × 16)
Joint
TV Stand Neck
~
Attachment
Screw
• Make sure to keep the removed screws.
(PSW5 × 16)
• When removing the Table-Top Stand from the Display, lay
the display face down on a stable work surface that is larger
than the Display.
• To prevent damaging the surface of the LCD display, make
7
Attach the Rear Cover to the TV
sure to place a soft cloth on the work surface.
Stand. (For SU-B551S model
CAUTION
only)
• If pressure or shock is applied to the surface of the Display,
the LCD display may break or become damaged.
• Lay the display face down on a stable and level surface
with the Table-Top Stand hanging over the edge of the
surface.
Having the display face and the base of the Table-Top
Stand on the same level surface will create an unstable
working condition and can damage the Display.
5
Install the TV onto the TV Stand.
The TV is installed by placing it in the groove of the
TV Stand.
Rear Cover
Arrow direction shows front of the TV Stand.
8 (GB)
