Sony SU-FL300M: To Sony dealers Step 1: Checking the parts
To Sony dealers Step 1: Checking the parts: Sony SU-FL300M
Table of contents
- CAUTION WARNING On Safety
- WARNING
- CAUTION
- To Sony dealers Step 1: Checking the parts
- Step 2: Assembling the TV Stand 1 2
- 4
- 5 2 Step 3: Preparing for the installation of the TV 1
- 2 Step 4: Installing the TV 1 3
- 2 Step 5: Safety measures to prevent toppling over 1 3
- Specifications Installing the Center Speaker (For Home Theatre Systems only)
- 1 2
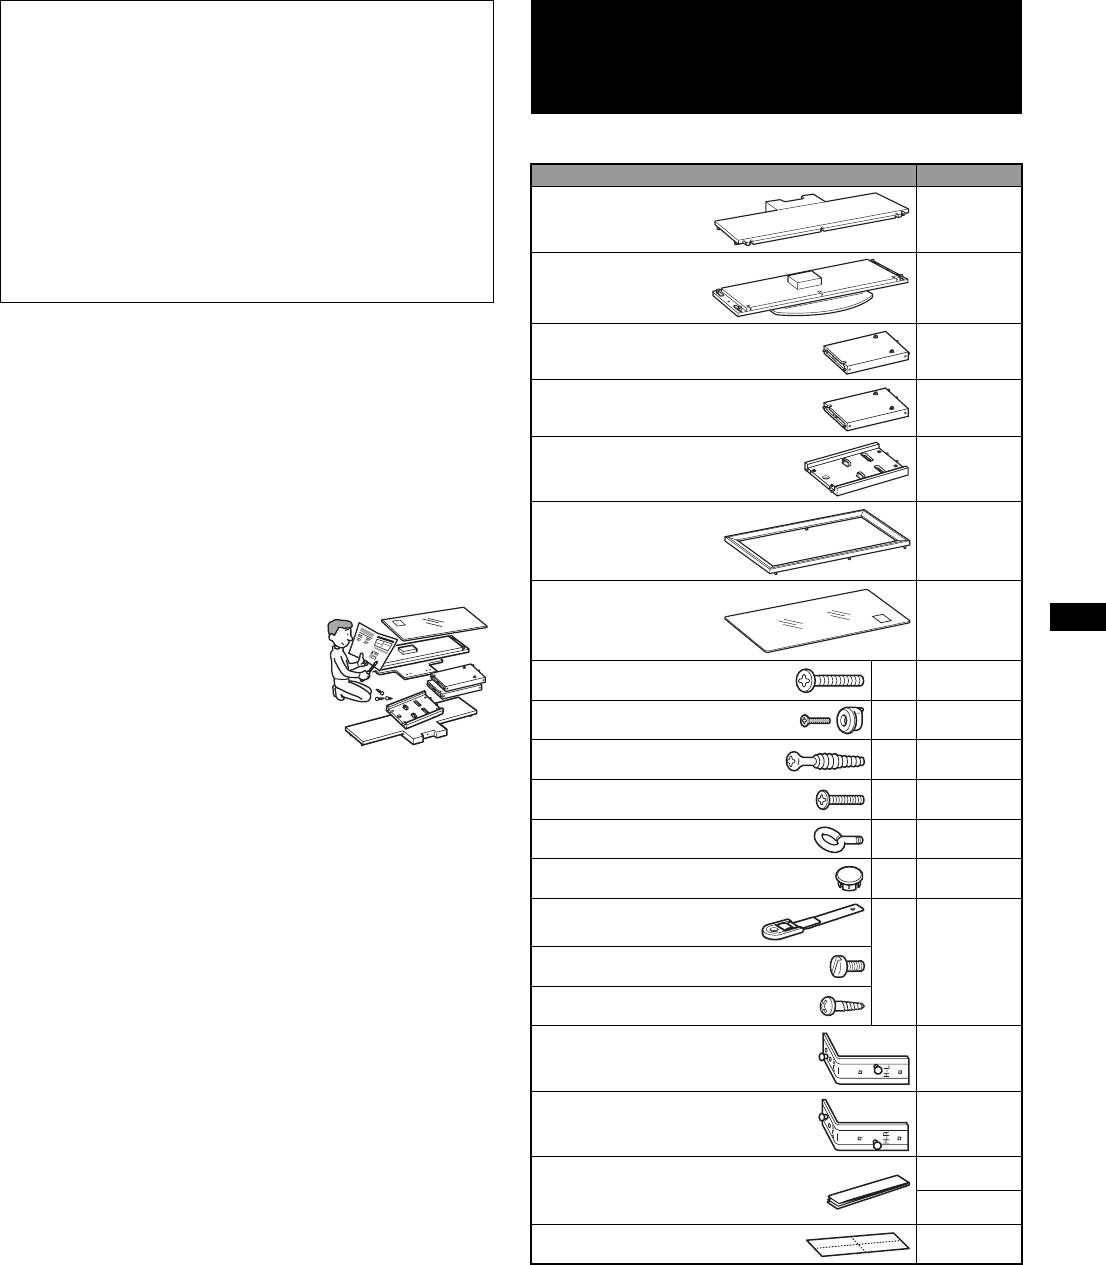
To Sony dealers
Step 1:
Be sure to thoroughly read the
Checking the parts
safety precautions described
previously and pay special
attention to safety during the
Name Quantity
Top Board
installation, maintenance,
1
checking, and repair of this
Base Board
product.
1
1
Be sure that two or more persons do
Side Pillar (L)*
1
the installation work.
1
Side Pillar (R)*
Be sure that two or more persons install the TV on the TV
1
Stand. If one person does the installation work alone, this
may result in an accident or injury. Be sure to keep children
Rear Pillar
1
away during the installation.
Front Panel
1
Be sure to assemble the TV Stand
securely following the instructions.
Glass Shelf
If a screw is not tightened securely, or
1
it has fallen out, it may cause the TV
Stand to topple over. This may cause
Screw (+PWH5 × 25)
4
damage or injury.
a*
8
Screw (+K4 × 20) + Sleeve
4
b*
2
Cam-lock screw
4
c*
4
Be careful not to injure your hands
Screw (+P4 × 15)
4
d*
4
or fingers while assembling.
Be careful not to pinch your fingers or hands when
Anchor bolt
4
e*
2
assembling the TV Stand and installing the TV.
Screw cap
4
f*
3
Support belt
Be sure to install the TV securely
following the instructions.
4
Screw (M6 × 18)
g*
1
Tighten the screws securely. If the TV is not installed
Wood screw (M3.8 × 20)
securely, it may fall and cause injury.
Speaker Hook (L)
1
Speaker Hook (R)
1
2
Paper template
4*
3
3*
Tape
1
1
*
The illustrations above are for SU-FL300M. This differs
from SU-FL300L. For SU-FL300L, there are two cutout
parts on the side of the Side Pillar.
2
*
For SU-FL300M, four paper templates are provided.
3
*
For SU-FL300L, three paper templates are provided.
4
*
The parts bags are labeled alphabetically.
Be sure to have a Phillips screwdriver that fits the screws
indicated above prior to the assembly.
5 (GB)
