Sony SU-FL300M: Step 2: Assembling the TV Stand 1 2
Step 2: Assembling the TV Stand 1 2: Sony SU-FL300M
Table of contents
- CAUTION WARNING On Safety
- WARNING
- CAUTION
- To Sony dealers Step 1: Checking the parts
- Step 2: Assembling the TV Stand 1 2
- 4
- 5 2 Step 3: Preparing for the installation of the TV 1
- 2 Step 4: Installing the TV 1 3
- 2 Step 5: Safety measures to prevent toppling over 1 3
- Specifications Installing the Center Speaker (For Home Theatre Systems only)
- 1 2
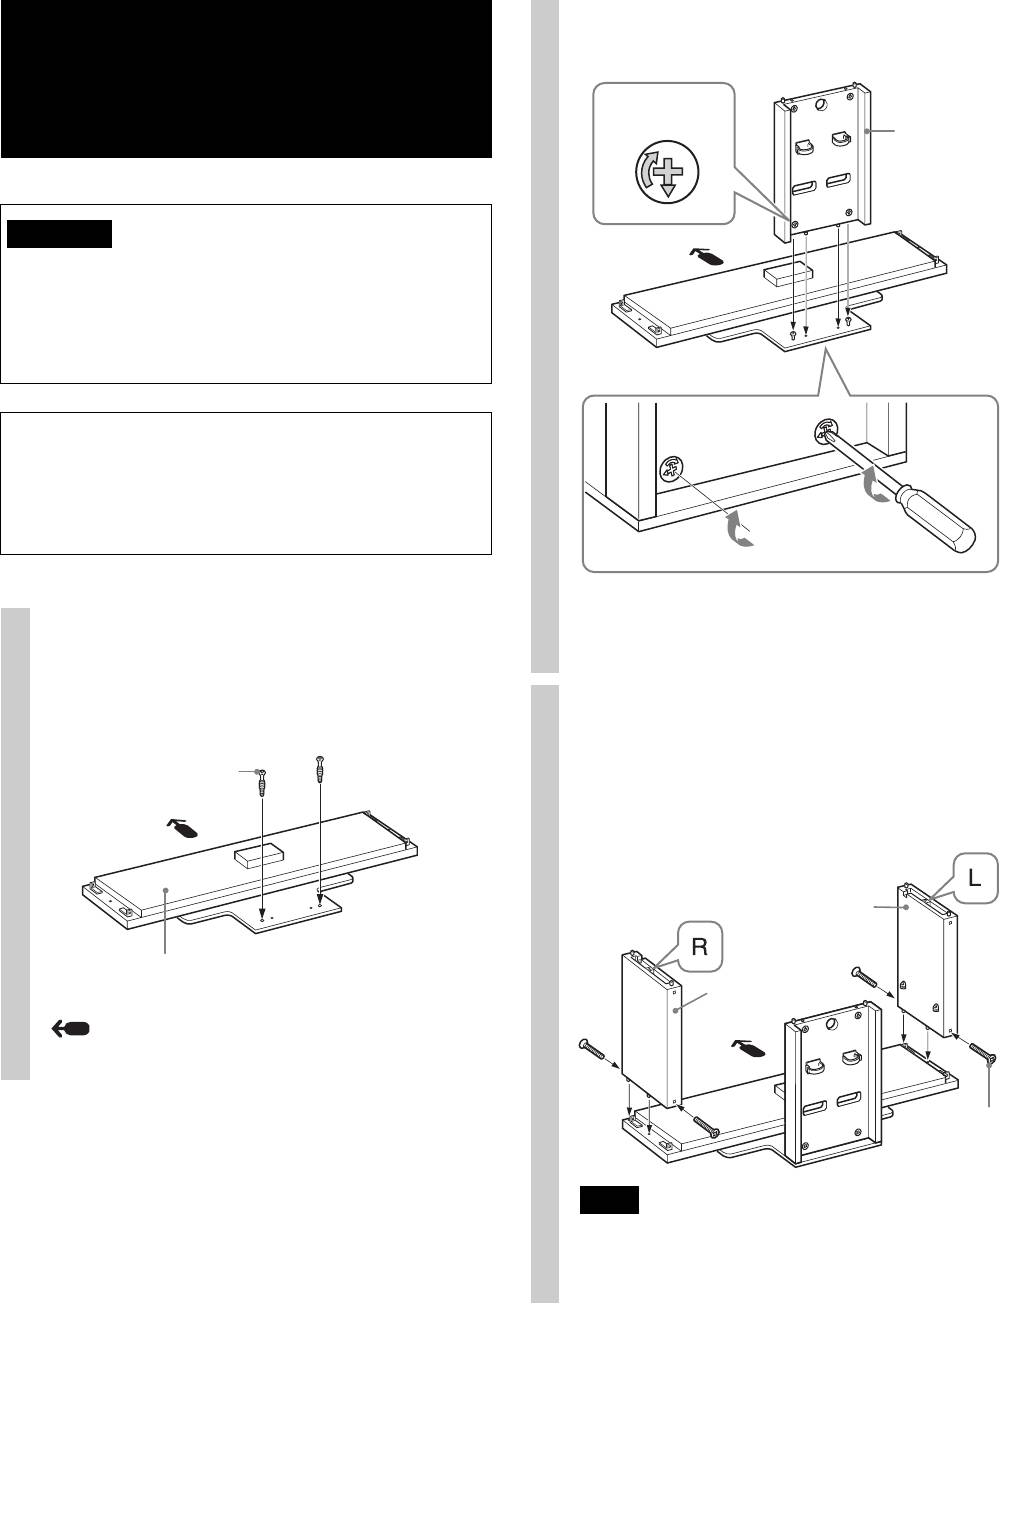
2 Attach the Rear Pillar to the Base Board and secure
Step 2:
the two Cam-locks with a screwdriver.
Assembling the TV
Cam-lock*
Stand
Rear Pillar
WARNING
If you allow the AC power cord to be pinched under or
between pieces of equipment, this may result in a short
circuit or an electric shock. If you stumble over the AC
power cord or the connecting cable, the TV Stand may
topple over and cause injury.
Decide on the installation location and lay the TV
Stand down before installing the TV.
Since the TV is heavy, it is recommended that you decide
on the installation location beforehand, and assemble the
TV Stand on site.
* Before attaching the Rear Pillar, make sure that the
F mark points downward.
1
Attach the Rear Pillar to the Base
Board.
1 Tighten the two supplied Cam-lock screws to the
2
Attach the Side Pillars to the
Base Board.
Base Board.
Cam-lock screw
Secure the Side Pillars and the Base Board with the
four supplied screws (+PWH5 × 25).
Side Pillar (L)
Base Board
Side Pillar (R)
Arrow direction shows front of the TV Stand.
Screw
(+PWH5 × 25)
Note
There are differences between the left and right pillars.
Be sure to install each pillar on the correct side.
6 (GB)
