Sony CDP-XE220: Getting Started Connecting the mains lead Where do I go next?
Getting Started Connecting the mains lead Where do I go next?: Sony CDP-XE220
Table of contents
- WARNING Precautions
- TABLE OF CONTENTS Welcome! About This Manual
- Getting Started Unpacking Hooking Up the System
- Getting Started Connecting the mains lead Where do I go next?
- Playing a CD
- Using the Display
- Playing CDs Checking the information of CD TEXT discs (CDP-XE520 only)
- Locating a Specific Track or a Particular Point in a Track
- Playing CDs Playing Tracks Repeatedly
- Playing in Random Order (Shuffle Play)
- Playing CDs Creating Your Own Programme (Programme Play)
- Playing CDs Creating a programme using the remote Checking the track order Changing the track order
- Recording Your Own Programme Recording a CD by Specifying Tape Length (Time Edit) (CDP-XE520 only)
- Recording From CDs Fading In or Out
- Recording From CDs
- Adjusting the Recording Level Notes on CDs
- Troubleshooting Specifications
- Index
Getting Started
Getting Started
You can adjust the output level to the amplifier
Connecting the mains lead
(CDP-XE520 and CDP-XE320 only)
Press LINE OUT LEVEL +/– on the remote. You can
Connect the mains lead to a wall outlet.
reduce the output level up to –20␣ dB.
FADE
When you reduce the output level, “FADE” (or
for
the CDP-XE320) appears in the display.
Where do I go next?
When you turn off the player, the output level
automatically returns to the maximum level.
Now you’re ready to use your player.
If you aren’t familiar with how to play CDs, go to the section
“Playing a CD” on page 6.
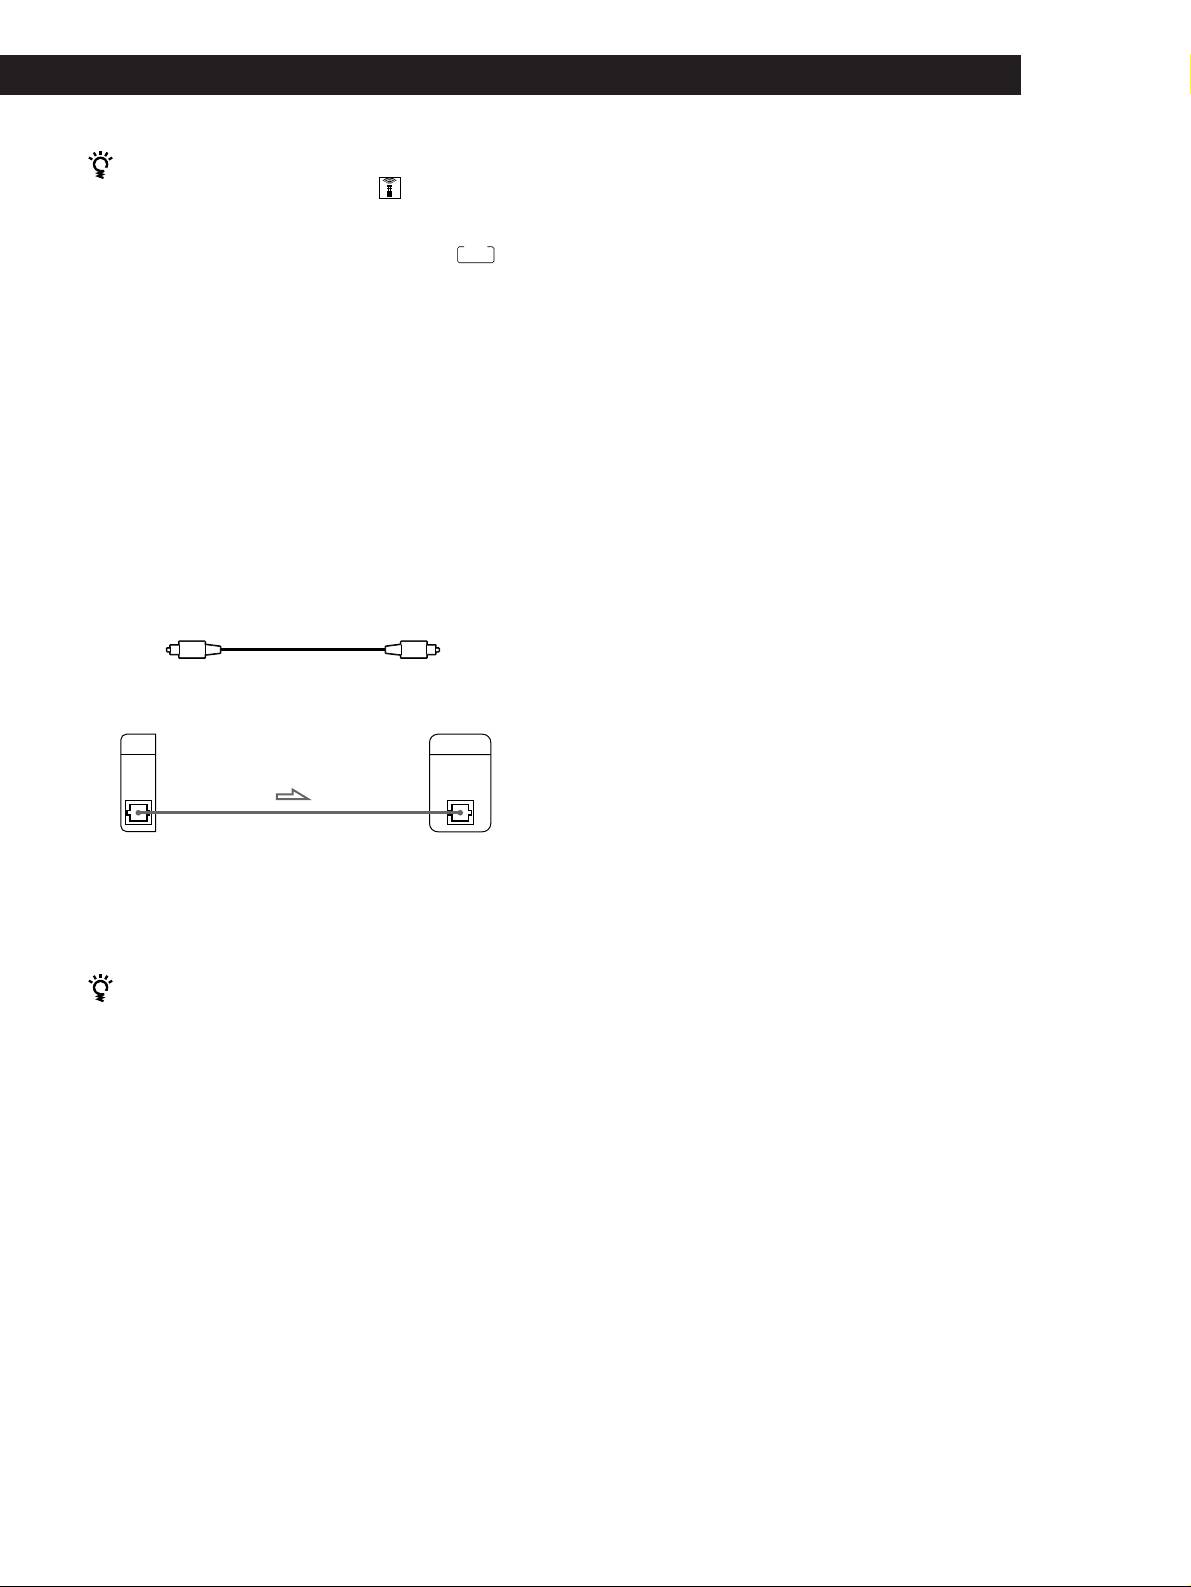
• If you have a digital component such as a digital
Then, go to the following sections for other operations.
amplifier, D/A converter, DAT or MD
Connect the component via the DIGITAL OUT (OPTICAL)
connector using the optical cable (not supplied). Take off
the cap and plug in the optical cable.
Note that you cannot use the following functions when
making this connection:
• Fading In or Out (see page 15)
• Time Fade (see page 16)
• Adjusting the output level using the LINE OUT
LEVEL +/– buttons on the remote (see above)
POC-15
Optical cable (not supplied)
CD player
Digital component
DIGITAL
DIGITAL
OUT
INPUT
OPTICAL
OPTICAL
Note
When you connect via the DIGITAL OUT (OPTICAL)
connector, noise may occur when you play CD software other
than music, such as a CD-ROM.
If you have a Sony component with the CONTROL A1
jack (CDP-XE520 only)
Connect the component via the CONTROL A1 jack. You
can simplify the operation of audio systems composed of
separate Sony components. For details, refer to the
supplementary “S-Link
TM
/CONTROL-A1 Control
System” instructions.
GB
5
