Sharp PN-60TW3: Mounting Precautions (For SHARP dealers and service engineers)
Mounting Precautions (For SHARP dealers and service engineers): Sharp PN-60TW3
10
E
Mounting Precautions (For SHARP dealers and service engineers)
• When installing, removing or moving the monitor, ensure that this is carried out by at least 4 people.
(PN-60TW3: at least 3 people.)
• Be sure to use a wall-mount bracket designed or designated for mounting the monitor.
• This monitor is designed to be installed on a concrete wall or pillar. Reinforced work might be necessary for some materials
such as plaster / thin plastic board / wood before starting installation.
This monitor and bracket must be installed on a wall which can endure at least 4 times or more the weight of the monitor.
Install by the most suitable method for the material and the structure.
• To attach a VESA-compliant mounting bracket, use M6 screws that are 5/16 inch (8 mm) to 3/8 inch (10 mm) longer than the
thickness of the mounting bracket.
Screws (M6)
Mounting bracket
Monitor mounting
5/16 - 3/8 inch (8-10 mm)
• Do not use an impact driver.
• After mounting, please carefully ensure the monitor is secure, and not able to come loose from the wall or mount.
• Do not use any screw holes other than VESA holes for installation.
n
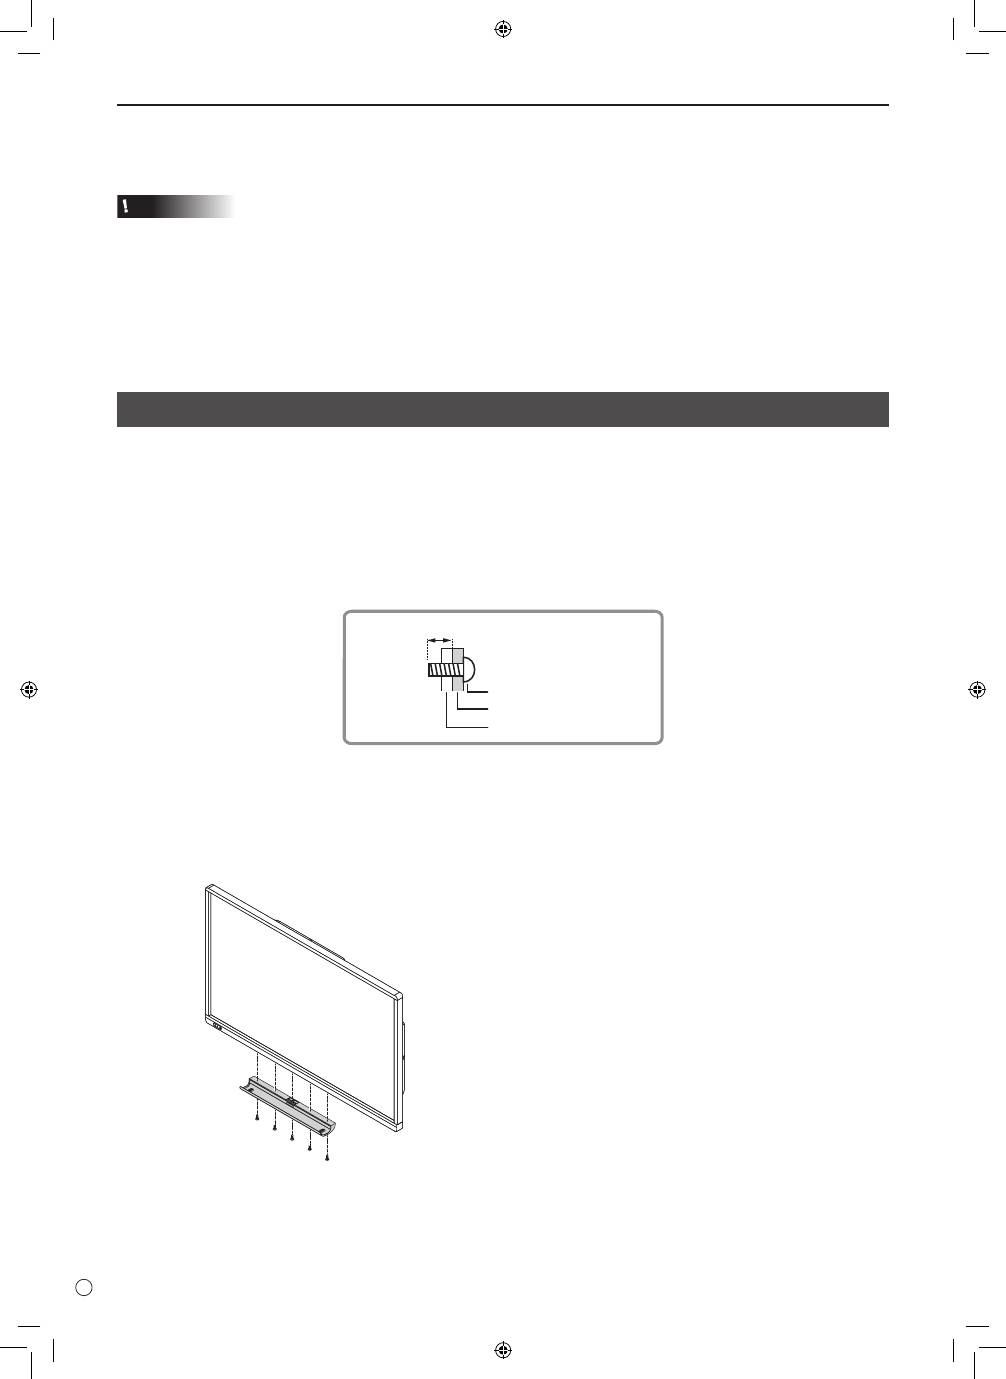
Attaching the Tray
Secure the tray using 5 tray mounting screws (M3) (supplied).
Turning power off
1. Press the POWER button.
The monitor enters standby mode.
Caution
• When the power is in the off state, the wireless LAN access point function of the wireless controller cannot be used.
• When the power is turned off, any handwritten data on the Wireless mode and Direct Drawing mode is lost. Always save any data
that you need before turning off the power.
In Direct Drawing mode or Wireless mode, a confirmation message appears when the POWER button is pressed.
• If the monitor will be turned off by SCHEDULE, LAN control, or OFF IF NO OPERATION, save any data you need in advance.
The power will turn off even if there is unsaved data. (The data will be lost.)
Оглавление
- DEAR SHARP CUSTOMER IMPORTANT INFORMATION Contents
- SAFETY PRECAUTIONS
- SAFETY INSTRUCTION
- MOUNTING PRECAUTIONS
- Supplied Components Preparing the Remote Control Unit and the Touch Pen
- Connecting the wireless adapter Connecting the wireless token
- Connections
- Turning Power On/Off
- Mounting Precautions (For SHARP dealers and service engineers)
- Table des matières
- PRÉCAUTIONS DE SÉCURITÉ
- MESURES DE SÉCURITÉ
- PRÉCAUTIONS POUR LE MONTAGE
- Composants fournis
- Connexion de l’adaptateur sans fil Connexion du jeton sans fil
- Connexions
- Mise sous tension et hors tension
- Précautions pour le montage (À l’attention des revendeurs et techniciens SHARP)
- ESTIMADO CLIENTE DE SHARP INFORMACIÓN IMPORTANTE Índice
- PRECAUCIONES DE SEGURIDAD
- INSTRUCCIONES DE SEGURIDAD
- PRECAUCIONES DE MONTAJE
- Componentes suministrados
- Conexión del token inalámbrico Conexión del adaptador inalámbrico
- Conexiones
- Encendido/apagado
- Precauciones de montaje (para distribuidores y técnicos de servicio de SHARP)
- Inhalt
- SICHERHEITSVORKEHRUNGEN
- SICHERHEITSANLEITUNG
- WICHTIGE HINWEISE ZUR BEFESTIGUNG Technische Daten
- Mitgelieferte Komponenten Vorbereitung der Fernbedienung und von Touch-Pen
- Anschließen des Drahtlos-Adapters Anschließen des Drahtlos-Tokens
- Anschlüsse
- Ein- und ausschalten
- УВАЖАЕМЫЙ КЛИЕНТ КОМПАНИИ SHARP ВАЖНАЯ ИНФОРМАЦИЯ Содержание
- ПРАВИЛА ТЕХНИКИ БЕЗОПАСНОСТИ
- ИНСТРУКЦИИ ПО БЕЗОПАСНОСТИ
- МЕРЫ ПРЕДОСТОРОЖНОСТИ ПРИ КРЕПЛЕНИИ
- Комплектные принадлежности Подготовка пульта дистанционного управления и Стилус
- Подключение беспроводного адаптера Подключение токена беспроводной связи
- Соединения
- Включение/выключение питания
- Меры предосторожности при креплении (Для дилеров и инженеров по обслуживанию SHARP)
