Asus P5E3 Premium WiFi-AP@n: ATI CrossFire™
ATI CrossFire™: Asus P5E3 Premium WiFi-AP@n

®
This chapter tells how to install ATI
CrossFire™ graphics cards to avail of
ATI’s Multi-Video Processing technology.
®
ATI
CrossFire™
6
technology support

Chapter summary
6
6.1 Overview ....................................................................................... 6-1
6.2 Installing CrossFire™ graphics cards .......................................
6-2
6.3 Software information ...................................................................
6-5
ASUS P5E3 Premium/WiFi-AP @n

6.1 Overview
®
The motherboard supports the ATI
CrossFire™ technology that allows you to
install multi-graphics processing units (GPU) graphics cards. Follow the installation
procedures in this section.
6.1.1 Requirements
• CrossFire™ Edition graphics card (Master)
• CrossFire™-ready graphics card (Slave)
• CrossFire™-ready motherboard
• Make sure that your power supply unit (PSU) can provide at least the
minimum power required by your system. See 8. ATX power connectors on
page 2-34 for details.
®
• Visit the ATI website or download the Radeon
X850 Crossre™ Edition
User’s Guide from the support CD for detailed hardware requirements and
installation procedures.
• The ATI CrossFire™ technology supports only the following operating
systems:
®
- Windows
XP 32-bit (Home or Professional) with Service
Pack 2 (SP2)
®
- Windows
XP Professional 64-bit Edition.
®
• Make sure that your graphics card driver supports the ATI
CrossFire™
Technology. Download the latest driver from the ATI website (www.ati.com)
• The maximum resolution of Radeon™ X850 CrossFire™ Edition is 1600 x
1200 at 65 MHz when you use DVI output.
6.1.2 Before you begin
Uninstall other graphics card drivers in your system
To uninstall other graphics card drivers:
1. Close all current applications.
2. Go to
Control Panel > Add/Remove Programs.
3. Select your current graphics card driver/s.
4. Select
Add/Remove.
5. Restart your system.
ASUS P5E3 Premium/WiFi-AP @n 6-1
6.2 Installing CrossFire™ graphics cards
Before installing a CrossFire™ system, refer to the user guide that came with
®
the ATI
CrossFire™ Edition graphics card.
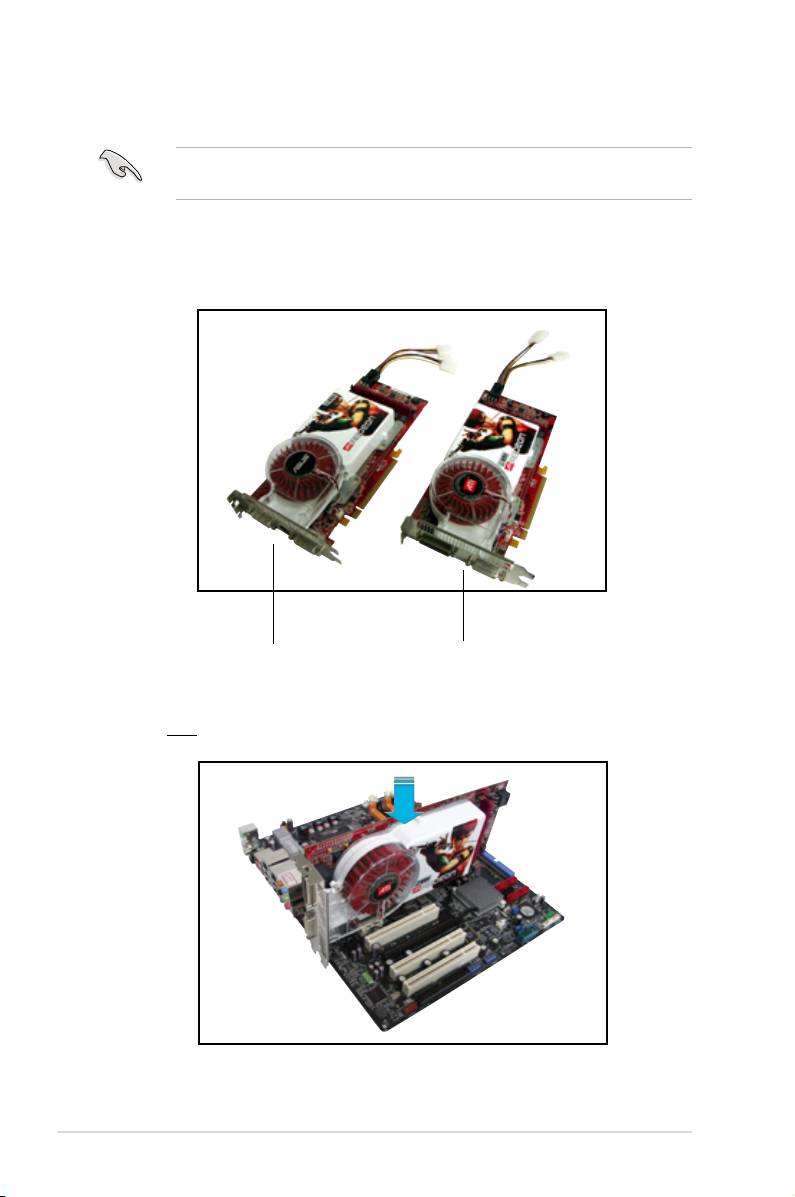
To install the graphics cards:
1. Prepare one CrossFire™ Edition (Master) graphics card and one
CrossFire™-ready (Slave) graphics card.
Slave graphics card Master graphics card
2. Insert the CrossFire™ Edition (Master) graphics card into the PCI Express
x16 blue slot. Make sure that the card is properly seated on the slot.
®
6-2 Chapter 6: ATI
MVP technology support
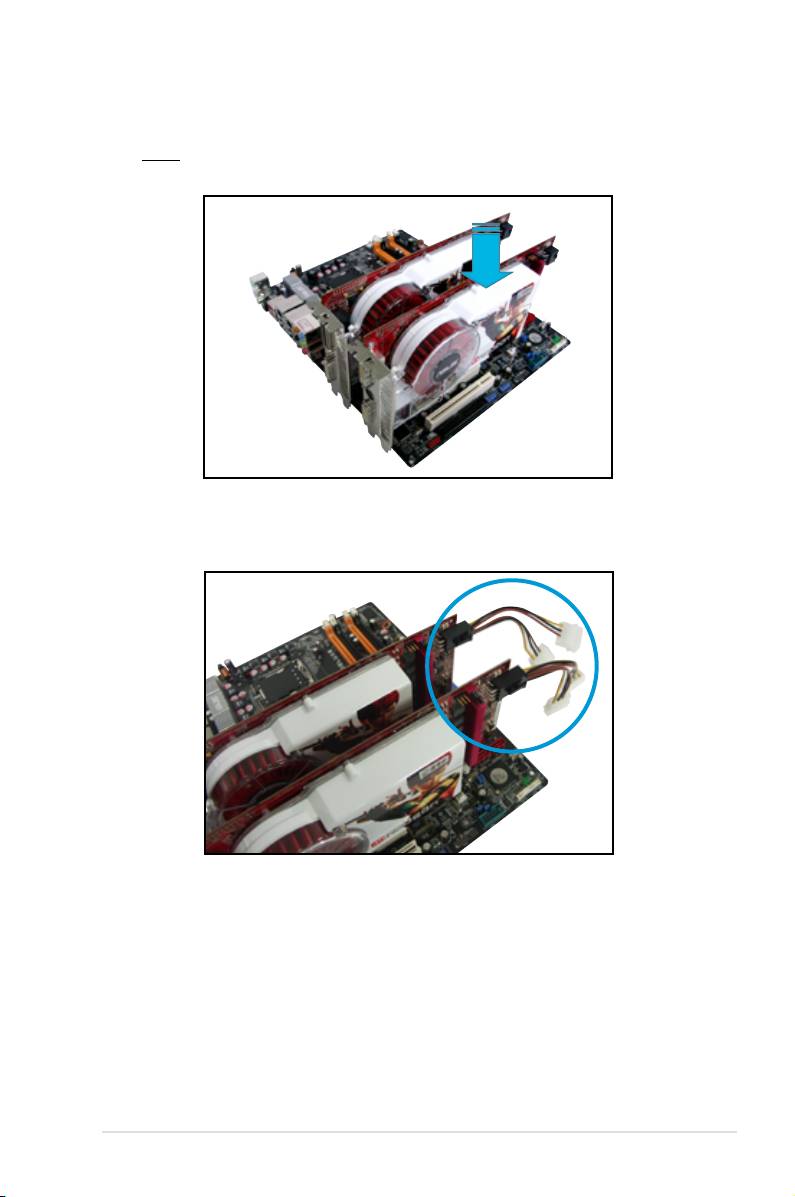
3. Insert the CrossFire™-ready (Slave) graphics card into the PCI Express x16
black slot. Make sure that the card is properly seated on the slot.
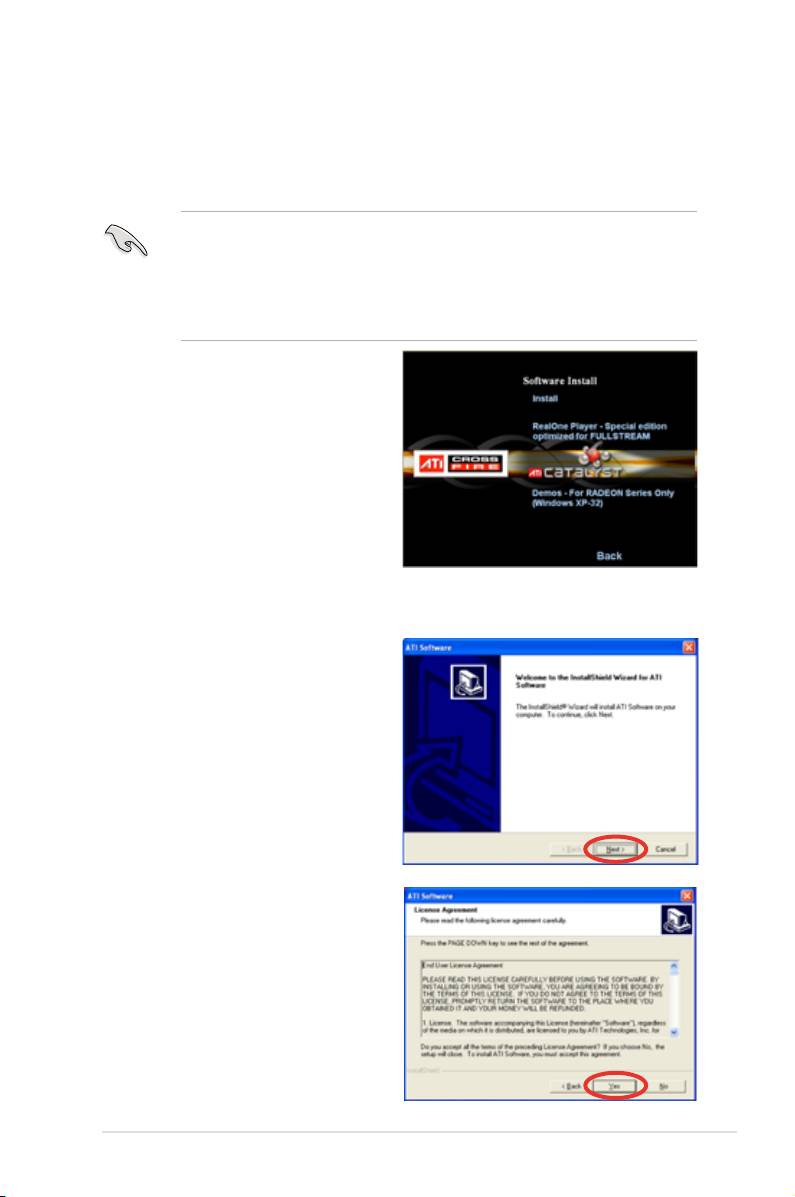
4. Connect an auxiliary power source from the power supply to the graphics
cards.
ASUS P5E3 Premium/WiFi-AP @n 6-3

5. Connect one end of the external cable to the Master graphics card.
6. Connect the other end of the external cable to the Slave graphics card.
7. Connect the loose end to the corresponding port on your monitor.
6
7
®
6-4 Chapter 6: ATI
MVP technology support
6.3 Software information
6.3.1 Installing the device drivers
Refer to the documentation that came with your graphics card package to install
the device drivers.
The ATI CrossFire™ technology supports only the following operating systems:
®
• Windows
XP 32-bit (Home or Professional) with Service
Pack 2 (SP2)
®
• Windows
XP Professional 64-bit Edition.
®
• Windows
Vista 32/64 bit Edition. (Will be ready later. Visit the ATI
website (www.ati.com)
1. Turn on your system and log in
with administrator rights.
®
2. Windows
auto-detects the
CrossFire™ graphics cards
and displays the Found New
Hardware Wizard window. Click
Cancel.
3. Place the CrossFire™ installation
CD in your optical drive and install
drivers from the opening menu.
4. Click Next to continue from the
installation window that appears.
5. Read the License Agreement,
then click Yes.
ASUS P5E3 Premium/WiFi-AP @n 6-5
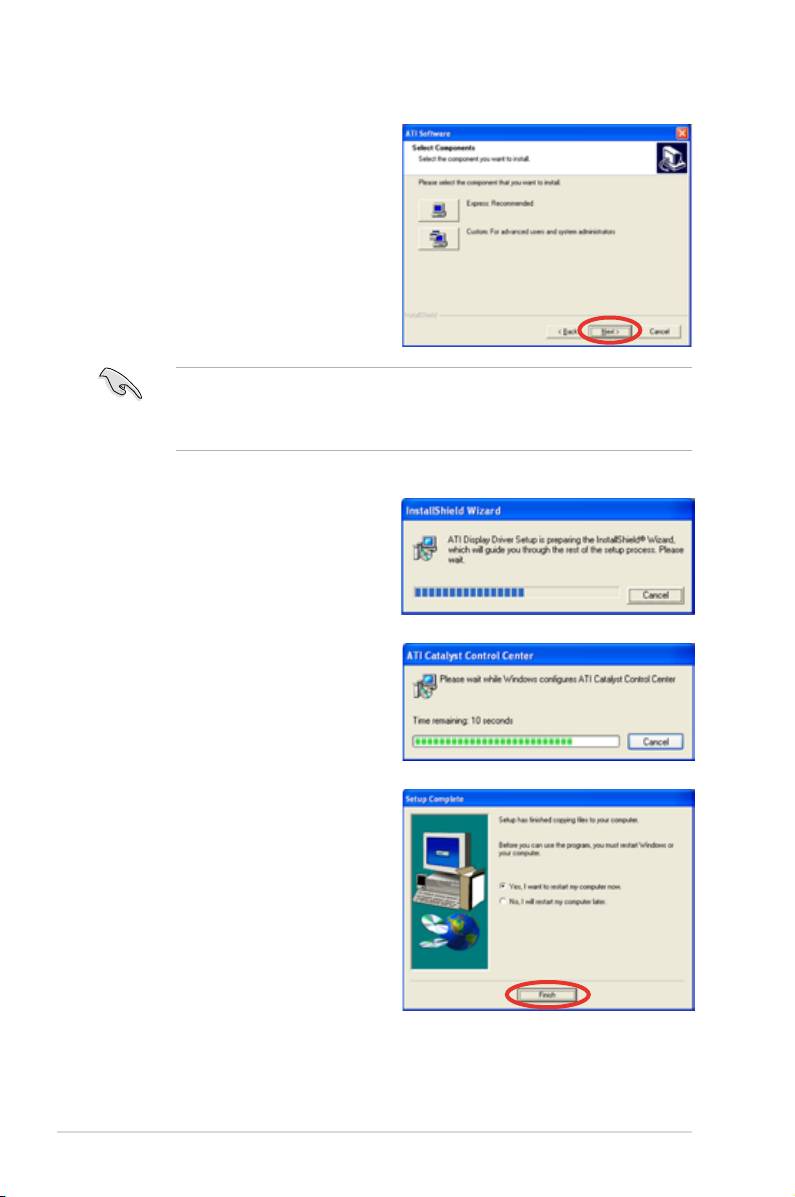
6. Select the components that you
want to install, then click Next.
•
Select Express to install the HydraVision™ multi-monitor and desktop
management software, as well as the ATI driver.
•
Select Custom to individually choose desired software components.
Setup prepares the installation
wizard that will guide you to setup
process.
Windows automatically congures
the ATI Catalyst Control Center.
The status windows indicates the
progress of the installation.
7. The Setup Complete window
appears, indicating that the driver
les have been copied to your
computer.
Click
Yes to restart your computer
now or No to restart later
8. Click
Finish.
®
6-6 Chapter 6: ATI
MVP technology support

6.3.2 Using the Catalyst™ Control Center
The Catalyst™ Control Center allows you to access display features of the ATI
hardware and software you installed. Use this application to adjust your graphic
settings, enable/disable connected devices, and change your desktop orientation.
Launching the Catalyst™ Control Center
There are several ways to launch the Catalyst™ Control Center:
®
•
On the Windows
task bar, click Start > ATI Catalyst™ Control Center >
Catalyst™ Control Center
•
Double-click the Catalyst™ Control Center desktop shortcut.
®
•
On the Windows
task bar, double-
click the Catalyst™ Control Center
icon.
ASUS P5E3 Premium/WiFi-AP @n 6-7
The Catalyst™ Control Center Dialog Box
View
The Catalyst™ Control Center provides two views:
Standard - simple view with wizards for beginners
Advance - allows advanced users to access and congure the complete
features of the software
Set to Advance view to enable the CrossFire™ function.
®
6-8 Chapter 6: ATI
MVP technology support
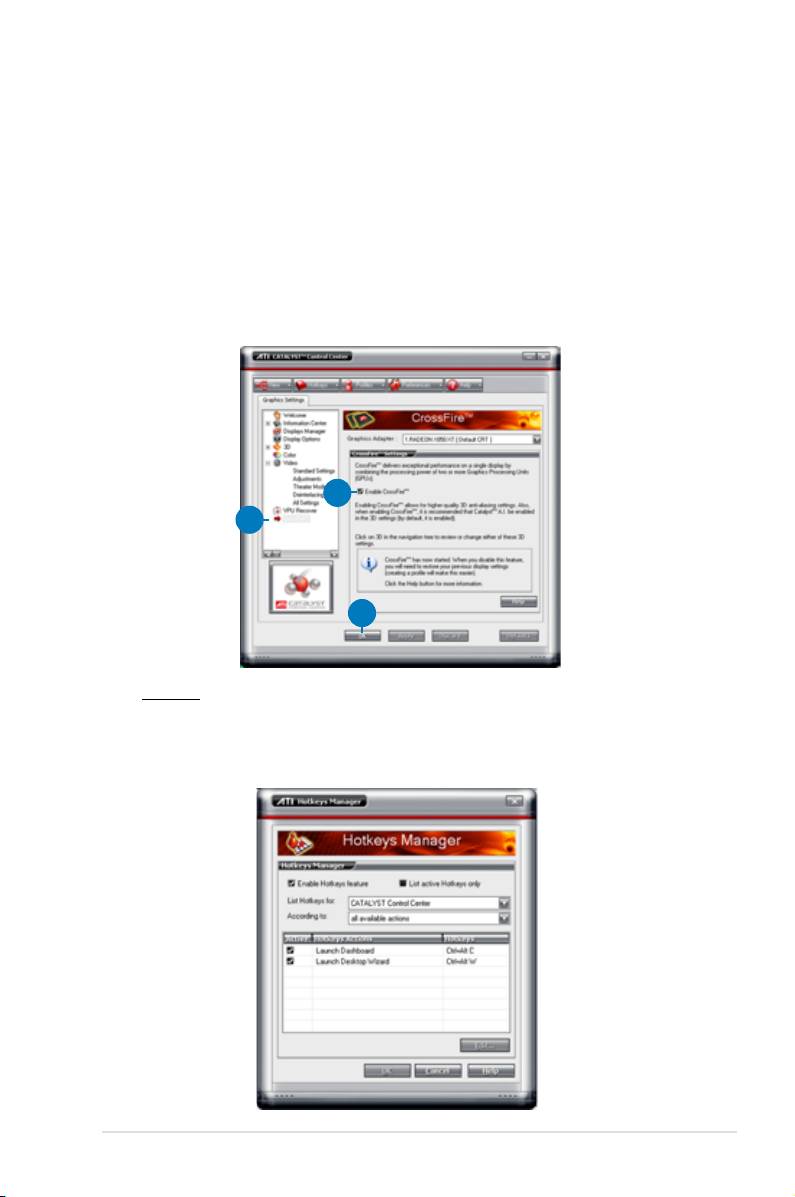
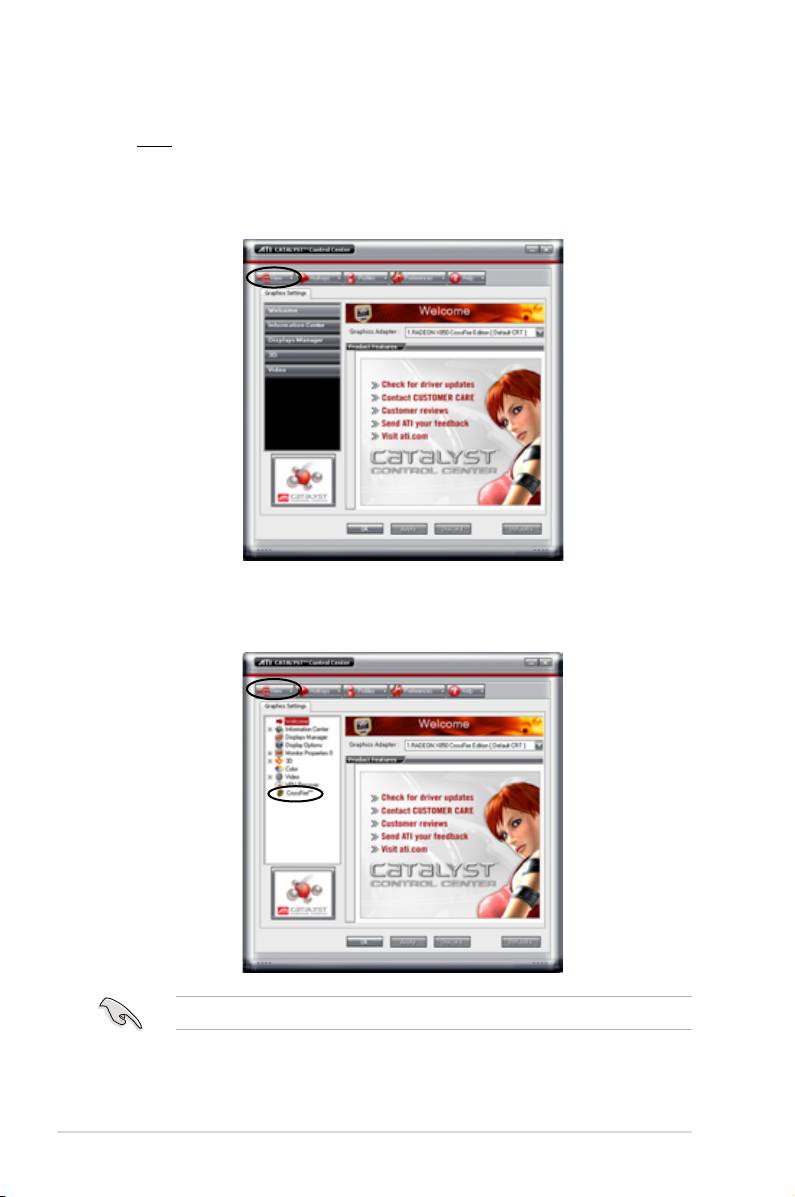
To enable CrossFire™:
1. Set the view to
Advance.
2. Click the Crossre™ item in Graphics Settings.
3. In the CrossFire™ Settings dialog, tick the box opposite
Enable
CrossFire™.
4. Click
OK to effect the setting.
3
2
4
Hotkeys
Click the Hotkeys tab on the Catalyst™ Control Center to access the
Hotkeys Manager, which allows you to create key combinations as shortcuts
for performing certain functions quickly.
ASUS P5E3 Premium/WiFi-AP @n 6-9
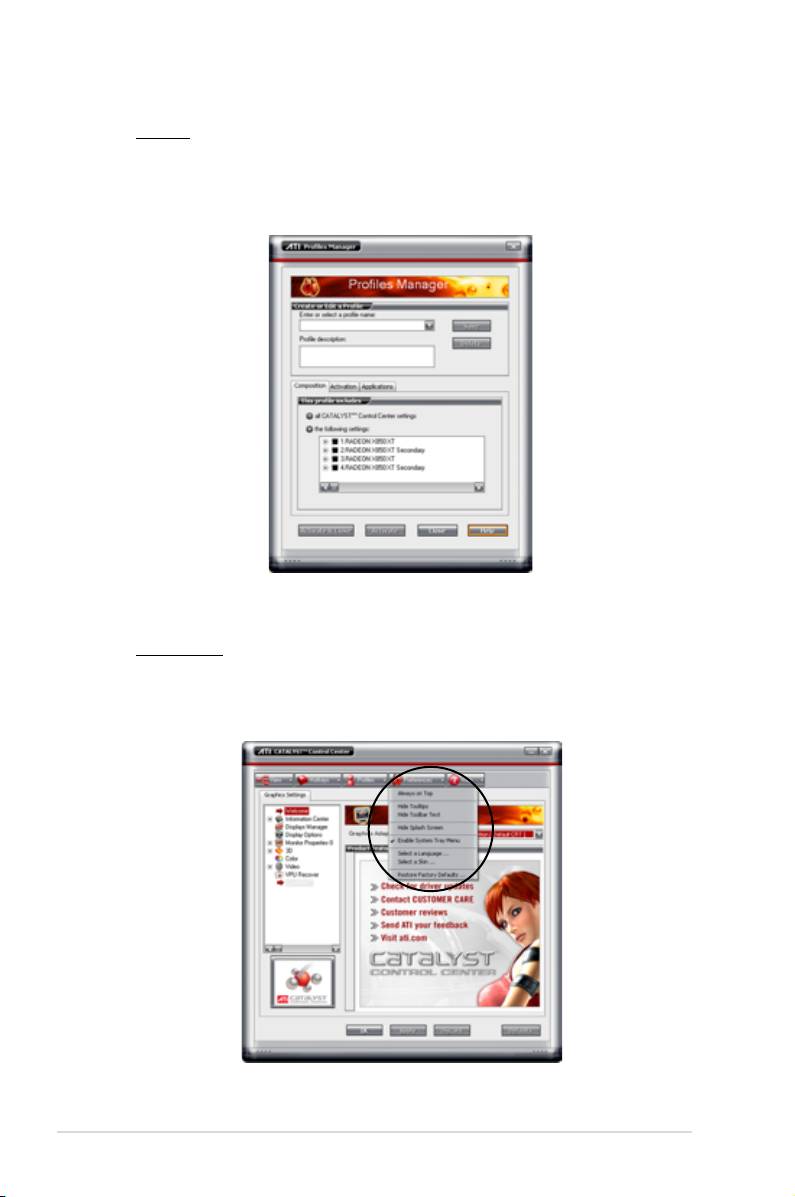
Profiles
Click the Proles tab on the Catalyst™ Control Center to access the Proles
Manager, which allows you to create customized environments for your
desktop, video, and 3D applications.
Preferences
Click the Preferences tab on the Catalyst™ Control Center to select a
language, restore defaults, change skins, or enable/disable the System Tray
icon.
®
6-10 Chapter 6: ATI
MVP technology support
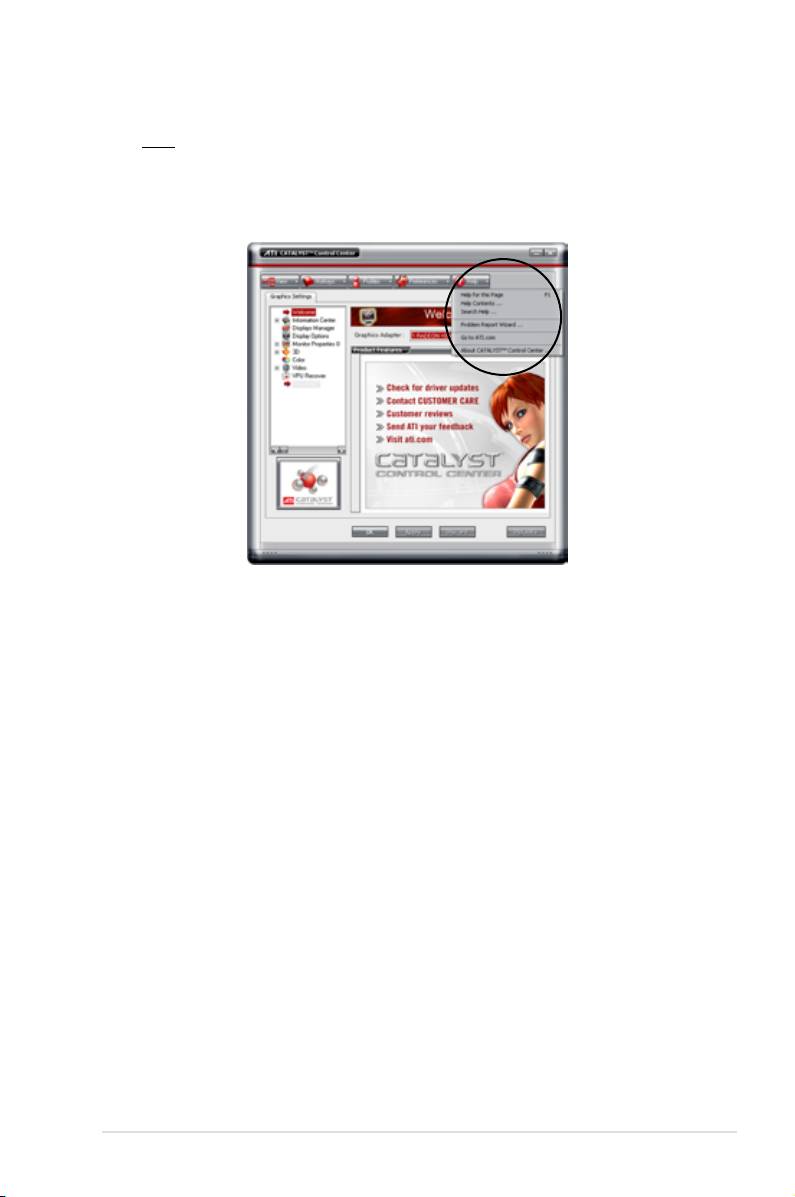
Help
Click the Help tab on the Catalyst™ Control Center to access the online help
system, generate a Problem Report, and get the Catalyst™ Control Center
version information.
ASUS P5E3 Premium/WiFi-AP @n 6-11

®
6-12 Chapter 6: ATI
MVP technology support
Оглавление
- Product
- Hardware
- Powering up
- BIOS setup
- Software
- ATI CrossFire™
- CPU features
