Sony KDL-40R453B: Installing the TV onto the Checking the parts wall Preparing for installation
Installing the TV onto the Checking the parts wall Preparing for installation: Sony KDL-40R453B
Table of contents
- Installation Information for Using Sony Wall-Mount Bracket (SU-WL450)
- On Safety To Customers WARNING To Customers CAUTION To Sony dealers Precautions
- Installing the TV onto the Checking the parts wall Preparing for installation
- Deciding on the installation location 1 Decide on the installation location.
- 2 Select Wall mounting style. It is selectable as shown below. WARNING 3 Fit Base Adaptor by using Screw (PSW 4x10) to Base (20) when selecting 2-a.
- Installing the Base on the wall 4 Decide the positions of the screws for installing the Base (20) .
- Preparing for the installation of the TV
- Installing the TV on the wall
- Confirming the completion of the installation Other information
- Specifications
Installing the TV onto the
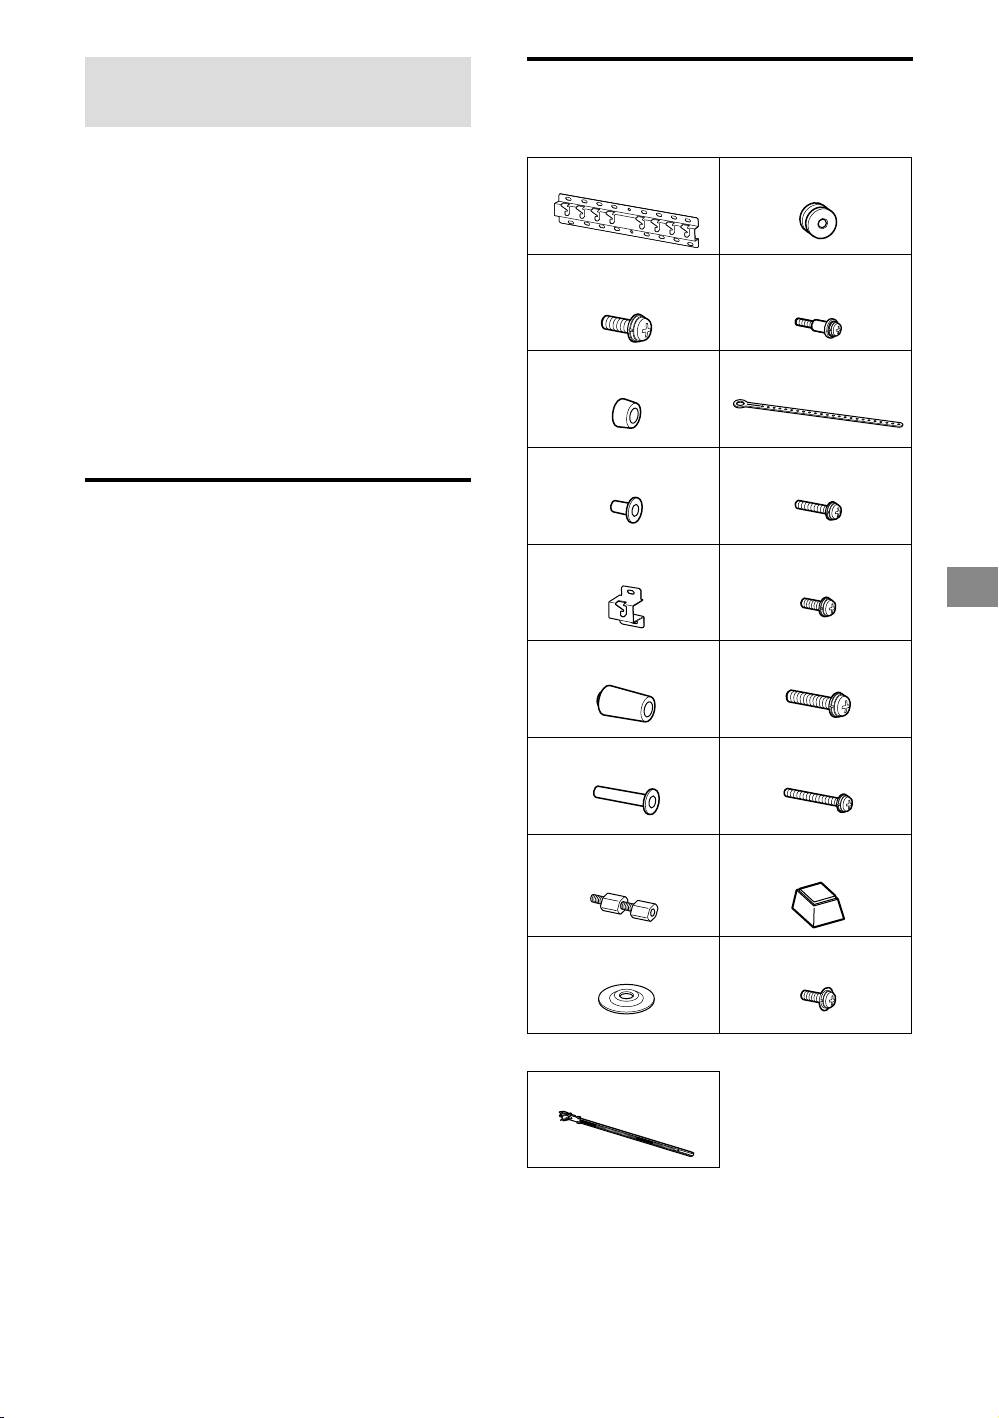
Checking the parts
wall
Supplied with SU-WL450
Installation procedure differs, depending on
Verify that all the parts are included.
your TV.
Base (20) (1) Pulley (2)
Use the Wall-Mount Bracket SU-WL450 to
install the TV to the wall.
Note
If the Table-Top Stand is attached to the TV, detach the
PSW 6x20 (4) PSW 4x20 with
Table-Top Stand beforehand. See the Quick Start Guide
Bush (2)
and follow in reverse order the steps to attach the
Table-Top Stand.
Place the TV with its screen facing down on a level and
stable surface covered with a thick and soft cloth, when
Spacer (20) (2) Belt (1)
securing the Attachment parts for Wall-Mount Bracket or
when removing the Table-Top Stand from the TV to
prevent damaging the surface of the LCD display.
Be sure to store the removed screws in a safe place,
keeping them away from children.
Bush (20) (M4) (2) PSW 4x20 (2)
Preparing for installation
Have the TV’s Reference Guide at hand
before installation.
Base Adaptor (2) PSW 4x10 (8)
Be sure to have a Phillips screwdriver that
GB
fits the screws prior to the assembly.
Confirm the installing position of your TV.
Prepare four or more screws of 8 mm
diameter and one screw of 5 mm or
Spacer (60) (2) PSW 6x50 (2)
equivalent (not supplied). Select screws
suitable for the material of the wall.
Bush (M4) (2) PSW 4x50 (2)
Wall-Mount
Spacer (2)
Attachment (S) (2)
Washer (1) PSW 5x12 (1)
Supplied with the TV
Cable holder (2)
− 5 (GB) −


