Remington PG180: инструкция
Раздел: Красота, здоровье, спорт. туризм, хобби
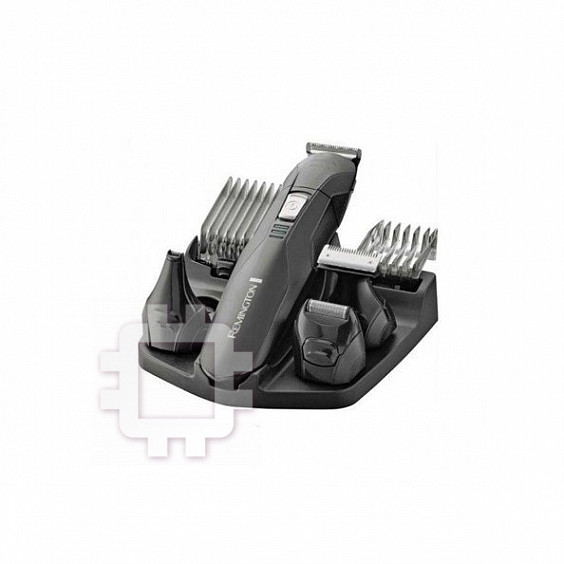
Тип: Набор для персонального ухода

Характеристики, спецификации
Инструкция к Набору для персонального ухода Remington PG180

BATTERY OPERATED GROOMING KIT
PG180

ENGLISH
ENGLISH
Thank you for buying your new Remington® product.
Before use, please read these instructions carefully and keep them safe. Remove all packaging
4
before use.
3
A CAUTION
• Don’t use the appliance for any purpose other than those described in these instructions.
• Do not use the appliance if it is damaged or malfunctions.
C KEY FEATURES
1 On/o switch
2 Groomer
2
3 Detail trimmer
4 Miniscreen shaver
5 Nose, ear, eyebrow trimmer
5
6 1 attachment guide comb
1
• 3 year guarantee
C GETTING STARTED
,Batteries
• Make sure the product is turned o
• Slide o the battery compartment cover then pull o.
• Insert 2 “AA” alkaline battery, so that the (+) and (-) marks on the battery face the same
mark in the battery compartment.
• Replace the battery compartment cover.
Note: Remove batteries if the unit is not in use for long periods.
6
C HOW TO USE
, Attaching and removing the comb
The adjustable guide comb gives 5 dierent trim lengths. To fasten the guide comb, snap on
to the back of the detail trimmer head.
If you are trimming for the rst time start with the maximum trimming length setting.
, Before you begin
Comb facial hair with a ne comb before you start trimming. Hairs should be dry and without
any waxes or lotions before using the groomer
, To thin and taper beards or moustaches
• Attach the trimmer blade.
• Place the hair length attachment on the trimmer blade, select the desired length and
2 3

ENGLISH
ENGLISH
switch on.
• Start trimming under the chin, following the jawbone line. Work toward the ear and
,Using your miniscreen shaver
upper beard line using an upward motion.
• Hold the groomer so the MiniScreen gently touches your face.
• Use short, and well-controlled movements to shave around your beard/moustache.
Use your free hand to stretch your skin. This encourages the hair to stand upright,
,To trim edge of beard or moustache
making it easier to shave.
• Attach the trimmer blade.
• Hold groomer with cutting blade facing you.
Note: The MiniScreen shaver was designed to shave the detail areas around your beard/
• Start with edge of beard/moustache line, and with the cutting blades resting lightly
moustache/sideburns. It was not designed to shave your entire face. For a close
against your skin, use slow movements to create a beard/moustache line.
comfortable shave, guaranteed, use one of Remington’s electric shavers.
E Tips for best results
,To trim sideburns
Comb your hair in the direction that it grows so that the hairs are at their maximum height
• Attach the trimmer blade.
and facing in the same direction.
• Use a small comb to lift the hairs. Hold the comb at the desired beard or moustache
After trimming, lightly go over the trimmed areas with the foil to get a smooth clean nish.
length.
Since all hairs do not grow in the same direction, you may want to try dierent trimming
• Move the groomer along the comb to cut the hairs. Use light pressure and
positions (i.e. upwards, downwards or across) for better results.
well-controlled movements to trim hair.
C CARE FOR YOUR GROOMER
,Trimming the nape of your neck
Care for your product to ensure a long lasting performance. We recommend that you clean
• Attach the trimmer blade.
your groomer after each use.
• Use your ngers to lift the hair at the base of your head up o the neck. Your index
The easiest and the most hygienic way to clean the groomer is by rinsing the product head
nger should be covering the roots of the hairs you are lifting to prevent accidental
after use with warm water. Always keep the protective cap on the shaving head and keep
removal by groomer.
the trimmer in the “o” position when the shaver is not in use.
• Using your other hand, hold the groomer to the base of your neck with the cutting unit
facing up, and move the groomer up the length of the neck until the unit touches your
nger covering the hair roots at the base of your head. Move the unit slowly when
E After each use
performing this operation and to keep the hair roots at the base of your head out of the
• Rinse the accumulated hair from the cutters and shake o excess water. Alternatively,
way of the groomer.
use a brush.
• Gently tap on a at surface to remove hair particles, and brush the remaining hairs
,To remove hair from nose and ear
away.
• Place one or two drops of cutter oil or sewing machine oil on the blades. Turn the
• Attach nose, ear & eyebrow attachment.
clipper on to distribute the oil evenly, wipe o any excess oil.
• Insert groomer’s cutting unit gently into the nostril or ear.
• Wipe the main unit with a damp cloth and dry immediately.
• Gently move the groomer in and out of the nostril or ear and at the same time rotate
Note: Ensure that the groomer is turned o when applying the oil or rinsing under the
the groomer.
tap.
• Avoid inserting the cutting unit more than 6mm into your nostril or ear.
,To remove hair from eyebrows
F IMPORTANT SAFETY INSTRUCTIONS
• Attach nose, ear, eyebrow attachment.
• The appliance must only be used by or under the supervision of a responsible adult.
• Gently guide cutting unit to stray, unwanted hairs along the eyebrow line or protruding
• Use and store the appliance out of reach of children.
from the eyebrow itself.
• Do not use attachments other than those we supply.
• To remove the hairs completely lower onto the skin and move over desired area.
• This product is battery operated only
• Use slow and well-controlled movements.
• This product uses alkaline batteries. At the end of their life the batteries must be
removed from the appliance and be recycled or disposed of properly in accordance
with your state and local requirements.
4 5
ENGLISH
DEUTSCH
• Do not put in re or mutilate your batteries when disposing as they may burst and
Vielen Dank, dass Sie sich für den Kauf Ihres neuen Remington® Produktes entschieden
release toxic materials.
haben.
• Do not short circuit as it may cause burns.
Lesen Sie diese Bedienungsanleitung vor der Verwendung des Produkts aufmerksam durch
• Do not use the appliance if it is damaged or malfunctions.
und bewahren Sie sie für später auf. Entfernen Sie vor dem Gebrauch vollständig die
• Store the product at a temperature between 15°C and 35°C.
Verpackung.
• Turn o when cleaning or using under running water.
• Don’t put the appliance in liquid, don’t use it near
water in a bath-tub, basin or any other vessel, and
A VORSICHT
don’t use it outdoors.
• Benutzen Sie das Gerät ausschließlich zu den in diesen Anweisungen beschriebenen
Zwecken.
• Benutzen Sie das Gerät keinesfalls, wenn es beschädigt ist oder Fehlfunktionen zeigt..
H ENVIRONMENTAL PROTECTION
To avoid environmental and health problems due to hazardous substances in electrical and
electronic goods, appliances marked with this symbol must not be disposed of with
C HAUPTMERKMALE
unsorted municipal waste, but recovered, reused or recycled.
1 Ein/Aus-Schalter
2 Bartschneider
3 Präzisionstrimmer
4 MiniScreen-Rasierer
E
SERVICE AND GUARANTEE
5 Nasenhaar-, Ohren- und Augenbrauen-Trimmer
6 1 Trimmaufsätze
• 3 Jahre Garantie
This product has been checked and is free of defects.
We guarantee this product against any defects that are due to faulty material or
workmanship for the guarantee period from the original date of consumer purchase.
C VORBEREITUNGEN
If the product should become defective within the guarantee period, we will repair any such
defect or elect to replace the product or any part of it without charge, provided there is
, BATTERIEN
proof of purchase.
• Schalten Sie das Gerät aus.
This does not mean an extension of the guarantee period.
• Drehen Sie die Batteriefachabdeckung und heben Sie sie ab.
In the case of a guarantee simply call the Service Centre in your region.
• Setzen Sie 2 AA Batterie so ein, dass die (+) und (-) Markierungen auf der Batterie mit
This guarantee is oered over and above your normal statutory rights.
den Markierungen im Batteriefach übereinstimmen.
The guarantee shall apply in all countries in which our product was sold via an authorised
• Setzen Sie die Batteriefachabdeckung wieder ein, indem Sie das der Taste
dealer.
gegenüberliegende Ende einschieben und auf die Taste drücken, bis der Deckel mit
This guarantee does not include damage to the product by accident or misuse, abuse,
hörbarem Klicken einrastet.
alteration to the product or use inconsistent with the technical and/or safety instructions
Entfernen Sie die Batterien aus dem Gerät, wenn es über einen längeren Zeitraum nicht
required.
genutzt wird.
This guarantee shall not apply if the product has been dismantled or repaired by a person
not authorised by us.
If you ring the Service Centre, please have the Model No. to hand, as we won’t be able to
C VERWENDUNG
help you without it.
It’s on the rating plate which can be found on the appliance.
, Anbringen und entfernen von Kammaufsätzen
Der verstellbare Kammaufsatz bietet 5 verschiedene Schnittlängeneinstellungen. Um den
Kammaufsatz zu befestigen, lassen Sie ihn an der Rückseite des Präzisionstrimmkopfes
einschnappen.
Wenn Sie das erste Mal trimmen, beginnen Sie mit der größten Schnittlängeneinstellung.
6 7

DEUTSCHDEUTSCH
, NASENHAARE TRIMMEN
, BEVOR SIE LOSLEGEN
• Bringen Sie den Nasenhaar-, Ohren- und Augenbrauenaufsatz an.
Kämmen Sie das Gesichtshaar mit einem feinen Kamm, bevor Sie zu schneiden beginnen.
• Schieben Sie die Schneideeinheit des Nasenhaarschneiders vorsichtig in Ihre
Das Haar sollte trocken sein und vor der Verwendung des Bartschneiders nicht mit Wachs
Nasenlöcher.
oder Lotions behandelt worden sein.
• Bewegen Sie den Nasenhaarschneider vorsichtig in die Nase hinein und wieder heraus
und drehen Sie gleichzeitig den Trimmer.
• Achten Sie darauf, dass Sie die Scheideeinheit nicht weiter als 6mm in die Nase
, FÜR DÜNNE UND GETRIMMTE BÄRTE ODER SCHNURBÄRTE
einführen.
• Bringen Sie den breiten Trimmaufsatz an.
• Bringen Sie den Nasenhaar-, Ohren- und Augenbrauenaufsatz an.
• Setzen Sie den Schnittlängenaufsatz auf den Trimmer, wählen Sie die gewünschte
• Führen Sie die Schneideeinheit vorsichtig entlang der Augenbraue oder direkt an der
Länge und schalten Sie das Gerät ein.
Augenbrauen, um ungewollte Haare zu entfernen
• Beginnen Sie unter dem Kinn und folgen Sie dann der Kieferlinie. Arbeiten Sie sich mit
• Langsame und Kontrollierte Bewegungen ausführen
Aufwärtsbewegungen in Richtung Ohr und zur oberen Bartlinie vor.
, VERWENDUNG IHRES MINISCREEN-RASIERERS
, BART- ODER SCHNURBARTRÄNDER TRIMMEN
• Halten Sie den Bartschneider so, dass der MiniScreen sanft Ihr Gesicht berührt.
• Bringen Sie den schmalen Trimmaufsatz an.
• Machen Sie kurze und kontrollierte Bewegungen, wenn Sie rund um Ihren Bart/
• Halten Sie den Bartschneider mit der Trimmklinge zu Ihnen gerichtet fest.
Schnurbart rasieren. Straen Sie Ihre Haut mit der freien Hand. Dadurch steht das Haar
• Beginnen Sie am Rand der Bart-/Schnurbartlinie und denieren Sie mit langsamen
gerade auf und Sie können es leichter abrasieren.
Bewegungen und leichtem Druck auf Ihrer Haut eine Bart-/Schnurbartkante.
HINWEIS:Der MiniScreen Rasierer wurde speziell für die empndlichen Bereiche rund
, KOTELETTEN TRIMMEN
um Ihren Bart/Schnurbart/Koteletten entwickelt. Er eignet sich nicht für die Rasur des
• Bringen Sie den schmalen Trimmaufsatz an.
gesamten Gesichtes. Für eine garantiert komfortable und präzise Rasur verwenden Sie am
• Heben Sie das Haar mit einem kleinen Kamm an. Halten Sie den Kamm in der
besten einen Remington® Elektrorasierer.
gewünschten Bart- oder Schnurbartlänge fest.
• Bewegen Sie den Bartschneider entlang des Kamms, um das Haar zu schneiden. Üben
Sie leichten Druck aus und achten Sie auf kontrollierte Bewegungen beim Trimmen.
E Tipps für optimale Ergebnisse.
, NACKEN TRIMMEN
Kämmen Sie das Haar in Wuchsrichtung, damit die Haare ihre maximale Länge erreichen
und in dieselbe Richtung weisen.
• Bringen Sie den schmalen Trimmaufsatz an.
Nach dem Trimmen rasieren Sie mit der Scherfolie über die getrimmten Bereiche, um einen
• Stellen Sie mit Ihren Fingern das Haar am Haaransatz über dem Nacken auf. Ihr
seidenweichen, sauberen Abschluss zu erhalten.
Zeigenger sollte die Haarwurzeln bedecken, um versehentliches Abrasieren zu
Da nicht alle Haare in dieselbe Richtung wachsen, sollten Sie eventuell verschiedene
verhindern.
Schneidepositionen (z.B. aufwärts, abwärts oder quer) ausprobieren, um bessere
• Halten Sie mit der anderen Hand den Bartschneider an Ihren Haaransatz mit der
Ergebnisse zu erzielen.
Schnitteinheit nach oben gerichtet, und bewegen ihn über den ganzen Nacken, bis er
Ihren Finger berührt, der die Haarwurzeln am Haaransatz abdeckt. Bewegen Sie das
Gerät langsam vorwärts und halten Sie die Haarwurzeln am Haaransatz außerhalb der
Reichweite des Bartschneiders.
C PFLEGE IHRES BARTSCHNEIDERS
Pegen Sie Ihr Gerät, um noch lange Freude damit zu haben. Wir empfehlen Ihnen, den
, OHRHAARE TRIMMEN:
Bartschneider nach jeder Verwendung zu reinigen.
• Bringen Sie den Nasenhaar-, Ohren- und Augenbrauenaufsatz an.
Der einfachste und hygienischste Weg zur Reinigung des Geräts ist, den Bartschneider
• Führen Sie die Schneideeinheit vorsichtig in den äußeren Gehörgang ein.
nach dem Gebrauch mit warmem Wasser abzuspülen. Lassen Sie die Schutzkappe auf dem
• Drehen Sie den Clipper vorsichtig mit kreisenden Bewegungen.
Scherkopf und den Trimmer in der AUS-Position, wenn der Rasierer nicht in Verwendung ist.
• Um Haare zu entfernen, die sich außerhalb des Außenohrkanals störend bemerkbar
machen, führen Sie den Trimmer vorsichtig rund um den Rand Ihres Ohrs.
• Achten Sie darauf, dass Sie die Scheideeinheit nicht weiter als 6mm in den Gehörgang
einführen.
8 9
Оглавление
- PG180
- This product has been checked and is free of defects.
- Dieses Produkt wurde geprüft und ist frei von Mängeln.
- Kam het haar in de haargroeirichting, zodat alle haren hun maximale lengte hebben en in
- Nous vous remercions d’avoir acquis ce produit Remington.
- Peignez les poils dans le sens de la pousse an qu’ils soient à la hauteur maximale et
- Peine el pelo en la dirección de su crecimiento para que el pelo alcance la máxima altura y
- Trattate bene il vostro apparecchio per avere prestazioni durature nel tempo.
- Kamma håret i den riktning det växer i så att håren är i maximal höjd och ligger åt samma
- Tento výrobok bol prekontrolovaný a je bez chýb.
- Uzun ömürlü bir performans elde etmek için, cihazınıza özen gösterin. Tüy kesme makinenizi
- AE
- AE AE
- AE


