Sony SU-46HX1: 2 Install the TV onto the TV Stand. 4 Attach the Neck Cover to the Neck. 3 Secure the TV and the TV Stand with the four TV Neck 5 Attach the Rear Cover to the TV Stand.
2 Install the TV onto the TV Stand. 4 Attach the Neck Cover to the Neck. 3 Secure the TV and the TV Stand with the four TV Neck 5 Attach the Rear Cover to the TV Stand.: Sony SU-46HX1
Table of contents
- On Safety WARNING CAUTION
- CAUTION
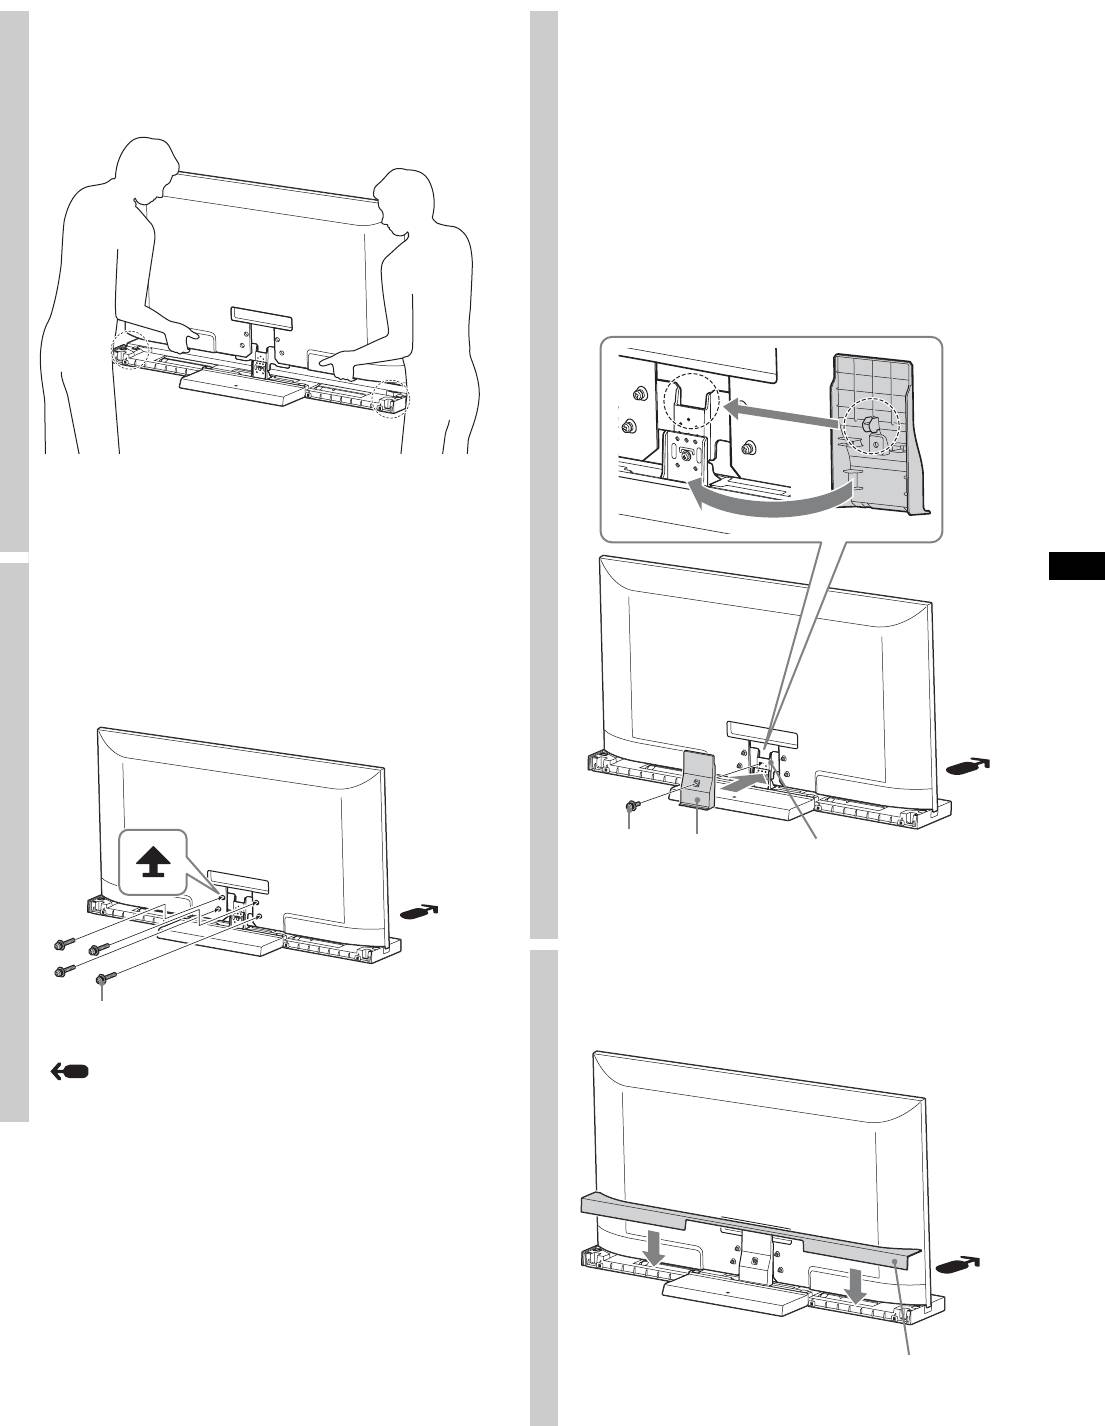
- Step 2: Installing the TV Step 1: Checking the parts 1 Hold the TV at the specified point when moving the TV.
- 2 Install the TV onto the TV Stand. 4 Attach the Neck Cover to the Neck. 3 Secure the TV and the TV Stand with the four TV Neck 5 Attach the Rear Cover to the TV Stand.
- Step 3: Specifications Safety measures to prevent toppling over
- Adjusting the viewing 3 angle of the TV 1 2
- 4 Secure the screws.
2
Install the TV onto the TV Stand.
4
Attach the Neck Cover to the
The TV is installed by placing it in the groove of the
Neck.
TV Stand.
Align the Neck Cover with the Neck and slide it down
as shown in the illustration below. Secure the Neck
Cover and Neck with the Neck Cover Screw (PSW5 ×
16) black (supplied).
If you want to adjust the viewing angle of the TV,
adjust the angle before attaching the Neck Cover. Refer
to Step 2 of “Adjusting the viewing angle of the TV” on
page 7.
~
• Be careful not to pinch your fingers when installing the TV.
3
Secure the TV and the TV Stand
with the four TV Neck
Attachment Screws (PSW5 × 16)
black (supplied).
Neck Cover
Neck Cover
Neck
Screw
(PSW5 × 16)
black
5
Attach the Rear Cover to the TV
TV Neck Attachment Screw
Stand.
(PSW5 × 16) black
Arrow direction shows front of the TV Stand.
Rear Cover
5 (GB)
