Dell OptiPlex 320: Power Connections
Power Connections: Dell OptiPlex 320
Table of contents
- Notes, Notices, and Cautions
- Contents
- Finding Information What Are You Looking For? Find It Here
- What Are You Looking For? Find It Here
- What Are You Looking For? Find It Here
- Setting Up Your Computer Set Up Your Keyboard and Mouse
- Set Up Your Monitor
- Power Connections
- System Views Mini Tower Computer — Front View 3 floppy drive Insert a floppy disk into this drive.
- 9 headphone connector Use the headphone connector to attach headphones.
- Mini Tower Computer — Back View
- Mini Tower Computer — Back-Panel Connectors
- 7 microphone connector
- Desktop Computer — Front View
- Desktop Computer — Back View
- Desktop Computer — Back-Panel Connectors
- 9 video connector
- Removing the Computer Cover Before You Begin Before Working Inside Your Computer
- Mini Tower Computer
- 1 security cable slot
- Desktop Computer
- Inside Your Computer Mini Tower Computer
- System Board Components
- Jumper Settings Mini Tower Computer
- Jumper Setting Description Desktop Computer
- System Board Components
- Jumper Settings Desktop Computer
- Jumper Setting Description Solving Problems Dell Diagnostics When to Use the Dell Diagnostics
- Starting the Dell Diagnostics From Your Hard Drive Starting the Dell Diagnostics From the Drivers and Utilities CD
- Dell Diagnostics Main Menu Option Function Tab Function
- System Lights Power Light Problem Description Suggested Resolution
- Diagnostic Lights Light Pattern Problem Description Suggested Resolution
- Light Pattern Problem Description Suggested Resolution
- Light Pattern Problem Description Suggested Resolution
- Beep Codes Code Cause Code Cause
- Resolving Software and Hardware Incompatibilities Using Microsoft Windows XP System Restore Creating a Restore Point Restoring the Computer to an Earlier Operating State
- Undoing the Last System Restore Enabling System Restore Reinstalling Microsoft Windows XP Before You Begin
- Reinstalling Windows XP Booting From the Operating System CD
- Windows XP Setup
- Using the Drivers and Utilities CD Drivers for Your Computer
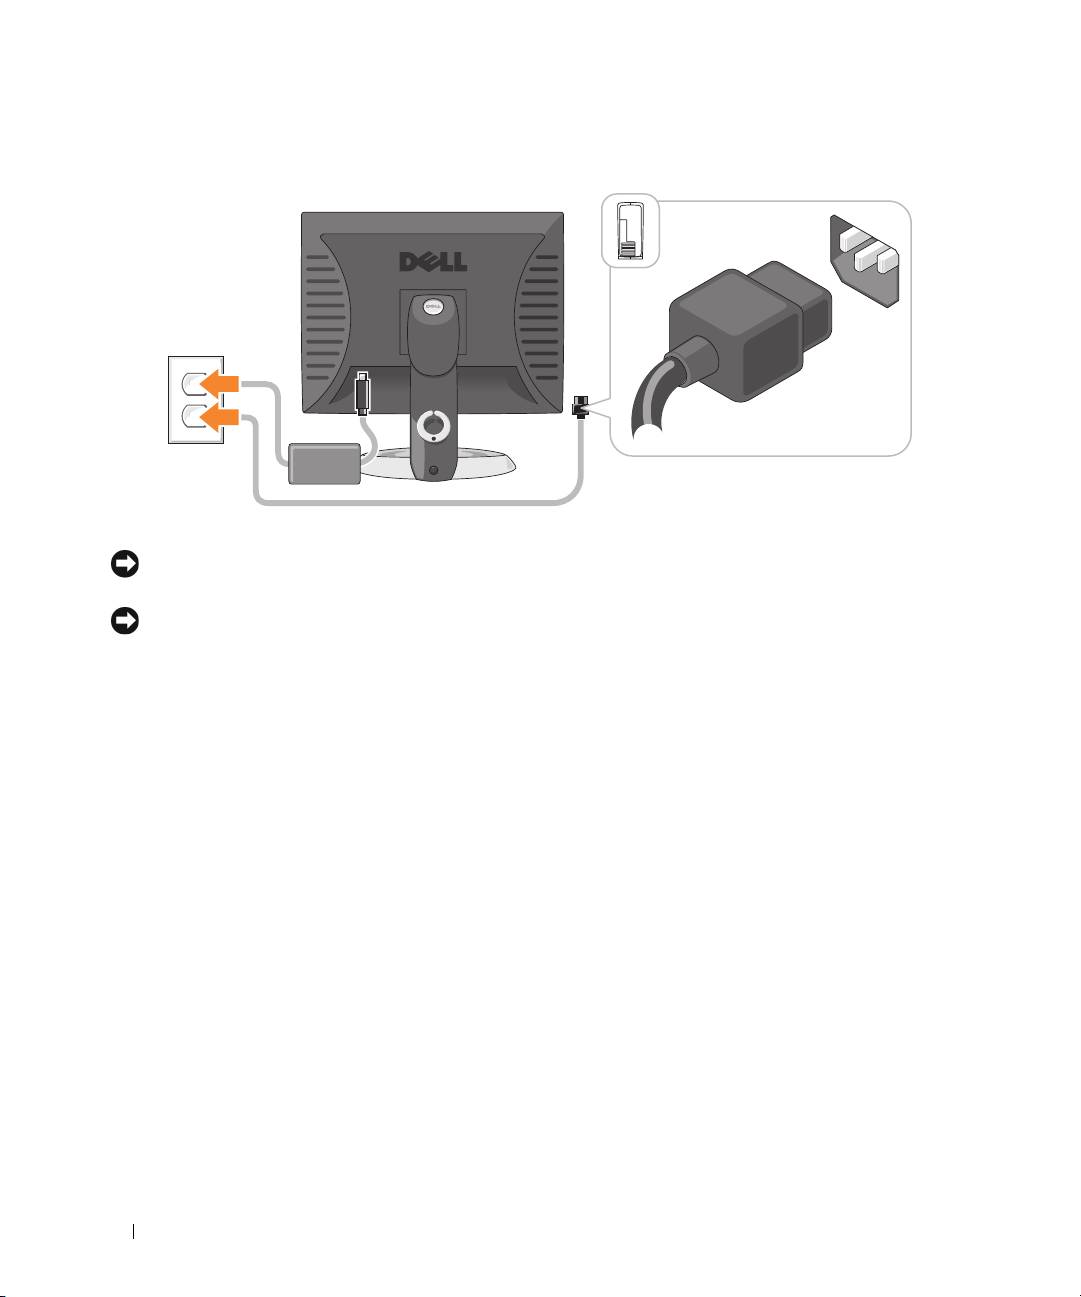
Power Connections
NOTICE: To avoid damaging a computer with a manual voltage-selection switch, set the switch for the voltage that
most closely matches the AC power available in your location.
NOTICE: In Japan, the voltage selection switch must be set to the 115-V position even though the AC power
available in Japan is 100 V.
6
Verify that the voltage selection switch is set correctly for your location.
Your computer has a manual voltage-selection switch. Computers with a voltage selection switch on
the back panel must be manually set to operate at the correct operating voltage.
10 Quick Reference Guide
Top 10 manuals
100.00
NZXT HALE90 1000W99.99
Samsung SM-R38099.97
AEG BSB 18C99.97
Dell 2700W99.97
Smeg KSEC70X99.96
Beurer HDE 4099.96
Pyramida KH 50 v.299.96
MSI CSM-H81M-P3299.96
AEG HR 562799.95
Melissa 640-048