Sharp AL-840-2 – страница 7
Инструкция к Многофункциональному Устройству (Мфу) Sharp AL-840-2
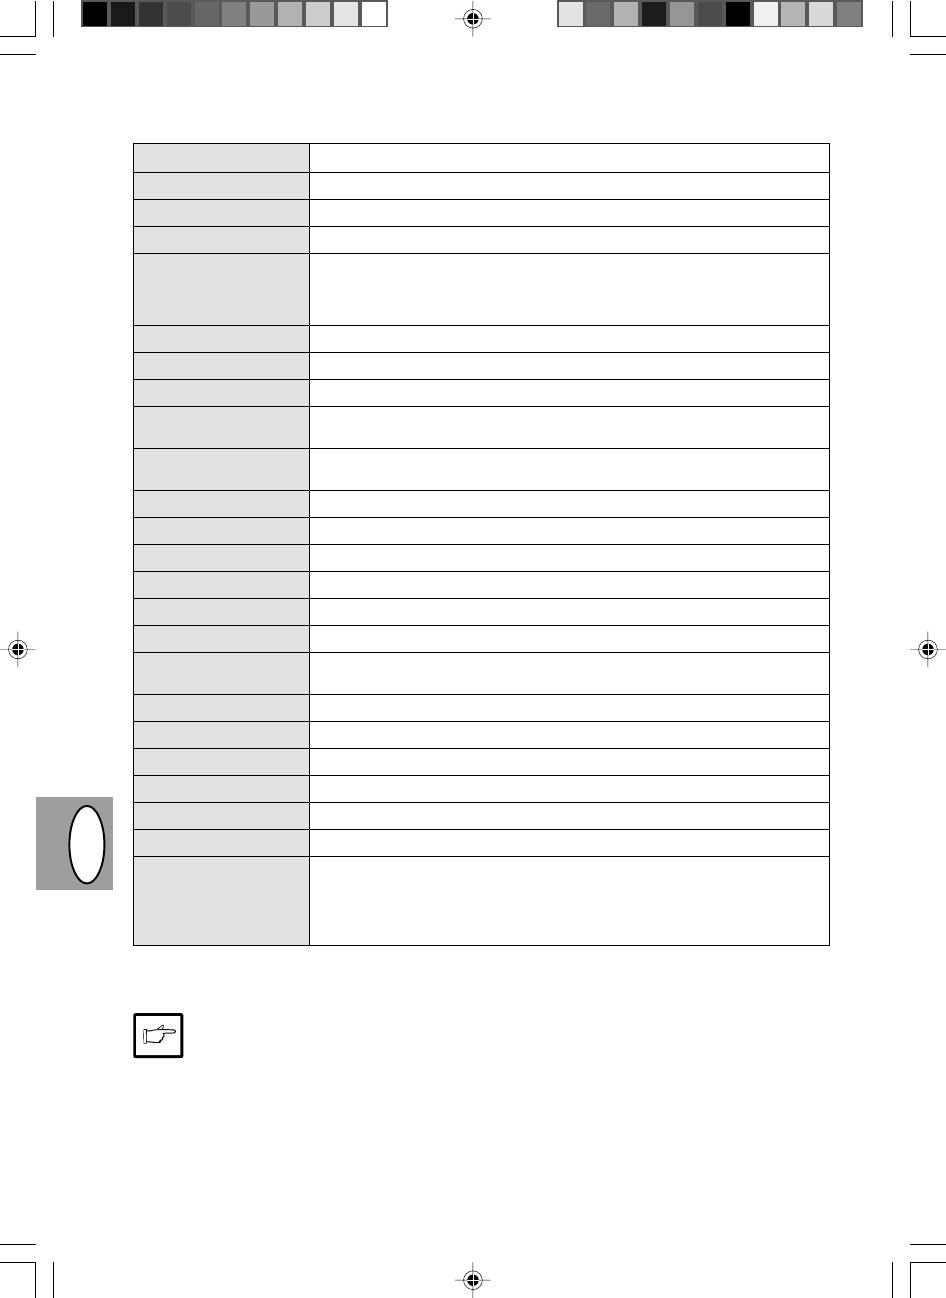
Copy and print quality problems
The causes listed in the table below are probable causes only, and may not represent all of the possible cases
which may occur under actual operating conditions. If you experience a problem which does not seem to fall under
any of the cases listed in this table, or if you are concerned about any other aspect of copying and printing
operation, contact your SHARP service center.
Problem
Possible cause
Solution
Irregular faded patches
There is a paper quality problem.
Use only paper that meets the specifi-
or print
cations required by the copier. p. 3-11
and contains advice on how to get the best performance from the printer.
The descriptions contained in this manual assume that you are familiar
Thank you very much for buying a SHARP laser printer. This manual
with the operation of your computer and with how to send files to be printed.
tells you how to set up, operate and maintain your new printer,
Please use this manual along with the documentation for your computer
hardware and software.
Your new printer has been specially designed to give you high-quality,
trouble-free printing performance. The printer driver software lets the printer
communicate with your computer via an IEEE P1284 bidirectional parallel
interface, so you can control all aspects of printing from the Windows Printer
control panel on your computer screen. Printing speed is a maximum
4 pages per minute at resolutions of 300 x 300 dpi for
the JX-9200 and 600 x 600 dpi for the JX-9210.
the US EPA Energy Star program. Moreover, no harmful ozone is
completed it switches to a standby mode which complies with
Your printer features low power consumption, and after printing is
Consideration has also been given to ecological and environmental factors.
Toner may be unevenly distributed.
Remove the TD cartridge and shake it
higher than the background noise level.
ensures that no toner is wasted. Printer operation is also very
approximately 5 kg, meaning that it is easy to transport and set up. The
Its footprint is no larger than a single A4 page, and the total weight is
Despite being packed with so many features, the printer is very compact.
during printing, and during standby mode the noise level is no
produced during printing, and the toner self-recycling technology
quiet: the printer generates less than 45 dBA of acoustic noise
100-sheet multipurpose tray is also located at the top of the printer to
Most software applications will let you adjust the margins to have around
save space and to make inserting the paper easy.
gently to evenly distribute the toner.
These minimum margin settings vary depending on whether you are
the edges of the paper that you will be printing on. The area inside the
margins then becomes the "printable area". The Windows Printer Driver
specifies the minimum values that you can set for these page margins.
be made in your software applications in both Windows and PCL modes.
in PCL emulation mode.
printing from a Windows application or from a non-Windows application
The following illustration and tables show the minimum settings that can
Then replace the TD cartridge. p. 3-21
Copier prints out blank
The TD cartridge is not installed
Check that the TD cartridge is installed
pages.
properly.
correctly. p. 3-8
Black staining
There is a paper quality problem.
Use only paper that meets the specifica-
tions required by the copier. p. 3-11
A TD cartridge from another
Always use the same TD cartridge
SHARP copier has been installed.
with the same copier. Using a car-
tridge that has already been used in
another copier may not give satisfac-
tory results.
Character voids
The paper may be too dry.
Try copying or printing with a different
batch of paper.
Background scatter
The paper may be too damp.
Try copying or printing with a different
batch of paper. Do not open packages
of paper until necessary so that the pa-
per does not absorb too much moisture
from the air. p. 3-38
Copying or printing over uneven
If printing onto envelopes, change your
surfaces.
printing layout to avoid printing over ar-
eas that have overlapping seams on
the reverse side.
Operating environment (tempera-
Use the copier in proper operating en-
ture, humidity) is not proper.
vironment. p. 3-2
Missing characters
The paper may be too damp.
Try copying or printing with a different
and contains advice on how to get the best performance from the printer.
Thank you very much for buying a SHARP laser printer. This manual
tells you how to set up, operate and maintain your new printer,
batch of paper. Do not open packages
The descriptions contained in this manual assume that you are familiar
with the operation of your computer and with how to send files to be printed.
trouble-free printing performance. The printer driver software lets the printer
Please use this manual along with the documentation for your computer
Your new printer has been specially designed to give you high-quality,
hardware and software.
of paper until necessary so that the pa-
Consideration has also been given to ecological and environmental factors.
the JX-9200 and 600 x 600 dpi for the JX-9210.
4 pages per minute at resolutions of 300 x 300 dpi for
control panel on your computer screen. Printing speed is a maximum
communicate with your computer via an IEEE P1284 bidirectional parallel
interface, so you can control all aspects of printing from the Windows Printer
Your printer features low power consumption, and after printing is
completed it switches to a standby mode which complies with
the US EPA Energy Star program. Moreover, no harmful ozone is
produced during printing, and the toner self-recycling technology
ensures that no toner is wasted. Printer operation is also very
during printing, and during standby mode the noise level is no
higher than the background noise level.
quiet: the printer generates less than 45 dBA of acoustic noise
per does not absorb too much moisture
Its footprint is no larger than a single A4 page, and the total weight is
approximately 5 kg, meaning that it is easy to transport and set up. The
100-sheet multipurpose tray is also located at the top of the printer to
Despite being packed with so many features, the printer is very compact.
save space and to make inserting the paper easy.
Most software applications will let you adjust the margins to have around
the edges of the paper that you will be printing on. The area inside the
margins then becomes the "printable area". The Windows Printer Driver
specifies the minimum values that you can set for these page margins.
These minimum margin settings vary depending on whether you are
printing from a Windows application or from a non-Windows application
in PCL emulation mode.
from the air. p. 3-38
The following illustration and tables show the minimum settings that can
be made in your software applications in both Windows and PCL modes.
DGB
The drum may be dirty.
Clean the drum. p. 3-24
Double printing (previous
Thick paper is used.
Feed thick paper one sheet at a
image overlaps with cur-
time. p. 3-11
rent image)
The paper may be too dry.
Try copying or printing with a different
batch of paper.
Back of printout dirty
The transfer roller may be dirty.
Copy or print a few blank pages to
clean the transfer roller.
3–30

Problem Possible cause
Solution
Image voids along a
TD cartridge or drum cartridge not
Ensure that the TD cartridge and
paper edge
installed properly.
drum cartridge are installed properly.
The descriptions contained in this manual assume that you are familiar
Thank you very much for buying a SHARP laser printer. This manual
with the operation of your computer and with how to send files to be printed.
tells you how to set up, operate and maintain your new printer,
Please use this manual along with the documentation for your computer
and contains advice on how to get the best performance from the printer.
communicate with your computer via an IEEE P1284 bidirectional parallel
Your new printer has been specially designed to give you high-quality,
trouble-free printing performance. The printer driver software lets the printer
hardware and software.
p. 3-21, 3-22
interface, so you can control all aspects of printing from the Windows Printer
control panel on your computer screen. Printing speed is a maximum
the JX-9200 and 600 x 600 dpi for the JX-9210.
Consideration has also been given to ecological and environmental factors.
Your printer features low power consumption, and after printing is
4 pages per minute at resolutions of 300 x 300 dpi for
completed it switches to a standby mode which complies with
the US EPA Energy Star program. Moreover, no harmful ozone is
Its footprint is no larger than a single A4 page, and the total weight is
during printing, and during standby mode the noise level is no
produced during printing, and the toner self-recycling technology
Despite being packed with so many features, the printer is very compact.
higher than the background noise level.
ensures that no toner is wasted. Printer operation is also very
quiet: the printer generates less than 45 dBA of acoustic noise
approximately 5 kg, meaning that it is easy to transport and set up. The
100-sheet multipurpose tray is also located at the top of the printer to
save space and to make inserting the paper easy.
Most software applications will let you adjust the margins to have around
the edges of the paper that you will be printing on. The area inside the
margins then becomes the "printable area". The Windows Printer Driver
specifies the minimum values that you can set for these page margins.
These minimum margin settings vary depending on whether you are
printing from a Windows application or from a non-Windows application
in PCL emulation mode.
be made in your software applications in both Windows and PCL modes.
The following illustration and tables show the minimum settings that can
Low resolution print fea-
There may be too many applica-
Close all unnecessary applications
ture is activated*
1
.
tions open.
before printing.
Resolution is set to 600 dpi.
Set resolution to 300 dpi.
Faded graphics
Toner may be unevenly distributed.
Remove the TD cartridge and gently
shake it horizontally to evenly distrib-
ute toner. p. 3-8
Toner is low.
TD cartridge must be replaced soon.
Prepare a new TD cartridge. p. 3-21
Half of the page is
The page layout is too complex.
Simplify the page layout to reduce
blank*
2
.
required memory.
Resolution is set to 600 dpi.
Set resolution to 300 dpi.
tells you how to set up, operate and maintain your new printer,
Thank you very much for buying a SHARP laser printer. This manual
trouble-free printing performance. The printer driver software lets the printer
hardware and software.
interface, so you can control all aspects of printing from the Windows Printer
Your new printer has been specially designed to give you high-quality,
Please use this manual along with the documentation for your computer
with the operation of your computer and with how to send files to be printed.
The descriptions contained in this manual assume that you are familiar
and contains advice on how to get the best performance from the printer.
control panel on your computer screen. Printing speed is a maximum
communicate with your computer via an IEEE P1284 bidirectional parallel
Page orientation setting may be
Change the page orientation with the
incorrect.
printer driver.
There may be too many applica-
Close all unnecessary applications
tions open.
before printing.
The paper in the tray may be larger
Load the correct paper into the paper
than the paper size specified in your
tray.
application or printer driver.
Interface cable specifications may
Use the interface cable included with
be incorrect.
the AL-840.
The CPU specifications may be
Check that the CPU of your computer
incorrect.
is 486DX 66 MHz or better.
The computer may have insufficient
Install more random-access memory
random-access memory (RAM).
(RAM) in your computer.
*
1
Low resolution print (AL-840 only)
If a page including complex graphics or various kinds of fonts is printed, the computer resource may be in-
sufficient. In this case, the printer driver activates the low resolution printing feature which automatically
DGB
lowers the resolution of a complex page.
*
2
The problem occurs only if the copier is used as a printer. (AL-840 only) See also the printer operation
manual.
3–31

FEHLERSUCHE
Sollte ein Problem auftreten, überprüfen Sie zunächst die nachfolgende Liste, bevor Sie sich an den Sharp-
Kundendienst wenden. In den unten beschriebenen Fällen liegt keine Fehlfunktion des Kopierers vor.
Problem Mögliche Ursache Lösung
Der Kopierer kopiert Kopierer am Netz angeschlossen? Den Kopierer an eine geerdete
nicht. Steckdose anschließen. S. 3-3
Netzschalter eingeschaltet? Den Netzschalter einschalten. S. 3-3
Frontabdeckung geschlossen? Die Frontabdeckung vorsichtig
schließen. S. 3-8
Kein Bild auf den Kopien. Liegt das Original mit der Vorderseite Original mit der Vorderseite nach
nach unten auf der Vorlagenglas? unten auf die Vorlagenglas legen.
S. 3-12
Die Energiesparanzeige Kopierer in der Vorwärmphase? Beliebige Taste drücken, um die
(
) leuchtet. Vorwärmphase zu verlassen. S. 3-18
Kopierer im automatischen Die Kopiertaste (
) drücken, um den
Energiesparbetrieb? automatischen Energiesparbetrieb zu
verlassen. S. 3-18
Kopien sind zu dunkel Ist das Original zu dunkel oder Die Belichtung manuell korrigieren.
oder zu hell. zu hell? S. 3-14
Kopierer im automatischen Die Belichtungsautomatik richtig
Belichtungsmodus? einstellen. S. 3-15
Kopierer im Photo-Modus? Den Photo-Belichtungsmodus
verlassen. S. 3-14
Staub, Schmutz und Ist der Vorlagenglas oder die Regelmäßig reinigen. S. 3-24
Schmierflecken auf den Vorlagenabdeckung verschmutzt?
Kopien.
Ist das Original selbst verschmutzt Saubere Originale verwenden.
oder fleckig?
Teile des Bildes fehlen. Ist die Trommeleinheit sauber? Trommeleinheit reinigen.
S. 3-24
Häufiger Papierstau. Wurde Spezialpapier verwendet? Standardpapier verwenden.
Spezialpapier Blatt für Blatt zuführen.
S. 3-11
Papier gewellt oder feucht? Das Kopierpapier flach und in der
Verpackung an einem trockenen Ort
aufbewahren. S. 3-38
Papierstücke im Kopierer? Alle Stücke von gestautem Papier
entfernen. S. 3-26
Papierführungen am Papierfach nicht Die Führungen entsprechend dem
richtig eingestellt? Format des Kopierpapiers einstellen.
S. 3-9
DGB
Zu viel Papier im Papierfach? Überschüssiges Papier aus dem
Papierfach entfernen. S. 3-9
Entwicklereinheit oder Die richtige Installation der
Trommeleinheit nicht richtig Entwicklereinheit und Trommeleinheit
installiert. überprüfen. S. 3-21, 3-22
Das kopierte Bild läßt Zu schweres Kopierpapier? Kopierpapier entsprechend den
sich leicht abreiben. Gewichtsangaben verwenden. S. 3-11
Feuchtes Papier? Durch trockenes Papier ersetzen.
Wird der Kopierer längere Zeit nicht
benutzt, das Kopierpapier aus dem
Papierfach entnehmen und in der
Verpackung an einem trockenen Ort
aufbewahren. S. 3-38
3–32
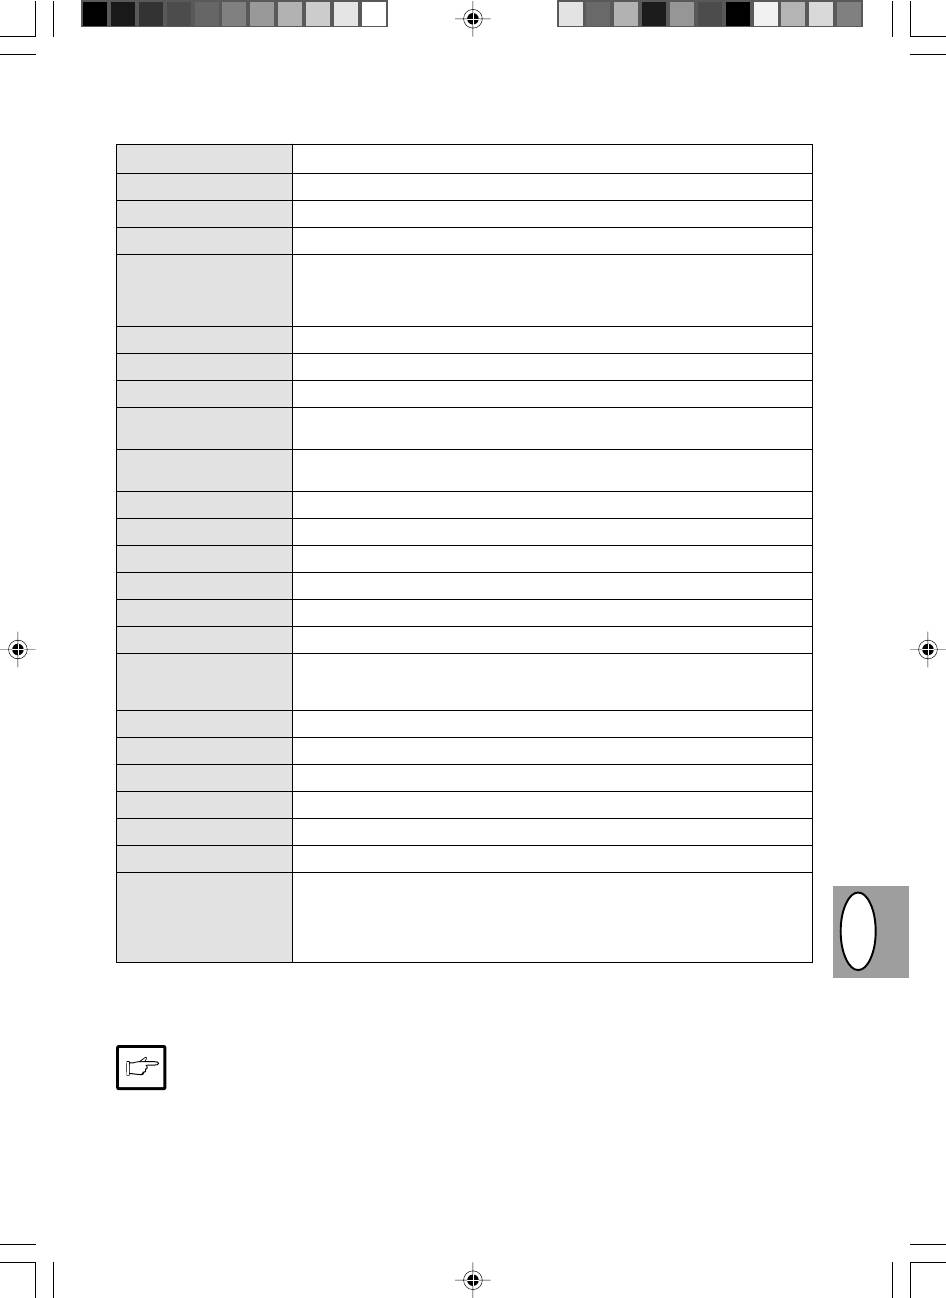
Probleme mit der Kopier- und Druckqualität
In der nachfolgenden Tabelle sind nur einige mögliche Ursachen aufgeführt. Unter den tatsächlichen Betriebs-
bedingungen können weitere Störungsursachen auftreten. Wenden Sie sich an Ihren SHARP-Kundendienst,
falls ein Problem entsteht, das anscheinend nicht unter die in der Tabelle aufgelisteten Fälle eingeordnet werden
kann, oder falls Ihnen ein Aspekt des Kopier- oder Druckvorgangs merkwürdig erscheint.
Problem
Mögliche Ursache
Abhilfemaßnahme
Unregelmäßiger Druck oder
Falsche Papierqualität.
Nur Papier verwenden, das die für den Ko-
blasse Stellen
pierer erforderlichen Spezifikationen auf-
tells you how to set up, operate and maintain your new printer,
Thank you very much for buying a SHARP laser printer. This manual
weist. S. 3-11
Please use this manual along with the documentation for your computer
The descriptions contained in this manual assume that you are familiar
with the operation of your computer and with how to send files to be printed.
and contains advice on how to get the best performance from the printer.
hardware and software.
Your new printer has been specially designed to give you high-quality,
trouble-free printing performance. The printer driver software lets the printer
communicate with your computer via an IEEE P1284 bidirectional parallel
completed it switches to a standby mode which complies with
Your printer features low power consumption, and after printing is
Consideration has also been given to ecological and environmental factors.
the JX-9200 and 600 x 600 dpi for the JX-9210.
interface, so you can control all aspects of printing from the Windows Printer
4 pages per minute at resolutions of 300 x 300 dpi for
control panel on your computer screen. Printing speed is a maximum
the US EPA Energy Star program. Moreover, no harmful ozone is
produced during printing, and the toner self-recycling technology
ensures that no toner is wasted. Printer operation is also very
save space and to make inserting the paper easy.
approximately 5 kg, meaning that it is easy to transport and set up. The
Its footprint is no larger than a single A4 page, and the total weight is
Despite being packed with so many features, the printer is very compact.
quiet: the printer generates less than 45 dBA of acoustic noise
during printing, and during standby mode the noise level is no
higher than the background noise level.
Ungleichmäßige Verteilung des Toners.
Die Entwicklereinheit entnehmen und vor-
Most software applications will let you adjust the margins to have around
100-sheet multipurpose tray is also located at the top of the printer to
the edges of the paper that you will be printing on. The area inside the
margins then becomes the "printable area". The Windows Printer Driver
specifies the minimum values that you can set for these page margins.
sichtig schütteln, um den Toner gleichmäßig
be made in your software applications in both Windows and PCL modes.
The following illustration and tables show the minimum settings that can
in PCL emulation mode.
printing from a Windows application or from a non-Windows application
These minimum margin settings vary depending on whether you are
zu verteilen. Entwicklereinheit wieder ein-
setzen. S. 3-21
Der Kopierer liefert
Die Entwicklereinheit ist nicht richtig
Richtige Installation der Entwicklereinheit
unbedruckte Seiten.
installiert.
überprüfen. S. 3-8
Schwarze Flecken
Falsche Papierqualität.
Nur Papier verwenden, das die für den Ko-
pierer erforderlichen Spezifikationen auf-
weist. S. 3-11
Es wurde eine Entwicklereinheit aus
Für den selben Kopierer stets die selbe Ent-
einem anderen SHARP-Kopierer
wicklereinheit verwenden. Die Verwendung
installiert.
einer Entwicklereinheit, die bereits in einem
anderen Kopierer in Gebrauch war, führt
nicht zum gewünschten Ergebnis.
Weiße Flecken in einzelnen
Das Kopierpapier ist zu trocken.
Den Druck- oder Kopiervorgang mit Papier
Zeichen
aus einer anderen Lieferung wiederholen.
Verschmierter Hintergrund
Das Kopierpapier ist zu feucht.
Den Druck- oder Kopiervorgang mit Papier
aus einer anderen Lieferung wiederholen. Die
Verpackung erst öffnen, wenn das Kopierpa-
pier benötigt wird, damit es nicht zu viel
Feuchtigkeit aus der Luft aufnimmt. S. 3-38
Kopieren oder Drucken auf unebener
Beim Bedrucken von Umschlägen das Lay-
Oberfläche.
out ändern. Nicht auf Stellen drucken, an
denen sich auf der Rückseite des Um-
schlags überlappende Nahtstellen befinden.
Ungeeignete Betriebsbedingungen
Kopierer unter geeigneten Umgebungsbe-
(Temperatur, Luftfeuchtigkeit).
dingungen gemäß Seite 3-2 einsetzen.
Fehlen von Zeichen
Das Kopierpapier ist zu feucht.
Den Druck- oder Kopiervorgang mit Papier
aus einer anderen Charge wiederholen. Die
Please use this manual along with the documentation for your computer
and contains advice on how to get the best performance from the printer.
tells you how to set up, operate and maintain your new printer,
Thank you very much for buying a SHARP laser printer. This manual
hardware and software.
with the operation of your computer and with how to send files to be printed.
The descriptions contained in this manual assume that you are familiar
Your new printer has been specially designed to give you high-quality,
Consideration has also been given to ecological and environmental factors.
4 pages per minute at resolutions of 300 x 300 dpi for
the JX-9200 and 600 x 600 dpi for the JX-9210.
control panel on your computer screen. Printing speed is a maximum
interface, so you can control all aspects of printing from the Windows Printer
trouble-free printing performance. The printer driver software lets the printer
communicate with your computer via an IEEE P1284 bidirectional parallel
Verpackung erst öffnen, wenn das Kopier-
during printing, and during standby mode the noise level is no
produced during printing, and the toner self-recycling technology
quiet: the printer generates less than 45 dBA of acoustic noise
ensures that no toner is wasted. Printer operation is also very
the US EPA Energy Star program. Moreover, no harmful ozone is
completed it switches to a standby mode which complies with
Your printer features low power consumption, and after printing is
higher than the background noise level.
papier benötigt wird, damit es nicht zu viel
Despite being packed with so many features, the printer is very compact.
approximately 5 kg, meaning that it is easy to transport and set up. The
Its footprint is no larger than a single A4 page, and the total weight is
100-sheet multipurpose tray is also located at the top of the printer to
printing from a Windows application or from a non-Windows application
These minimum margin settings vary depending on whether you are
specifies the minimum values that you can set for these page margins.
margins then becomes the "printable area". The Windows Printer Driver
Most software applications will let you adjust the margins to have around
the edges of the paper that you will be printing on. The area inside the
save space and to make inserting the paper easy.
Feuchtigkeit aus der Luft aufnimmt. S. 3-38
in PCL emulation mode.
The following illustration and tables show the minimum settings that can
be made in your software applications in both Windows and PCL modes.
DGB
Die Trommel ist verschmutzt.
Trommel reinigen. S. 3-24
Doppeltes Bedrucken (das
Verwendung von dickem Kopierpapier.
Dickes Papier Blatt für Blatt zuführen.
vorherige Bild überlappt mit
S. 3-11
dem aktuellen Bild)
Das Kopierpapier ist zu trocken.
Den Druck- oder Kopiervorgang mit Papier
aus einer anderen Lieferung wiederholen.
Die Rückseite der bedruck-
Die Übertragungsrolle ist schmutzig.
Einige Leerseiten kopieren oder drucken,
ten Seiten ist verschmutzt.
um die Übertragungsrolle zu reinigen.
3–33
Problem Mögliche Ursache
Abhilfemaßnahme
Entlang einer Kante ist
Entwicklereinheit oder Trommelein-
Darauf achten, daß Entwicklereinheit
kein Bild vorhanden.
heit ist nicht richtig installiert.
und Trommeleinheit richtig installiert
and contains advice on how to get the best performance from the printer.
Thank you very much for buying a SHARP laser printer. This manual
tells you how to set up, operate and maintain your new printer,
hardware and software.
The descriptions contained in this manual assume that you are familiar
with the operation of your computer and with how to send files to be printed.
Please use this manual along with the documentation for your computer
sind, siehe S. 3-21, 3-22
Your new printer has been specially designed to give you high-quality,
trouble-free printing performance. The printer driver software lets the printer
communicate with your computer via an IEEE P1284 bidirectional parallel
interface, so you can control all aspects of printing from the Windows Printer
control panel on your computer screen. Printing speed is a maximum
Your printer features low power consumption, and after printing is
4 pages per minute at resolutions of 300 x 300 dpi for
Consideration has also been given to ecological and environmental factors.
completed it switches to a standby mode which complies with
the JX-9200 and 600 x 600 dpi for the JX-9210.
ensures that no toner is wasted. Printer operation is also very
the US EPA Energy Star program. Moreover, no harmful ozone is
produced during printing, and the toner self-recycling technology
quiet: the printer generates less than 45 dBA of acoustic noise
100-sheet multipurpose tray is also located at the top of the printer to
Despite being packed with so many features, the printer is very compact.
approximately 5 kg, meaning that it is easy to transport and set up. The
Its footprint is no larger than a single A4 page, and the total weight is
higher than the background noise level.
during printing, and during standby mode the noise level is no
Most software applications will let you adjust the margins to have around
the edges of the paper that you will be printing on. The area inside the
margins then becomes the "printable area". The Windows Printer Driver
save space and to make inserting the paper easy.
specifies the minimum values that you can set for these page margins.
These minimum margin settings vary depending on whether you are
be made in your software applications in both Windows and PCL modes.
The following illustration and tables show the minimum settings that can
in PCL emulation mode.
printing from a Windows application or from a non-Windows application
Die Druckerfunktion „Ge-
Zu viele Anwendungen geöffnet.
Vor dem Drucken alle unnötigen An-
ringe Auflösung“ wurde
wendungen schließen.
aktiviert *
1
.
Die Auflösung ist auf 600 dpi
Auflösung auf 300 dpi einstellen.
eingestellt.
Blasse Grafiken
Ungleichmäßige Verteilung des
Die Entwicklereinheit entnehmen und
Toners.
vorsichtig schütteln, um den Toner
gleichmäßig zu verteilen. Entwickler-
einheit wieder einsetzen. S. 3-8
Nur noch wenig Toner vorhanden.
Die Entwicklereinheit muß in Kürze
ausgewechselt werden. Eine neue
Entwicklereinheit vorbereiten. S. 3-21
Die Hälfte der Seite ist
Zu komplexes Seitenlayout.
Das Seitenlayout vereinfachen, um
unbedruckt *
2
.
benötigte Speichermenge zu reduzie-
ren.
Thank you very much for buying a SHARP laser printer. This manual
tells you how to set up, operate and maintain your new printer,
hardware and software.
Please use this manual along with the documentation for your computer
and contains advice on how to get the best performance from the printer.
with the operation of your computer and with how to send files to be printed.
The descriptions contained in this manual assume that you are familiar
communicate with your computer via an IEEE P1284 bidirectional parallel
Your new printer has been specially designed to give you high-quality,
trouble-free printing performance. The printer driver software lets the printer
control panel on your computer screen. Printing speed is a maximum
interface, so you can control all aspects of printing from the Windows Printer
Die Auflösung ist auf 600 dpi einge-
Auflösung auf 300 dpi einstellen.
stellt.
Falsche Einstellung der Seitenori-
Die Seitenorientierung über den Druk-
entierung.
kertreiber ändern.
Zu viele Anwendungen geöffnet.
Vor dem Drucken alle unnötigen An-
wendungen schließen.
Das Papier im Papierfach ist größer
Das richtige Papier in das Papierfach
als das in Ihrer Anwendung oder
einlegen.
dem Druckertreiber spezifizierte
Papierformat.
Falsche Spezifikationen des
Das mit dem AL-840 gelieferte
Schnittstellenkabels.
Schnittstellenkabel verwenden.
Falsche Spezifikationen der CPU.
Ihr Computer sollte mindestens mit
einer 486DX 66 MHz-CPU ausgestat-
tet sein.
DGB
Der Computer verfügt über zu
Arbeitsspeicher (RAM) erweitern.
wenig Arbeitsspeicher (RAM).
*
1
Drucken mit geringer Auflösung ( nur bei AL-840)
Wenn eine Seite umfangreiche Grafiken oder viele verschiedene Schriftarten enthält, kann der Speicher
des Computers unzureichend sein. In diesem Fall aktiviert der Drucker die Funktion "Drucken mit geringer
Auflösung", die automatisch die Auflösung einer umfangreichen Seite verringert.
*
2
Dieses Problem tritt nur auf, wenn der Kopierer als Drucker verwendet wird (nur AL-840). Siehe auch Be-
dienungsanleitung des Druckers.
3–34
STATUS INDICATORS
When the following indicators light up or blink on the operation panel or the following displays appear in the
display, solve the problem immediately referring to both the table below and the relevant page.
Indication
Cause and remedy
Drum replacement
Steadily
Replacement of drum cartridge will be needed soon. Prepare a
required indicator
lit
new cartridge. p. 3-22
w
Blinking
Drum cartridge must be replaced. Replace it with a new one.
p. 3-22
TD cartridge replace-
Steadily
Replacement of TD cartridge will be needed soon. Prepare a
ment required indicator
lit
new cartridge. p. 3-21
s
Blinking
TD cartridge must be replaced. Replace it with a new one.
p. 3-21
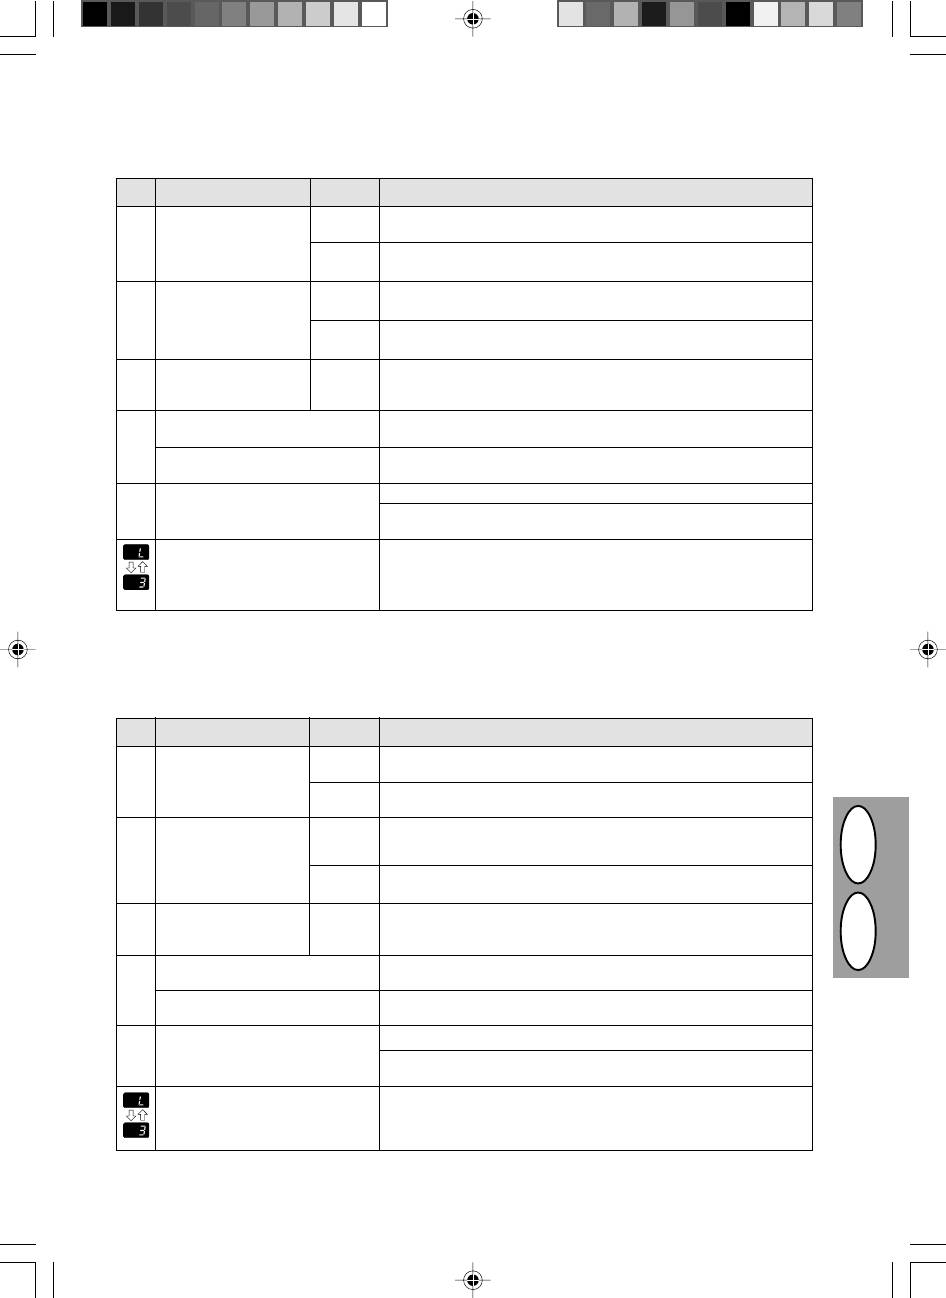
Misfeed indicator
Blinking
A misfeed has occurred. Remove the misfed paper referring to
t
the description of „Misfeed removal.“ p. 3-26.
„CH“ is blinking in
The TD cartridge is not installed. Check if the cartridge is in-
the display.
stalled. p. 3-8
n
„CH“ is steadily lit in the
Front cover is open. Close the front cover securely.
display.
p. 3-8
„P“ is blinking in
Paper tray is empty. Load copy paper. p. 3-9
Q
the display.
A misfeed has occurred in the paper tray. Remove the misfed
paper. p. 3-26
A letter and a number
The copier will not function. Turn the power switch off and then
appear alternately.
switch it on, and if there is again an error, remove the power
cord from the outlet, and contact your authorized Service repre-
sentative.
STATUSANZEIGEN
Wenn auf dem Bedienfeld die folgenden Anzeigelämpchen blinken oder aufleuchten oder folgende Anzeigen
erscheinen, das Problem sofort anhand der nachfolgenden Tabelle und der entsprechenden Beschreibung lösen.
Anzeige
Ursache und Abhilfemaßnahme
Anzeige für den
Ständiges
Das Auswechseln der Trommeleinheit wird in Kürze notwendig. Eine neue
erforderlichen Austausch
Leuchten
Einheit vorbereiten. S. 3-22
w
der Trommeleinheit
Blinken
Die Trommeleinheit muß ausgewechselt werden. Durch eine neue ersetzen.
S. 3-22
Anzeige für den erforderli-
Ständiges
Das Auswechseln der Entwicklereinheit wird in Kürze notwendig. Eine neue
chen Austausch der
Leuchten
Entwicklereinheit vorbereiten. S. 3-21
Entwicklereinheit
s
Blinken
Die Entwicklereinheit muß ausgewechselt werden. Durch eine neue ersetzen.
S. 3-21
Papierstauanzeige
Blinken
Ein Papierstau ist aufgetreten. Das gestaute Papier gemäß der Beschreibung
t
unter „Papierstaubeseitigung“ entfernen. S. 3-26.
DGB
„CH“ blinkt auf der
Die Entwicklereinheit ist nicht installiert. Die Installation der Entwicklereinheit
Anzeige.
überprüfen. S. 3-8
n
„CH“ leuchtet auf der
Die Frontabdeckung ist offen. Gut schließen. S. 3-8
Anzeige ständig auf.
„P“ blinkt auf der Anzeige.
Das Papierfach ist leer. Kopierpapier einlegen. S. 3-9
Q
Im Papierfach ist ein Papierstau aufgetreten.
Gestautes Papier entfernen. S. 3-26
Ein Buchstabe und
Der Kopierer funktioniert nicht. Den Netzschalter ausschalten, dann wieder
eine Zahl erscheinen im
einschalten. Wenn der Fehler erneut auftritt, Netzstecker aus der Steck-
Wechsel.
dose ziehen. Wenden Sie sich an Ihre autorisierten Kundendienstvertre-
tung.
3–35
SPECIFICATIONS
Type Digital copying machine, desk-top type
Copy system Dry, electrostatic transfer
Originals Sheets, bound documents
Original size Max. A4
Copy sizes A6 to A4
(Feed copy paper lengthwise only.)
Image loss: Max. 5 mm (leading and trailing edges)
Max. 3 mm (either of the other edges)
Copy speed 8 copies/min.
Continuous copying Max. 50 copies; subtractive counter
First-copy time 12.5 sec. (normal copying mode)
Copy ratio Variable: 50% to 200% in 1% increments (total 151 steps)
Fixed: 50%, 70%, 86%, 100%, 141%, 200%
Exposure system Moving optical source, slit exposure (stationary platen) with automatic expo-
sure
Copy paper feed One paper tray with automatic feed (250 sheets)
Fusing system Heated pressure roller method
Development system Mono component electrostatic roller method
Light source Fluorescent lamps
Resolution Scan: 400 dpi, Output: 600 dpi
Gradation Scan: 256 levels, Output: 2 levels
Power supply Local voltage ±10% (For this copiers power supply requirements, see the
name plate located on the back of the unit.)
Power consumption 600 W
Overall dimensions 460 mm (W) x 750 mm (D)
Weight Approx. 11 kg, TD and drum cartridges included
Copier dimensions 460 mm (W) x 425 mm (D) x 229 mm (H)
Operating conditions Temperature: 10°C to 35°C
Humidity: 20% to 80% (Max. 60% at 35°C)
Noise level Sound Power Level L
WA
(1B=10dB)
Copying: 6.7 [B (A)], Standby: Background noise level
Sound Pressure Level L
PA
(bystander positions)
Copying: 49 [dB (A)], Standby: Background noise level
Noise emission measurement in accordance with ISO 7779.
DGB
First-copy time may differ depending on operating conditions, such as power-supply voltage and room
temperature. The values for copy speed are rounded to the nearest whole number.
As a part of our policy of continuous improvement, SHARP reserves the right to make design and
specification changes for product improvement without prior notice. The performance specification
figures indicated are nominal values of production units. There may be some deviation from these values
in individual units.
3–36
TECHNISCHE DATEN
Typ Digitaler Kopierer, Tischgerät
Kopiersystem Trockene, elektrostatische Übertragung
Originale Blätter, gebundene Vorlagen
Originalformate Max. A4
Kopienformate A6 bis A4
(Kopierpapier nur der Länge nach einführen)
Bildverlust: Max. 5 mm (obere und untere Kante der Kopie)
Max. 3 mm (andere Kanten)
Kopiergeschwindigkeit 8 Kopien/min
Fortlaufendes Kopieren Max. 50 Kopien, abwärtszählend
Erste Kopie nach 12,5 s oder weniger (normaler Kopierbetrieb)
Kopiermaßstäbe Einstellbar zwischen 50% und 200%, in Schritten von 1% (insgesamt 151
Schritte), Voreinstellungen: 50%, 70%, 86%, 100%, 141%, 200%.
Belichtungssystem Schlitzbelichtung mit beweglicher Optik und fester Originalauflage, mit auto-
matischer Belichtungsfunktion.
Kopierpapierzufuhr Ein Papierfach mit automatischem Einzug (250 Blatt)
Fixiersystem Verfahren mit beheizter Druckrolle
Entwicklungssystem Einzelkomponentenverfahren, elektrostatische Rolle
Lichtquelle Fluoreszenzlampen
Auflösung Scan: 400 dpi, Ausgabe: 600 dpi
Graustufen Scan: 256 Stufen, Ausgabe: 2 Stufen.
Stromverbrauch Örtliche Spannung ±10% (die für diesen Kopierer erforderliche Spannung
kann von dem Typenschild abgelesen werden, das an der Rückseite des Ge-
räts angebracht ist).
Leistungsaufnahme 600 W
Gesamtabmessungen 460 mm (B) x 750 mm (T)
Gewicht Ca. 11 kg
Kopiererabmessungen 460 mm (B) x 425 mm (T) x 229 mm (H)
Betriebsbedingungen Temperatur: 10°C bis 35°C
Luftfeuchtigkeit: 20% bis 80% (max. 60% bei 35°C)
Geräuschpegel Schallpegel LWA (1B=10dB)
Kopieren: 6,7 [B (A)], Standby: Hintergrund-Geräuschpegel
Schallpegel LPA (für Nebenstehende)
Kopieren: 49 [dB (A)], Standby: Hintergrund-Geräuschpegel
DGB
Messung der Geräuschemission gemäB ISO 7779.
Die Zeit bis zur ersten Kopie kann sich abhängig von den Betriebsbedingungen, wie der Versorgungsspannung
oder der Raumtemperatur, ändern. Die Werte für die Kopiergeschwindigkeit wurden auf die nächste ganze Zahl
aufgerundet.
SHARP behält sich im Rahmen der ständigen Produktverbesserung das Recht auf Änderung der
Konstruktion und der technischen Daten ohne Vorankündigung vor. Die Leistungsangaben sind
nominelle Werte von Produktionseinheiten. Einzelne Einheiten können von diesen Werten abweichen.
3–37
SUPPLY PART NUMBERS AND STORAGE
AUFBEWAHRUNG UND ARTIKELNUMMERN VON VERBRAUCHS-
MATERIALIEN
When ordering supplies, please use the correct part
Bei der Bestellung von Verbrauchsmaterialien bitte die
numbers as listed below.
richtigen Artikelnummern verwenden, die nachfolgend
aufgelistet sind.
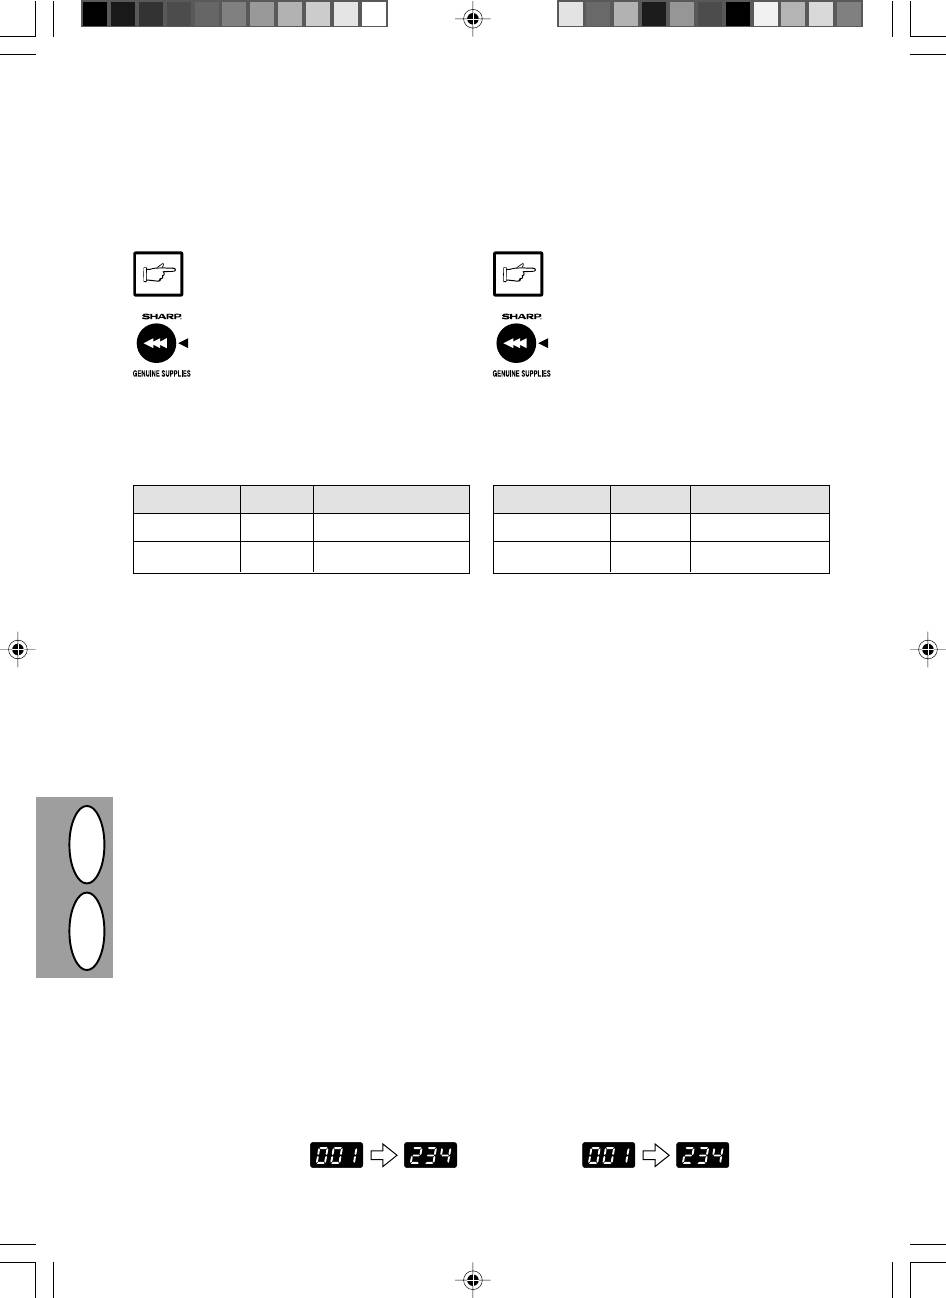
Be sure to use only genuine SHARP parts and
Nur Originalteile und Originalzubehör von
supplies.
SHARP verwenden.
For best copying results, be sure to use only
Für beste Kopierergebnisse, maximale Le-
SHARP Genuine Supplies which are de-
bensdauer und Leistungsfähigkeit der
signed, engineered, and tested to maxi-
SHARP-Kopierer nur das speziell dafür
mize the life and performance of SHARP
konstruierte, hergestellte und getestete
copiers. Look for the Genuine Supplies la-
Originalzubehör und -verbrauchsmaterial
bel on the toner package.
von SHARP verwenden. Achten Sie auf
das Etikett „Genuine Supplies“ auf der Ton-
erverpackung.
Supply list
Liste der Verbrauchsmaterialien
Supply Part no. Usable life
Ersatzteil Artikelnr. Lebensdauer
TD cartridge AL-80TD Approx. 3,000 sheets*
Entwicklereinheit AL-80TD Ca. 3000 Blatt*
Drum cartridge AL-80DR Approx. 20,000 sheets
Trommeleinheit AL-80DR Ca. 20000 Blatt
* Based on copying onto A4 at 5% toned area
* Basierend auf Kopien, die auf Kopierpapier des Formats A4
angefertigt werden und deren bedruckte Fläche 5% beträgt.
Proper storage
Richtige Aufbewahrung
1. Store the supplies in a location that is:
1. Die Verbrauchsmaterialien an einem Ort aufbewah-
· clean and dry,
ren, der
· sauber und trocken ist,
· at a stable temperature,
· gleichbleibende Temperatur aufweist,
· not exposed to direct sunlight.
· keinem direkten Sonnenlicht ausgesetzt ist.
2. Store copy paper in the wrapper and lying flat.
2. Kopierpapier in der Verpackung und flach liegend
· Paper stored out of the wrapper or in packages
aufbewahren.
standing on end may curl or get damp, resulting in
· Unverpacktes Papier oder Packungen, die ste-
paper misfeeds.
hend aufbewahrt werden, können sich an einem
Ende wellen oder feucht werden. Dies führt zu
Papierstau.
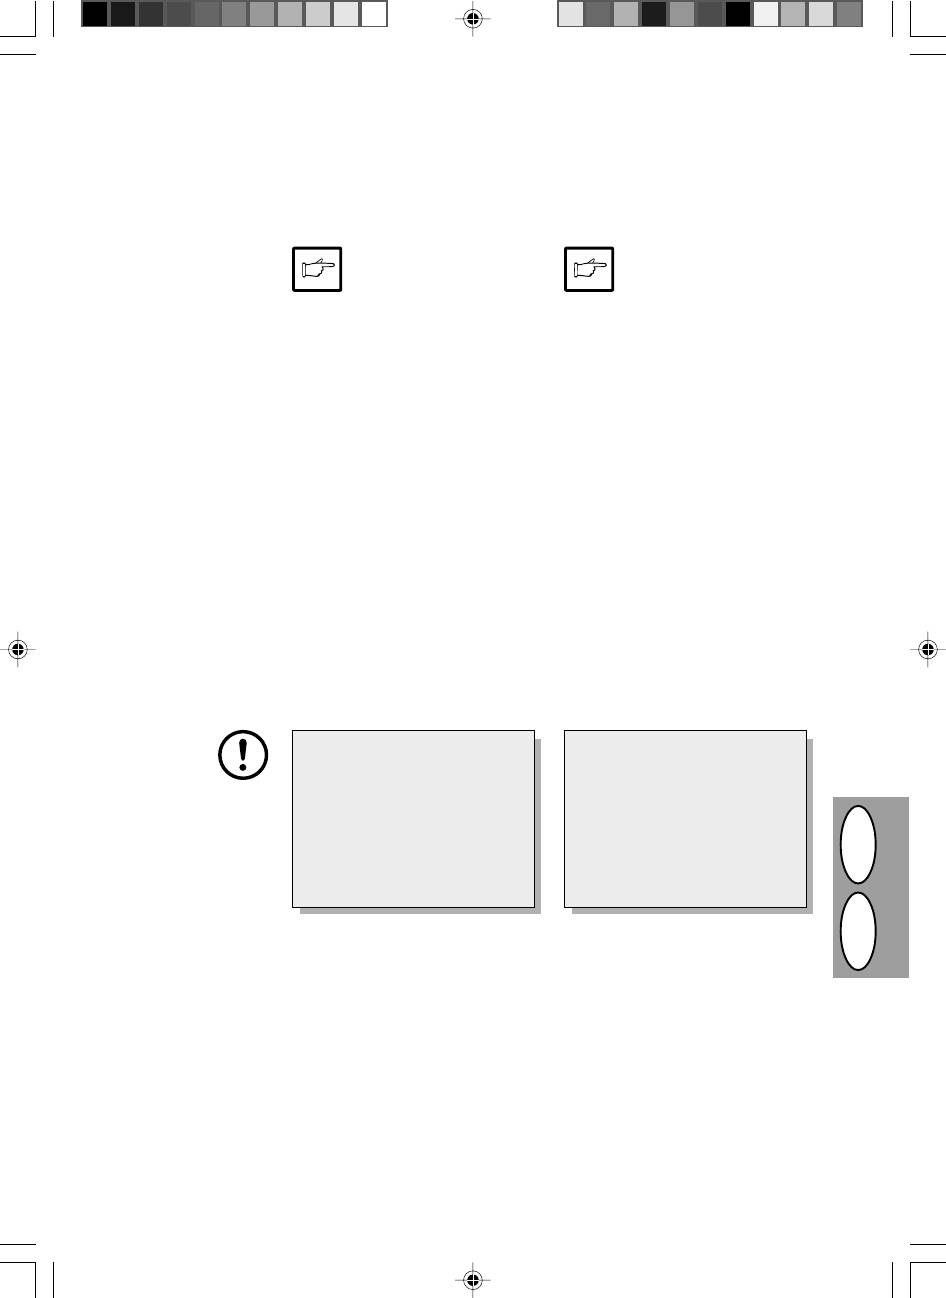
DISPLAYING TOTAL NUMBER OF COPIES
ANZEIGE DER GESAMTEN KOPIENZAHL
DGB
Use the following procedure to display the total number
Zur Anzeige der Anzahl aller bisher erstellten Kopien
of copies.
folgendermaßen vorgehen:
1. Press the clear (
>
) key to reset the
1. Die Rückstelltaste (
>
) drücken, um
display to zero.
die Anzeige auf Null zurückzustellen.
2. Press and hold down the clear (
>
)
2. Die Rückstelltaste (
>
) ca. 5 Sekunden
key for approximately 5 seconds. The
lang drücken und halten. Die Gesamt-
total number of copies will appear in
zahl der Kopien erscheint in zwei
two steps, each with three digits.
Schritten, jeweils mit drei Stellen.
Example:
Beispiel: Die Gesamtzahl der Kopien
Total number of copies is 1,234.
beträgt 1234.
3–38
MOVING INSTRUCTIONS
TRANSPORTANWEISUNGEN
When moving this copier, follow the procedure below.
Beim Transport des Kopierers die nachfolgenden An-
weisungen befolgen.
When moving this copier, be
Vor dem Transport des Kopie-
sure to remove the TD cartridge
rers unbedingt die Entwickler-
from the machine. This pre-
einheit ausbauen, damit wäh-
vents toner from spilling inside
rend des Transports kein To-
the machine during shipment.
ner im Inneren des Kopierers
ausläuft.
1. Turn the power switch off and discon-
nect the power cord.
1. Den Netzschalter ausschalten und
das Netzkabel ziehen.
2. Remove the printer interface cable.
(AL-840 only)
2. Das Kabel für die Druckerschnittstel-
le entfernen (nur AL 840).
3. Push gently on both sides of the front
3. Vorsichtig an beiden Seiten der Front-
cover to open the cover.
abdeckung drücken, um sie zu öff-
4. Gently pull the TD cartridge out. See
nen.
page 3-21, TD CARTRIDGE RE-
4. Die Entwicklereinheit vorsichtig her-
PLACEMENT.
ausziehen (siehe Seite 3-21, AUS-
5. Remove the copy paper from the pa-
WECHSELN DER ENTWICKLER-
per tray. To remove the paper, see
EINHEIT).
page 3-26, Misfeed in the paper tray.
5. Das Kopierpapier aus dem Papier-
6. Remove the paper tray from the cop-
fach entnehmen. Siehe dazu Seite
ier.
3-26, Papierstau im Papierfach.
7. Gently push the paper output tray
6. Das Papierfach vom Kopierer abneh-
back into the copier until it stops.
men.
7. Das Papierausgabefach vorsichtig bis
8. Attach to the left side of the copier the
zum Anschlag in den Kopierer zu-
screw that has been saved. See page
rückschieben.
3-7, SETUP.
8. Die aufbewahrte Schraube an der lin-
ken Seite des Kopierers anbringen.
Siehe Seite 3-7, AUFSTELLEN
When shipping the copier, the
Diese Schraube dient der Siche-
screw must be reinstalled to pre-
rung des Scannerkopfes. Wenn der
vent shipping damage. This screw
Kopierer während des Scannens
will secure the scanning head. If
eines Originals ausgeschaltet wur-
the power has been turned off while
de, befindet sich der Scannerkopf
an original was being scanned, the
nicht ganz auf der linken Seite. In
scanning head is not at the left end
diesem Fall den Kopierer nochmals
position. In this case, turn on the
einschalten und sicherstellen, daß
copier and then turn it off after
sich der Kopf ganz links befindet,
checking the head is at the left end
dann den Kopierer wieder aus-
position.
schalten.
9. Close the front cover.
9. Die Frontabdeckung schließen.
DGB
10. Attach the packing materials and tape
10.Das während der Installation des Ko-
which were removed during installa-
pierers entfernte Verpackungsmate-
tion of the copier. See page 3-7, RE-
rial und Klebeband wieder anbringen.
MOVING PROTECTIVE PACKING
Siehe dazu Seite 3-7, ENTFERNEN
MATERIALS.
DER SCHUTZVERPACKUNG.
11.Pack the copier into the carton.
11.Den Kopierer in den Karton packen.
3–39
INTRODUCTION
INDLEDNING
Ce copieur a été conçu de manière à offrir une utilisation
Denne kopimaskine er designet til en intuitiv let betje-
facile et intuitive en occupant un espace minimal. Pour
ning og kræver et minimum af plads. For at opnå fuld
pouvoir tirer le meilleur parti de toutes les caractéristiques
udnyttelse af alle kopimaskinens features, skal De gøre
du copieur, il est important de bien vous familiariser avec
Dem fortrolig med denne betjeningsvejledning og kopi-
le mode d’emploi et avec le copieur.
maskinen.
Le AL-840 peut être utilisé à la fois comme copieur et
AL-840 kan både anvendes som kopimaskine og som
comme imprimante laser, tandis que le AL-800 ne
laserprinter medens AL-800 kun kan anvendes som
peut servir que de copieur. Ce manuel ne décrit que
kopimaskine. Denne betjeningsvejledning beskriver
les fonctions de copie. Pour la description des fonc-
kun kopimaskinens features. Vedr. beskrivelse af prin-
tions de l’imprimante, référez-vous au manuel séparé.
terens features, se separat betjeningsvejledning.
Conventions utilisées dans le mode d’emploi
Dans le mode d’emploi, les symboles suivants sont utilisés
Anvendte konventioner i denne manual
pour fournir à l’utilisateur les informations pertinentes pour
I denne betjeningsvejledning benyttes følgende tegn for
l’utilisation du copieur.
at give anvenderen informationer, der er vigtige ved brug
af kopimaskinen.
Avertit l’utilisateur qu’une blessure de l’opéra-
teur ou un endommagement du copieur pourrait
Advarer anvenderen, at der er fare for tilska-
se produire si le contenu de l’avertissement n’est
dekomst og ødelæggelse af kopimaskinen,
pas respecté scrupuleusement.
Avertis-
hvis indholdet i advarslen ikke overholdes
sement
fuldstændigt.
Advarsel
Avertit l’utilisateur qu’un endommagement du
Gør anvenderen opmærksom på, at der kan
copieur ou d’une de ses composantes pourrait se
ske skade på kopimaskinen eller en af dens
produire si le contenu de la mise en garde n’est
pas respecté scrupuleusement.
komponenter, såfremt indholdet i henvisning
Attention
Giv agt
ikke overholdes.
Les remarques fournissent des informations
relatives au copieur au sujet des spécifica-
OBS giver informationer, der er relevante for
tions, des fonctions, des performances, du
kopimaskinen med hensyn til specifikatio-
fonctionnement, etc., qui peuvent être utiles à
ner, funktion, ydeevne, virkemåde og sådan-
Remarque
l’opérateur.
ne emner, der er nyttige for anvenderen.
OBS
Indique une lettre affichée sur l’affichage.
Indikerer et bogstav, der vises på displayet.
SOMMAIRE
INDHOLDSFORTEGNELSE
Déballage .................................................................. I
Udpakning ................................................................. I
Nom des divers éléments ....................................... V
Delbetegnelser ........................................................III
Tableau de commande ........................................... IX
Betjeningspanel.................................................... VIII
Introduction........................................................... 4-1
Indledning ............................................................. 4-1
Installation du copieur .......................................... 4-2
Korrekt installering ............................................... 4-2
Précautions........................................................... 4-4
Advarsler .............................................................. 4-4
Mise en service .................................................... 4-7
Opstilling............................................................... 4-7
Installation de la cartouche toner/développeur ... 4-8
Isætning af TD-patron .......................................... 4-8
Chargement du papier de reproduction............... 4-9
Ilægning af kopipapir............................................ 4-9
Connexion du cable d’interface
Tilslutning af interface-kablet (kun AL-840) ...... 4-10
(AL-840 uniquement)...................................... 4-10
Normal kopiering ................................................ 4-12
Reproduction normale........................................ 4-12
Eksponeringsindstilling/Foto kopiering .............. 4-14
Réglage de l’exposition/Reproduction de
Automatisk eksponeringsindstilling ................... 4-15
photographies ................................................. 4-14
Formindskelse/Forstørrelse/Zoom..................... 4-16
Réglage de l’exposition automatique................. 4-15
Tosidet kopiering ................................................ 4-17
Réduction/Agrandissement/Zoom ..................... 4-16
Beskrivelse af specialfunktioner ........................ 4-18
Copie recto verso ............................................... 4-17
Tonersparemodus .............................................. 4-19
Description des fonctions particulières.............. 4-18
Anvenderprogrammer ........................................ 4-20
Mode d’économie de toner ................................ 4-19
Udskiftning af TD-patron .................................... 4-21
Programmes utilisateur ...................................... 4-20
Udskiftning af kopitromle ................................... 4-22
Remplacement de la cartouche toner/développeur..
4-21
Vedligeholdelse .................................................. 4-24
Remplacement de la cartouche de tambour ..... 4-22
Udtagning af forkert indført papir....................... 4-26
Entretien par l’utilisateur .................................... 4-24
Problemer med kopimaskinen ............................ 4-32
Blocage de papier – extraction .......................... 4-26
Status indikatorer ................................................ 4-35
Guide de dépannage.......................................... 4-29
Specifikationer.................................................... 4-37
Fonction d’autodiagnostic .................................. 4-35
Ekstraudstyrs- og reservedelsnumre og
Fiche technique .................................................. 4-36
DK F
opbevaring.......................................................... 4-38
Numéros de référence des fournitures en option
Transport ............................................................ 4-39
et de réserve et conservation ............................ 4-38
Transport du copieur .......................................... 4-39
4–1

INSTALLATION DU COPIEUR
KORREKT INSTALLERING
Une installation incorrecte peut causer
Forkert installlering kan ødelægge kopi-
des dommages au copieur. Observez
maskinen. Vær opmærksom på følgen-
les indications suivantes lors de la pre-
de under den første opstilling og hvis
mière installation et à chaque fois que le
kopimaskinen eventuelt flyttes.
copieur a été déplacé.
Si le copieur est déplacé d’un en-
Hvis kopimaskinen flyttes fra et
droit frais à un endroit chaud, de la
koldt rum til et varmt, kan der op-
condensation peut se former à l’in-
træde kondensering i kopimaski-
térieur de l’appareil. Utiliser le co-
nen. Brug af kopimaskinen i denne
pieur dans ces conditions entraîne-
tilstand medfører dårlig kopikvalitet
ra une mauvaise qualité de copie,
og fejlfunktioner. Lad kopimaskinen
ainsi que des dysfonctionnements.
stå i mindst 2 timer ved rumtempe-
Laissez le copieur s’adapter à la
ratur før brug.
température ambiante pendant au
moins 2 heures avant de l’utiliser.
1. N’installez pas le copieur dans des
1. Opstil ikke kopimaskinen i områder
endroits:
der er:
· humides ou très poussiéreux;
· tildampede, fugtige eller meget stø-
· exposés aux rayons directs du so-
vede
leil;
· udsat for direkte sollys
· mal aérés;
· dårligt ventileret
· soumis à des variations rapides de
· udsat for ekstreme temperatur- el-
température ou d’humidité, par
ler fugtighedsændringer, f.eks. i
exemple, près d’un climatiseur ou
nærheden af klimaanlæg eller var-
d’un appareil de chauffage.
meapparater.
2. Veillez à respecter l’espace requis
2. Sørg for tilstrækkelig plads rundt om
autour du copieur en vue de l’entre-
maskinen til service og tilstrækkelig
tien et d’une ventilation correcte.
ventialtion.
3. N’exposez pas la cartouche de tam-
3. Udsæt ikke kopitromlen for direkte
bour aux rayons directs du soleil.
sollys.
L’exposition de cet élément aux
Dette vil ødelægge overfladen (den
rayons directs du soleil peut endom-
grønne del) på kopitromlen og medfø-
mager sa surface (partie verte), ce qui
re plettede kopier.
entraînerait la formation de taches
4. Opbevar reservedele såsom kopi-
(20 cm)
sur les copies.
tromler og TD patroner på et mørkt
4. Rangez les fournitures de réserve,
sted uden at fjerne emballagen før
telles que les cartouches de tambour
brug.
et les cartouches toner/développeur,
Hvis de udsættes for direkte sollys,
dans un endroit sombre et ne les
resulterer det i plettede kopier.
(10 cm)
(10 cm)
déballez pas avant l’utilisation.
L’exposition aux rayons directs du
5. Berør ikke direkte overfladen (den
soleil peut entraîner la formation de
grønne del) på kopitromlen med hån-
taches sur les copies.
den.
5. Ne touchez pas directement la surfa-
Dette kan ødelægge overfladen og
(20 cm)
ce (partie verte) de la cartouche de
medføre plettede kopier.
tambour avec la main.
Ce contact endommagerait la surface
de la cartouche, ce qui entraînerait la
formation de taches sur les copies.
DK F
4–2
6. Veillez à ce que l’interrupteur d’alimen-
6. Kontroller om netkontakten på kopi-
tation du copieur se trouve en position
maskinen er i OFF stilling. Stik netled-
d’arrêt. Introduisez le cordon d’alimen-
ningen i netbøsningen på bagsiden af
tation fourni dans la fiche du cordon
kopimaskinen.
d’alimentation à l’arrière du copieur.
Si vous utilisez le copieur dans un
Hvis kopimaskinen flyttes fra et
autre pays que le pays d’achat du
koldt rum til et varmt, kan der op-
copieur, vous devez vous assurer
træde kondensering i kopimaski-
que l’alimentation électrique locale
nen. Brug af kopimaskinen i denne
est compatible avec le modèle de
tilstand medfører dårlig kopikvalitet
votre appareil. Si vous branchez le
og fejlfunktioner. Lad kopimaskinen
copieur à une alimentation électri-
stå i mindst 2 timer ved rumtempe-
que incompatible, l’appareil subira
ratur før brug.
des dommages irréparables.
7. Branchez l’autre extrémité du cordon
7. Stik den anden ende af netledningen
d’alimentation à la prise de courant la
i den nærmeste stikdåse.
plus proche.
Stik kun netledningen i en korrekt
Branchez toujours le cordon d’ali-
jordforbundet stikdåse. Anvend ikke
mentation à une prise de courant
forlængerledninger eller multistik-
murale correctement reliée à la terre.
dåser.
N'utilisez pas de câble prolongateur
ou de blocs multi-prises.
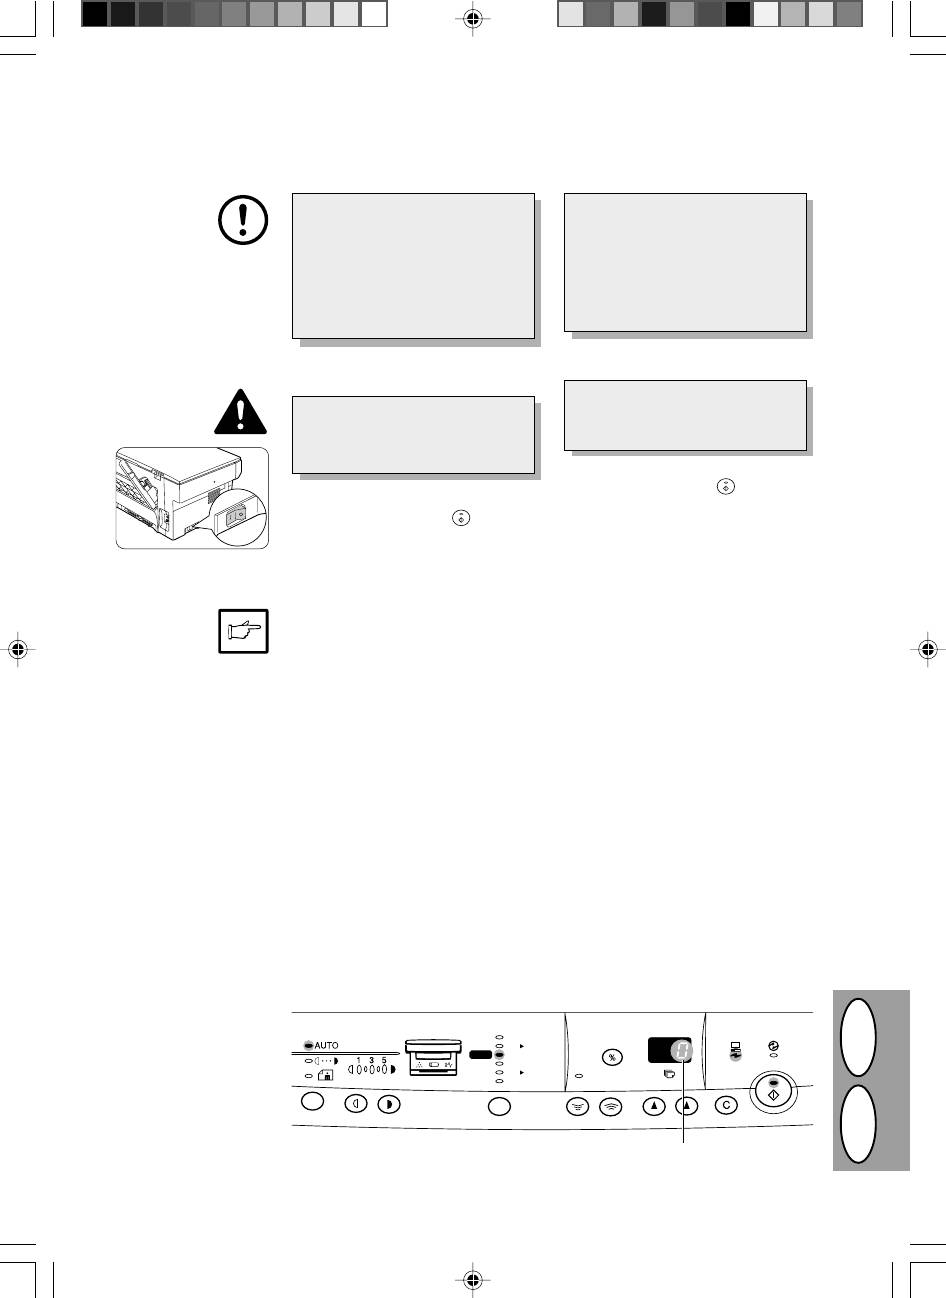
Stil netkontakten på venstre side af kopi-
Mettez l’interrupteur d’alimentation situé sur
maskinen på „ON“. Klar (
) indikatoren
le côté gauche du copieur en position de
lyser og andre indikatorer, der viser start-
marche. Le témoin de prêt (
) s’allume et
indstillingerne på betjeningspanelet ly-
d’autres témoins indiquant les réglages ini-
ser ligeledes for at signalisere klar-til-
tiaux du tableau de commande s’allument
standen. Vedrørende startindstillinger-
également pour signaler que le copieur est
ne, se „Startindstillinger på betjenings-
prêt. En ce qui concerne les réglages ini-
panelet“ beskrevet nedenfor. of operati-
tiaux, reportez-vous à la section ”Réglages
initiaux du tableau de commande” ci-après.
on panel" described below.
Ce copieur passe au mode d’économie
Kopimaskinen skifter til en energispare-
d’énergie une fois que le laps de temps réglé
s’est écoulé sans qu’une opération de copie
modus, når den indstillede tid er udløbet
n’ait été faite après la dernière copie d’un
uden nogen form for kopimaskineaktivi-
cycle de copie ou après la mise sous tension
tet, efter at den sidste kopi i et kopie-
du copieur.
ringsforløb er lavet eller efter at der er
Les réglages des modes d’économie d’éner-
tændt for kopimaskinen. Indstillingerne i
gie peuvent être modifiés. Reportez-vous à la
energisparemodien kan modificeres. se
page 4-20, PROGRAMMES UTILISATEUR.
side 4-20 ANVENDERPROGRAMMER.
Le copieur retourne aux réglages initiaux un
certain laps de temps prédéterminé après
Kopimaskinen skifter tilbage til startind-
que la dernière copie d’un travail a été effec-
stillingerne efter et forudindstillet tids-
tuée. Ce laps de temps prédéterminé (temps
rum efter at den sidste kopi er lavet. Det
de réinitialisation automatique) peut être
forudindstillede tidsrum (auto klartid) kan
modifié. Reportez-vous à la page 4-20, PRO-
ændres. Se side 4-20, ANVENDERPRO-
GRAMMES UTILISATEUR.
GRAMMER.
RÉGLAGES INITIAUX DU TABLEAU DE COMMANDE
STARTINDSTILLINGER AF BETJENINGSPANELET
Le copieur retourne aux réglages ini-
Kopimaskinen skifter til startindstillinger-
tiaux lors de la mise sous tension ou
ne , hvis den har været tændt eller et
lorsque la touche d’effacement (
>
) est
forudindstillet tidsrum (auto klartid) er
appuyée.
gået, efter at den sidste kopi er lavet.
200%
141%
A5 A4
100%
86%
70%
A4 A5
ZOOM
50%
DK F
”0” est affiché sur l’affichage.
„0“ vises på displayet
4–3
PRÉCAUTIONS
ADVARSLER
Veuillez respecter les précautions ci-après lors de
Følg henvisningerne nedenfor, når kopimaskinen be-
l’utilisation du copieur.
nyttes.
· Installez le copieur sur un socle stable et horizontal.
· Anbring kopimaskinen på en fast, plan flade.
· N’installez pas le copieur dans un endroit humide ou
· Opstil ikke kopimaskinen i et fugtigt eller støvet rum.
poussiéreux.
· Hvis kopimaskinen ikke benyttes i et længere tids-
· Lorsque le copieur n’est pas utilisé pendant une
rum, f.eks. ved sammenhængende helligdage, stil-
longue période, par exemple pendant les vacances
les netkontakten på off og netledningen fjernes fra
ou lors du transport de l’appareil, placez l’interrup-
stikdåsen.
teur d’alimentation en position d’arrêt et débranchez
· Opvarmningsområdet er varmt. Udvis forsigtighed i
le cordon d’alimentation de la prise de courant.
dette område når der fjernes forkert indført papir.
· La zone de fixation est chaude. Faites attention à
· Hvis kopimaskinen flyttes, skal der slukkes for net-
cette zone lors de l'extraction de feuilles bloquées.
kontakten og netleningen fjernes fra netstikdåsen.
· Ne regardez pas directement la source lumineuse.
· Kig ikke direkte ind i lyskilden. Dette kan medføre
Cela pourrait endommager vos yeux.
øjenskader.
· Ne recouvrez pas le copieur d’une couverture, d’un
· Tildæk ikke kopimaskinen med en støvet afdæk-
linge ou d’une housse de plastique lorsqu’il est sous
ning, stof eller plastikfilm når kopimaskinen er tændt.
tension. Ce recouvrement peut empêcher l’évacua-
Dette kan forhindre varmeudstråling og ødelægge
tion de la chaleur et endommager l’appareil.
kopimaskinen.
Appareil à laser de classe 1
KLASSE 1 LASERAPPARAT
Rayonnement laser invisible lorsque le capot
Usynlig laserstråling i åben tilstand og når
est ouvert et la sécurité pontée. Eviter toutes
sikkerhedsbrydere er ude af funktion, undgå
exposition au faisceau.
udsættelse for stråling.
D’usine, la puissance de sortie du scanner
Scanneren bliver justeret til 0.6 mW plus 13.4
est réglée sur 0,6 milliwatt plus 13,4 PCTS et
procent på samlebåndet og holdes konstant
est maintenue constante par la commande
under drift af den automatiske effektkontrol
automatique de puissance (APC).
(APC).
Ce produit contient une source laser. Pour
Dette produkt indeholder en laveffekt laser.
garantir la sécurité, il est interdit d’enlever un
For at garantere kontinuerlig sikkerhed må
capot quelconque pour accéder à l’intérieur
afdækninger ikke fjernes og forsøg ikke at få
de l’appareil. Veuillez confier tout entretien à
adgang til det indre af apparatet.Overlad al
un personnel qualifié.
service til kvalificeret personale.
PRECAUTION
GIV AGT
·Ne mettez pas rapidement le copieur en
·Tænd og sluk ikke kopimaskinen hurtigt
marche après l'avoir arrêté. Attendez tou-
efter hinanden. Når kopimaskinen er sluk-
jours 10 à 15 secondes avant de le remet-
ket, vent da 10 til 15 sekunder, før den
tre sous tension.
tændes igen.
·N'oubliez pas d'éteindre le copieur avant
·Kopimaskinen skal slukkes, før delene in-
de mettre des fournitures en place.
stalleres.
DK F
4–4
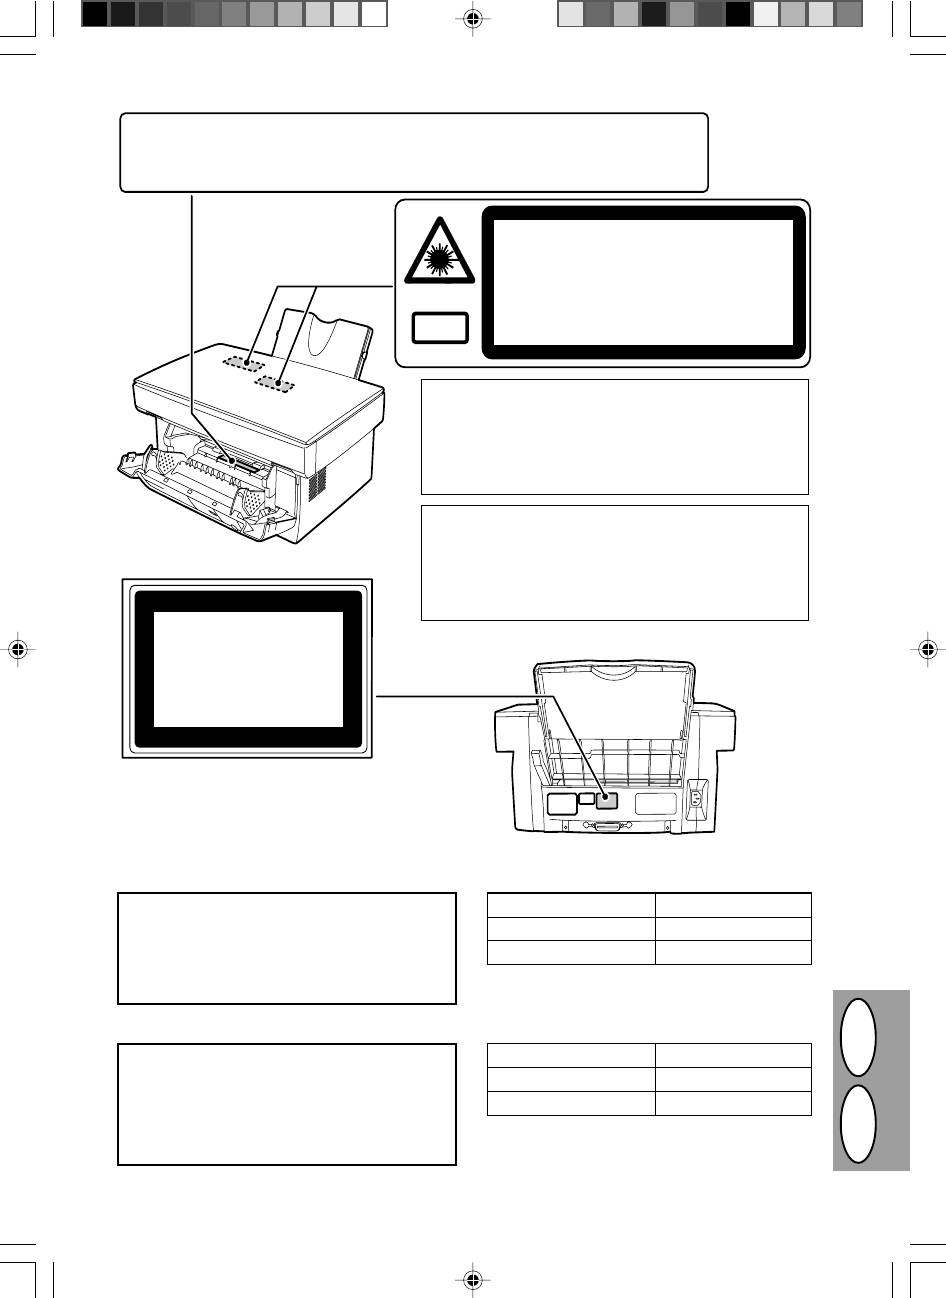
●
CAUTION: HIGH TEMPERATURE
●
ZUR BEACHTUNG: HOHE TEMPERATUR
●
ATTENTION: TEMPERATURE ELEVEE
●
CUIDADO: TEMPERATURA ELEVADA
INVISIBLE LASER RADIATION WHEN OPEN AND INTERLOCKS DEFEATED.
CAUTION
AVOID EXPOSURE TO BEAM.
UNSICHTBARE LASERSTRAHLUNG WENN ABDECKUNG GEÖFFNET UND
VORSICHT
SICHERHEITSVERRIEGELUNG ÜBERERÜCKT. NICHT DEM STRAHL AUSSETZEN.
USYNLIG LASERSTRÅLING VED ÅBNING, NÅR SIKKERHEDSAFBRYDERE ER
ADVARSEL
UDE AF FUNKTION. UNDGA UDSAETTELSE FOR STRÅLING.
USYNLIG LASERSTRÅLING NÅR DEKSEL ÅPNES OG SIKKERHEDSLÅS BRYTES.
ADVERSEL
UNNGÅ EKSPONERING FOR STRÅLEN.
OSYNLIG LASERSTRÅLNING NÄR DENNA DEL ÄR ÖPPNAD OCH SPÄRRAR ÄR
VARNING
URKOPPLADE. STRÅLEN ÄR FARLIG. BETRAKTA EJ STRÅLEN.
Laserstrahl
AVATTAESSA JA SUOJALUKITUS OHITETTAESSA OLET ALTTIINA NÄKYMÄTÖNTÄ
VARO!
LASERSÄTEILYLLE. ÄLÄ KATSO SÄTEESEEN.
VAROITUS! LAITTEEN KÄYTTÄMINEN MUULLA
KUIN TÄSSÄ KÄYTTÖOHJEESSA MAINITULLA
TAVALLA SAATTAA ALTISTAA KÄYTTÄJÄN
TURVALLISUUSLUOKAN 1 YLITTÄVÄLLE
NÄKYMÄTTÖMÄLLE LASERSÄTEILYLLE.
VARNING - OM APPARATEN ANVÄNDS PÅ ANNAT
SÄTT ÄN I DENNA BRUKSANVISNING
SPECIFICERATS, KAN ANVÄNDAREN UTSÄTTAS
FÖR OSYNLIG LASERSTRÅLNING, SOM
ÖVERSKRIDER GRÄNSEN FÖR LASERKLASS 1.
CLASS 1
LASER PRODUCT
LASER KLASSE 1
Longueur d’onde 785 nm ± 15 nm
Attention
Ce produit contient un dispositif émettant un laser à
Durée des impulsions (13,98 ± 2 µs)/7 mm
faible puissance. Pour assurer la sécurité, ne pas
enlever le couvercle ni accéder à l’intérieur du produit.
Puissance de sortie 0,40 mW ± 0,05 mW
Pour toute réparation, s’adresser à une personne
qualifiée.
Advarsel
Bølgelængde 785 nm ± 15 nm
Dette produkt indeholder en
Pulstid (13,98 ± 2 µs)/7 mm
svagstrømslaseranording. For at opretholde
sikkerheden må afskærmninger ikke fjernes, og der
Udgangseffekt 0,40 mW ± 0,05 mW
må ikke gøres forsøg på at få adgang til den
indvendige side af dette produkt. Overlad al
DK F
servicering til kvalificerede teknikere.
4–5
L’utilisation de commandes ou de réglages ou la
Anvendelse af andre kontroller, justeringer eller
mise en œuvre de procédures différentes des
procedureudførelser end her specificeret kan
présentes instructions peut entraîner une exposi-
medføre farlig strålebelastning.
tion dangereuse à un rayonnement.
PRINCIPALES CARACTÉRISTIQUES
DE VIGTIGSTE FEATURES
1 Reproduction laser ultra-rapide
1 High-speed laser kopiering
· Etant donné que le délai de préchauffage est nul,
· Da opvarmningstiden er nul, kan kopieringen star-
la reproduction peut débuter dès que l’interrupteur
tes umiddelbart efter at der er tændt for netkontak-
d’alimentation est placé en position de marche.
ten.
· La durée de la première copie s’élève seulement
· Tiden for den første kopi er kun
12,5 sekunder
à
12,5 secondes (mode normal).
(normal modus).
· La vitesse de reproduction est de 8 copies/min., ce
· Kopieringshastigheden er 8 kopier/min., hvilket
qui améliore l’efficacité du travail.
øger arbejdseffektiviteten.
2 Image numérique haute qualité
2 Digitale billeder af høj kvalitet
· Une reproduction d’image de haute qualité à
600 ppp peut être réalisée.
· Kopiering af høj kvalitet med 600 dpi kan gennem-
· Outre le mode de réglage automatique de l’expo-
føres.
sition, l’exposition peut être réglée en cinq étapes
· Udover den automatiske eksponeringsmodus, kan
en mode manuel.
den manuelle eksponering indstilles i fem trin.
· La fonction de reproduction en mode photo, qui
· Kopieringsfunktionen fotomodus, der tillader frem-
permet une reproduction nette d’images origina-
ragende kopiering af vanskelige autotypier af ori-
les délicates en demi-tons telles que les photogra-
ginalbilleder, såsom monokromfotos og farvefo-
phies monochromes et en couleur, peut être utili-
tos, kan anvendes.
sée.
3 Væsentlige kopifunktioner
3 Principales fonctions de reproduction
· Zoomkopiering fra 50% til 200% i trin på 1% kan
· Une reproduction avec zoom de 50% à 200% peut
être réalisée par pas de 1%.
gennemføres.
· La reproduction continue d’un volume maximal de
· Fortsat kopiering af maksimalt 50 ark kan også
50 pages peut également être réalisée.
gennemføres.
· Le mode d’économie de toner peut être activé
· Toner sparemodus til reducering af tonerforbruget
pour réduire d’environ 10% la consommation de
med ca. 10% kan indstilles.
toner.
· Anvenderprogrammer som tillader indstilling/mo-
· Des programmes utilisateur permettant la défini-
difikation af funktioner til anvenderens behov tilby-
tion ou la modification de fonctions d’après les
des.
besoins de l’utilisateur sont fournis.
4 Scan 1 gang/print mange gange
4 Analyse optique unique pour impression multiple
· Kopimaskinen er udstyret med en 1-sides hukom-
· Le copieur est doté d’une mémoire-tampon de 1
melse, der tillader kopimaskinen at lave indtil 50
page. Cette mémoire permet à l’appareil d’analy-
kopier med kun 1 scanning. Denne feature medfø-
ser optiquement l’original à une seule reprise et de
réaliser des copies jusqu’à 50 exemplaires maxi-
rer øget arbejdsflow, nedsætter kopimaskinens
mum. Cette fonction améliore le flux de travail,
støjniveau, reducerer slitage af scanne-mekanis-
réduit les bruits de fonctionnement du copieur et
men. Denne feature medfører højere driftssikker-
limite l’usure du mécanisme d’analyse optique.
hed.
Cette fonction garantit également une plus grande
5 Printer feature (kun AL-840)
fiabilité.
· Al-840 kan anvendes som laser-printer.
5 Fonction d’impression (AL-840 uniquement)
· Le AL-840 peut être utilisé comme imprimante
6 Papirbakke til 250 ark
laser.
· Papirbakken kan indeholde 250 ark kopipapir.
6 Magasin à papier (250 feuilles)
Kapaciteten svarer til almindelig kontorbrug og
· Le magasin à papier contient jusqu’à 250 feuilles
tillader printning af store mængder og reducerer
de papier de reproduction. Cette capacité est
arbejdet med ilægning af papir.
adaptée au travail de bureau et permet d’imprimer
7 Miljøvenligt design
en grandes quantités tout en évitant de devoir trop
· Udgangsbakken er anbragt i kopimaskinen for at
souvent recharger le papier.
spare plads.
7 Conception respectueuse de l’environnement
· Foropvarmningsmodien og den automatiske ener-
· Le plateau de sortie est inséré à l’intérieur du
gislukkemodus er implementeret for at reducere
copieur afin de réaliser une économie d’espace.
energiforbruget i stand-by mode.
· Le mode de préchauffage et le mode de coupure
DK F
automatique du courant sont intégrés afin de rédui-
re la consommation électrique en mode de veille.
4–6
DK F
4–7
a
b
MISE EN SERVICE
OPSTILLING
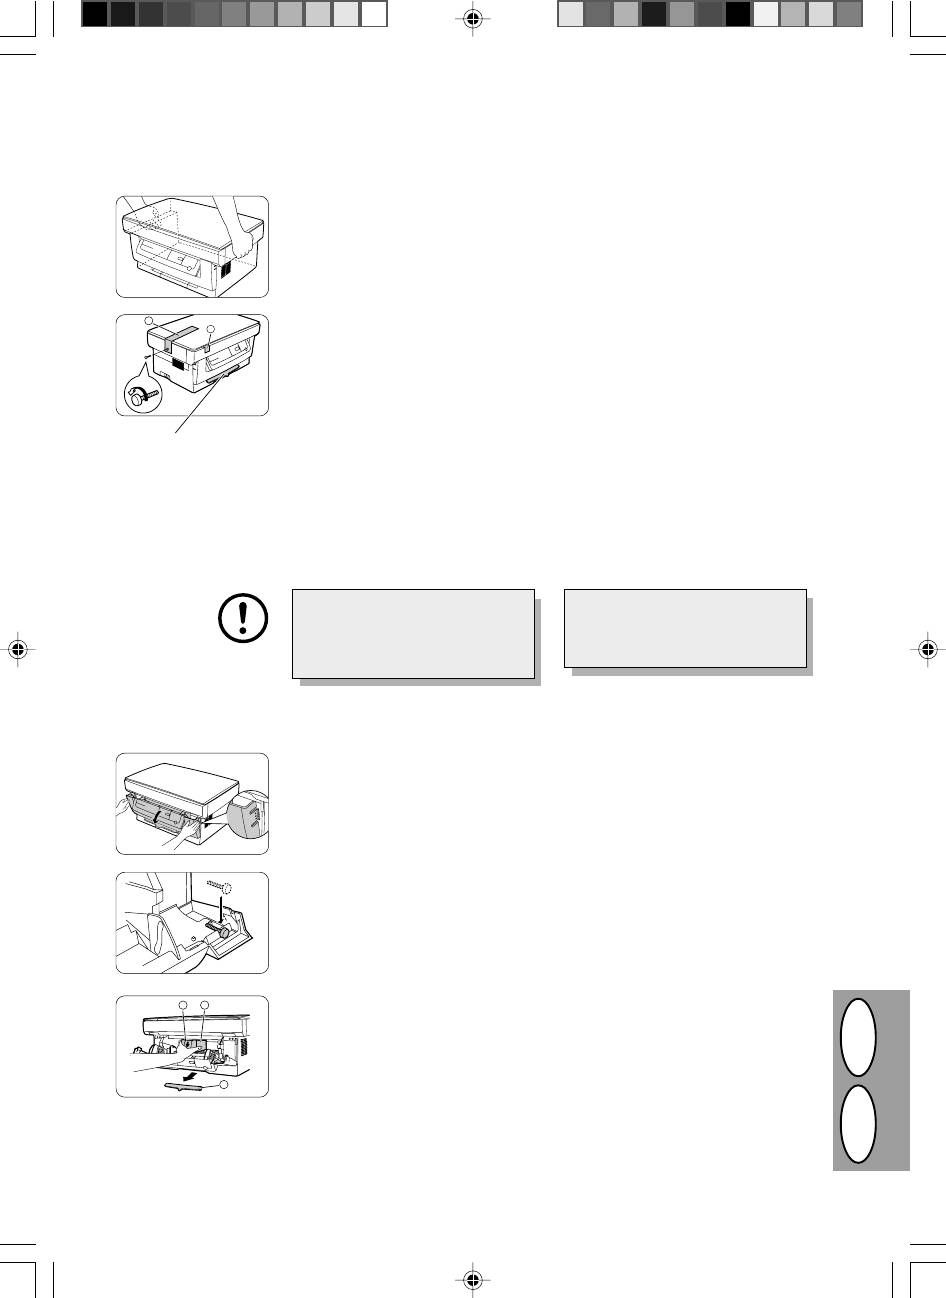
1. Déballez le copieur et tenez-le par les
1. Kopimaskinen udpakkes og holdes
poignées prévues des deux côtés de
på begge sider som vist ved transport
l'appareil pour le transporter jusqu'à
til opstillingsstedet.
son emplacement d'installation.
2. Dévissez la vis située sur le côté gau-
2. Fjern skruen på venstre side af kopi-
che du copieur en la faisant pivoter
maskinen ved at dreje skruen som
dans le sens de la flèche. Enlevez le
vist med en pil. Fjern beskyttelsesma-
matériau de protection a.
terialet a.
N'enlevez pas cette pièce
aussi longtemps que le
couvercle avant est fermé.
3. Enlevez la bande adhésive b.
3. Fjern tapen b.
Fjern ikke denne del når
frontafdækningen er lukket.
Gardez précieusement la vis
Opbevar skruen, da den skal an-
pour pouvoir la réutiliser si vous
vendes hvis kopimaskinen skal flyt-
êtes amené à déplacer le copieur
tes (s. 4-39). Opbevar skruen på
(p. 4-39). Revissez la vis à l'inté-
indersiden af frontafdækningen.
rieur du couvercle avant.
4. Appuyez doucement sur les deux cô-
4. Skub forsigtigt på begge sider af front-
tés du couvercle avant pour l’ouvrir.
afdækningen for at åbne den.
5. Revissez la vis, qui avait été enlevée
5. Opbevar skruen, der er fjernet i trin 2
à l'étape 2, du côté droit à l'intérieur
i højre inderside af frontafdækningen.
du couvercle avant.
d
e
6. Après avoir enlevé le matériau de
6. Efter fjernelse af beskyttelsesmateri-
protection c, tirez doucement et en
alet c, trækkes forsigtigt det sorte
une fois le papier de protection d et
beskyttelsespapir d og beskyttelses-
le matériau de protection e vers vous,
materialet e samtidigt ud i retning
et enlevez-les. Veillez à ne pas dé-
mod Dem selv. Pas på ikke at rive
c
chirer le papier de protection pendant
beskyttelsespapiret ved udtagningen.
que vous l’enlevez.
INSTALLATION DE LA CARTOUCHE TONER/DÉVELOPPEUR
ISÆTNING AF TD PATRON
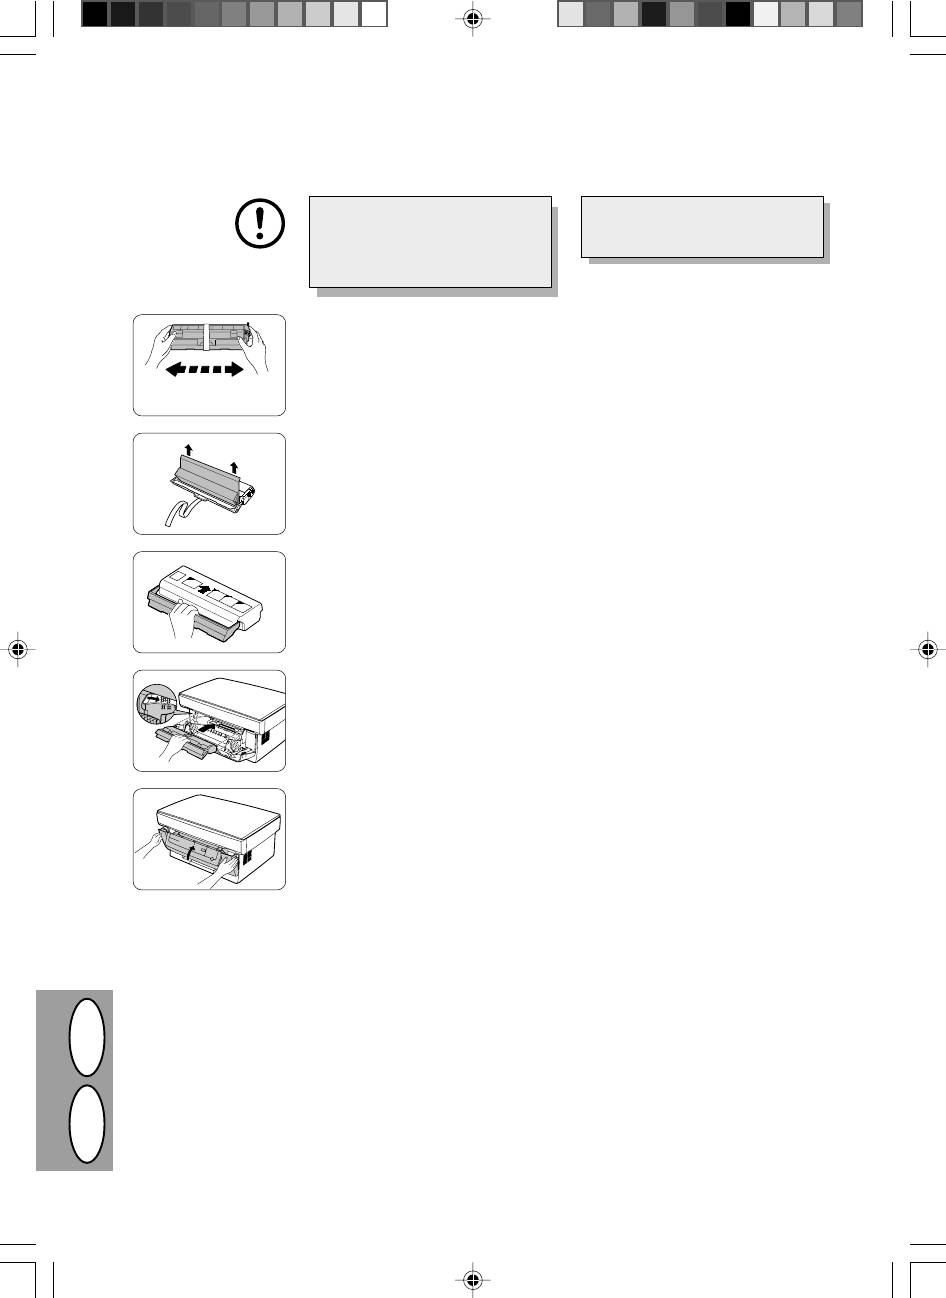
Assurez-vous que vous avez bien
Kontroller, at beskyttelsespapiret er
enlevé le papier de protection de la
fjernet fra kopitromlen før isætning
cartouche du tambour avant de
af TD patronen.
mettre en place la cartouche toner/
développeur.
1. Sortez la cartouche toner/déve-
1. Tag TD patronen ud af posen. Hold
loppeur de son sac de protection.
patronen på begge sider og ryst den
Saisissez la cartouche par ses deux
vandret fire eller fem gange.
extrémités et secouez-la horizontale-
ment à quatre ou cinq reprises.
4 ou 5 fois
4 eller 5 gange
2. Enlevez la bande de protection, puis
2. Fjern beskyttelsestapen og derpå be-
le couvercle de protection.
skyttelsesafdækningen.
3. Tenez la poignée de la cartouche
3. Hold håndtaget på TD patronen såle-
toner/développeur de manière à ce
des, at de påtrykte markeringer på
que les marques imprimées sur le
patronen peger opad.
dessus de la cartouche soient diri-
gées vers le haut.
4. Glissez doucement la cartouche to-
4. Isæt forsigtigt TD patronen i kopima-
ner/développeur le long des guides
skinen langs med føringerne i den
du copieur, dans le sens indiqué par
med pilen angivne retning.
la flèche.
Ret fremspringene på begge sider ind
Alignez sur les guides les ergots pré-
med føringerne.
sents des deux côtés de la cartouche.
5. Refermez le couvercle avant.
5. Luk frontafdækningen.
DK F
4–8
CHARGEMENT DU PAPIER DE REPRODUCTION
ILÆGNING AF KOPIPAPIR
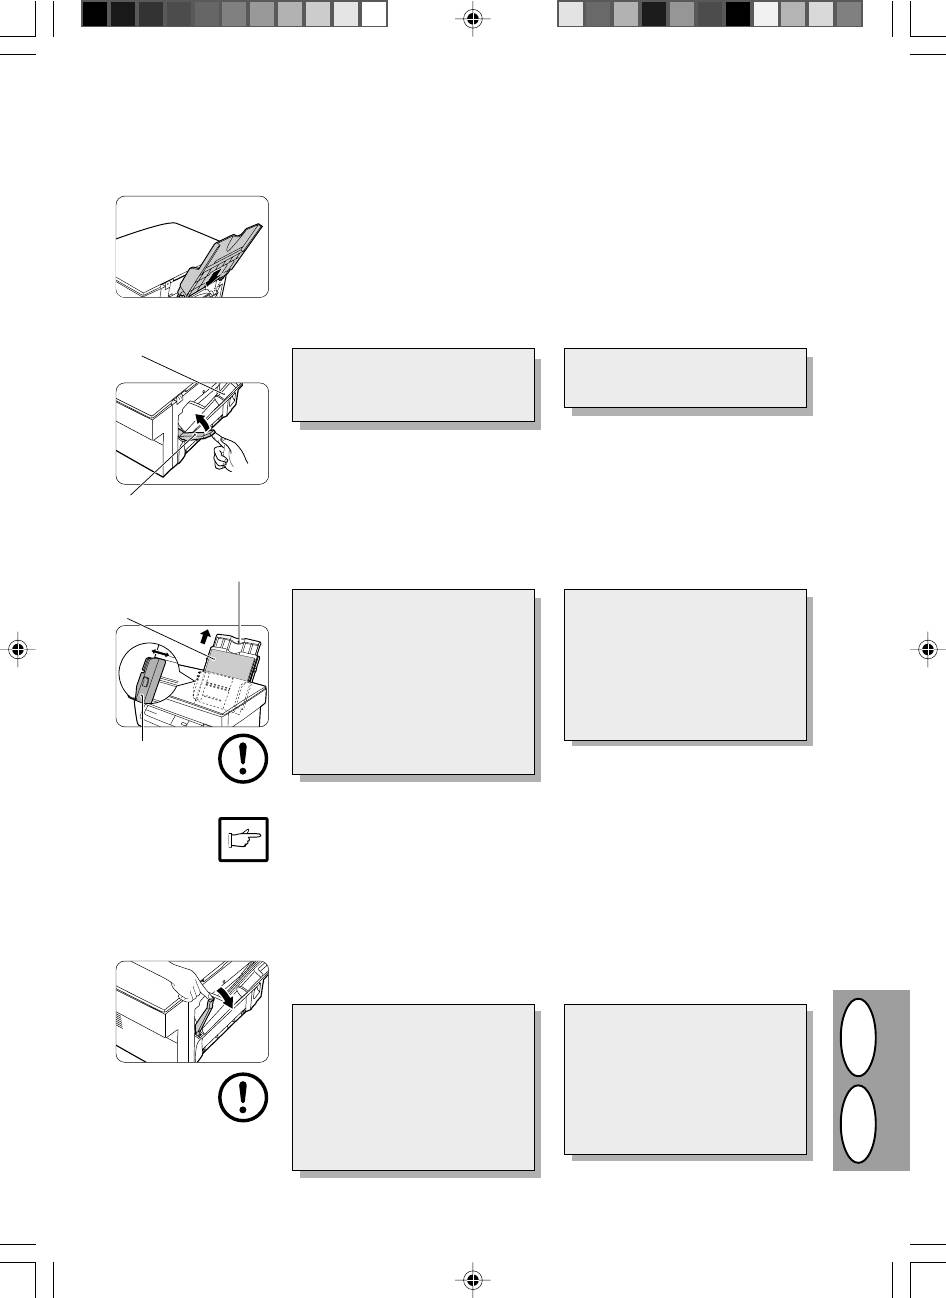
1. Tenez le magasin à papier de maniè-
1. Hold papirbakken således, at papir-
re à ce que le guide-papier du maga-
bakkens papirføring vender fremad
sin soit dirigé vers l’avant; glissez
og isæt derpå papirbakken i kopima-
alors le magasin dans les rainures
skinens papirbakkeslidser.
prévues à cet effet à l’intérieur du
copieur.
2. Poussez vers le haut le levier de dé-
2. Træk i papirudløserarmen der befin-
gagement du papier situé à l’arrière
der sig på bagsiden af kopimaskinen.
Magasin à papier
du copieur.
Papirbakke
Si vous chargez du papier alors
Hvis papiret lægges i uden at gøre
que cette opération n’a pas été
dette, optræder der forkert indfø-
exécutée, vous risquez de provo-
ring.
quer un bourrage.
3. Si vous utilisez du papier extra-long,
3. Hvis papiret lægges i uden at gøre
relevez le support du papier afin de
dette, optræder der fork. Spred papi-
soutenir la rame. Aérez le papier de
ret og anbring det i papirbakken med
reproduction et glissez-le dans le
printsiden vendende mod Dem. An-
Levier de dégagement du
magasin, face à imprimer tournée vers
bring papiret langs med den højre
papier
vous. Positionnez le papier le long du
side af papirbakken. Juster derpå pa-
Papirudløserarm
bord droit du magasin à papier. En-
pirføringen til papirets bredde.
suite, réglez le guide-papier pour qu’il
Support du papier
Papirholder
corresponde à la largeur de la rame.
Face à imprimer
Printside
· Le magasin peut contenir jusqu’à
· Papirbakken kan indeholde 250
250 feuilles de papier standard (56
ark standardpapir (56 til 80 g/m²).
à 80 g/m²). Veillez à ne pas y
Læg ikke for mange ark i.
glisser trop de feuilles.
· Indfør kun kopipapir i længderet-
· Ne chargez le papier de repro-
ningen.
duction que dans le sens de la lon-
gueur.
· Indfør kun eet ark ad gangen, hvis
der kopieres på specialpapir såsom
· Lorsque vous copiez sur du pa-
etiketter og transparentfolie.
pier spécial (étiquettes, transpa-
Guide-papier
rents,...), chargez les feuilles une à
Papirføring
une.
Lorsque vous copiez sur une enveloppe,
Hvis der kopieres på kuverter, sættes
glissez-la dans l’appareil de manière à
disse således i, at den side der skal
ce que la face à imprimer soit dirigée
printes vender opad og således, at klap-
vers le haut et que le rabat au verso se
pen på bagsiden vender mod højre set
trouve à droite lorsque vous vous trou-
fra forsiden af kopimaskinen. Afstanden
vez en face du copieur. Laissez un
mellem venstre side af kuverten og pa-
espace de 1 mm environ entre le guide-
pirføringen skal være ca. 1mm.
papier et le bord gauche de l’enveloppe.
4. Assurez-vous que le levier de déga-
4. Kontroller, at papirudløserarmen er
gement du papier est repoussé en
skubbet ind. Papiret holdes af papir-
place. Le papier sera pincé par le
føringsrullen inde i kopimaskinen.
rouleau de chargement du papier à
l’intérieur du copieur.
Lorsque vous placez du papier spé-
Hvis der anbringes specialpapir el-
cial, ou plusieurs feuilles de papier,
ler flere ark papir eller der laves
ou encore lorsque vous lancez des
tosidede kopier, kan det forekom-
copies recto verso, le papier ne
me, at papiret ikke kan klemmes
peut être pincé à l'intérieur du co-
fast inde i kopimaskinen selvom pa-
pieur même si le levier de dégage-
pirudløserarmen er skubbet tilbage.
ment du papier est remis en place.
I så tilfælde, gentages udløserarm-
Dans ce cas, répétez à plusieurs
ens funktion gentagne gange for at
reprises le maniement du levier de
dégagement du papier afin de vous
sikre, at papiret klemmes fast.
DK F
assurer que le papier est pincé.
4–9
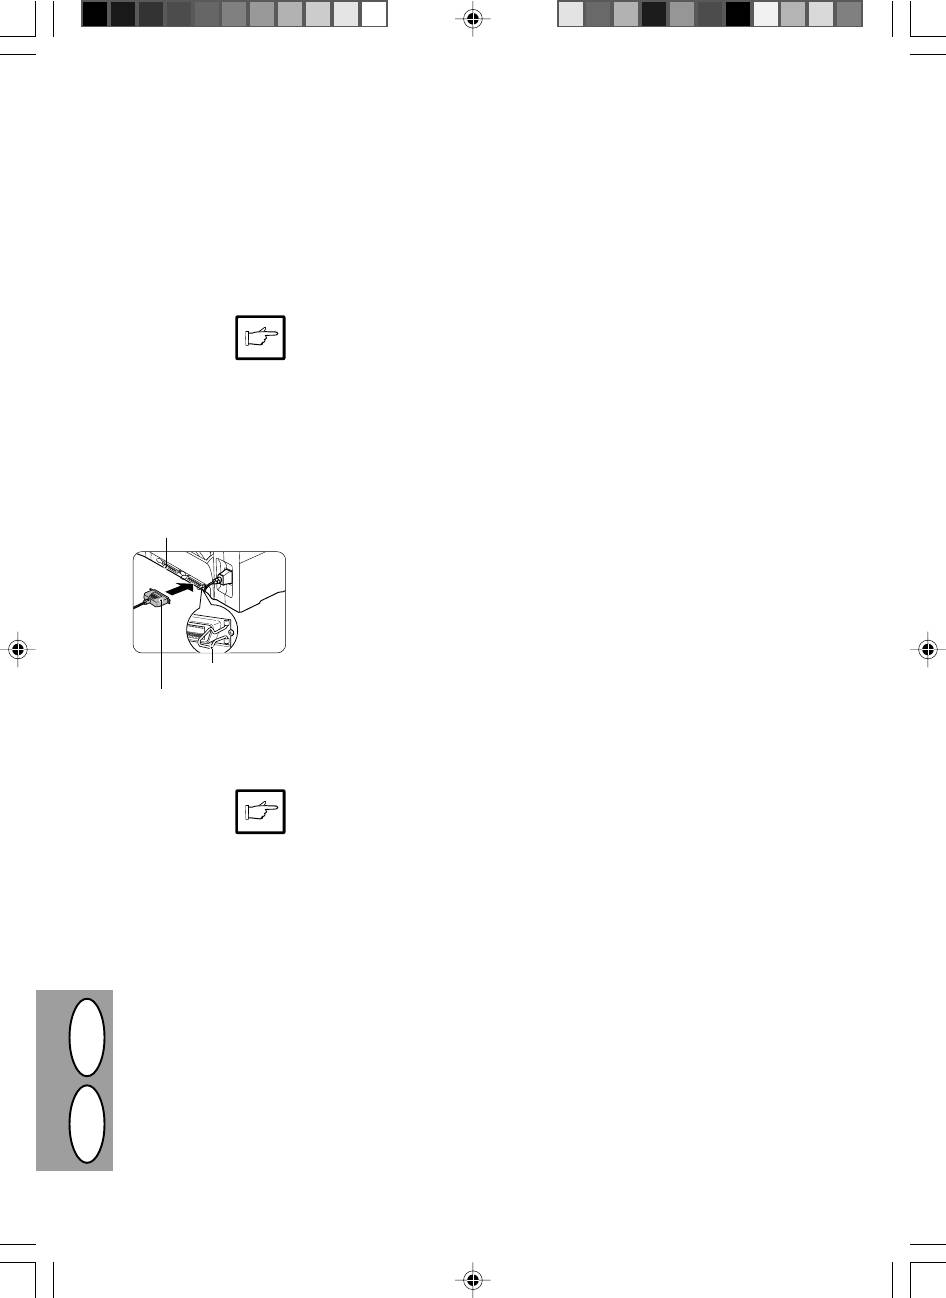
CONNEXION DU CABLE D’INTERFACE (AL-840 UNIQUEMENT)
TILSLUTNING AF INTERFACE-KABLET (KUN AL-840)
Pour utiliser le modèle AL-840 comme imprimante
For at anvende AL-840 som laserprinter skal det paral-
laser, branchez-le sur le câble d’interface parallèle.
lelle interface-kabel tilsluttes.
· Utilisez le câble d’interface parallèle
· Anvend det parallelle interface-kabel,
livré avec le AL-840.
der leveres sammen med AL-840.
· Pour les caractéristiques techniques
· Vedr. specifikationer for det parallelle
de l’interface parallèle, consultez le ma-
interface-kabel, se betjeningsvejlednin-
nuel d’utilisation et référez-vous à la
gen for printerens features.
section “Fonctions de l’imprimante”.
1. Contrôlez si les interrupteurs d’ali-
1. Kontroller, at netkontakten er i OFF-
mentation générale de l’imprimante
stilling på både printeren og compute-
et de l’ordinateur sont tous les deux
ren.
Connecteur d’interface
éteints (position OFF).
parallèle
Parallel interface-connector
2. Branchez le câble d’interface parallè-
2. Stik det parallelle interface-kabel ind i
le dans un des connecteurs de l’inter-
en af printerens connectorer (hvilken
face d’imprimante (quel que soit le
er ligegyldig). Clips de to holdeclips
connecteur que vous souhaitiez utili-
fast på siden af printer-connectoren
ser). Clipsez les deux griffes latérales
for at holde interface-connectoren på
du connecteur de l’imprimante de
plads.
manière à maintenir le connecteur du
Griffe à clipser
câble bien en place.
Holdeclips
Connecteur du câble
3. Branchez l’autre extrémité du câble
3. Stik den anden ende af kablet ind i
d’interface
sur le connecteur d’interface parallèle
parallel-connectoren på computeren.
Interface-connector
de votre ordinateur. (Pour plus de
(Vedr. detaljer, se computerens be-
détails, veuillez vous référer au ma-
tjeningsvejledning.)
nuel d’utilisation de votre ordinateur.)
L’imprimante envoie et reçoit des don-
Printeren sender og modtager data bidi-
nées dans les deux directions et à très
rektionalt og med stor hastighed. Nogle
grande vitesse. Certains commutateurs
omskifterbokse og gennemgangskom-
et appareils déviateurs ne peuvent sup-
ponenter understøtter ikke high-speed,
porter le transfert bidirectionnel de don-
bidirektional overføring af data og an-
nées à grande vitesse; si vous utilisez ce
vendelse af disse kan medføre printfejl.
type de dispositif, vous risquez de pro-
voquer des erreurs d’impression.
DK F
4–10


