Sony CDX-4000RX RU: Cleaning the connectors Dismounting the unit
Cleaning the connectors Dismounting the unit: Sony CDX-4000RX RU
Table of contents
- Welcome ! Precautions
- Notes on CDs
- Table of Contents
- Location of controls
- Resetting the unit Detaching the front panel
- Turning the unit on/off Setting the clock How to use the menu
- Listening to a CD
- Automatically scrolling a disc name Locating a specific track — Auto Scroll — Automatic Music Sensor (AMS) Locating a specific point in a track — Manual Search
- Playing a CD in various modes Memorising stations automatically
- Receiving the memorised stations Memorising only the desired stations
- Overview of the RDS function Displaying the station name
- Retuning the same programme automatically
- Listening to traffic announcements
- Presetting the RDS stations with the AF and TA data
- Locating a station by programme type
- Setting the clock automatically Labelling the rotary commander (optional)
- Using the rotary commander (optional)
- Adjusting the sound characteristics
- Attenuating the sound Changing the sound and display settings
- Boosting the bass sound Maintenance
- Cleaning the connectors Dismounting the unit
- Specifications
- Troubleshooting guide General CD playback
- Radio reception RDS
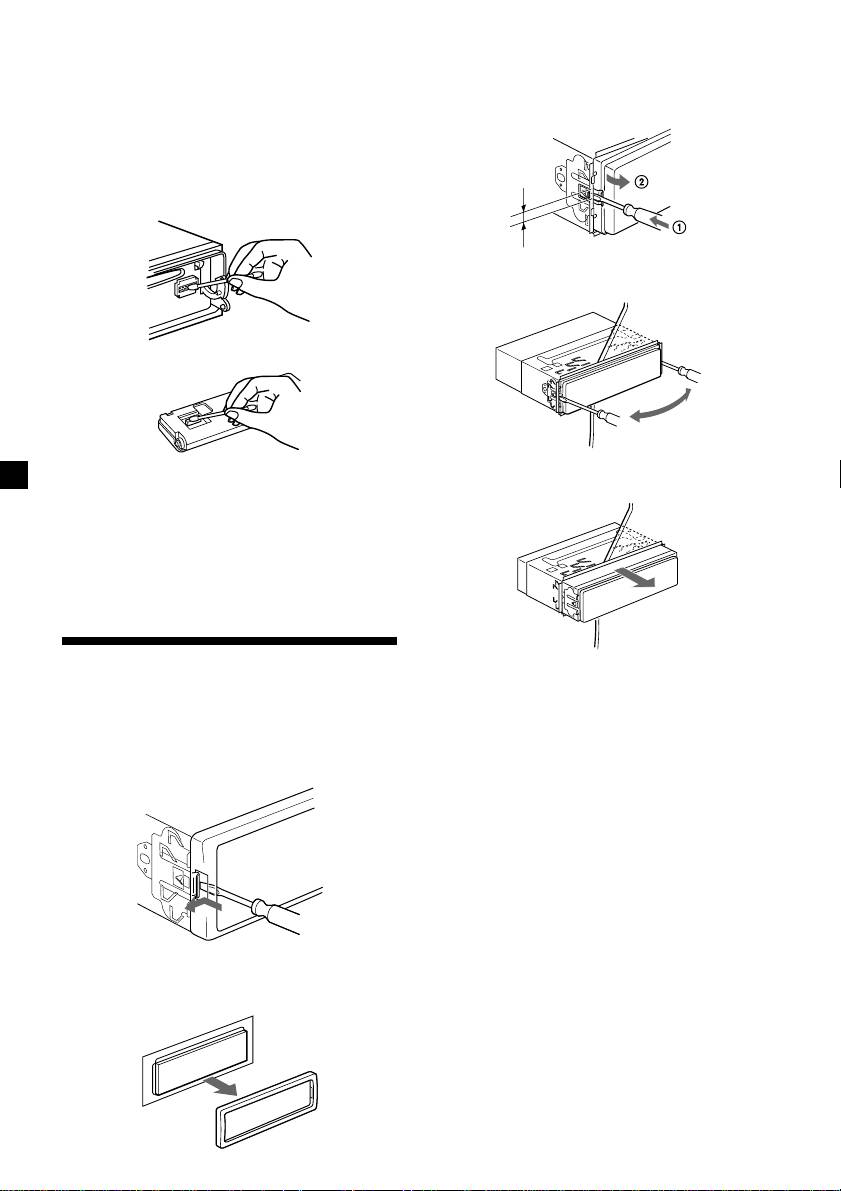
Cleaning the connectors
3 Use a thin screwdriver to push in the clip
The unit may not function properly if the
on the left side of the unit, then pull out
connectors between the unit and the front
the left side of the unit until the catch
panel are not clean. In order to prevent this,
clears the mounting.
open the front panel by pressing (OPEN), then
detach it and clean the connectors with a
cotton swab dipped in alcohol. Do not apply
too much force. Otherwise, the connectors may
be damaged.
4 mm
4 Repeat step 3 for the right side.
Main unit
Back of the front panel
5 Slide the unit out of its mounting.
Notes
• For safety, turn off the engine before cleaning
the connectors, and remove the key from the
ignition switch.
• Never touch the connectors directly with your
fingers or with any metal device.
Dismounting the unit
1 After taking off the front panel, press
the clip inside the front cover with a thin
screwdriver, and gently pry the front
cover free.
2 Repeat step 1 for the right side.
The front cover is removed.
22
