Sony KDL-52X2000 – page 2
Manual for Sony KDL-52X2000
Table of contents

Using the Digital Favourite list *
The Favourite feature allows you to select
programmes from a list of up to 20 channels you
specify. To display the Favourite list, see “Navigating
through menus” (page 23).
Watching TV
Digital Favourite list
* This function may not be available in some countries.
To Do this
Create your Favourite list for the first time A message appears asking if you want to add channels to the Favourite list
when you select “Digital Favourites” in the “MENU” for the first time.
1 Press to select “Yes”.
2 Press
F/f to select the channel you want to add.
If you know the channel number, you can use the number buttons to
directly select a channel.
3 Press .
Channels that are stored in the Favourite list are indicated by a
symbol.
Turn off the Favourite list Press RETURN.
See brief details on current programmes Press while selecting a channel. Press again to cancel.
Watch a channel Press while selecting a channel.
Add or remove channels in the Favourite
1 Press the blue button.
list
Channels that are stored in the Favourite list are indicated by a
symbol.
2 Press F/f to select the channel you want to add or remove.
If you know the channel number, you can use the number buttons to
directly select a channel.
3 Press .
4 Press the blue button to return to the Favourite list.
Remove all channels from the Favourite list
1 Press the blue button.
2 Press the yellow button.
A display appears to confirm that you want to delete all channels from the
Favourite list.
3 Press G/g to select “Yes”, then press to confirm.
GB
21

To use the Tools menu
Press TOOLS to display the following options when
Viewing pictures from
viewing pictures from connected equipment other
than a PC.
connected equipment
Options Description
Close
Closes the Tools menu.
Switch on the connected equipment, then
perform one of the following operation.
PAP (or Single Picture)
See page 18.
For equipment connected to the scart sockets using a
Picture Mode See page 24.
fully-wired 21-pin scart lead (page 43)
Start playback on the connected equipment.
Sound Mode See page 27.
The picture from the connected equipment appears on
Power Saving See page 31.
the screen.
Sleep Timer See page 31.
For an auto-tuned VCR (page 7)
In analogue mode, press PROG +/-, or the number
i Volume* See page 32.
buttons, to select the video channel.
Auto Clock Set Allows you to switch to digital
For other connected equipment (page 42)
mode and obtain the time.
Press / repeatedly until the correct input
symbol (see below) appears on the screen.
* This option appears only if “i Speaker Link” is set to
“Off” (page 32).
On screen
Labels of input jacks
display
AV1/2/3 or
1/2/3 or
AV1/2/3
1/2/3
AV4 4 (Y, P
B/CB, PR/CR) and
4 (L, R)
AV5 HDMI IN 5
AV6 HDMI IN 6
HDMI IN 6 and HDMI IN 6
(L, R)
AV 7 ,
7,
AV 7 o r
7 (Y, PB/CB, PR/CR) or
AV 7
7, and
7 (L (MONO), R)
PC PC and PC
Additional operations
To Do this
Return to normal
Press DIGITAL or ANALOG.
TV mode
Access the Input
Press to access the Input signal
signal index table
index table. (Then, only in
(except for PC video
analogue mode, press
g.) To
input signal)
select an input source, press
F/f,
then press .
GB
22
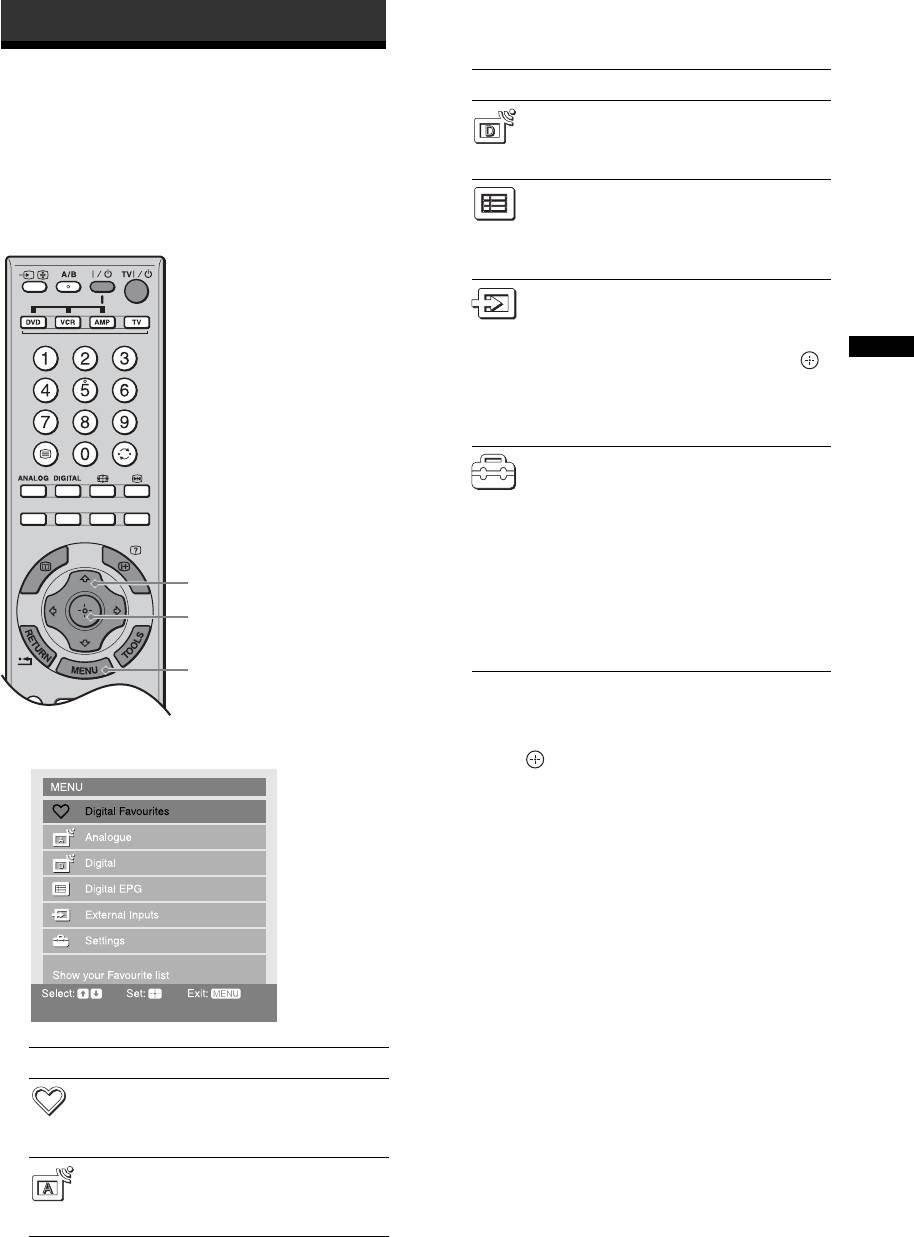
Using MENU Functions
Icon Description
Navigating through
Digital*
menus
Returns to the last viewed digital
channel.
“MENU” allows you to enjoy various convenient
Digital EPG*
features of this TV. You can easily select channels or
Displays the Digital Electronic
inputs sources and change the settings for your TV.
Programme Guide (EPG).
For details about settings, see page 19.
External Inputs
Selects equipment connected to your TV.
• To watch the desired external input,
select the input source, then press .
Using MENU Functions
• To assign a label to an external input,
select “Edit AV Labels”, then see
page 33.
Settings
Displays the Settings menu where most
of the advanced settings and adjustments
are performed.
For details about settings, see page 24 to
39.
2
Note
The options you can adjust vary depending
3
on the situation. Unavailable options are
greyed out or not displayed.
1
* This function may not be available in some countries.
2 Press F/f to select an option.
1 Press MENU to display the menu.
3 Press to confirm a selected option.
To exit the menu, press MENU.
Icon Description
Digital Favourites*
Displays the Favourite list. For details
about settings, see page 21.
Analogue
Returns to the last viewed analogue
channel.
GB
23

Picture menu
You can select the options listed below on the Picture
menu.
1 Press F/f to select “Settings” on MENU,
then press .
2 Press F/f to select a menu icon, then
press .
3 Press F/f/G/g to select an option.
Target Inputs
For the input currently being viewed, select whether to use the common setting or to
set each item separately.
“Common”: Applies common settings whose adjustments are shared with other
inputs in which “Target Inputs” is set to “Common”.
Current input name (e.g. AV1): Allows you to set each option separately for the
current input.
Tip
Set each input to “Common” if you require the same settings to apply to each input.
Picture Mode
Selects the picture mode.
“Vivid”: For enhanced picture contrast and sharpness.
“Standard”: For standard picture. Recommended for home entertainment.
“Custom”: Allows you to store your preferred settings.
Reset
Resets all the “Picture” settings except “Target Inputs” and “Picture Mode” to the
factory settings.
Tip
“Advanced Settings” (page 26) is also not reset. Select “Reset” in “Advanced Settings” to reset
items in “Advanced Settings”.
Backlight
Adjusts the brightness of the backlight.
Contrast
Increases or decreases picture contrast.
Brightness
Brightens or darkens the picture.
Colour
Increases or decreases colour intensity.
Hue
Increases or decreases the green tones and red tones.
Tip
“Hue” can only be adjusted for an NTSC colour signal (e.g. U.S.A. video tapes).
GB
24
Colour Temperature
Adjusts the whiteness of the picture.
“Cool”: Gives the white colours a blue tint.
“Neutral”: Gives the white colours a neutral tint.
“Warm 1”/“Warm 2”: Gives the white colours a red tint. “Warm 2” gives a redder
tint than “Warm 1”.
Tip
“Warm 1” and “Warm 2” can only be selected when you set “Picture Mode” to “Custom”.
Sharpness
Sharpens or softens the picture.
Noise Reduction
Reduces the picture noise (snowy picture).
“Auto”: Automatically reduces the picture noise.
“High”/“Medium”/“Low”: Modifies the effect of the noise reduction.
“Off”: Turns off the Noise Reduction feature.
“BNR”: Reduces the block picture noise. This is effective for digital channels, or a
connected DVD player/digital receiver with MPEG playback.
Tips
Using MENU Functions
• “Auto” is not available when watching component, HDMI or digital RF inputs.
• “Noise Reduction” is not available when using Freeze or PAP features.
DRC Mode
Selects a high-resolution picture with 4x density, for high quality sources (e.g. DVD
players, digital receivers).
“Mode 1”: Recommended for moving pictures.
“Mode 2”: Recommended for still images and text.
“Off”: Turns off the DRC Mode.
Tip
“DRC Mode” is not available when “Game Mode” is set to “On” or when using Freeze or PAP
features; also not available when watching 480p, 576p, 720p, 1080i or 1080p sources.
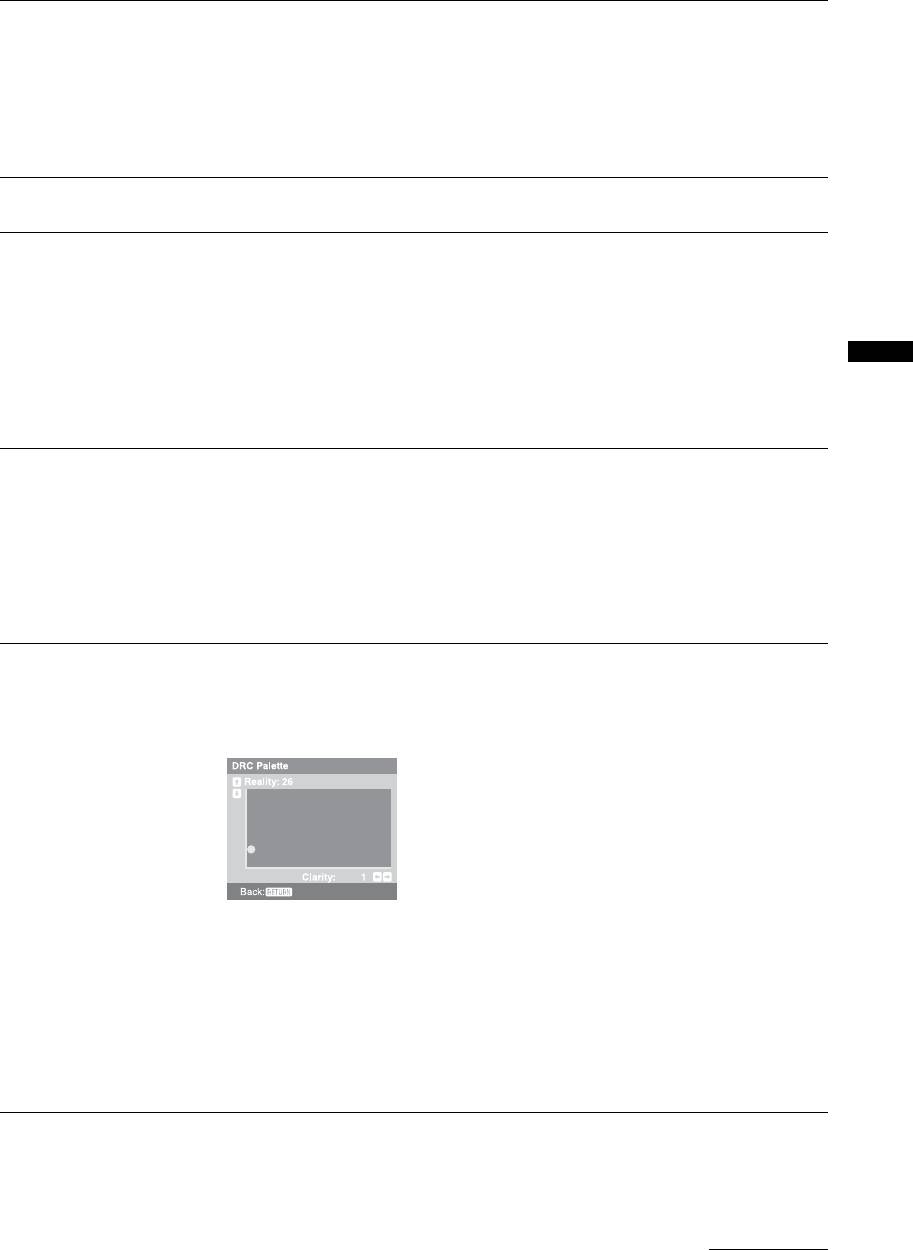
DRC Palette
Customizes the level of detail (“Reality”) and smoothness (“Clarity”) for each input
signal. For example, you can create a custom setting for your cable input’s picture,
and create another for your DVD player’s pictures.
The DRC palette appears.
Press
F/f/G/g to adjust the position of the marker (z).
As you move the z higher along the “Reality” axis, the picture becomes more
detailed. As you move the z to the right along the “Clarity” axis, the picture
becomes smoother.
Tip
“DRC Palette” is not available when “Game Mode” is set to “On”, “DRC Mode” is set to “Off”
or when using Freeze or PAP features; also not available when watching 480p, 576p, 720p,
1080i or 1080p sources.
Continued
GB
25

Advanced Settings
Customizes the Picture function in more detail. When you set “Picture Mode” to
“Custom”, you can set/change these settings.
“Reset”: Resets all the advanced settings to the factory settings.
“Black Corrector”: Enhances black areas of the picture for stronger contrast.
“Adv. Contrast Enhancer”: Automatically adjusts “Backlight” and “Contrast” to the
most suitable settings judging from the brightness of the screen. This setting is
especially effective for dark images scenes. It will increase the contrast distinction
of the darker picture scenes.
“Gamma”: Adjusts the balance between bright and dark areas of the picture.
“Clear White”: Emphasizes white colours.
“Live Colour”: Makes colours more vivid.
“Colour Space”: Changes the colour reproduction gamut. “Wide” reproduces the
vivid colour and “Normal” reproduces the standard colour.
“White Balance”: Adjusts the colour temperature colour by colour.
“Detail Enhancer”: Enhances the details of the picture.
“Edge Enhancer”: Enhances the outline of the picture.
Tips
• “Adv. Contrast Enhancer” and “Detail Enhancer” are not available when using Freeze or
PAP features.
• “Live Colour” is not available when “Colour Space” is set to “Normal”.
GB
26

Sound menu
You can select the options listed below on the Sound
menu. To select options in “Settings”, refer to “Picture
menu” (page 24).
Target Inputs
For the input currently being viewed, select whether to use the common setting or to
Using MENU Functions
set each item separately.
“Common”: Applies common settings whose adjustments are shared with other
inputs in which “Target Inputs” is set to “Common”.
Current input name (e.g. AV1): Allows you to set each option separately for the
current input.
Tip
Set each input to “Common” if you require the same settings to apply to each input.
Sound Mode
Selects the sound mode.
“Dynamic”: Enhances treble and bass.
“Standard”: For standard sound. Recommended for home entertainment.
“Custom”: Flat response. Also allows you to store your preferred settings.
Reset
Resets all the “Sound” settings except “Target Inputs”, “Sound Mode” and “Dual
Sound” to the factory settings.
Treble
Adjusts higher-pitched sounds.
Bass
Adjusts lower-pitched sounds.
Balance
Emphasizes left or right speaker balance.
Auto Volume
Keeps a constant volume level even when volume level gaps occur (e.g. adverts tend
to be louder than programmes).
Volume Offset
Adjusts the volume level of the current input relative to other inputs, when “Target
Inputs” is set to the current input name (e.g. AV1).
Surround
Selects the surround mode.
“Dolby Virtual”: Uses the TV speakers to simulate the surround effect produced by
a multi channel system.
“Off”: For normal stereo or mono reception.
BBE
Gives sound more impact by compensating for phase effects in speakers using the
“BBE High Definition Sound System”, when “Sound Mode” is set to “Custom”.
Continued
GB
27

Dual Sound
Selects the sound from the speaker for a stereo or bilingual broadcast.
“Stereo”, “Mono”: For a stereo broadcast.
“A”/“B”/“Mono”: For a bilingual broadcast, select “A” for sound channel 1, “B” for
sound channel 2, or “Mono” for a mono channel, if available.
Tip
If you select other equipment connected to the TV, set “Dual Sound” to “Stereo”, “A” or “B”.
Tip
Sound menu options other than “Dual Sound” cannot be used for headphones and audio output sockets.
GB
28
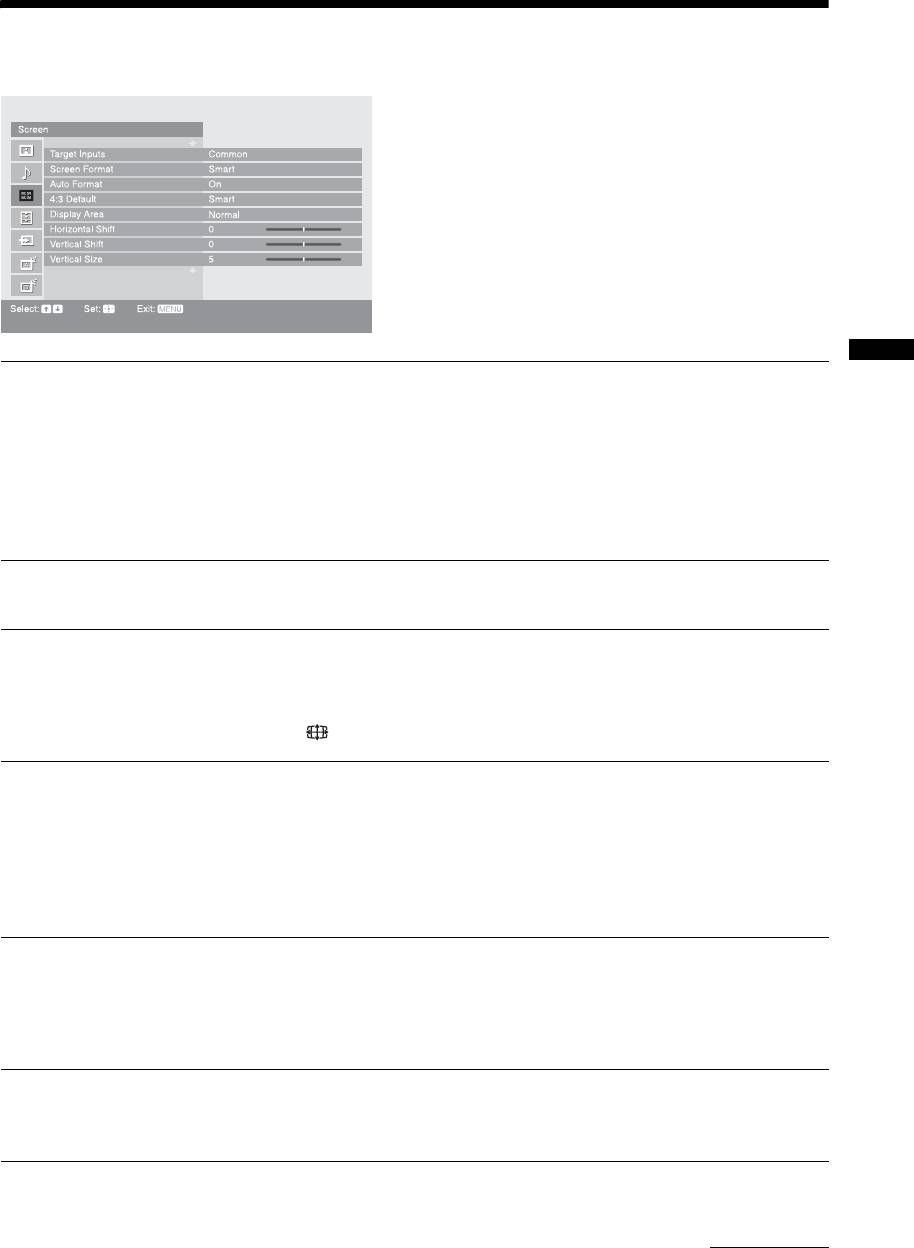
Screen menu
You can select the options listed below on the Screen
menu. To select options in “Settings”, refer to “Picture
menu” (page 24).
Target Inputs
For the input currently being viewed, select whether to use the common setting or to
Using MENU Functions
set each item separately.
“Common”: Applies common settings whose adjustments are shared with other
inputs in which “Target Inputs” is set to “Common”.
Current input name (e.g. AV1): Allows you to set each option separately for the
current input.
Tip
Set each input to “Common” if you require the same settings to apply to each input.
Screen Format
For details about the screen format, see “To change the screen format manually to
suit the broadcast” (page 17).
Auto Format
Automatically changes the screen format according to the broadcast signal. To keep
your setting, select “Off”.
Tip
Even if “Auto Format” is set to “On” or “Off”, you can always modify the format of the screen
by pressing repeatedly.
4:3 Default
Selects the default screen format for use with 4:3 broadcasts.
“Smart”: Displays conventional 4:3 broadcasts with an imitation wide screen effect.
“4:3”: Displays conventional 4:3 broadcasts in the correct proportions.
“Off”: Keeps the current “Screen Format” setting when the channel or input is
changed.
Tip
This option is available only if “Auto Format” is set to “On”.
Display Area
Adjusts the screen area displaying the picture.
“Full Pixel”: Displays the picture for 1080i or 1080p sources in the original size
when parts of the picture are cut off.
“Normal”: Displays the picture in the original size.
“-1”/“-2”: Enlarges the picture to hide the edge of the picture.
Horizontal Shift
Adjusts the horizontal position of the picture.
Tip
This option is not available when “Display Area” is set to “Full Pixel”.
Continued
GB
29

Vertical Shift
Adjusts the vertical position of the picture when the screen format is set to “Smart”,
“Zoom” or “14:9”.
Vertical Size
Adjusts the vertical size of the picture when the screen format is set to “Smart”.
GB
30
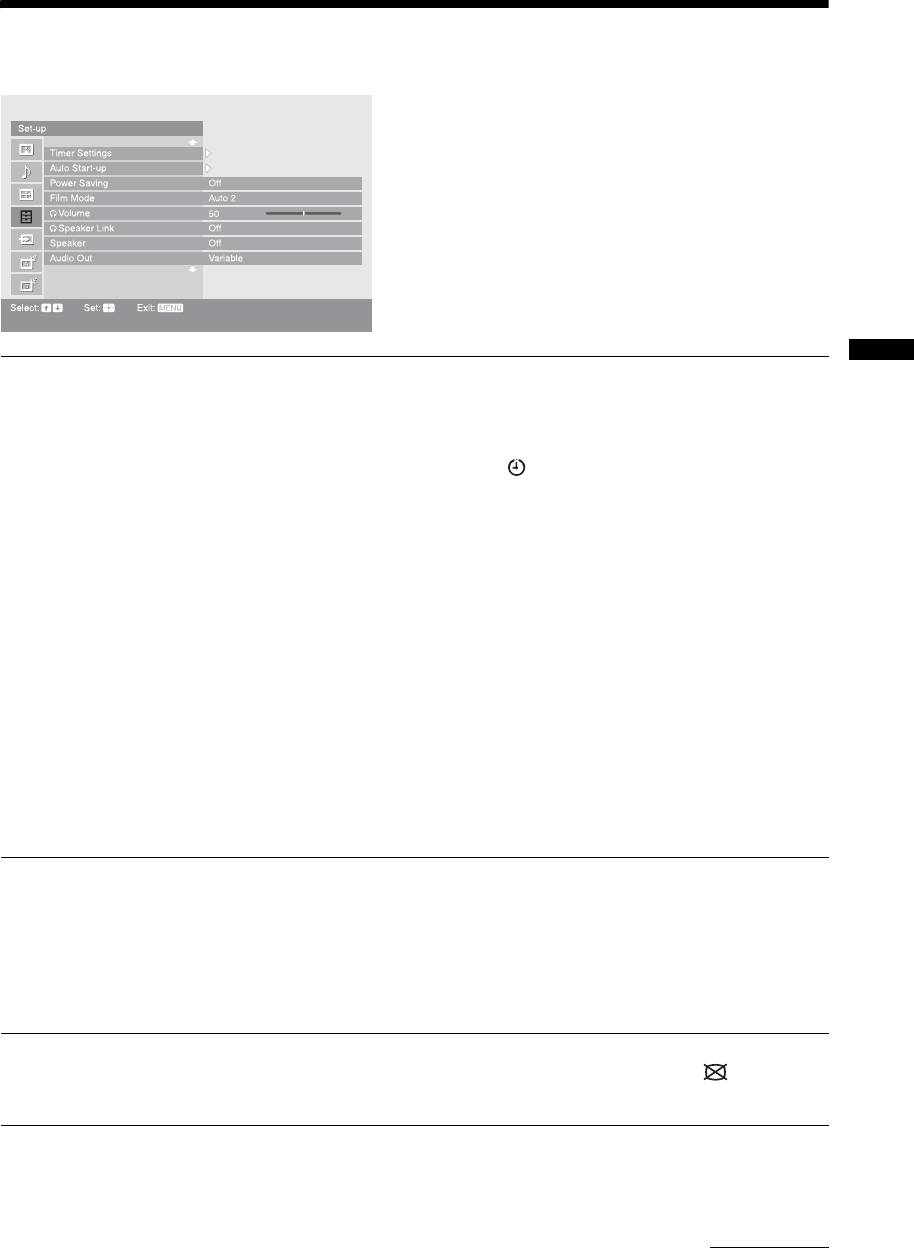
Set-up menu
You can select the options listed below on the Set-up
menu. To select options in “Settings”, refer to “Picture
menu” (page 24).
Timer Settings
Sets the timer to switch on/off the TV.
Using MENU Functions
Sleep Timer
Sets a period of time after which the TV automatically switches itself into standby
mode.
When the Sleep Timer is activated, the (Timer) indicator on the TV (front) lights
up in orange.
Tips
• If you switch off the TV and switch it on again, “Sleep Timer” is reset to “Off”.
• “TV will soon turn off by Sleep Timer” appears on the screen one minute before the TV
switches to standby mode.
On Timer
Sets the timer to switch on the TV from standby mode.
“Day”: Selects the day on which you want to activate the On Timer.
“Time”: Sets the time to switch on the TV.
“Duration”: Selects the time period after which the TV automatically switches to
standby mode again.
“Volume Set-up”: Sets the volume for when the timer switches on the TV.
Clock Set
Allows you to adjust the clock manually. When the TV is receiving digital channels,
the clock cannot be adjusted manually since it is set to the time code of the
broadcasted signal.
Auto Start-up
Starts the “first time operation menu” to select the language and country/region, tune
in all available digital and analogue channels, and set the time (only when no digital
channels are received). Usually, you do not need to do this operation because the
language and country/region will have been selected and channels already tuned
when the TV was first installed (page 6, 7). However, this option allows you to
repeat the process (e.g. to retune the TV after moving house, or to search for new
channels that have been launched by broadcasters).
Power Saving
Selects the power saving mode to reduce the power consumption of the TV.
When “Picture Off” is selected, the picture is switched off and the (Picture Off)
indicator on the TV (front) lights up in green. The sound remains unchanged.
Continued
GB
31

Film Mode
Provides smoother picture movement when playing DVD or VCR images taken on
film, reducing picture blur and graininess.
“Auto 1”: For a stable picture with minimal noise. Set to “Auto 2” if the screen is
partially degraded.
“Auto 2”: Use this setting for standard use.
“Off”: Turns off the Film mode.
Notes
• Even if “Auto 1” or “Auto 2” is selected, “Film Mode” will be automatically turned off and
a moving image will not be played smoothly if the image contains irregular signals or too
much noise.
• Film Mode is not available when using Freeze or PAP features, or when watching 480p,
576p, 720p or 1080p sources.
i Volume
Adjusts the volume of the headphones when “i Speaker Link” is set to “Off”.
(headphone volume)
i Speaker Link
Switches the TV’s internal speakers on/off when headphones are connected.
“On”: Sound is output only from headphones.
(headphone speaker
“Off”: Sound is output from both the TV and headphones.
link)
Speaker
Switches on/off the TV’s internal speakers.
“On”: The TV speakers are turned on in order to listen to the TV’s sound through the
TV speakers.
“Off”: The TV speakers are turned off in order to listen to the TV’s sound only
through your external audio equipment connected to the audio output sockets.
Audio Out
“Variable”: The audio output from your audio system can be controlled by the TV’s
remote.
“Fixed”: The audio output of the TV is fixed. Use your audio receiver’s volume
control to adjust the volume (and other audio settings) through your audio system.
Light Sensor
“On”: Automatically optimizes the picture settings according to the ambient light in
the room.
“Off”: Turns off the “Light Sensor” feature.
Note
Be sure not to put anything over the sensor, as its function may be affected. See page 15 for
further information on the sensor.
Logo Illumination
Lights up and turns off the Sony logo on the front of the TV.
Language
Selects the language in which the menus are displayed.
Information
Displays your TV’s product information.
All Reset
Resets all settings to the factory settings and then displays the Auto Start-up screen.
Note
All settings, including Digital Favourite list, country, language, auto tuned channels, etc. will
be reset.
GB
32
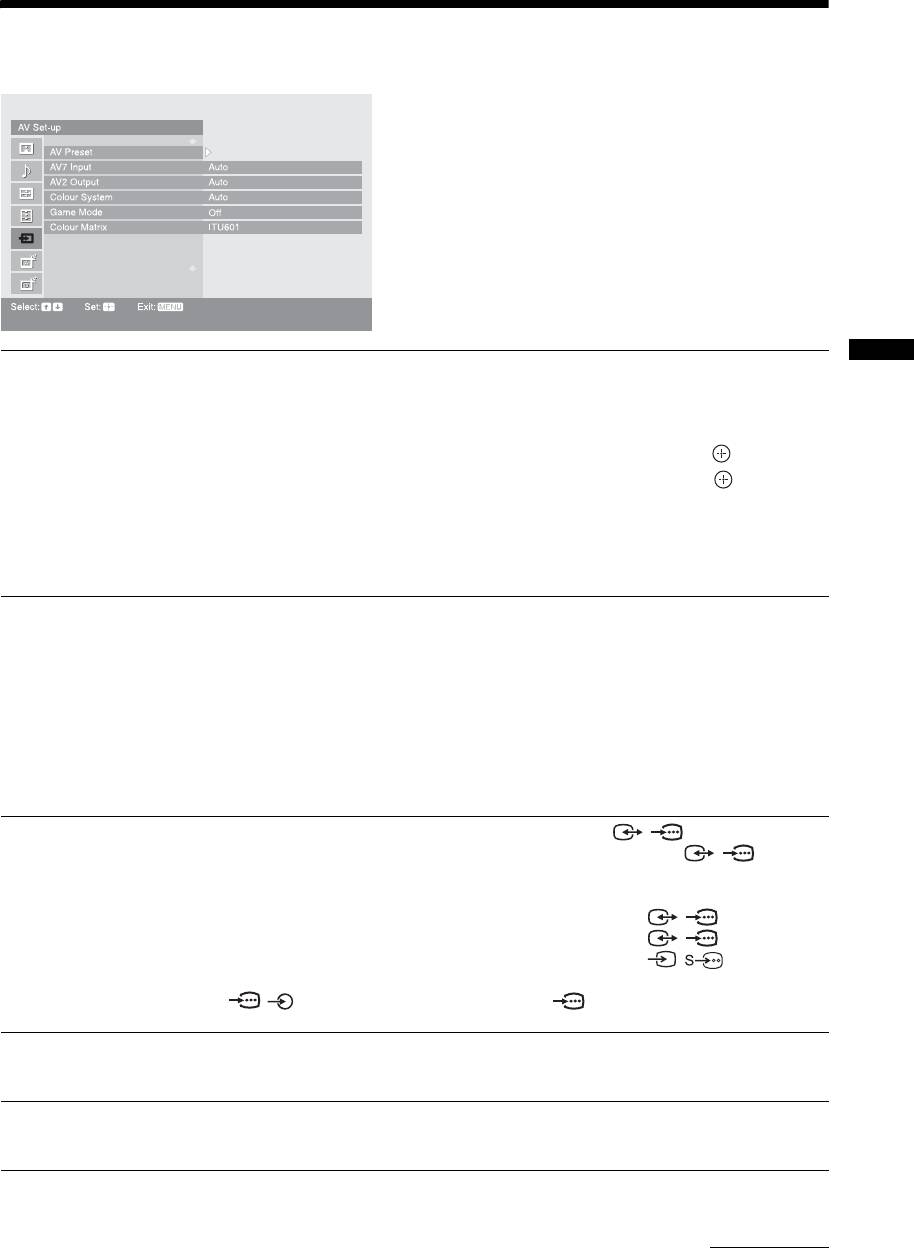
AV Set-up menu
You can select the options listed below on the AV Set-
up menu. To select options in “Settings”, refer to
“Picture menu” (page 24).
AV Preset
Assigns a name to any equipment connected to the side and rear sockets. The name
Using MENU Functions
will be displayed briefly on the screen when the equipment is selected. You can skip
input signals from connected equipment that you do not want displayed on the
screen.
1 Press
F/f to select the desired input source, then press .
2 Press
F/f to select the desired option below, then press .
Equipment labels: Uses one of the preset labels to assign a name to connected
equipment.
“Edit”: Creates your own label. Follow steps 2 to 4 of “Programme Labels” (page 35).
“Skip”: Skips an unnecessary input source.
AV7 Input
“Auto”: Switches automatically between the component video sockets, S Video
socket, and the composite video sockets on the left side of the TV depending on the
cable connection.
“Component”: Activates the component video sockets on the left side of the TV.
“S Video”: Activates the S Video socket on the left side of the TV.
“Composite”: Activates the composite video sockets on the left side of the TV.
Tip
When multiple cables are connected and “Auto” is selected, “Component”, “S
Video”, “Composite” will be activated in that order.
AV2 Output
Sets a signal to be output through the socket labelled / 2 on the rear of the
TV. If you connect a VCR or other recording equipment to the / 2 socket,
you can then record from the equipment connected to other sockets of the TV.
“TV”: Outputs a broadcast.
“AV1”: Outputs signals from equipment connected to the / 1 socket.
“AV3”: Outputs signals from equipment connected to the / 3 socket.
“AV7”: Outputs signals from equipment connected to the / 7 socket.
“Auto”: Outputs whatever is being viewed on the screen (except signals from the
/ 4, HDMI IN 5, HDMI IN 6 and PC sockets).
Colour System
Selects the colour system (“Auto”, “PAL”, “SECAM”, “NTSC3.58” or
“NTSC4.43”) according to the input signal from the input source.
Game Mode
Depending on the game software, reaction times may slow during fast-moving
scenes, etc. Select “On” to improve the reaction times.
Continued
GB
33

Colour Matrix
Usually used in the factory setting (AV1/2/3/7 (Composite and S video input signal)
is set to “ITU601”, and AV4/5/6/7 (Component input signal) is set to “Auto”). If the
tone of the picture from the input source is unnatural, select either “ITU601” or
“ITU709”, which normalizes the tone.
GB
34
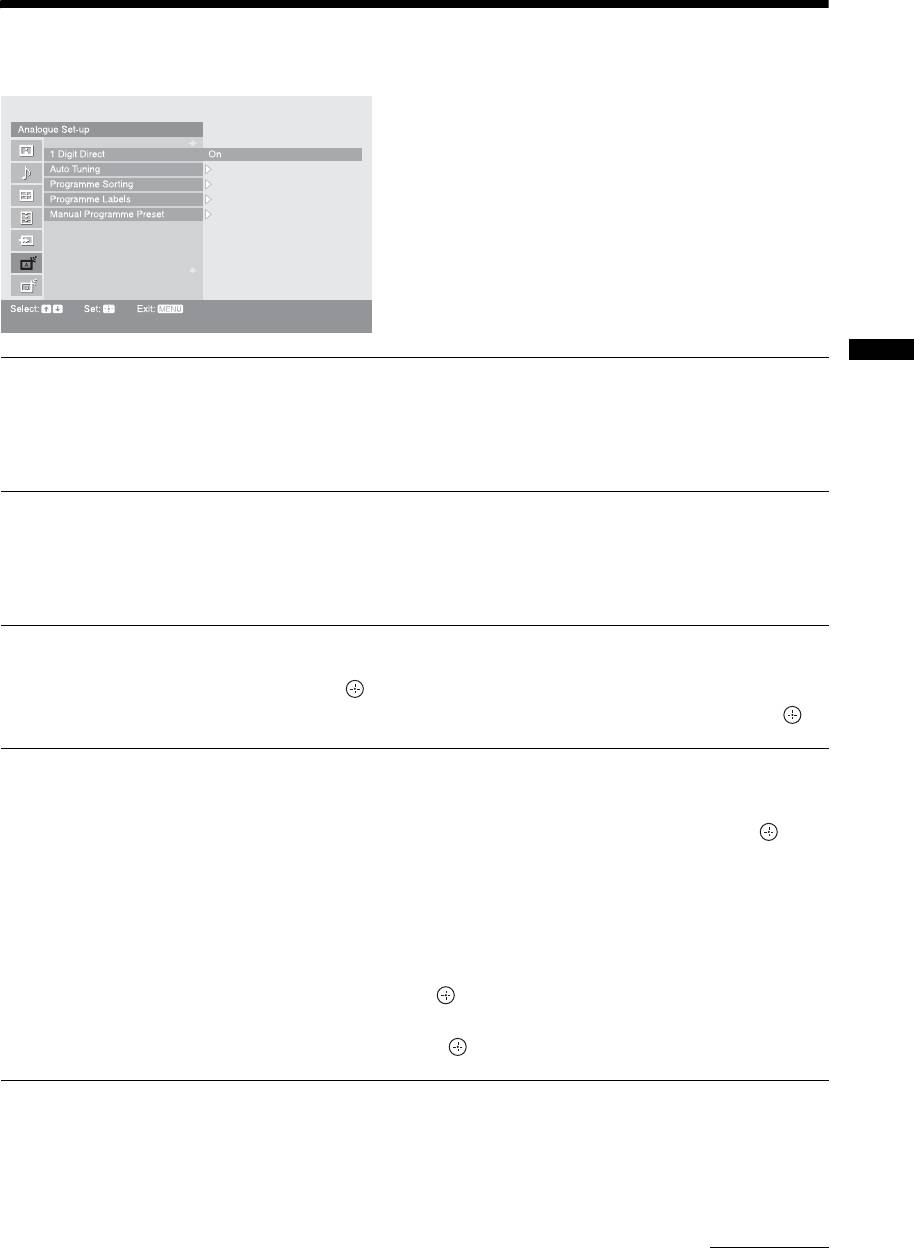
Analogue Set-up menu
You can select the options listed below on the
Analogue Set-up menu. To select options in
“Settings”, refer to “Picture menu” (page 24).
1 Digit Direct
When “1 Digit Direct” is set to “On”, you can select an analogue channel using one
Using MENU Functions
preset number button (0 - 9) on the remote.
Note
When “1 Digit Direct” is set to “On”, you cannot select channel numbers 10 and above entering
two digits using the remote.
Auto Tuning
Tunes in all the available analogue channels.
Usually you do not need to do this operation because the channels are already tuned
when the TV was first installed (page 7). However, this option allows you to repeat
the process (e.g. to retune the TV after moving house, or to search for new channels
that have been launched by broadcasters).
Programme Sorting
Changes the order in which the analogue channels are stored on the TV.
1 Press
F/f to select the channel you want to move to a new position,
then press .
2 Press
F/f to select the new position for your channel, then press .
Programme Labels
Assigns a channel name of your choice up to five letters or numbers. The name will
be displayed briefly on the screen when the channel is selected. (Names for channels
are usually taken automatically from Text (if available).)
1 Press F/f to select the channel you want to name, then press .
2 Press F/f to select the desired letter or number (“_” for a blank space),
then press
g.
If you input a wrong character
Press G/g to select the wrong character. Then, press F/f to select the correct
character.
To delete all the characters
Select “Reset”, then press .
3 Repeat the procedure in step 2 until the name is complete.
4 Select “OK”, then press .
Continued
GB
35

Manual Programme
Before selecting “Label”/“AFT”/“Audio Filter”/“Skip”/“Decoder”, press PROG +/-
to select the programme number with the channel. You cannot select a programme
Preset
number that is set to skip (page 37).
Programme
/System/Channel
Presets programme channels manually.
1 Press
F/f to select “Programme”, then press .
2 Press
F/f to select the programme number you want to manually tune
(if tuning a VCR, select channel 00), then press RETURN.
3 Press
F/f to select “System”, then press .
4 Press F/f to select one of the following TV broadcast systems, then
press RETURN.
B/G: For western European countries/regions
I: For the United Kingdom
D/K: For eastern European countries/regions
L: For France
5 Press F/f to select “Channel”, then press .
6 Press
F/f to select “S” (for cable channels) or “C” (for terrestrial
channels), then press
g.
7 Tune the channels as follows:
If you do not know the channel number (frequency)
Press F/f to search for the next available channel. When a channel has been found,
the search will stop. To continue searching, press
F/f.
If you know the channel number (frequency)
Press the number buttons to enter the channel number of the broadcast you want or
your VCR channel number.
8 Press to jump to “Confirm”, then press .
9 Press f to select “OK”, then press .
Repeat the procedure above to preset other channels manually.
Label
Assigns a name of your choice, up to five letters or numbers, to the selected channel.
This name will be displayed briefly on the screen when the channel is selected.
To input characters, follow steps 2 to 4 of “Programme Labels” (page 35).
AFT
Allows you to fine-tune the selected programme number manually if you feel that a
slight tuning adjustment will improve the picture quality.
You can adjust the fine tuning over a range of -15 to +15. When “On” is selected, the
fine tuning is performed automatically.
Audio Filter
Improves the sound for individual channels in the case of distortion in mono
broadcasts. Sometimes a non-standard broadcast signal can cause sound distortion or
intermittent sound muting when watching mono programmes.
If you do not experience any sound distortion, we recommend that you leave this
option set to the factory setting “Off”.
Notes
• You cannot receive stereo or dual sound when “Low” or “High” is selected.
• “Audio Filter” is not available when “System” is set to “L”.
GB
36

Skip
Skips unused analogue channels when you press PROG +/- to select channels. (You
can still select a skipped channel using the number buttons.)
Decoder
Views and records the scrambled channel selected when using a decoder connected
directly to scart connector / 1, or to scart connector / 2 via a VCR.
Note
Depending on the country/region selected for “Country” (page 7), this option may not be
available.
Confirm
Saves changes made to the “Manual Programme Preset” settings.
Using MENU Functions
GB
37
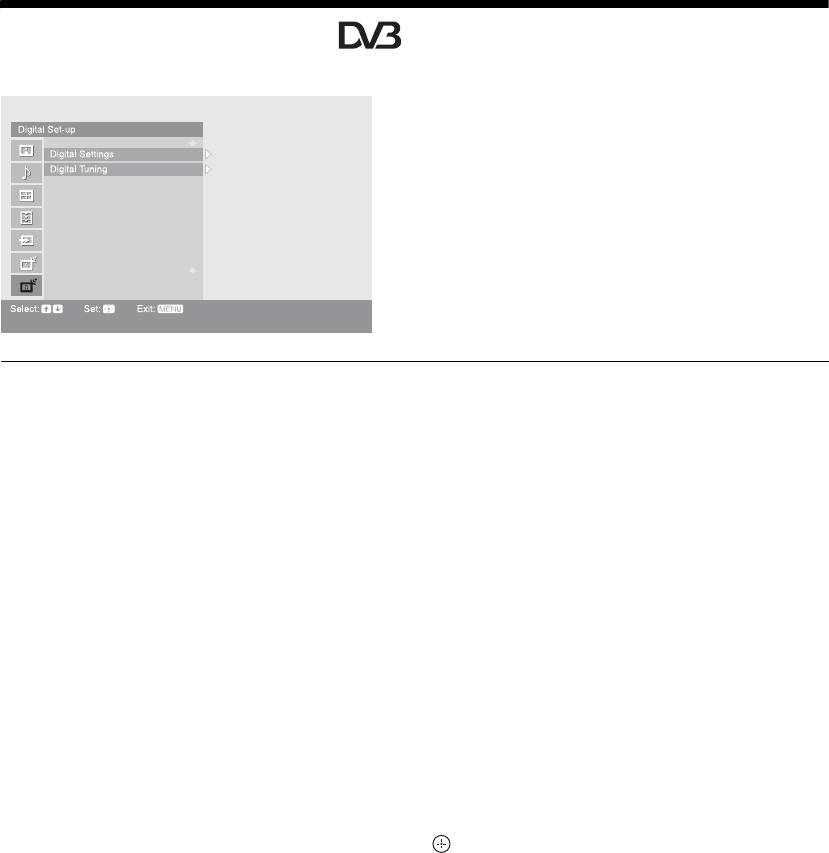
Digital Set-up menu
You can select the options listed below on the Digital
Set-up menu. To select options in “Settings”, refer to
“Picture menu” (page 24).
Note
Some functions may not be available in some countries.
Digital Settings
Displays the “Digital Settings” menu.
Subtitle Setting
Displays digital subtitles on the screen.
When “For Hard Of Hearing” is selected, some visual aids may also be displayed
with the subtitles (if TV channels broadcast such information).
Subtitle Language
Selects which language subtitles are displayed in.
Audio Language
Selects the language used for a programme. Some digital channels may broadcast
several audio languages for a programme.
Audio Type
Increases the sound level when “For Hard Of Hearing” is selected.
Parental Lock
Sets an age restriction for programmes. Any programme that exceeds the age
restriction can only be watched after a PIN Code is entered correctly.
1 Press the number buttons to enter your existing PIN code.
If you have not previously set a PIN, a PIN code entry screen appears. Follow the
instructions of “PIN Code” below.
2 Press F/f to select the age restriction or “None” (for unrestricted
watching), then press .
3 Press RETURN.
PIN Code
Sets a PIN code for the first time, or allows you to change your PIN code.
1 Enter a PIN as follows:
If you have previously set a PIN
Press the number buttons to enter your existing PIN.
If you have not set a PIN
Press the number buttons to enter the factory setting PIN of 9999.
2 Press the number buttons to enter the new PIN code.
A message appears to inform you that the new PIN has been accepted.
3 Press RETURN.
Tip
PIN code 9999 is always accepted.
GB
38

Technical Set-up
Displays the Technical Set-up menu.
“Auto Service Update”: Enables the TV to detect and store new digital services as
they become available.
“Software Download”: Enables the TV to automatically receive software updates
free through your existing aerial (when issued). It is recommended that this option
be set to “On” at all times. If you do not want your software to be updated, set this
option to “Off”.
“System Information”: Displays the current software version and the signal level.
“Time Zone”: Allows you to manually select the time zone you are in, if it is not the
same as the default time zone setting for your country.
CA Module Set-up
Allows you to access a Pay Per View service once you obtain a Conditional Access
Module (CAM) and a view card. See page 42 for the location of the (PCMCIA)
socket.
Notes
• CAM is not supported in all countries. Check with your authorized dealer.
Using MENU Functions
• “CA Module Set-up” is available only when a CAM is inserted.
Digital Tuning
Displays the “Digital Tuning” menu.
Digital Auto Tuning
Tunes in all the available digital channels.
Usually you do not need to do this operation because the channels were already tuned
when the TV was first installed (page 7). However, this option allows you to repeat
the process (e.g. to retune the TV after moving house, or to search for new channels
that have been launched by broadcasters).
Programme List Edit
Removes any unwanted digital channels stored on the TV, and changes the order of
the digital channels stored on the TV.
1 Press
F/f to select the channel you want to remove or move to a new
position.
If you know the programme number
Press the number buttons to enter the three-digit programme number of the broadcast
you want.
2 Remove or change the order of the digital channels as follows:
To remove the digital channel
Press . A message that confirms whether the selected digital channel is to be
deleted appears. Press
G to select “Yes”, then press .
To change the order of the digital channels
Press g, then press F/f to select the new position for the channel and press G.
Repeat the procedure in steps 1 and 2 to move other channels if required.
3 Press RETURN.
Digital Manual Tuning
Tunes the digital channels manually.
1 Press the number button to select the channel number you want to
manually tune, then press
F/f to tune the channel.
2 When the available channels are found, press
F/f to select the channel
you want to store, then press .
3 Press
F/f to select the programme number where you want to store the
new channel, then press .
Repeat the above procedure to manually tune other channels.
GB
39

PC Settings menu
You can select the options listed below on the PC
Settings menu when the TV is connected to a PC.
1 Press / repeatedly until PC
appears on the screen.
2 Press MENU to display the PC settings
menu.
Note
When you connect a PC to your TV for the first time, you
may need to adjust the screen display. In such cases, perform
“Auto Adjustment” or adjust the “Phase”, “Pitch”,
“Horizontal Shift”, or “Vertical Shift” in “Others” (page 41).
Picture
Display Mode
Selects the display mode.
“Video”: Select to view video images.
“Text”: Select to view text, charts or tables.
Reset
Resets all the “Picture” settings except “Display Mode” to the factory settings.
Backlight
Adjusts the brightness of the backlight.
Contrast
Increases or decreases picture contrast.
Brightness
Brightens or darkens the picture.
Colour Temperature
Adjusts the whiteness of the picture.
“Cool”: Gives the white colours a blue tint.
“Neutral”: Gives the white colours a neutral tint.
“Warm 1”/“Warm 2”: Gives the white colours a red tint. “Warm 2” gives a redder
tint than “Warm 1”.
Sound
Sound Mode
Selects the sound mode.
“Dynamic”: Enhances treble and bass.
“Standard”: For standard sound. Recommended for home entertainment.
“Custom”: Provides a flat response. Sound quality as customized on the connected
PC is maintained in the TV sound.
GB
40
