Hama ROC4238: инструкция
Раздел: Бытовая, кухонная техника, электроника и оборудование
Тип: Пульт Управления
Инструкция к Пульту Управления Hama ROC4238
ENGLISH .............................. 1
FRANÇAIS ........................... 5
DEUTSCH ............................ 9
ITALIANO .......................... 13
ESPAÑOL ........................... 17
NEDERLANDS ................. 21
PORTUGUÊS .................... 25
EΛΛΞIΛA
......................... 29
РУССКИЙ
........................ 33
POLSKI
............................... 37
ČEŠTINA
............................ 41
MAGYAR
........................... 45
SVENSKA ........................... 49
NORSK .............................. 53
DANSK ............................... 57
SUOMI ................................ 61
Characteristics - Caractéristiques - Eigenschaften - Caratteristiche
Características - Eigenschappen - Características -
χαρακτηριστικά
Технические характеристики
-
Dane techniczne - Technické údaje
Karakterisztika
- Data - Karakteristikker - Data - Ominaisuudet
Weight = 78 grammes
Poids = 78 grammes
Gewicht = 78 Gramm
Peso = 78 grammi
Peso = 78 gramos
Gewicht = 78 gram
Peso = 78 gramas
Βάρoς = 78
γραμμάρια
вес = 78
грамм
Ciężar = 78 g
Hmotnost = 78 g
Súly = 78 gramm
Vikt = 78 gram
Vekt = 78 gram
Vægt = 78 gram
Paino = 78 grammaa
Dimensions - Dimensions - Abmessungen - Dimensioni - Dimensiones
- Afmetingen - Dimensões -
Διαστάσεις
-
размеры
-
Wymiary - Rozměry
- Méret
- Mått - Dimensjoner - Mål - Mitat
= 190 x 48 x 15 mm
Hama GmbH & Co KG
86651 Monheim/Bayern GERMANY
Manufactured and commercialised
by HAMA under THOMSON
Trademark license
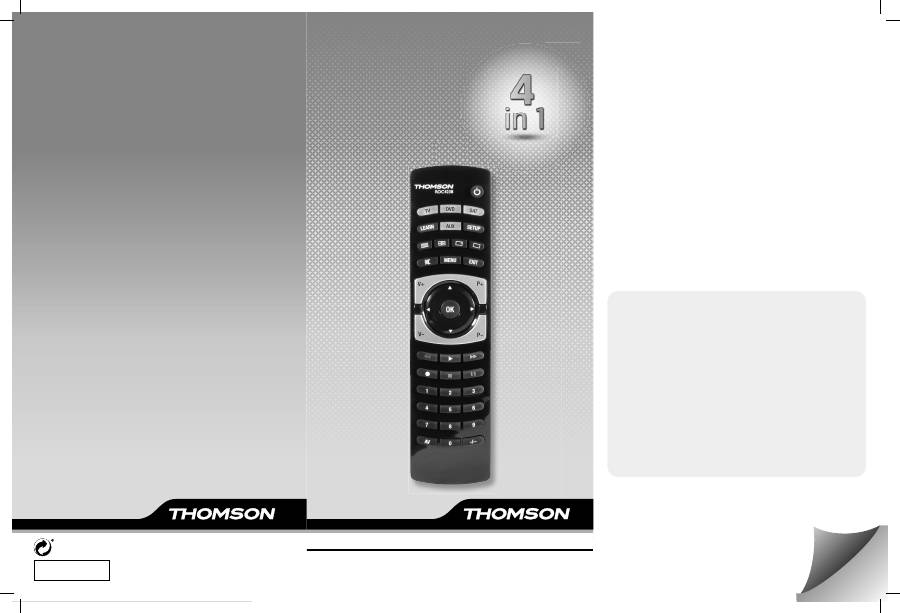
REMOTE CONTROL
Télécommande
Fernbedienung
Operating Instruction
Mode d'emploi
Bedienungsanleitung
ROC4238
00131795
00
TV
SAT
AU
X
DV
D
TV
SA
D
1
GB
1
5
9
13
17
21
25
29
33
37
41
45
49
53
57
61
1x 1x 1x
ROC
4239
STB
DVD
AUX
TV
C
A
B
CR2032
ROC
4238
2
4
6
8
10
12
14
16
18
20
22
24
1
3
5
7
9
11
13
15
17
19
21
23
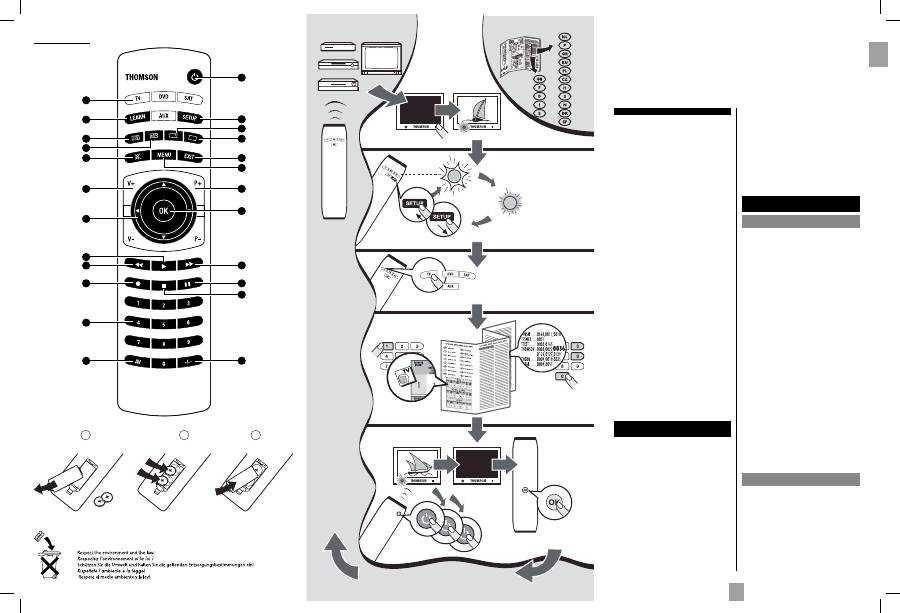
This universal remote control (4 in 1) is compatible with the majority of television sets, DVD pla-
yers and video recorders, as well as digital boxes such as satellite or cable receivers, DVBT recei-
vers (Digital Video Broadcast Terrestrial), ADSL decoders, and so on.
This remote control was programmed in the factory, so that you can use it to control most of the
sets of the THOMSON group’s make. For this reason, we recommend that prior to attempting to
programme the remote control, you try it out by means of one of the methods described in this
user manual. However, fi rst of all, please activate the remote control by removing the 2 protective
tabs from the 2 CR 2032 batteries.
Please keep this guide along with the code list (provided separately), so that you can subsequent-
ly programme your remote control for use with other sets.
1:
On/Standby or Standby only, depending on
the equipment being used.
2 Mode keys: Select the device to control
(TV, DVD, …).
3 Setup: Allows you to program your remote before
the
fi
rst use. It also allows you to access to
secondary functions of certain A/V
appliances (Shift). Press and release the
„Setup“ key followed by the function key you
want.
4 Learn: Used for the learning codes procedure (key
copying) (see page 3).
5:
Displays information of the selected
appliance.
6:
Teletext On.
7:
Teletext
Off.
8:
Teletext Hold (stop page scrolling).
9 Exit: Turn off the menu of the selected
product.
10 (Mute): Switches the selected appliance sound
off.
11 Menu: Turns on the menu of the selected
product.
12 V-, V+: Increases (+) or decreases (-) the volume
of the selected device.
13 P+, P-: Channel Up and Channel Down buttons.
14:
Allow you to navigate the menus
horizontally and verticaly.
15 OK: Con
fi
rms a selection.
16 (play): Play a DVD disc (DVD)*.
17:
Fast forward (DVD)*.
18 (rewind): Goes backward (DVD)*.
19 (pause): Suspends play and stops on an image*.
20 (record): To record, press the RECORD key twice.
21 (stop): Stop the disc (DVD)*.
22 Numeric keys 0 - 9: These keys have the same
functions as those of your original
remote and are also used to enter the
codes for different products.
23 -/--: In connection with the numeric keys, this
button allows you, with some equipment,
to select directly channels with 2 digits.
24 AV: For selecting an external source (SCART,
HDMI,
...).
* The coloured buttons can be used to select
categories when teletext is activated, and speci
fi
c
functions depending on the make.
The keys
Testing the remote control before
you programme it
1. Turn on the product you want to control.
2. Press the Mode key that corresponds to the type of
product you want to control:
TV
: television set,
DVD
: DVD player,
SAT
: satellite
receiver,
AUX
: any other equipment.
3. Direct the remote control towards your equipment
and try to switch it off by simply pressing the
key
G
. If the device does not turn off, you must
program the remote control using one of the
methods A, B, C or D described hereafter.
Note 1: Except for the
TV
key, the
DVD
,
SAT
and
AUX
mode keys can be programmed to control a device
other than that indicated on the key. It is therefore
possible, for example, to allocate SAT mode to the
DVD
key. You must enter the code corresponding to
the manufacturer and the device by using one of the
methods indicated in this manual.
However, method
D
(automatic search for a code)
will greatly simplify the task for you. In this case it
is only necessary to enter a code from the list that
corresponds to the type of device, for example: 0603
for a Thomson satellite receiver) and then to run the
automatic search procedure. The remote control will
then test all the codes automatically until it
fi
nds those
that control the receiver.
Note 2: To control 2 devices of the same type and the
same brand (2 Thomson AUXs, 2 Thomson satellite
receivers, ...) ensure
fi
rst that these two devices are
not set to react to the same sub code, they will require
one sub code for one and a different sub code for
the other (i.e., codes A and B with Thomson devices).
Once you have checked this, successively program 2
separate mode keys using method
D
.
Programming
the remote control
Method A – Fast programming
with 1-digit subcode
Before you start programming, you must
fi
nd the
subcode
of the set to be controlled. Entering a
subcode lets the remote control test a prede
fi
ned list of
codes. Refer to the list provided with these instructions,
page I of the
subcodes
.
1. Switch on the set you want to control.
2. Hold down the
SETUP
key until the key that
corresponds to the last mode you selected blinks
and then remains lit (the indicator light remains on
for a few seconds to give you the time to proceed
with the following steps. The indicator lamp
fl
ashes
to signal that this time is almost up, and then goes
off).
3. Press the key that corresponds to the type of
equipment you want to control:
TV
: television set,
DVD
: DVD player,
SAT
: satellite
receiver, cable, DVBT, ADSL,
AUX
: any other
appliance.
4. While the indicator is lit, type in the subcode
(example:
1
for THOMSON).
5. Direct the remote control towards the set and try to
switch it off by pressing the key
G
.
6. If the set you want to control switches off, press
OK
to memorise the code.
7. Should the set not switch off, press key
G
repeatedly,
until the set switches off. Between two key presses,
leave enough time for the key corresponding to the
selected mode enough time to light up again (about
1 second). Proceeding this way will enable you to
see whether the set responds or not.
8. Immediately upon the switching-off of the set to be
controlled, press
OK
to store the code.
Check of the programming:
In principle, your set is ready for receiving the remote
control commands.
Check your remote control for proper functioning by
performing the test described on page 2.
Method B – 4-digit codes
programming
Before you start programming, you must
fi
nd the
code
of the set to be controlled.
Refer to the list provided with these instructions, page
II of the
codes
.
1. Switch on the set you want to control.
2. Hold down the
SETUP
key until the key that
corresponds to the last mode you selected blinks
and then remains lit (the indicator light remains on
for a few seconds to give you the time to proceed
with the following steps. The indicator lamp
fl
ashes
to signal that this time is almost up, and then goes
off).
A
2
3
GB
GB
3. Press the key that corresponds to the type of
equipment you want to control:
TV
: television set,
DVD
: DVD player,
SAT
: satellite
receiver, cable, DVBT, ADSL,
AUX
: any other
appliance.
4. While the indicator is lit, enter the
fi
rst digit of the
4-digit code proposed for the set to be controlled
(example:
0166
for a Thomson TV).
5. Direct the remote control towards the set and try to
switch it off by pressing the key
G
.
6. Should the set not switch off, repeat step 2. Then
type in the next 4-digit code. Try to switch off the
set by pressing key
G
once. Repeat this procedure
by trying out each of the 4-digit codes.
Check of the programming:
In principle, your set is ready for receiving the remote
control commands.
Check your remote control for proper functioning by
performing the test described on page 2.
Method C – Programming by means
of code retrieval
Should none of the codes work, you still have the
possibility of retrieving the appropriate code without
having to perform any input.
1. Switch on the set you want to control.
2. Hold down the
SETUP
key until the key that
corresponds to the last mode you selected blinks
and then remains lit.
3. Press the key that corresponds to the type of
equipment you want to control:
TV
: television set,
DVD
: DVD player,
SAT
: satellite
receiver, cable, DVBT, ADSL,
AUX
: any other
appliance.
4. Direct the remote control towards the set and try to
switch it off by pressing the key
G
.
5. If the set you want to control switches off, press
OK
to memorise the code.
6. Should the set not switch off, press key
G
as many
times as required (up to 200 times), until the set
switches off. Between two key presses, leave
enough time for the key corresponding to the
selected mode to light up again (about 1 second).
Proceeding this way will enable you to see whether
the set responds or not.
7. Immediately upon the switching-off of the set to be
controlled, press
OK
to store the code.
Check of the programming:
In principle, your set is ready for receiving the remote
control commands.
Check your remote control for proper functioning by
performing the test described on page 2.
Try out other remote control keys to
fi
nd out the range
of functions you can control. If you think that not all of
the keys are active, repeat the procedure of this
programming method to
fi
nd out the code supporting a
wider range of features.
Method D – Automatic
code search
With this method, the remote control scrolls through
the full code list by sending an IR signal to the set to
be controlled remotely. Proceed as follows:
1. Check that your equipment is on. If not, switch it on
manually.
2. Hold down the
SETUP
key until the key that
corresponds to the last mode you selected blinks
and then remains lit (the indicator light remains on
for a few seconds to give you the time to proceed
with the following steps. The indicator lamp
fl
ashes
to signal that this time is almost up, and then goes
off).
3. Release the
SETUP
key.
4. Press the key corresponding to the type of
equipment (for example
TV
).
5. Press the
P+
or standby
G
or
B
(
DVD
only) key.
After a few seconds, the remote control begins to
scroll through the whole code list included in the
library (at a rate of roughly 1 code per second).
Press the
P+
key once again to slow down the test
speed (1 code every 3 seconds). As soon as the set
changes channels, you must press
OK
to save the
code and stop the remote control scrolling through
the list. If you do not react quickly enough, you can
go back to the previous code by pressing
P-
or
E
(
DVD
only) as many times as necessary (you can
go forward by pressing
G
,
P+
or
B
(
DVD
only) if
you have gone back too far). As soon as the set
responds again, press OK to save the code.
Method E – Programming for control of a
COMBO (combined TV-VCR, TV/DVD, VCR/
DVD, … set)
Depending on the COMBO group (TV/VCR, VCR/
DVD, etc.) and the make, you will be required to
enter a single code for both devices in the COMBO, or
to enter two codes, one code per device. Consult the
separate list to discover this.
Before you start programming, you must
fi
nd the
subcode or code of the subset to be controlled
(television or video recorder, ...). Refer to the list
supplied with this user manual (see page subcodes
or codes).
1. Switch on the COMBO you want to control.
2. Hold the
SETUP
key down until the key
corresponding to the last selected mode blinks and
then remains lit.
3. Press the key of the
fi
rst device to control, and then
follow one of the programming methods A, B, C or
D previously described.
4. If a second code programming is required, then
repeat steps 2 and 3 above.
How to retrieve
a programmed code
It may be useful to retrieve the code programmed in
the remote control.
1. Hold down the
SETUP
key until the key that
corresponds to the last mode you selected blinks
and then remains lit.
2. Press the key that corresponds to the type of
equipment you want to control:
TV
: television set,
DVD
: DVD player,
SAT
: satellite
receiver, cable, DVBT, ADSL,
AUX
: any appliance.
3. Press the
SETUP
key brie
fl
y, so that the last mode
selected blinks once.
4. Press the numbered keys in ascending order (
0
to
9
) until the selected mode blinks once.
5. The number that caused the selected mode to blink
is the
fi
rst of the four numbers that make up your
code. Make a note of it below.
6. Repeat step 4 to
fi
nd out the other numbers of the
code.
7. When the fourth number has been found, the
indicator light for the selected mode goes out.
Check of
the programming
- For a television or a satellite receiver: switch on
and, for example, press
2
to change channels.
- Video recorder: load a tape and then press
B
.
- DVD player: load a DVD and then press
B
.
Try other remote control keys to
fi
nd out the range of
functions you can control. If you think that not all of the
keys are active, try the programming
Method B
or
C
.
When you have retrieved the code of your set, jot
it down so that you can use it whenever needed.
After battery replacement, you may have to
programme the remote control again.
Learning function
If the make of the device you wish to control is not in
the separate code list or if some functions are missing
in the code you have programmed, you can copy
the key functions of the original remote control of
the device into your ROC 4238. Depending on the
format of the transmission codes of the original remote
control, your ROC 4238 remote control can memorise
up to 150 keys.
Global delete – Delete all the keys copied (this is
recommended the fi rst time you use this function)
1. Hold down the
SETUP
key until the key
corresponding to the last selected mode remains lit.
2. Release the
SETUP
key.
3. Press twice on the
LEARN
. key. The mode key goes
out and then relights.
4. Press once on the
SETUP
key. The mode key goes
out after several seconds.
5. All the copied keys are now deleted.
Before starting
• The batteries in the 2 remote controls must be in
good condition; change them if necessary.
• First copy 2 or 3 keys from the original remote
control in order to check the compatibility of the
codes of both remote controls. Then carry out a
global delete of these keys before starting the full
learning procedure.
• Lay out the original remote control and your ROC
4238 end to end so as to align the LED diodes
on the 2 remote controls. Where necessary adjust
the height of both remote controls so that the LED
diodes are properly aligned.
• Place the remote controls with the infrared diodes
on a table so that they point each other at a
distance between 15 and 50 mm.
• Do not move the remote controls during the
learning procedure.
• Ensure that the room is not lit by
fl
uorescents tubes
or low consumption lamps since such light sources
can interfere with the copying.
• The 2 remote controls must be at least one metre
away from any light source.
• Avoid copying
VOL
and keys codes and the play
keys since depending on the remote controls the
codes of these keys do not necessarily control the
same devices.
• When the memory of your ROC 4238 is full, the
mode key will blink for 3 seconds. It is then not
possible to copy any more codes without
fi
rst
carrying out a global delete.
• When you copy a key, it is possible that the mode
key will blink feebly. In this case, do not release the
key and wait until the blinking stops.
Note 1: if the learning procedure does not seem to
work correctly, try the following:
1. End the learning procedure by pressing
SETUP
.
2. Check that the LEDs of the two remote controls
are properly aligned. Carry out the alignment
procedure.
3. Modify the distance between the remote controls,
increasing or reducing the distance from 1.5 cm to
5 cm.
4. Restart the procedure from the beginning.
5. If the problem persists and always with the same
key, check that the original remote control is
actually operating: is it sending IR signals? (check
batteries; is it correctly aligned in relation to the
diode on your ROC 4238?)
Note 2:
• You cannot copy keys to the
LEARN SETUP
and
MODE
keys.
• All the keys copied to a mode will be deleted
if a 4
fi
gure code is entered for this mode (and
likewise for direct entry of a code, search of a
code or make).
Identifying the position of the diode on the
original remote control (keys to copy)
If the LED of the original remote control is not visible
(for example, if hidden behind a dark plastic plate),
the instructions below will help you to locate it
precisely.
1. Place the front of the original remote control (the
part you point at the device to control) around
2.5 cm from the LED of your ROC 4238 (see
LEARNING diagram above).
2. Hold down the
SETUP
key until the key
corresponding to the last selected mode remains lit.
3. Release the
SETUP
key.
4. Press once on a mode key (
TC
,
DVD
,
AUX
, …).
The key goes out and then relights.
5. Press once on the
LEARN
key.
6. Hold down one of the keys on the original remote
control while moving the remote control from left
to right. As soon as the 2 remote controls are
correctly aligned, the mode key blinks rapidly.
7. To copy the key functions from your original remote
control into your ROC 4238, go to step 5 of “To
copy keys”.
Note: Some original remote controls don
ʼ
t transmit
continuous IR signals when a key is held down. If this is
the case, press several times on one of the keys while
moving the remote control from left to right.
To copy keys
1. Hold down the
SETUP
key until the key
corresponding to the last selected mode remains lit.
2. Release the
SETUP
key.
3. Press once on the mode key (
TV
,
DVD
,
SAT
,
AUX
).
The key goes out then relights.
4. Press the
LEARN
key once.
5. Press once on the key of your ROC 4238 to which
you want to copy one of the keys of your original
remote control.
6. Hold down the key of the original remote control
you wish to copy until the mode key goes out and
then relights (2 to 3 seconds). In case of problems,
the mode key will blink for 3 seconds but will
remain in learning mode.Try again or try another
key.
7. For the other keys, repeat the procedure from step
5 onwards.
8. Press the
SETUP
key once when all the desired
keys have been copied. The mode key goes off.
To delete all keys copied under a mode
1. Hold down the
SETUP
key until the key
corresponding to the last selected mode remains lit
2. Release the
SETUP
key.
3. Press once on a mode key (
TV
,
DVD
,
SAT
,
AUX
).
The key goes out then relights.
4. Press twice on the
LEARN
. key. The key goes out
then relights.
5. Press once on the
SETUP
key. The mode key
goes out. All the keys copied under this mode are
deleted.
Other functions
Placing all devices on standby
Press the
G
key twice in less than one second, keeping
it held down the second time. All the devices go on
standby one after the other (the devices which were
already on Standby may turn on).
Adjustment of ALL volume controls under a
specifi c mode
In its delivered state, the ROC 4238 is programmed
such that all modes will use their own Volume and
Mute functions if present.
You can allocate the volume control to one of the
modes of the remote control on condition that the
volume control exists on the corresponding device (e.g.
control of TV sound in TV mode, or DVD, …).
1. Hold the
SETUP
key down until the key
corresponding to the last selected mode blinks and
then remains lit.
2. Release the
SETUP
key
3. Press the
H
key until the mode key blinks once.
A
DVD CODE TV CODE STB CODE AUX CODE
4
5
GB
F
4. Press once on the mode key (
TV
,
DVD
, …)
corresponding to the device whose volume will
always be controlled by the
VOL
and
H
keys.
5. Press the
H
key once. The mode key goes off.
6. All other mode will now punch-through to your
chosen mode for Volume and Mute control.
Adjustment of the volume controls for EACH
mode.
You can decide that the volume control is functional
for each mode selected on condition that the volume
control exists on the corresponding device (e.g. control
of the television set sound in TV mode, the control of
the sound of the SAT receiver in STB mode, …).
1. Hold the
SETUP
key down until the key
corresponding to the last selected mode blinks and
then remains lit.
2. Release the
SETUP
key
3. Press the
H
key until the mode key blinks once.
4. Press once on the mode key (
TV
,
DVD
, …)
corresponding to the device whose volume will
always be controlled by the
VOL
and
H
keys.
5. Press the
VOL-
key once.
6. Press the
H
key once.
7. The chosen mode key will now use its own Volume
and Mute functions
Restoring the universal Volume/Mute functions
If you have changed the universal volume and mute
functions, as described in the previous two sections,
you can reset the functions back to the factory settings:
1. Hold the
SETUP
key down until the key
corresponding to the last selected mode blinks and
then remains lit.
2. Release the
SETUP
key
3. Press the
H
key until the mode key blinks once.
4. Press and release the
H
key. The mode key light
will go out completely. The volume and mute
functions are now restored to their factory defaults.
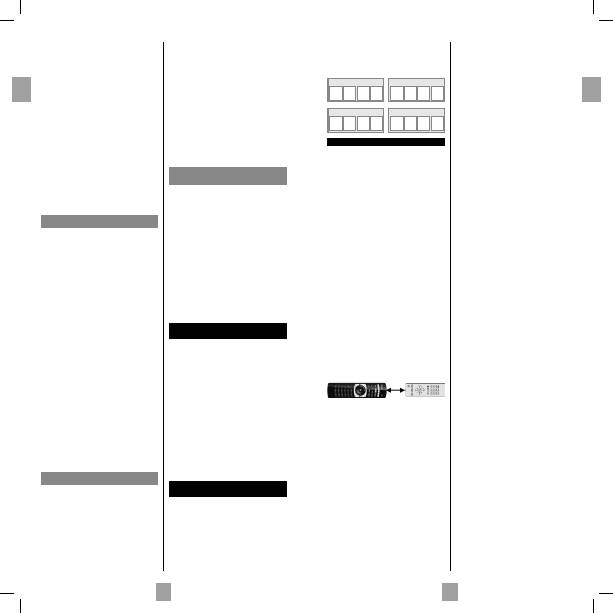
Replacing the batteries
Use 2 CR2032 Lithium batteries
1. Open the cover on the back of the remote control.
2. Remove the old batteries.
2. Check the +/– polarity on the batteries and inside
the compartment.
3. Insert the batteries.
4. Close the cover.
When exchanging the batteries, it may be necessary to
reprogram the unit. Hence it is advisable to record the
codes needed for your devices.
Used batteries do not qualify as household waste. The
batteries must be disposed of at a special collection
point for used batteries.
Note on environmental protection:
After the implementation of the European
Directive 2002/96/EU in the national le-
gal system, the following applies:
Electrical and electronic devices may not
be disposed of with domestic waste.
Consumers are obliged by law to return electrical and
electronic devices at the end of their service lives to the
public collecting points set up for this purpose or point
of sale. Details to this are de
fi
ned by the national law
of the respective country. This symbol on the product,
the instruction manual or the package indicates that a
product is subject to these regulations. By recycling,
reusing the materials or other forms of utilising old
devices, you are making an important contribution to
protecting our environment.
A
Cette télécommande universelle (4 en 1) est compatible avec la plupart des téléviseurs, lecteurs
DVD, magnétoscopes ainsi que la plupart des boîtiers numériques tels que les récepteurs satellite
ou câble, les récepteurs TNT, les décodeurs ADSL, ...
Pour programmer votre télécommande, suivez une des méthodes A, B, C, D ou E détaillées dans
ce manuel. Mais avant tout, mettez la télécommande en service en enlevant la languette de
protection des 2 piles CR2032.
Conservez cette notice et la liste des codes séparée afi n de pouvoir reprogrammer ultérieurement
la télécommande.
1: Marche/Veille ou Veille uniquement selon les
appareils..
2 Touches de Modes: Touches de mode. Sélection de
l
ʼ
appareil à commander (TV, DVD, …).
3 Setup: Cette touche vous permet de programmer
la télécommande. Elle vous permet aussi
d
ʻ
accéder aux fonctions secondaires de
certains équipements. Appuyez et relachez la
touche „Setup“ suivi de la touche
correspondant à la fonction désirée.
4 Learn: utilisée pour la procédure d
ʼ
apprentissage de
codes (copie de touches) (voir page 7).
5: Af
fi
che des informations de l
ʻ
appareil sélectionné.
6: Mise en marche télétexte.
7: Arrêt du télétexte.
8: Arrêt de l
ʼ
alternance des pages (télétexte).
9 Exit:
Sortie du menu de l
ʻ
appareil sélectionné.
10 (Mute): Coupure du son de l
ʻ
appareil sélectionné.
11 Menu: Af
fi
chage du menu de l
ʻ
appareil sélectionné.
12 V-, V+: Permet d
ʻ
augmenter (+) ou de diminuer (-)
le volume sonore de l
ʻ
appareil sélectionné.
13 P+, P-: Touches Programme + ou Programme -.
14: Touches de direction. Elles vous permettent de
naviguer horizontalement et verticalement dans les
menus.
15 OK: Con
fi
rmation d
ʻ
une selection.
16 (lecture): Lecture d
ʻ
un disque (DVD)*.
17 (avance rapide): Permet d
ʻ
avancer rapidement (DVD)*.
18 (retour rapide): Permet de revenir en arrière (DVD)*.
19 (pause): Arrête la lecture et arrêt sur image (DVD)*.
20 (enregistrement): Pour lancer l
ʻ
enregistement,
appuyez 2 fois sur la touche
(DVD).
21 (stop): Arrête le disque (DVD)*.
22 Touches 0 à 9: Elles ont les mêmes fonctions
que les touches numériques de
votre télécommande habituelle et
servent en plus à entrer les codes
des
appareils.
23 -/--:
Permet, pour certains appareils, d
ʻ
entrer les
chaînes à 2 chiffres. Appuyez d
ʻ
abord
sur cette touche puis sur les touches
numériques correspondant au numéro de la
chaîne.
24 AV: Sélection d
ʼ
une source externe (PERITEL, HDMI, ...).
* Touches colorées, utilisables pour le choix de rubriques
lorsque le télétexte est activé, et fonctions spéci
fi
ques selon
la marque.
Description des touches
Essai de la télécommande sans
l’avoir programmée
Il se peut que cette télécommande, en fonction des
réglages d
ʼ
usine, soit déjà compatible avec votre
appareil. Faites un test de la façon suivante
1. Mettez en marche l
ʼ
appareil que vous souhaitez
commander.
2. Appuyez sur la touche correspondant au type
d
ʼ
appareil à commander :
TV
: téléviseur,
DVD
: lecteur DVD,
SAT
: récepteur
satellite,
AUX
: tout autre type d
ʻ
appareil.
3. Dirigez la télécommande vers l
ʼ
appareil à
commander et essayez de l
ʼ
éteindre avec la
touche
G
. Si l
ʼ
appareil ne s
ʼ
éteint pas, vous devrez
programmer la télécommande en suivant une des
méthodes
A
,
B
,
C
ou
D
décrites ci-après.
Note 1: Exceptée la touche TV, chaque touche de
mode (
DVD
,
SAT
et
AUX
) est programmable pour
commander un appareil autre que celui indiqué sur la
touche. Il est donc possible d
ʻ
attribuer, par exemple,
le mode
SAT
à la touche
DVD
. Vous devrez entrer le
code correspondant à la marque et à l
ʻ
appareil désiré
en suivant une des méthodes indiquées dans ce manuel.
Cependant, la méthode D (recherche automatique d
ʻ
un
code) vous simpli
fi
era la tâche. Il vous suf
fi
ra d
ʻ
entrer
n
ʻ
importe quel code de la liste correspondant au
type d
ʻ
appareil (ex : 0603 pour un récepteur satellite
Thomson) puis de lancer la procédure de recherche
automatique. La télécommande testera ainsi tous les
codes jusqu
ʻ
à trouver celui qui fera réagir le récepteur.
Note 2: Pour commander 2 appareils de mêmes
types et de mêmes marques (2 magnétoscopes
Thomson, 2 récepteurs satellite Thomson, ...) assurez
vous au préalable, que ces deux appareils sont déjà
paramétrés pour ne réagir qu
ʻ
à un sous code pour
l
ʻ
un et à un autre sous code pour l
ʻ
autre (code A et
B pour les appareils Thomson). Programmez ensuite
et successivement 2 touches de mode en utilisant la
méthode
D
.
Programmation
de la télécommande
Méthode A - Programmation rapide
avec un sous-code à 1 chiffre
Avant de commencer la programmation, recherchez
le sous-code de l
ʼ
appareil que vous souhaitez
commander. L
ʻ
entrée d
ʻ
un
sous-code
permet à la
télécommande de tester une liste prédé
fi
nie de codes.
Reportez-vous à la liste jointe à cette notice, page I
des
sous-codes
.
1. Mettez en marche l
ʼ
appareil que vous souhaitez
commander.
2. Maintenez appuyée la touche
SETUP
jusqu
ʻ
à ce
que la touche correspondant au dernier mode
sélectionné clignote puis reste allumée (le voyant
restera allumé quelques secondes pour vous laissez
le temps de procéder aux étapes suivantes. Le
clignotement du voyant indique la
fi
n du temps
disponible, puis il s
ʼ
éteint).
3. Appuyez sur la touche correspondant au type
d
ʼ
appareil à commander :
TV
: téléviseur,
DVD
: lecteur
DVD
,
SAT
: récepteur
satellite, câble, TNT, box ADSL, AUX: tout autre type
d
ʻ
appareil.
4. Pendant que le voyant est allumé, tapez le sous-code
(ex : 1 pour Thomson).
5. Dirigez la télécommande vers l
ʼ
appareil et essayez
de l
ʼ
éteindre en appuyant une fois sur la touche
G
.
6. Si l
ʼ
appareil à commander s
ʼ
éteint, appuyez sur
OK
pour mémoriser le code.
7. Si l
ʼ
appareil ne s
ʼ
éteint pas, appuyez de nouveau sur
la touche
G
, plusieurs fois jusqu
ʼ
à ce que l
ʼ
appareil
s
ʼ
éteigne. Entre deux appuis, laissez le temps à
la touche correspondant au mode sélectionné de
s
ʼ
éteindre puis de se rallumer (environ 1 seconde).
Ceci vous permet de vous rendre compte de la
réaction de l
ʼ
appareil.
8. Dès que l
ʼ
appareil à commander s
ʼ
éteint, appuyez
sur
OK
pour mémoriser le code.
Vérifi cation de la programmation :
Votre appareil est, en principe, prêt à recevoir les
ordres de la télécommande.
Véri
fi
ez le fonctionnement en procédant au test de
la page 6.
Méthode B – Programmation
avec des codes à 4 chiffres
Avant de commencer la programmation, recherchez le
code de l
ʼ
appareil que vous souhaitez commander.
Reportez-vous à la liste jointe à cette notice, page II
des codes.
1. Mettez en marche l
ʼ
appareil que vous souhaitez
commander.
6
7
F
F
2. Maintenez appuyée la touche
SETUP
jusqu
ʻ
à ce
que la touche correspondant au dernier mode
sélectionné clignote puis reste allumée (le voyant
restera allumé quelques secondes pour vous laissez
le temps de procéder aux étapes suivantes. Le
clignotement du voyant indique la
fi
n du temps
disponible, puis il s
ʼ
éteint).
3. Appuyez sur la touche correspondant au type
d
ʼ
appareil à commander :
TV
: téléviseur,
DVD
: lecteur DVD,
SAT
: récepteur
satellite, câble, TNT, box ADSL,
AUX
: tout autre
type d
ʻ
appareil.
4. Pendant que le voyant est allumé, tapez un des
codes à 4 chiffres proposés pour la marque de
l
ʼ
appareil à commander (ex : 0166 pour Thomson).
5. Dirigez la télécommande vers l
ʼ
appareil et essayez
de l
ʼ
éteindre en appuyant une fois sur la touche
G
.
6. Si l
ʼ
appareil ne s
ʼ
éteint pas, répétez l
ʼ
étape 2.
Tapez ensuite, le code à 4 chiffres suivant. Essayez
d
ʼ
éteindre l
ʼ
appareil en appuyant une fois sur
la touche
G
. Renouveler l
ʼ
opération en essayant
chacun des codes à 4 chiffres.
Vérifi cation de la programmation :
Votre appareil est, en principe, prêt à recevoir les
ordres de la télécommande.
Véri
fi
ez le fonctionnement en procédant au test de
la page 6.
Méthode C – Programmation
par recherche de code
Si aucun code ne fonctionne, il est possible de
retrouver le code sans avoir à le taper.
1. Mettez en marche l
ʼ
appareil que vous souhaitez
commander.
2. Maintenez appuyée la touche
SETUP
jusqu
ʻ
à ce
que la touche correspondant au dernier mode
sélectionné clignote puis reste allumée.
3. Appuyez sur la touche correspondant au type
d
ʼ
appareil à commander :
TV
: téléviseur,
DVD
:
lecteur DVD,
SAT
: récepteur satellite, câble, TNT,
box ADSL,
AUX
: tout autre type d
ʻ
appareil.
4. Dirigez la télécommande vers l
ʼ
appareil et essayez
de l
ʼ
éteindre en appuyant une fois sur la touche
G
.
5. Si l
ʼ
appareil à commander s
ʼ
éteint, appuyez sur
OK pour mémoriser le code.
6. Si l
ʼ
appareil ne s
ʼ
éteint pas, appuyez de nouveau
sur la touche
G
, autant de fois que nécessaire
(jusqu
ʼ
à 200 fois) jusqu
ʼ
à ce que l
ʼ
appareil
s
ʼ
éteigne. Entre deux appuis, laissez le temps à
la touche correspondant au mode sélectionné de
s
ʼ
éteindre puis de se rallumer (environ 1 seconde).
Ceci vous permet de vous rendre compte de la
réaction de l
ʼ
appareil.
7. Dès que l
ʼ
appareil à commander s
ʼ
éteint, appuyez
sur
OK
pour mémoriser le code.
Vérifi cation de la programmation :
Votre appareil est, en principe, prêt à recevoir les
ordres de la télécommande.
Véri
fi
ez le fonctionnement en procédant au test de
la page 6.
Essayez d
ʼ
autres touches de la télécommande
pour connaître l
ʼ
étendue des fonctions que votre
télécommande peut commander. Si vous pensez que
toutes les touches ne sont pas actives, renouvelez la
procédure de cette méthode de programmation a
fi
n de
trouver un code couvrant plus de fonctions.
wider range of features.
Méthode D – Recherche
automatique d’un code
Dans le cadre de cette méthode, la télécommande
déroule la liste complète des codes en envoyant un
signal IR (Infra Rouge) à l
ʼ
appareil à télécommander.
Procédez ainsi :
1. Véri
fi
ez que votre équipement est en marche.
Sinon allumez le manuellement.
2. Maintenez appuyée la touche
SETUP
jusqu
ʻ
à ce
que la touche correspondant au dernier mode
sélectionné clignote puis reste allumée (le voyant
restera allumé quelques secondes pour vous laissez
le temps de procéder aux étapes suivantes. Le
clignotement du voyant indique la
fi
n du temps
disponible, puis il s
ʼ
éteint).
3. Relâchez la touche
SETUP
.
4. Appuyez sur la touche de l
ʼ
équipement souhaité
(par exemple
TV
).
5. Appuyez une seule fois sur la touche
PROG+
ou
G
ou
B
(
DVD
seulement). Après quelques secondes
la télécommande commence à dérouler toute la
liste de codes inclus dans la bibliothèque (environ
1 code par seconde). Appuyer une deuxième fois
sur
PROG+
pour réduire la vitesse de test (1 code
toutes les 3 secondes). Dès que l
ʼ
appareil change
de chaîne, vous devez appuyer immédiatement
sur
OK
pour enregistrer le code et stopper le
déroulement de la liste. Si vous n
ʼ
avez pas réagi
assez vite, vous avez la possibilité de revenir au
code précédent en appuyant sur
PROG-
ou
E
(
DVD
seulement) autant de fois que nécessaire
(vous pouvez réavancer en appuyant sur
G
, ou
PROG+
ou
B
(
DVD
seulement) si vous êtes allés
trop en arrière). Dès que l
ʼ
appareil répond à
nouveau, appuyez sur
OK
pour enregistrer le
code.
Méthode E - Programmation pour com-
mander un COMBO (combiné TV/VCR,TV/
DVD,VCR/DVD, …)
Selon la famille de combo (TV/VCR,VCR/DVD,…) et la
marque, vous serez amené à entrer un seul code pour
les deux appareils réunis dans le combo ou à entrer
deux codes, un code par appareil. Reportez-vous à la
liste séparée pour le savoir.
Avant de commencer la programmation, recherchez le
sous-code ou le code de l
ʼ
appareil que vous souhaitez
commander (ex. : téléviseur puis magnétoscope ou
COMBO TV/VCR). Reportez-vous à la liste jointe à
cette notice, page des sous-codes ou page des codes.
1. Mettez en marche le COMBO que vous souhaitez
commander.
2. Maintenez appuyée la touche
SETUP
jusqu
ʻ
à ce
que la touche correspondant au dernier mode
sélectionné clignote puis reste allumée.
3. Appuyez sur la touche du premier appareil
à commander, puis suivez une des méthodes
de programmation A, B, C ou D décrites
précédemment.
4. Si un deuxième code est nécessaire, répétez les
étapes 2 et 3 ci-dessus.
Comment retrouver
un code programmé
Il peut être utile de retrouver le code programmé dans
la télécommande.
1. Maintenez appuyée la touche
SETUP
jusqu
ʻ
à ce
que la touche correspondant au dernier mode
sélectionné clignote puis reste allumée.
2. Appuyez sur la touche correspondant au type
d
ʼ
appareil à commander :
TV
: téléviseur,
DVD
: lecteur DVD,
SAT
: récepteur
satellite, câble, TNT, box ADSL,
AUX
: tout autre
type d
ʻ
appareil.
3. Appuyez à nouveau brièvement sur la touche
SETUP
, le dernier mode sélectionné clignote 1 fois.
4. Appuyez sur les touches numériques dans
l
ʻ
ordre croissant (
0
à
9
) jusqu
ʻ
à ce que le mode
sélectionné clignote une fois.
5. Le chiffre qui a fait clignoter le mode sélectionné
est le premier des quatre chiffres composant votre
code, notez-le.
6. Répétez l
ʻ
étape 4 pour retrouver les autres chiffres
du code.
7. Lorsque le quatrième chiffre est trouvé, le voyant
du mode sélectionné s
ʼ
éteint.
Vérifi cation
de la programmation
- Pour un téléviseur ou un récepteur satellite :
allumez l
ʼ
appareil et appuyez, par exemple, sur 2
pour changer de chaîne.
- Pour un magnétoscope : insérez une cassette puis
appuyez sur
B
.
- Pour un lecteur DVD : insérez un disque puis
appuyez sur
B
.
Essayez d
ʼ
autres touches de la télécommande
pour connaître l
ʼ
étendue des fonctions que votre
télécommande peut commander. Si vous pensez que
toutes les touches ne sont pas actives, essayez une
autre méthode de programmation,
Méthode B
ou
C
.
Fonction d’apprentissage (learning)
Si la marque de l
ʼ
appareil à commander ne
fi
gure
pas dans la liste des codes livrée séparément ou si
quelques fonctions manquent, vous pouvez copier
dans votre ROC 4238 les fonctions des touches de
la télécommande d
ʼ
origine de cet appareil. Selon le
format des codes de transmission de la télécommande
d
ʼ
origine, votre télécommande pourra mémoriser
jusqu
ʼ
à 150 touches.
Effacement général – Efface toutes les touches
copiées (recommandé la première fois)
1. Maintenez appuyée la touche SETUP jusqu
ʻ
à ce
que la touche correspondant au dernier mode
sélectionné reste allumée.
2. Relâchez la touche SETUP.
3. Appuyez deux fois sur la touche LEARN. La touche
s
ʼ
éteint puis se rallume.
4. Appuyez une fois sur la touche SETUP. La touche
de mode s
ʼ
éteint après quelques secondes.
5. Toutes les touches copiées sont effacées.
Avant de commencer
• Les piles des 2 télécommandes doivent être en bon
état ; éventuellement changez-les.
• Copiez au préalable 2 à 3 touches de la
télécommande d
ʼ
origine a
fi
n de véri
fi
er la
compatibilité des codes des deux télécommandes.
Procédez ensuite à une remise à zéro avant de
commencer la procédure d
ʼ
apprentissage.
• Disposez la télécommande d
ʼ
origine et votre
ROC4238 bout à bout de façon à aligner les
diodes LED des 2 télécommandes. Eventuellement
ajustez la hauteur des 2 télécommandes pour que
les diodes LED soient bien alignées.
• Véri
fi
ez que l
ʼ
écartement entre les 2
télécommandes soit compris entre 15 et 50mm.
• Ne déplacez pas les télécommandes pendant la
procédure d
ʼ
apprentissage.
• Assurez-vous que l
ʼ
éclairage de la pièce ne soit
pas produit par des tubes
fl
uorescents ou par une
lampe à basse consommation car ces sources
lumineuses peuvent provoquer des interférences et
perturber la copie.
• Les 2 télécommandes doivent être à plus d
ʼ
un
mètre de toute source lumineuse.
• Evitez de copier les codes des touches VOL et
H
et aussi ceux des touches de dé
fi
lement car
selon les télécommandes les codes de ces touches
ne commandent pas nécessairement les mêmes
appareils.
• Lorsque la mémoire de votre ROC 4238 sera
pleine, la touche de mode clignotera pendant 3
secondes. Il ne sera alors plus possible de copier
d
ʼ
autres codes sans effectuer une remise à zéro.
• Lorsque vous copiez une touche, il est possible que
la touche de mode clignote faiblement. Dans ce
cas ne relâchez pas la touche et attendez que le
clignotement cesse.
Note 1 : si la procédure d
ʼ
apprentissage semble ne
pas se dérouler correctement, essayez ceci :
1. Terminez la procédure d
ʼ
apprentissage en
appuyant sur
SETUP
.
2. Véri
fi
ez que les LED des deux télécommandes
soient bien alignées. Utilisez la procédure
d
ʼ
alignement.
3. Modi
fi
ez l
ʼ
écartement des télécommandes en
augmentant ou diminuant la distance de 1,5 cm à
5 cm.
4. Reprenez la procédure au début.
5. Si le problème persiste avec la même touche,
véri
fi
ez si la télécommande d
ʼ
origine fonctionne
: transmet-elle les signaux IR (Infra Rouge) ? (voir
piles) ; est-elle correctement placée par rapport à
la diode de votre ROC 4238 ?
Note 2 :
• Vous ne pouvez pas copier des touches sous les
touches
LEARN
,
SETUP
et les touches de
MODE
.
• Toutes les touches copiées pour un mode sont
effacées si un code à 4 chiffres est entré sous ce
mode (et aussi pour l
ʼ
entrée directe d
ʼ
un code, la
recherche de code ou de marque).
Identifi cation de la position de la diode sur la
télécommande originale (à copier)
Si la LED de la télécommande d
ʼ
origine n
ʼ
est pas
visible (cachée par exemple par un cache en plastique
de couleur foncée), les instructions ci-dessous vous
aideront à la localiser.
1. Placez l
ʼ
avant de télécommande originale (la
partie que, d
ʼ
habitude, vous dirigez vers l
ʼ
appareil
à commander) à environ 2,5 cm de la LED de
votre ROC 4238 en face de l
ʼ
indication
LEARN
(reportez-vous au schéma ci-dessus).
2. Maintenez appuyée la touche
SETUP
jusqu
ʻ
à ce
que la touche correspondant au dernier mode
sélectionné reste allumée.
3. Relâchez la touche
SETUP
.
4. Appuyez une fois sur une touche de mode (
TV
,
DVD
,
SAT
,
AUX
). La touche s
ʼ
éteint puis se
rallume.
5. Appuyez une fois sur la touche
LEARN
.
6. Maintenez appuyée une des touches de la
télécommande originale tout en la déplaçant
vers la droite puis vers la gauche. Dès que les 2
télécommandes sont correctement alignées, la
touche de mode clignote rapidement.
7. Pour copier des touches de votre télécommande
originale dans votre ROC 4238, continuez à
l
ʼ
étape 5 du paragraphe « Pour copier les
touches ».
Note : Certaines télécommandes originales ne
transmettent pas les signaux IR de façon continue
lorsqu
ʼ
une touche est pressée. Dans ce cas appuyez
plusieurs fois sur une des touches tout en déplaçant la
télécommande vers la droite et vers la gauche.
Pour copier des touches
1. Maintenez appuyée la touche
SETUP
jusqu
ʻ
à ce
que la touche correspondant au dernier mode
sélectionné reste allumée.
2. Relâchez la touche
SETUP
.
3. Appuyez une fois sur une touche de mode (
TV
,
DVD
,
SAT
,
AUX
). La touche s
ʼ
éteint puis se
rallume.
4. Appuyez une fois sur la touche
LEARN
.
5. Appuyez une fois sur la touche de votre ROC
4238 sous laquelle vous souhaitez copier une des
touches de la télécommande originale.
6. Maintenez appuyée la touche de la télécommande
originale à copier jusqu
ʼ
à ce que latouche de
mode s
ʼ
éteigne et se rallume (2 à 3 secondes). En
cas de problème, la touche de mode clignotera
pendant 3 secondes mais restera en mode
apprentissage. Essayez à nouveau ou passez à
une autre touche.
7. Pour les autres touches, répétez la procédure à
partir de l
ʼ
étape 5.
8. Appuyez une fois sur la touche
SETUP
lorsque
toutes les touches souhaitées sont copiées. La
touche de mode s
ʼ
éteint.
A
Lorsque vous aurez trouvé le code de votre
appareil, notez-le afi n de vous y reporter
facilement en cas de besoin. Lorsque vous
changerez les piles, vous pourrez être amené à
reprogrammer la télécommande.
CODE DVD CODE TV CODE STB CODE AUX
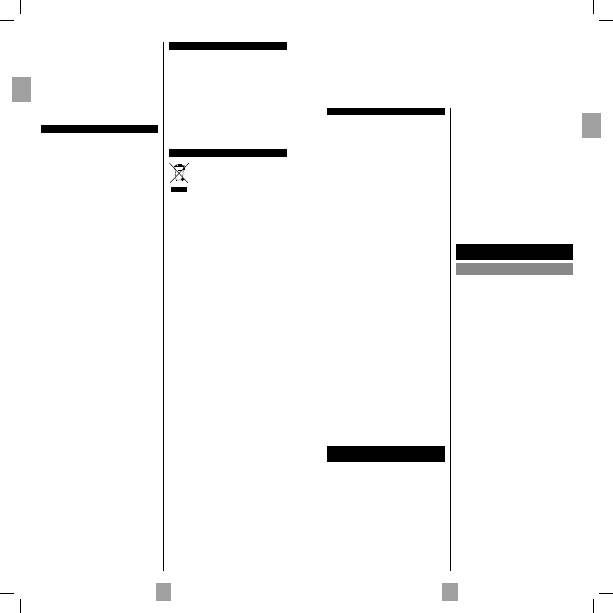
8
9
F
D
Remplacement des piles
Utilisez 2 piles Lithium CR2032.
1. Ouvrez le compartiment piles à l
ʻ
arrière de la
télécommande.
2. Enlevez les piles usagées.
2. Véri
fi
ez la polarité +/- sur les piles et à l
ʻ
intérieur
du compartiment piles de la télécommande.
3. Insérez les piles.
4. Refermez le compartiment.
Lorsque vous changez les piles, il peut être nécessaire
de reprogrammer la télécommande. C
ʻ
est pourquoi
nous vous conseillons de noter les codes utilises pour
chacun de vos appareils.
Les piles usagées ne sont pas des déchets domestiques
! Elles doivent être déposées dans un lieu de collecte
de piles usagées.
Remarques concernant la protection de
l
ʼ
environnement:
Conformément à la directive europée-
nne 2002/96/CE, et a
fi
n d
ʻ
atteindre un
certain nombre d
ʻ
objectifs en matière de
protection de l
ʻ
environnement, les règles
suivantes doivent être appliquées. Elles concernent les
déchets d
ʻ
équipement électriques et électroniques. Le
pictogramme “picto” présent sur le produit, son manu-
el d
ʻ
utilisation ou son emballage indique que le produit
est soumis à cette réglementation. Le consommateur
doit retourner le produit usager aux points de collecte
prévus à cet effet. Il peut aussi le remettre à un reven-
deur. En permettant en
fi
n le recyclage des produits,
le consommateur contribuera à la protection de notre
environnement. C
ʻ
est un acte écologique.
Autres fonctions
Mise en veille de tous les appareils
Appuyez 2 fois en moins d
ʼ
une seconde, sur la touche
G
en la maintenant appuyée la deuxième fois. Tous les
appareils s
ʼ
éteignent les uns après les autres (Attention:
les appareils déjà en veille risquent de s
ʻ
allumer).
Réglage de TOUTES les commandes de volume
sous un mode déterminé
En sortie d
ʻ
usine, votre ROC 4238 est programmée
de telle façon que chaque mode contrôle son propre
volume si celui-ci existe sur l
ʻ
appareil sélectionné.
Vous pouvez affecter le contrôle du volume sonore à
un des modes de la télécommande à condition que
le contrôle du volume sonore existe sur l
ʼ
appareil
correspondant (ex : contrôle du son TV en modes TV,
DVD, SAT et AUX).
1. Appuyez sur la touche
SETUP
jusqu
ʻ
à ce que la
touche correspondant au dernier mode sélectionné
reste allumée.
2. Relâchez la touche
SETUP
.
3. Appuyez sur la touche
H
jusqu
ʻ
à ce que la touche
de mode clignote une fois.
4. Appuyez une fois sur la touche de mode (
TV
,
DVD
,
…) correspondant à l
ʼ
appareil dont le volume sera
toujours commandé par les touches
VOL
et
H
.
5. Appuyez une fois sur la touche
H
, la touche de
mode s
ʻ
éteint.
6. Les touches Volume et
H
contrôle désormais le
Volume de l
ʻ
appareil choisi quel que soit le mode
sélectionné sur la télécommande.
Réglage des commandes de volume pour CHAQUE
mode.
Vous pouvez décider que le contrôle du volume soit
fonctionnel pour chaque mode choisi à condition que le
contrôle du volume existe sur l
ʼ
appareil correspondant
(ex : commande du son du téléviseur en mode TV, puis
commande du son d
ʼ
un récepteur SAT en mode SAT, …).
1. Appuyez sur la touche
SETUP
jusqu
ʻ
à ce que la
touche correspondant au dernier mode sélectionné
reste allumée.
2. Relâchez la touche
SETUP
.
3. Appuyez sur la touche
H
jusqu
ʻ
à ce que la touche
de mode clignote une fois.
4. Appuyez une fois sur la touche de mode (
TV
,
DVD
,
…) correspondant à l
ʼ
appareil dont le volume sera
toujours commandé par les touches
VOL
et
H
.
5. Appuyez une fois sur la touche
VOL-
.
6. Appuyez une fois sur la touche
H
, la touche de
mode s
ʻ
éteint.
7. Les touches Volume et
H
du mode choisi
contrôleront désormais l
ʻ
appareil sélectionné.
Réactivation de la fonction universelle de volume
et de désactivation du son
Si vous avez modi
fi
é les fonctions de volume et de
désactivation du son comme décrit dans les deux
sections précédentes, il est possible de réactiver les
paramètres d
ʻ
usine de ces fonctions.
1. Appuyez sur la touche
SETUP
jusqu
ʻ
à ce que la
touche correspondant au dernier mode sélectionné
reste allumée.
2. Relâchez la touche
SETUP
.
3. Appuyez sur la touche
H
jusqu
ʻ
à ce que la touche de
mode clignote une fois.
4. Appuyer encore une fois sur la touche
H
. La touche
source s
ʻ
éteint complètement. Les réglages d
ʻ
origine
des fonctions de volume et de désactivation du son
sont maintenant rétablis.
Pour effacer toutes les touches copiées sous un
mode
1. Maintenez appuyée la touche
SETUP
jusqu
ʻ
à ce
que la touche correspondant au dernier mode
sélectionné reste allumée.
2. Relâchez la touche
SETUP
.
3. Appuyez une fois sur une touche de mode (
TC
,
DVD
,
AUX
, …). La touche s
ʼ
éteint puis se rallume.
4. Appuyez deux fois sur la touche
LEARN
. La touche
s
ʼ
éteint puis se rallume.
5. Appuyez une fois sur la touche
SETUP
. La touche
de mode s
ʼ
éteint. Toutes les touches copiées sous
ce mode sont effacées.
Diese Universal-Fernbedienung (4 in 1) ist kompatibel mit den meisten Fernsehgeräten, DVD-Playern
und Videorecordern, sowie mit Digitalboxen wie Satelliten- oder Kabelreceivern, DVB-T-Receivern
(Digital Video Broadcast - Terrestrial), ADSL-Dekodern usw. Die Fernbedienung wurde werkseitig so
programmiert, dass Sie sie zur Steuerung der meisten Geräte aus der Herstellung der THOMSON-
Gruppe verwenden können. Aus diesem Grund empfehlen wir Ihnen, die Fernbedienung erst mithilfe
der in diesem Benutzerhandbuch beschriebenen Methoden zu testen, bevor Sie versuchen, sie neu
zu programmieren. Aktivieren Sie aber zunächst die Fernbedienung, indem Sie die beiden Schutz-
abdeckungen von den zwei CR 2032-Batterien entfernen. Bitte heben Sie diese Anleitung zusammen
mit der Codeliste auf (separat mitgeliefert), damit Sie nach und nach Ihre Fernbedienung auch zur
Verwendung mit weiteren Geräten programmieren können.
1: Ein/Standby oder nur Standby, abhängig von den
verwendeten
Geräten.
2 Modus-Tasten (Mode): Zum Auswählen des zu
bedienenden Geräts (TV, DVD...)
3 Setup: Ermöglicht die Programmierung vor der
ersten Nutzung. Sie ermöglicht außerdem
den Zugriff auf Sekundärfunktionen
bestimmter A/V-Geräte (Umschalttaste).
Drücken Sie hierzu einmal kurz die Taste
„Setup“, gefolgt von der gewünschten
Funktionstaste.
4 Learn: Wird für den Vorgang zum Lernen der Codes
verwendet (Kopieren der Tasten, siehe Seite 12)
5: Zeigt Informationen des ausgewählten Geräts an
6: Teletext
ein
7: Teletext
aus
8: Teletext anhalten (Bildlauf stoppen)
9 Exit: Schaltet das Menü des ausgewählten
Geräts
aus
10 (Stumm): Schaltet den Ton des ausgewählten
Geräts
aus
11 Menu: Schaltet das Menü des ausgewählten
Geräts
ein
12 V-, V+: Erhöht (+) bzw. vermindert (-) die
Lautstärke des ausgewählten Geräts
13 P+, P-: Tasten zum Umschalten auf den nächsten
bzw. vorherigen Kanal
14: Ermöglicht die horizontale und vertikale
Navigation durch die Menüs
15 OK: Bestätigung der Auswahl
16 (Wiedergabe): Wiedergabe einer DVD (DVD)*
17: Schneller Vorlauf (DVD)*
18 (zurück): Rücklauf (DVD)*
19 (Pause): Hält die Wiedergabe an und stoppt auf
einem
Bild*
20 (Aufnahme): Drücken Sie die Taste RECORD
zwei Mal, um die Aufnahme zu starten.
21 (Stopp): Stoppt die Disk (DVD)*
22 Nummerntasten 0 - 9:
Diese Tasten haben dieselben Funktionen wie
die auf Ihrer Original-Fernbedienung und werden
außerdem verwendet, um die Codes für
verschiedene Produkte einzugeben.
23 -/--: In Verbindung mit den Nummertasten
ermöglicht Ihnen diese Taste bei einigen
Geräten eine direkte zweistellige Anwahl von
Programmen.
24 AV: Zur Auswahl einer externen Quelle (SCART,
HDMI
usw.)
* Die farbigen Tasten können bei aktiviertem Teletext zur
Auswahl von Kategorien und speziellen Funktionen (je
nach Aufbau der Menüs) verwendet werden.
Die Tasten
Testen der noch nicht
programmierten Fernbedienung
1. Schalten Sie das Gerät ein, das Sie steuern
möchten.
2. Die Taste drücken, welche der zu steuernden
Geräteart
entspricht:
TV
: Fernseher,
DVD
: DVD
Player,
STB
: Satellitenempfänger, Kabel, TNT,
ADSL,
AUX
.
3. Richten Sie die Fernbedienung auf das zu steuernde
Gerät und versuchen Sie, es mit der Taste
G
auszuschalten. Wenn sich das Gerät nicht
ausschaltet, müssen Sie die Fernbedienung nach
einer der nachstehend beschriebenen Methoden
A
,
B
,
C
oder
D
programmieren.
Hinweis 1: Mit Ausnahme der TV-Taste sind alle
Modustasten (
DVD
,
...
) programmierbar, um
ein anderes Gerät als das auf der Taste angegebene
zu steuern. So können Sie zum Beispiel den STB Modus
der Taste STB zuordnen. Sie müssen den der
Marke und dem gewünschten Gerät entsprechenden
Code eingeben, indem Sie eine der in dieser
Bedienungsanleitung beschriebenen Methoden
befolgen. Methode
D
(automatische Codesuche)
erleichtert Ihnen diesen Vorgang. Sie brauchen nur
irgendeinen Code der Liste einzugeben, welche dem
Gerätetyp entspricht (z.B. 0603 für einen Thomson-
Satellitenempfänger), und dann den automatischen
Suchvorgang zu starten. Die Fernbedienung testet
dann alle Codes, bis sie den Code gefunden hat, auf
den der Empfänger anspricht.
Hinweis 2: Um zwei Geräte des gleichen Typs und der
gleichen Marke zu steuern (2 Thomson-
Videorecorder, 2 Thomson-Satellitenempfänger), sich
zunächst vergewissern, dass diese beiden Geräte
bereits so parametriert sind, dass das eine Gerät nur
auf einen Untercode und das andere Gerät auf einen
anderen Untercode reagiert (Codes A und B für die
Thomson-Geräte). Dann nacheinander zwei
Modustasten nach Methode
D
programmieren.
Programmieren der
Fernbedienung
Methode A – Schnelles Programmieren
mit 1-stelligem Untercode
Bevor Sie mit dem Programmieren beginnen, müssen
Sie den Untercode des zu steuernden Geräts suchen.
Die Eingabe eines Unter-Codes ermöglicht der
Fernsteuerung, eine Liste von vorde
fi
nierten Codes zu
testen. Siehe die dieser Bedienungsanleitung beigelegte
Liste, Seite I der Untercodes.
1. Schalten Sie das Gerät ein, das Sie steuern
möchten.
2. Taste SETUP gedrückt halten, bis die der zuletzt
benützten Betriebsart entsprechende Taste blinkt
und dann ununterbrochen leuchtet (Sie leuchtet
einige Sekunden lang, um Ihnen Zeit für die
folgenden Betätigungen zu geben. Die Anzeige
blinkt zunächst, um Sie zu informieren, daß die Zeit
fast abgelaufen ist und erlischt dann).
3. Die Taste drücken, welche der zu steuernden
Geräteart
entspricht:
TV
: Fernseher,
DVD
: DVD
Player,
STB
: Satellitenempfänger, Kabel, TNT, ADSL,
AUX
4. Wenn die Anzeige leuchtet, den Untercode
eintippen (z. B. 1 für THOMSON).
5. Die Fernbedienung auf das Gerät richten und
versuchen, es auszuschalten, indem Sie auf die
Taste
G
drücken.
6. Sobald sich das zu bedienende Gerät abschaltet,
drücken Sie zur Abspeicherung des Codes auf die
OK
Taste.
7. Sollte sich das Gerät nicht ausschalten, erneut
mehrmals die Taste
G
drücken, bis sich das Gerät
ausschaltet. Zwischen zwei aufeinanderfolgenden
Tastenbetätigungen, müssen Sie ca. 1 Sekunde
warten, um der Betriebsartenleuchte genügend Zeit
zum Verlöschen und Wiederau
fl
euchten zu geben.
Auf diese Weise können Sie feststellen, ob das
Gerät reagiert oder nicht.
8. Sowie sich das zu steuernde Gerät ausschaltet, auf
OK
drücken, um den Code zu speichern.
Überprüfen der Programmierung:
Ihr Gerät ist im Prinzip bereit, die Befehle der
Fernbedienung zu empfangen.
Prüfen Sie das korrekte Funktionieren Ihrer
Fernbedienung, indem Sie den Funktionstest auf
Seite 11 durchrühren.
Оглавление
- DVD CODE TV CODE STB CODE AUX CODE
- CODE DVD CODE TV CODE STB CODE AUX
- DVD-CODE TV-CODE STB-CODE AUX-CODE
- CODICE DVD CODICE TV CODICE STB CODICE AUX
- CÓDIGO DVD CÓDIGO TV CÓDIGO STB CÓDIGO AUX
- DVD-CODE TV-CODE STB-CODE AUX-CODE
- CÓDIGO DVD CÓDIGO TV CÓDIGO STB CÓDIGO AUX
- Τα κουμπιά Έλεγχος του τηλεχειριστηρίου πριν από τον προγραμματισμό του
- Πώς θα ανακτήσετε έναν προγραμματισμένο κωδικό
- Αντικατάσταση των μπαταριών
- Определение запрограммированного кода
- Замена батарей
- Odczytywanie zaprogramowanego kodu
- Wymiana baterii
- Jak získat naprogramovaný kód
- A gombok A távirányító tesztelése beprogramozás előtt
- Hogyan keressük vissza a beprogramozott kódot
- Elemcsere
- KOD DVD KOD TV KOD STB KOD AUX
- Not om miljöskydd:Efter implementeringen av EU direktiv 2002/96/EU i den nationella lagstiftningen, gäller följande:Elekriska och elektroniska apparater får inte avyttras med hushållsavfall.Konsumenter är skyldiga att återlämna elektriska och elektroniska apparatervid slutet av dess livslängd till, för detta ändamål, offentliga uppsamlingsplatser. Detaljer för detta de fi nieras via den nationella lagstiftningen i respektive land. Denna symbol på produkten, instruktionsmanualen eller på förpackningen indikerar att produkten innefattas av denna bestämmelse. Genom återvinning och återanvändning av material bidrar du till att skydda miljön och din omgivning.
- DVD-KODE TV-KODE STB-KODE AUX-KODE
- DVD-KOODI TV-KOODI STB-KOODI AUX-KOODI
