Sharp R-217E: INSTALLATION INSTRUCTIONS
INSTALLATION INSTRUCTIONS: Sharp R-217E
A35652,Russia R217E O/M,En
E – 3
A35652,Russia R217E O/M,En
INSTALLATION INSTRUCTIONS
1. Remove all packing materials from the oven cavity . Check the unit for any damage, such as a misaligned
door, damaged gaskets around the door or dents inside the oven cavity or on the door. If there is any damage,
please do not operate the oven until it has been checked by a SERVICE CENTRE APPROVED BY SHARP
and repaired, if necessary.
2. Accessories provided
1) Turntable tray
2) Roller stay
3) Operation manual and cooking guide
4) Cook book (Russian)
3. Locate the roller stay in the centre of the oven, then fit the turntable on the roller stay. Make sure the turntable
and roller stay are centrally located and locked together. NEVER OPERATE THE OVEN WITHOUT THE
ROLLER STAY AND TURNTABLE.
4. The oven should not be installed in any area where excessive heat and steam are generated, for example,
next to a conventional oven unit. The oven should be installed so as not to block ventilation openings.
Allow at least 15 cm on the top of the oven for free air space.
5. Neither the manufacturer nor the distributors can accept any liability for damage to the machine or personal
injury for failure to observe the correct electrical connecting procedure.
The A.C. voltage must be single phase 220V, 50Hz.
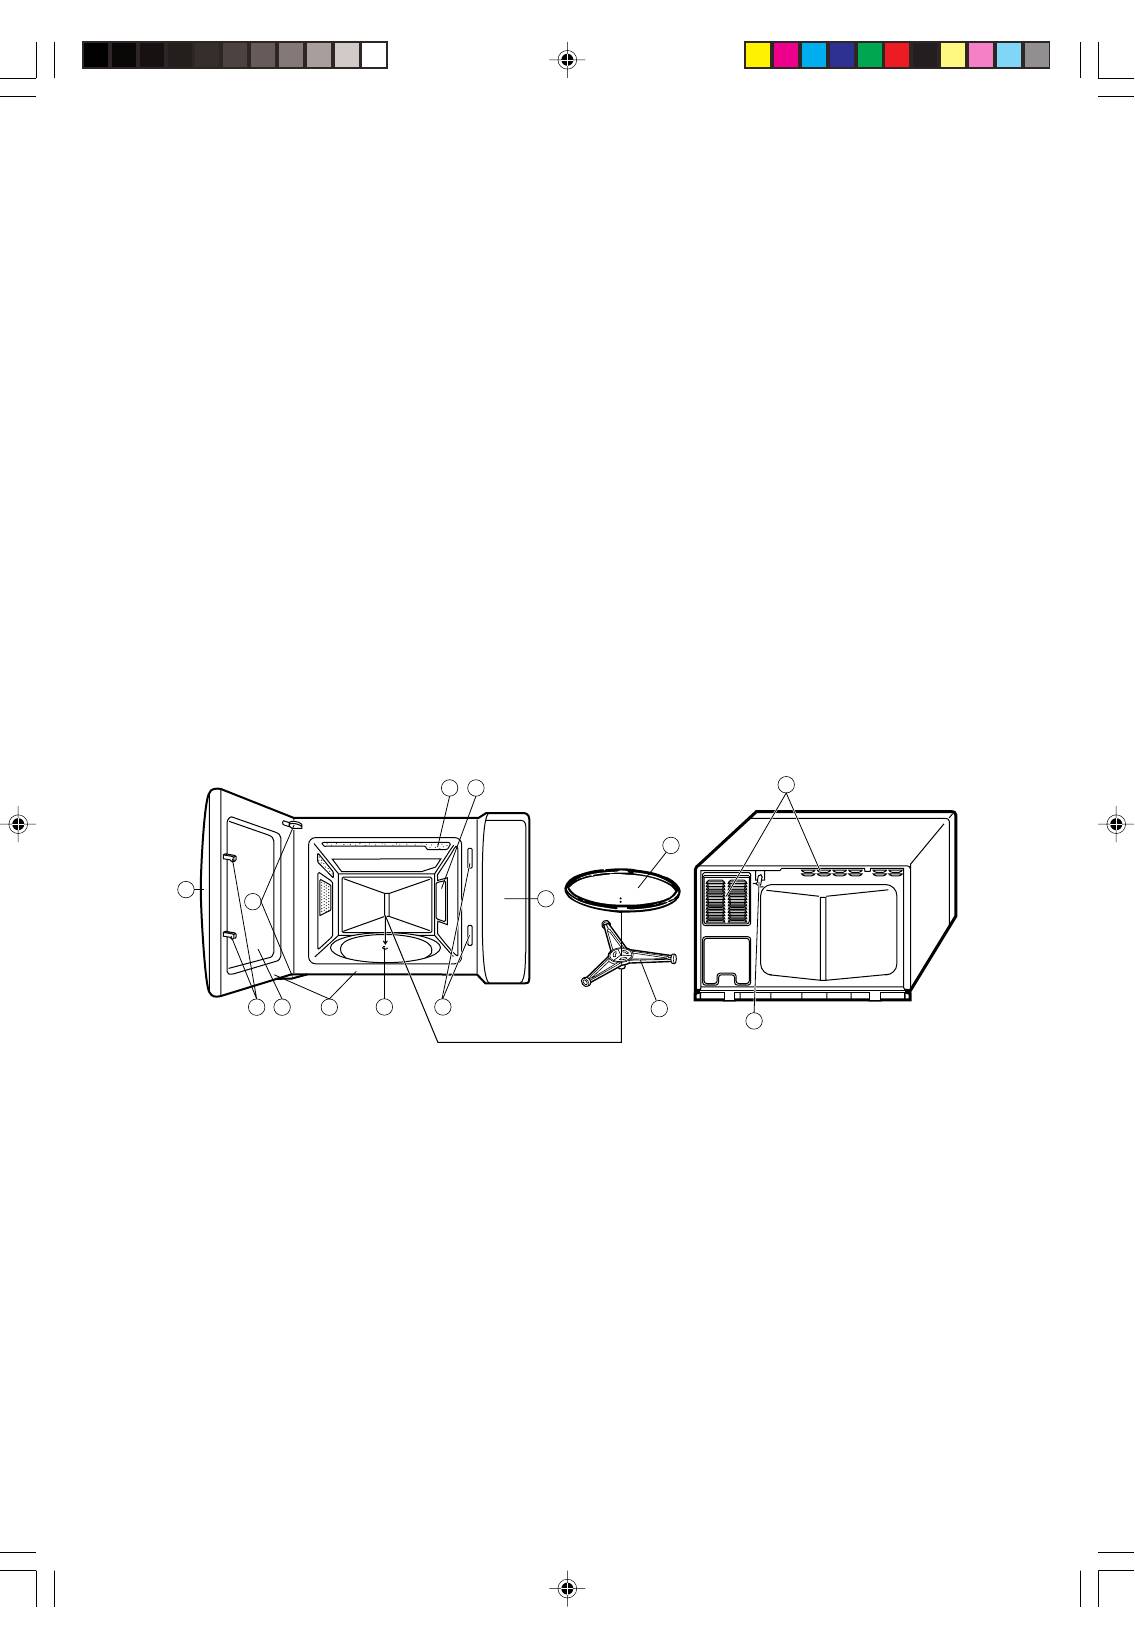
OVEN DIAGRAM
2
9
11
12
1
3
8
654
7
4
13
10
1. Door handle
8. Control panel (See page E-4)
2. Oven lamp
9. Waveguide cover
3. Door hinges
10. Power supply cord
4. Door safety latches
11. Ventilation openings
5. See through door
12. Turntable
6. Door seals and sealing surfaces
13. Roller stay
7. Coupling
Оглавление
- HR
- VTHS GHTLJCNJHJÖZJCNB
- JCJ>ST ERFPFZBY
- BZCNHERWBY GJ ECNFZJDRT
- GFZTKM EGHFDKTZBY
- HF>JNF C GFZTKM* EGHFDKTZBY
- LHEUBT ELJ>ZST AEZRWBB
- EÜJL PF GTXM*
- GJKTPZST CJDTNS
- GJCELF LKY GHBUJNJDKTZBY D VBRHJDJKZJDSÜ GTXFÜ
- Herjdjlcndj gj hfpvjhföbdfzb+
- WARNING
- SPECIAL NOTES
- INSTALLATION INSTRUCTIONS
- CONTROL PANEL
- OPERATION OF CONTROL PANEL
- OTHER CONVENIENT FEATURE
- CARE AND CLEANING
- MICROWAVE COOKING TECHNIQUES
- MICROWAVE SAFE COOKWARE
- DEFROSTING GUIDE


