Dell Inspiron 14z N411z: Keyboard
Keyboard: Dell Inspiron 14z N411z
8
Keyboard
WARNING: Before working inside your computer, read the safety information
that shipped with your computer. For additional safety best practices information,
see the Regulatory Compliance Homepage at dell.com/regulatory_compliance.
CAUTION: Only a certified service technician should perform repairs on your
computer. Damage due to servicing that is not authorized by Dell is not covered by
your warranty.
CAUTION: To avoid electrostatic discharge, ground yourself by using a wrist
grounding strap or by periodically touching an unpainted metal surface (such as a
connector on your computer).
CAUTION: To help prevent damage to the system board, remove the main battery
(see "Removing the Battery" on page 13) before working inside the computer.
CAUTION: The keycaps on the keyboard are fragile, easily dislodged, and time-
consuming to replace. Be careful when removing and handling the keyboard.
CAUTION: Be extremely careful when removing and handling the keyboard.
Failure to do so could result in scratching the display panel.
Removing the Keyboard
1
Follow the instructions in "Before You Begin" on page 9.
2
Remove the battery. See "Removing the Battery" on page 13.
3
Turn the computer over and open the display as far as possible.
4
Gently slide a plastic scribe between the keyboard and palm-rest assembly.
5
Press the four tabs on the palm-rest assembly and disengage the keyboard.
Keyboard 31
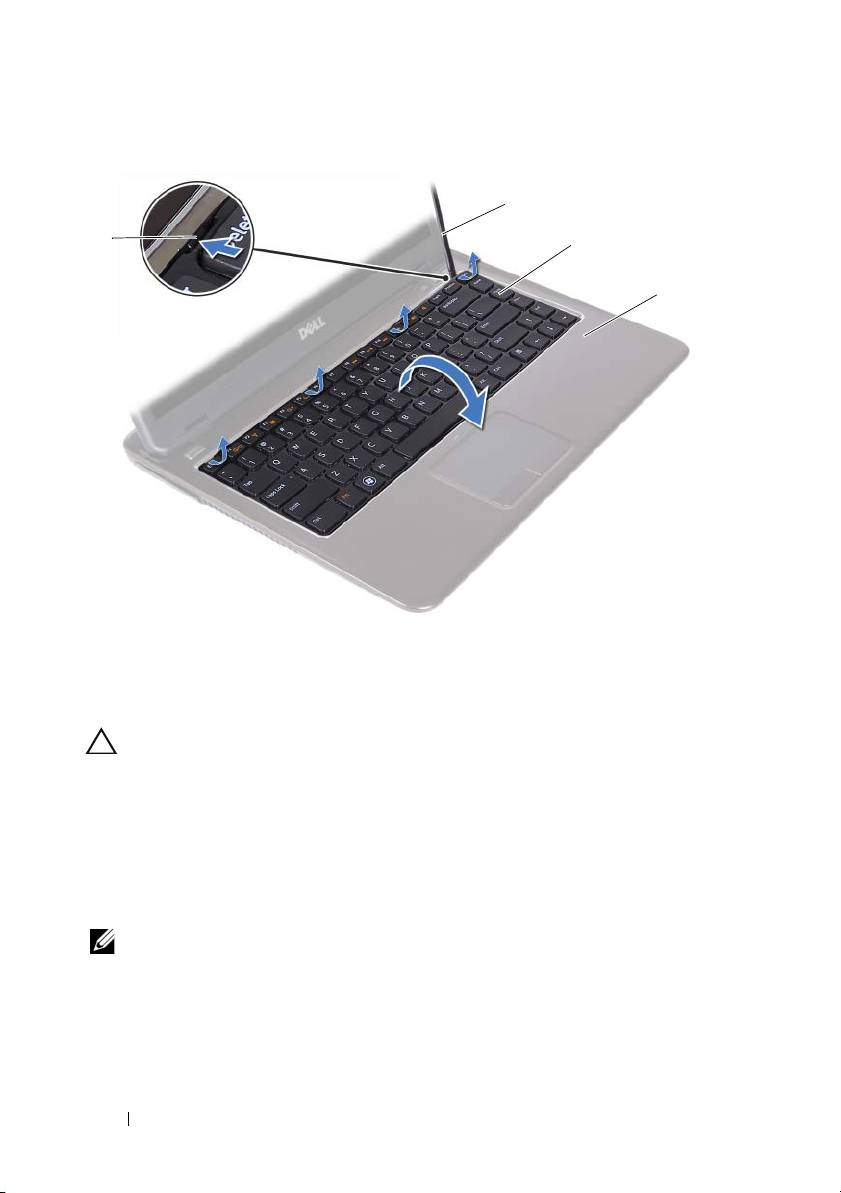
1 tabs (4) 2 plastic scribe
3 keyboard 4 palm-rest assembly
CAUTION: Exercise caution while lifting up the keyboard to avoid pulling the
keyboard connector from the system board forcefully.
6
Carefully lift the keyboard and slide the keyboard tabs out of the slots on
the palm-rest assembly.
7
Turn the keyboard over and place the keyboard on the palm-rest assembly.
8
Lift the connector latches and disconnect the keyboard cable and the
keyboard-backlight cable from the connectors on the system board.
NOTE: The keyboard-backlight cable is available only if you purchased a back-lit
keyboard.
32 Keyboard
2
1
3
4
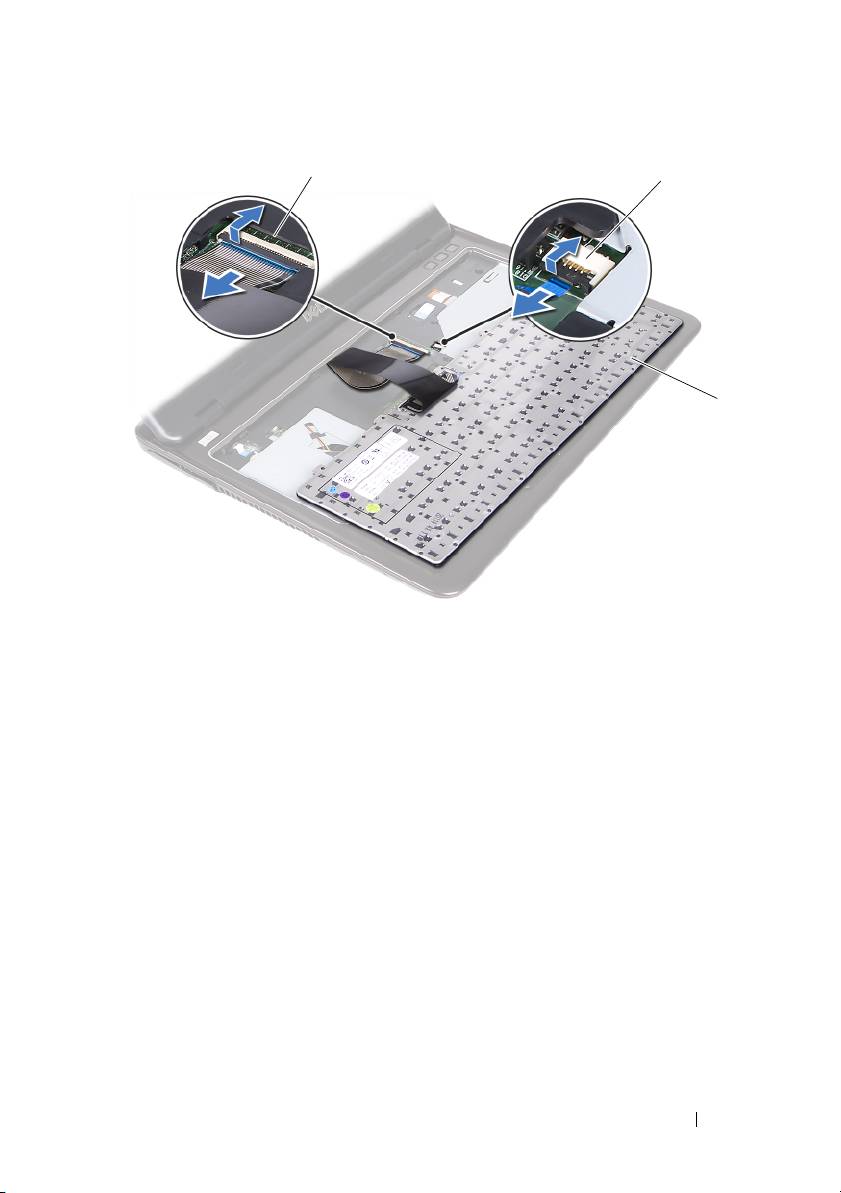
1 keyboard-cable connector 2 keyboard-backlight cable connector
3 keyboard
9
Lift the keyboard off the palm-rest assembly.
Replacing the Keyboard
1
Follow the instructions in "Before You Begin" on page 9.
2
Slide the keyboard cable into the connector on the system board and press
down on the connector latch to secure the keyboard cable.
3
Align the tabs on the keyboard with the slots on the palm-rest assembly
and lower the keyboard into place.
4
Gently press around the edges of the keyboard to secure the keyboard in
place.
5
Replace the battery. See "Replacing the Battery" on page 14.
Keyboard 33
1
2
3

34 Keyboard
Оглавление
- Contents
- Before You Begin
- Battery
- Module Cover
- Coin-Cell Battery
- Hard-Drive Assembly
- Optical Drive
- Memory Module(s)
- Keyboard
- Palm-Rest Assembly
- Wireless Mini-Card
- Display
- DC-in Connector Assembly
- USB Board
- Camera Module
- Thermal Fan
- System Board
- Heat-Sink Assembly
- Media-Card Reader Board
- Speakers
- System Setup
- Flashing the BIOS
