Acer W700 – страница 2
Инструкция к Планшету Acer W700

YOUR ACER TABLET PC TOUR
After setting up your computer as illustrated in the setup poster, let us
show you around your new Acer computer.
You can enter information into you new computer via the touchscreen.
Tablet PC
Your new computer has two components: the tablet and the tablet cradle.
The following set of images will show you both of these. The views are
labeled as if you are holding the Tablet with the screen towards you and
the camera at the top.
Your Acer tablet PC tour - 19
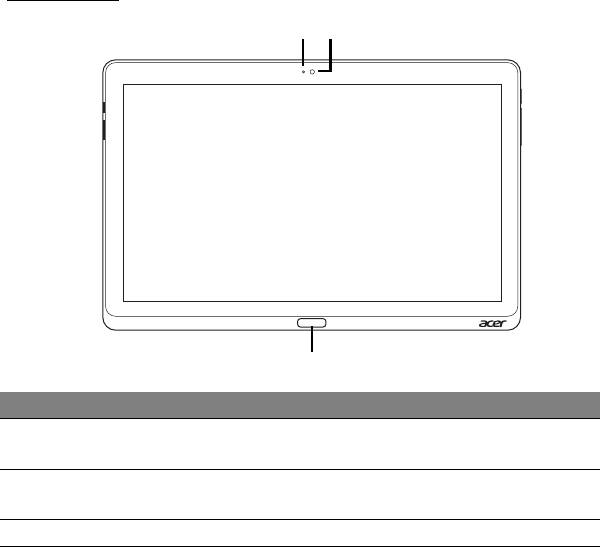
Front view
20 - Your Acer tablet PC tour
1
2
3
No. Item Description
Camera
1
Lights up when camera is active.
indicator light
Integrated
2
Web camera for video communication.
webcam
3 Windows key Press once to open the Start menu.
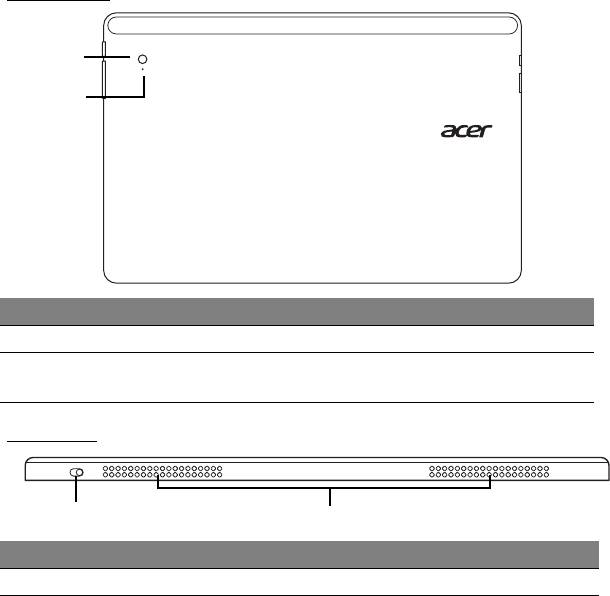
Back view
No. Item Description
1 Integrated webcam Web camera for video communication.
Camera indicator
2
Lights up when camera is active.
li
ght
Your Acer tablet PC tour - 21
1
2
Top view
1
2
No. Item Description
1 Lock switch Locks the screen orientation.
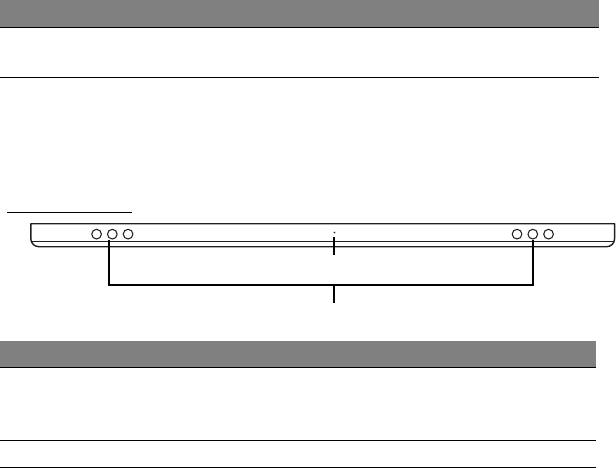
Note: Display orientation may be fixed when apps designed for a
specific orientation are running. These include games and other full-
screen apps. When making video calls, you should always hold the
tablet in landscape orientation.
Bottom view
22 - Your Acer tablet PC tour
1
2
No. Item Description
Ventilation and
Allows the computer to stay cool.
2
cooling fan
Do not cover or obstruct the openings.
No. Item Description
Insert a paperclip into the hole and press for
1 Reset button
four seconds
to reset the computer (simulates
removing and reinstalling the battery).
2 Speakers Delivers stereo audio output.
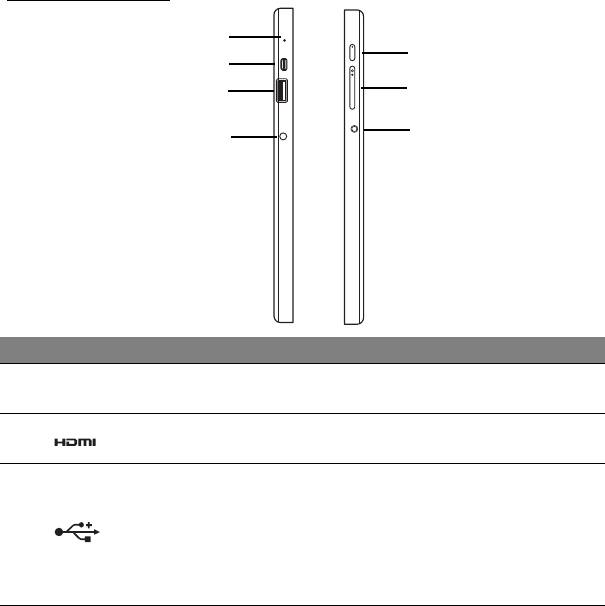
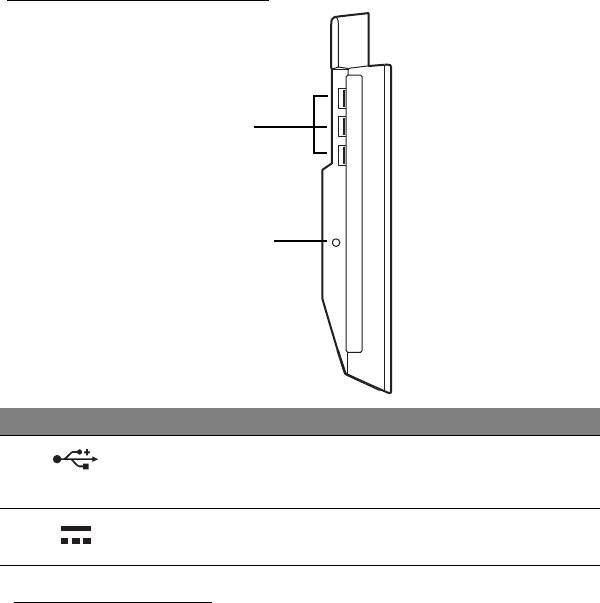
Left/right views
Your Acer tablet PC tour - 23
1
5
2
6
3
7
4
No. Icon Item Description
Internal microphone for sound
1 Microphone
recording.
Supports high-definition digital video
2
micro HDMI port
connections.
Connects to USB devices.
A USB 3.0 port can be distinguished
by it
s blue connector (see below).
3
USB 3.0 port
When using the cradle’s USB ports, it
is recommended to plug in the power
adapt
er.
No. Icon Item Description
4
DC-in jack Connects to an AC adapter.
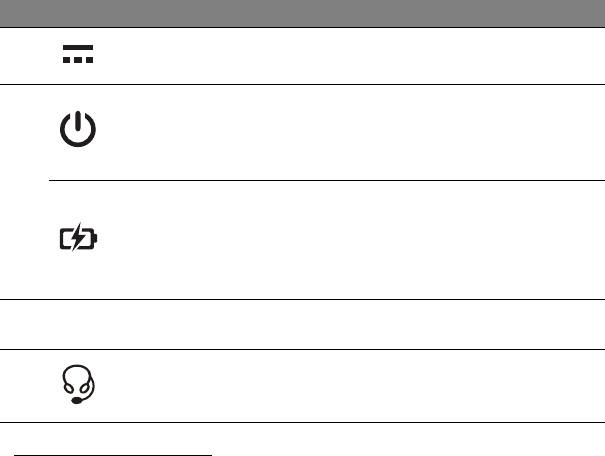
Press to turn the tablet on; press
again to p
lace the tablet in Sleep
Power button
mode. Press and hold to turn the
tablet off.
5
Indicates the computer's battery
st
atus. See
Battery LED
1. Charging: Amber
.
2. Fully charged: Blue
when plugged
in.
Press to increase or decrease
6
+ / -
Volume key
volume.
Connects to audio devices
Headset/speaker
7
(e.g., speakers, headphones) or a
jack
headset with microphone.
Information on USB 3.0
• Compatible with USB 3.0 and earlier USB devices.
• For optimal performance, use USB 3.0-certified devices.
• Defined by the USB 3.0 (SuperSpeed USB) specification.
24 - Your Acer tablet PC tour

LED Indicators
LED color State Description
Blue Steady The computer is fully charged and plugged in.
The computer is fully charged and running on
battery power
.
Blue On briefly
After pressing the power button, the blue LED
st
ays lit for a few seconds before turning off.
Amber Steady The computer is charging and plugged in.
The computer is not fully charged and running
on battery power
.
Amber On briefly
After pressing the power button, the amber
LED s
tays lit for a few seconds before turning
off.
The battery is critically low or abnormal battery
Amber Blinking
situation.
Off The computer is off.
Connect the tablet to the cradle
This multi-position cradle makes it simple to dock your tablet because you
don’t have to worry about aligning ports and connectors or placing the
Your Acer tablet PC tour - 25
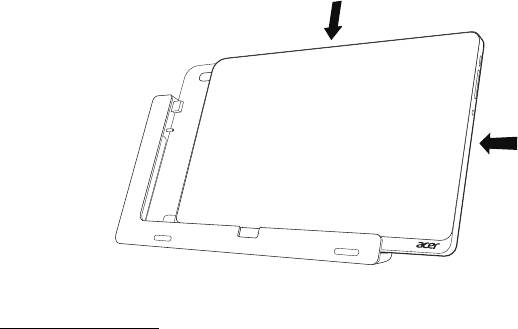
tablet at the correct angle. Simply rest the tablet in the cradle and slide it
to the left until it stops.
Tablet cradle
The following set of images show you the bundled cradle.
NOTE: In some countries the cradle is optional.
26 - Your Acer tablet PC tour
1
2
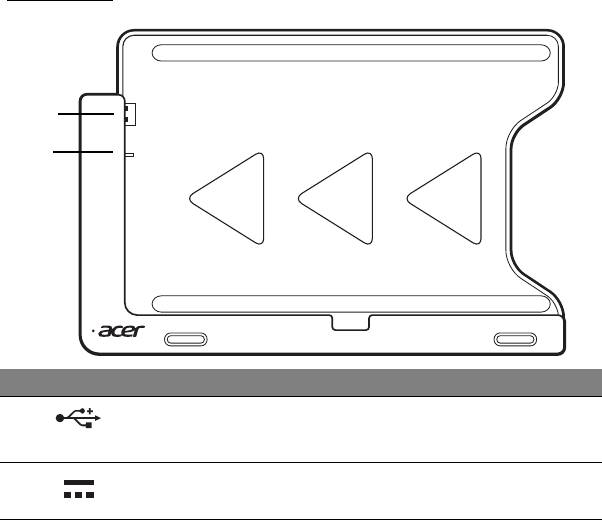
Front view
Your Acer tablet PC tour - 27
1
2
No. Icon Item Description
1
USB connector Connects to the tablet’s USB port.
Provides power from the cradle to the
2
DC-out jack
t
ablet
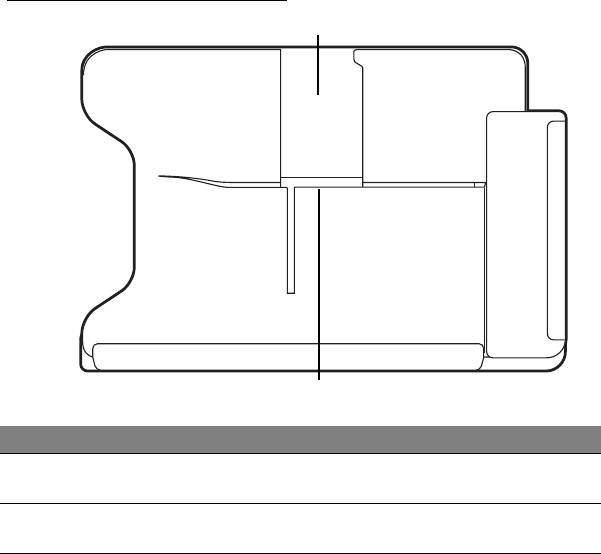
Back view (stand not shown)
28 - Your Acer tablet PC tour
1
2
No. Item Description
Portrait view
Insert the stand here to rest the tablet in portrait
1
slot
view
.
Landscape
Insert the stand here to rest the tablet in
2
view
slot
landscape view.
Left view (stand not shown)
Your Acer tablet PC tour - 29
1
2
No. Icon Item Description
Connect to USB devices.
1
USB 3.0 ports
A USB 3.0 port can be distinguished
by its blue connector (see below).
2
DC-in jack Provides power to the cradle.
Information on USB 3.0

• Compatible with USB 3.0 and earlier USB devices.
• For optimal performance, use USB 3.0-certified devices.
• Defined by the USB 3.0 (SuperSpeed USB) specification.
Environment
• Temperature:
• Operating: 5 °C to 35 °C
• Non-operating: -20 °C to 65 °C
• Humidity (non-condensing):
• Operating: 20% to 80%
• Non-operating: 20% to 80%
30 - Your Acer tablet PC tour
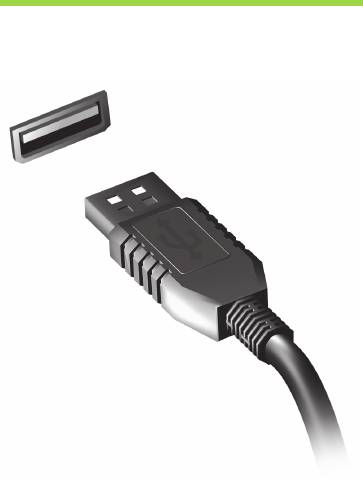
UNIVERSAL SERIAL BUS (USB)
The USB port is a high-speed serial bus which allows you to connect USB
peripherals without taking up system resources.
Universal Serial Bus (USB) - 31
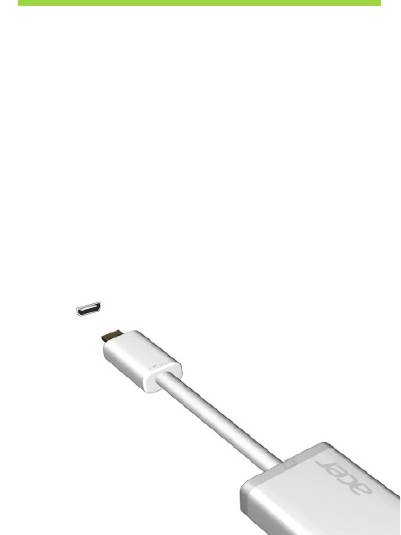
HDMI MICRO
HDMI (High-Definition Multimedia Interface) is an industry-supported,
uncompressed, all-digital audio/video interface. HDMI provides an
interface between any compatible digital audio/video source, such as a
set-top box, DVD player, and A/V receiver and a compatible digital audio
and/or video monitor, such as a digital television (DTV), over a single
cable.
Use the HDMI Micro port on your computer to connect with high-end audio
and video equipment. Single cable implementation allows tidy setup and
fast connection.
32 - HDMI Micro
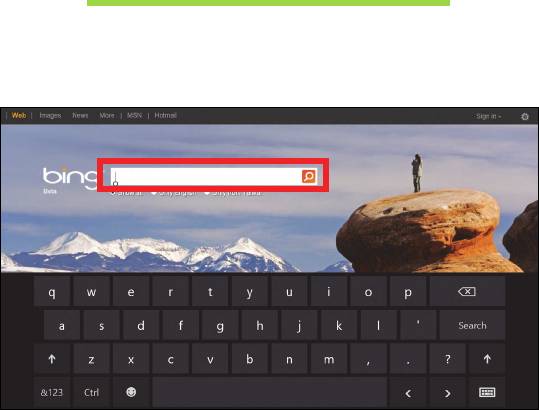
USING THE VIRTUAL KEYBOARD
Microsoft Windows provides a convenient virtual keyboard for entering
data. There are several ways to display the keyboard:
Tap inside any text field to display the Windows virtual keyboard.
Using the virtual keyboard - 33
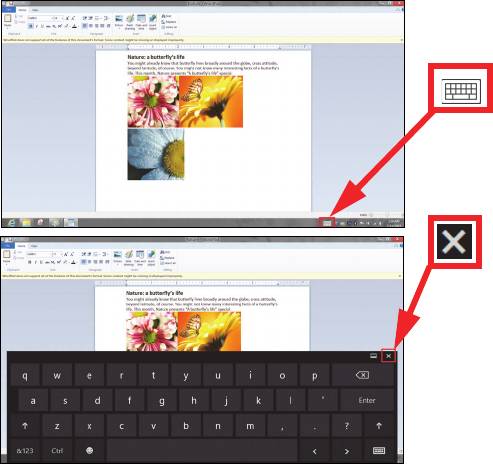
From Desktop, tap the Keyboard icon in the system tray to display the
keyboard. Tap the "x" in the keyboard’s top-right corner to close the
keyboard.
34 - Using the virtual keyboard

WIRELESS NETWORKS
Connecting to the Internet
Your computer's wireless connection is turned on by default.
Windows will detect and display a list of available networks during setup.
Select your network and enter the password if required.
Otherwise, open Internet Explorer and follow the instructions.
Please refer to your ISP or router documentation.
Wireless networks
A wireless LAN or WLAN is a wireless local area network, which may link
two or more computers without using wires. Setting up a wireless network
is easy and allows you to share files, peripheral devices and an Internet
connection.
What are benefits of a wireless network?
Mobility
Wireless LAN systems allow you and other users of your home network to
share access to files and devices connected to the network, for example a
printer or scanner.
Also you can share an internet connection with other computers in your home.
Wireless networks - 35

Installation speed and simplicity
Installing a wireless LAN system can be fast and easy and eliminates the
need to pull cables through walls and ceilings.
Components of a wireless LAN
To set up your Wireless network at home you need to have the following:
Access point (router)
Access points (routers) are two-way transceivers that broadcast data into the
surrounding environment. Access points act as a mediator between wired
and wireless network. Most routers have a built-in DSL modem that will allow
you access to a high speed DSL internet connection. The ISP (Internet
Service Provider) you have chosen normally supplies a modem/router with
the subscription to their services. Read carefully the documentation supplied
with your Access point/router for detailed setup instructions.
36 - Wireless networks
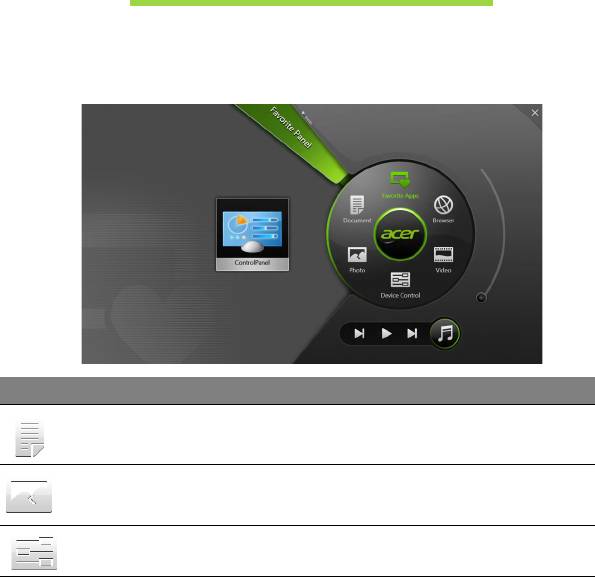
ACER RING
Acer Ring incorporates a number of useful functions and tools in one
easy-to-use interface. Tap the touchscreen with all five fingers at once to
display Acer Ring.
Icon Item Description
Document Import documents here for quick access.
Photo View pictures stored in your computer.
Adjust settings for your computer (please
Device Control
refer to "Device Control" on page 39).
Acer Ring - 37

Icon Item Description
Video Play videos stored in your computer.
Quickly access your favorite desktop
Favorite Apps
apps.
Play music stored in your computer.
Controls visible from Acer Ring include
Music
Previous track, Play, and Next track. A
volume slider control is located on the
right side of Acer Ring.
To the left of Acer Ring you can see a selection of AppCards. These
AppCards are thumbnails of links, files, or apps depending on what
section you have selected from Acer Ring. Scroll through the AppCards
and tap on a card to open it.
38 - Acer Ring
