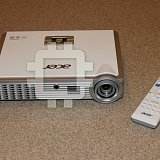
Acer K335: инструкция
Характеристики, спецификации
Инструкция к Проектору Acer K335

Acer projector provides powerful networking
display (via source LAN/WiFi, DLNA),
English
multimedia display (via source MEDIA), and
USB display (via source USB B) functions.
A. Projector Settings
Press the Source button on the projector
keypad or remote control. You will see a source
list allowing you to choose your desired source.
(1) Select AP Mode in the LAN/Wi-Fi setting
(the projector plays an AP role). Tap
“DoWiFi” and you will see below splash
screen. Check out below information:
Projector ID (if enabled, a 4-digit random
Insert the USB WiFi adapter into the USB A
number will display on the upper-left
port or plug in the LAN cable (for selected
corner of the screen), Projector Name (SSID,
models with LAN port) for WiFi Display &
default name is AcerProjector), WiFi IP
DLNA functions.
(default IP is 192.168.100.10), Security
(default is None), and LAN IP.
Press Apply/Enter when you finish the
adjustment.
Projector Name(SSID) : AcerProjectorXXX
WiFi IP : 192.168.100.10
Security : None (default)
You can play multi-media contents from RAM,
LAN IP : 0.0.0.0 (if no LAN cable plugged in)
USB handy drive, SD hard via the MEDIA
source.
You can plug the mini USB cable into the USB
B port for USB display.
WiFi Display
Select the source “LAN/WiFi”, and you will see
the WiFi Display welcome screen. Acer
Projector can play the following 3 roles: AP
Mode (Default), Client Mode or WiFi Direct by
changing settings in the Setup LAN/WiFi
menu.

English
(2) Select Client Mode in the LAN/WiFi setting,
you will see below screen.
(3) Select WiFi Direct in the LAN/WiFi setting,
Please connect to an available AP and input
and you can connect the projector to other
password if necessary.
WiFi Direct-certified devices. Below
information will show on splash screen.
Projector Name : AcerProjectorXXX
WiFi Mode : WiFi Direct
WiFi Direct : On (Default is Off)
DLNA Mode
When the source “DLNA” selected, you can
choose DMP or DMR mode after you complete
Then the splash screen displays with below
the network settings (the same way as you do
information:
for WiFi Display).
Connected AP Name(SSID) : Depended
Media Console (DMP) : You can tap the media
Client IP : Depended
libraries detected and play contents from the
Security : Depended
selected library.
LAN IP : 0.0.0.0 ( if no LAN cable plugged in)
You can project the screen from your tablet or
smartphone to the projector by using the
application “eDisplay”. In Client mode, the
projector is also able to access the internet.
Media Display (DMR) : projector under the
DMR mode (digital media renderer) is ready for
displaying the contents from other DLNA
devices.

English
MEDIA Mode
For USB display, please install Acer_USB.exe on
Select the source “MEDIA”, and there are 5
your NB and remember to reboot after the
options for you to choose from Music, Photo,
installation completes.
Video, Document, and Setup. You can play
Below shortcut icon will be on the desktop of
contents from RAM (Internal memory), USB
your NB.
storage devices, or SD card (for selected
models).
Double click on the shortcut, and you can
mirror or extend your screen and
enable/disable audio streaming.
USB Display
Select the source “USB B”, and you will see
below main page for you to choose from USB
storage (RAM) or USB display.
You can access the internal memory (RAM) via
USB Storage (RAM) or do USB projection via
USB Display.
Please make sure the USB cable is plugged in
first.

English
B. Device Installation (WiFi Display)
NB eDisplay (Windows & Mac OS)
You can download the application (acer
eDisplay Management) from CD or webpage
(192.168.100.10) when the projector is in AP
Mode.
Tablet & Smartphone eDisplay
(Android & iOS)
You can get the application “eDisplay” from
Android’s Google Play or iOS’s Apple Store.
Execute the app to project the small screen
from your device to a bigger one via the
projector.
Click RUN and follow the wizard to install, you
will get a shortcut Acer Projector Gateway W7
Support the following functions: EZ Remote,
on your desktop and execute it.
Streaming Doc, Dropbox, Streaming Web, Pix
Viewer, & Sketch.
Note :
1. Android 4.0 and above supported.
“Projection mode” supports “Full, L/R, 4-Split
2. iOS 5.0 and above supported.
Mirror projection” & “Full, L/R, 4-Split
3. If you want to use Dropbox or Streaming Web,
Extension projection”, Audio On/Off, and
please set the projector to be in Client mode.
controls the projected screen to be frozen or
hidden.
(Android eDisplay)
“Video mode” supports video streaming.
(iOS eDisplay)
Оглавление
- A. Projector Settings
- B. Device Installation (WiFi Display)
- A. Paramètres du projecteur
- B. Installation de l’appareil
- A. Projektoreinstellungen
- B. Geräteinstallation
- A. Impostazioni del proiettore
- B. Installazione del dispositivo
- A. Configuración del proyector
- B. Instalación del dispositivo
- A. Definições do Projector
- B. Instalação do dispositivo
- A. プロジェクタの設定
- B. デバイスのインストール
- A. Настройки проектора
- B. Установка устройства
- A. 投影機設定
- B. 裝置安裝(WiFi 顯示)
- A. 投影机设置
- B. 设备安装(WiFi 显示)


