Acer ASPIRE ONE AO753: инструкция
Раздел: Компьютерная техника, комплектующие, аксессуары
Тип: Нетбук

Инструкция к Нетбуку Acer ASPIRE ONE AO753
Contents
English
Slovenski
Français
Hrvatski
Deutsch
Română
Italiano
Български
Español
Eesti
Português
Latviski
Nederlands
Lietuviškai
Norsk
Ελληνικά
Dansk
Türkçe
Svenska
日本語
Suomi
한국어
Русский
繁體中文
Polski
简体中文
Magyar
Bahasa Indonesia
Čeština
ไทย
Slovenčina

Series
Quick Guide

Series
© 2010 All Rights Reserved
Aspire One Series Quick Guide
Original Issue: 05/2010
Aspire One Series Notebook PC
Model number: __________________________________
Serial number: ___________________________________
Date of purchase: ________________________________
Place of purchase: ________________________________

Quick Guide
Federal Communications Commission
Declaration of Conformity
This device complies with Part 15 of the FCC Rules. Operation is subject to the following two conditions: (1) this device may not
cause harmful interference, and (2) this device must accept any interference received, including interference that may cause
undesired operation.
The following local Manufacturer / Importer is responsible for this declaration:
Product name: Notebook PC
Brand: Acer
Model number: MS2296
Machine type: AO 753 series
Name of Responsible Party: Acer America Corporation
Address of responsible party: 333 West San Carlos St., San Jose
CA 95110, U. S. A.
Contact person: Acer Representative
Phone No.: 1-254-298-4000
Fax No.: 1-254-298-4147
April 30, 2010

Series
CE Declaration of Conformity
We,
Acer Incorporated
8F, 88, Sec. 1, Hsin Tai Wu Rd., Hsichih, Taipei Hsien 221, Taiwan
Contact Person: Mr. Easy Lai, e-mail:easy_lai@acer.com.tw
And,
Acer Europe SA
Via Cantonale, Centro Galleria 2 6928 Manno Switzerland
Hereby declare that:
Product: Notebook Computer
Trade Name: Acer
Model Number: MS2296
Machine Type: AO753 series
Is compliant with the essential requirements and other relevant provisions of the following EC directives, and that all the
necessary steps have been taken and are in force to assure that production units of the same product will continue comply with
the requirements.
EMC Directive 2004/108/EC as attested by conformity with the following harmonized standards:
• EN55022,AS/NZSCISPR22,ClassB
• EN55024
• EN61000-3-2ClassD
• EN61000-3-3
Low Voltage Directive 2006/95/EC as attested by conformity with the following harmonized standard:
• EN60950-1
Council Decision 98/482/EC (CTR21):
(Applicable to product with pan- European single terminal connection to the Public Switched Telephone Network (PSTN).)
RoHS Directive 2002/95/EC on the Restriction of the Use of certain Hazardous Substances in Electrical and Electronic Equipment
Quick Guide
• Themaximumconcentrationvaluesoftherestrictedsubstancesbyweightinhomogenousmaterialare:
Lead
0.1%
Polybrominated Biphenyls (PBB’s)
0.1%
Mercury
0.1%
Polybrominated Diphenyl Ethers (PBDE’s)
0.1%
Hexavalent Chromium
0.1%
Cadmium
0.01%
Directive 2009/125/EC with regard to establishing a framework for the setting of ecodesign requirements for energy-related
product.
R&TTE Directive 1999/5/EC as attested by conformity with the following harmonized standard:
• Article3.1(a)HealthandSafety
- EN60950-1
- EN62311
• Article3.1(b)EMC
- EN301 489-1
- EN301 489-3 (Applicable to non-bluetooth wireless keyboard mouse set).
- EN301 489-7
- EN301 489-17
- EN301 489-24
• Article3.2SpectrumUsages
- EN300 440-2 (Applicable to non-bluetooth wireless keyboard mouse set).
- EN300 328
- EN301 511
- EN301 893 (Applicable to 5GHz high performance RLAN).
- EN301 908-1
- EN301 908-2
Year to begin affixing CE marking 2010.
April 30, 2010
Date
Easy Lai /Manager
Regulation Center, Acer Inc.
Series
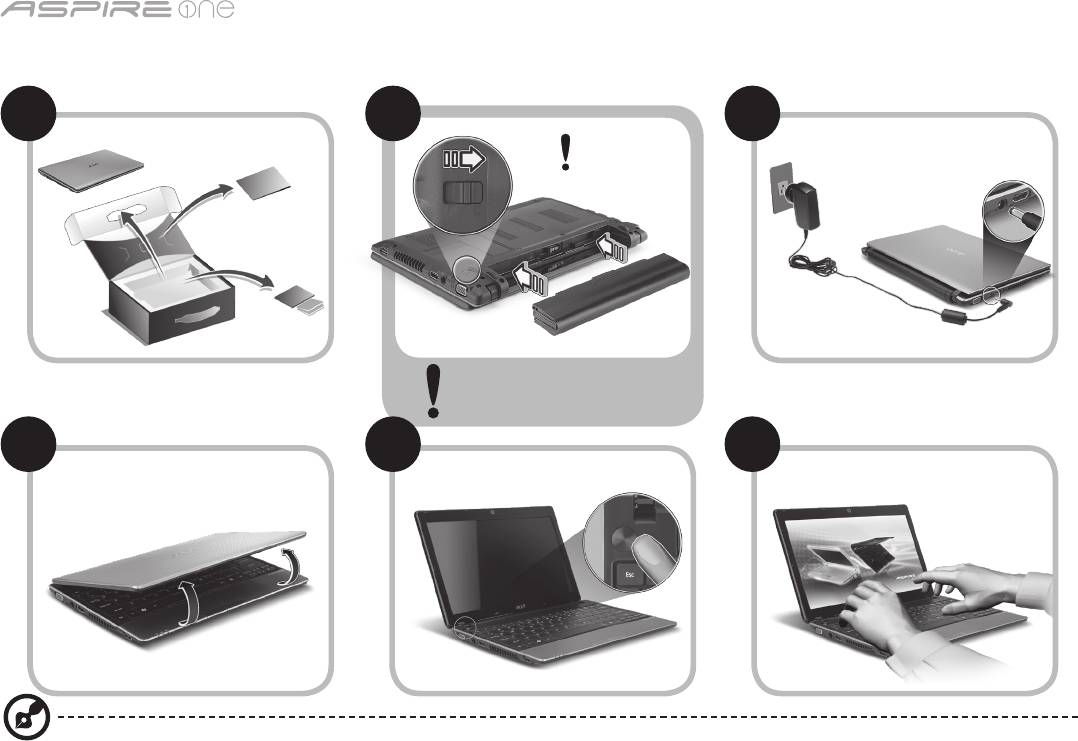
Just for starters
1 2 3
2-2
3-2
2-1
3-1
Ensure that the battery is
properly locked in place, as
illustrated in 2-2.
4 5 6
Illustrations are for reference only. Actual product specifications may vary.
1

Quick Guide
First things first
We would like to thank you for making an Acer notebook your choice for meeting your mobile computing needs.
Your guides
To help you use your Acer notebook, we have designed a set of guides*:
First off, the Quick Guide helps you get started with setting up your computer.
For more on how your computer can help you to be more productive, please refer to the AcerSystem User Guide. This guide
contains detailed information on such subjects as system utilities, data recovery, expansion options and troubleshooting. In
addition it contains warranty information and the general regulations and safety notices for your notebook. It is available in
Portable Document Format (PDF) and comes preloaded on your notebook.
Note: Viewing the file requires Adobe Reader. If Adobe Reader is not installed on your computer, clicking on AcerSystem
User Guide will run the Adobe Reader setup program first. Follow the instructions on the screen to complete the
installation. For instructions on how to use Adobe Reader, access the Help and Support menu.
* IMPORTANT NOTICE: Please note that the guides mentioned herein, whether in printed or electronic form, are for your
reference only and except as provided in the specific warranty information contained in the AcerSystem User Guide
nothing contained in these guides shall constitute a representation or warranty by Acer with regard to the product you
purchased. Acer expressly disclaims any liability for errors contained in the guides.
2
Series
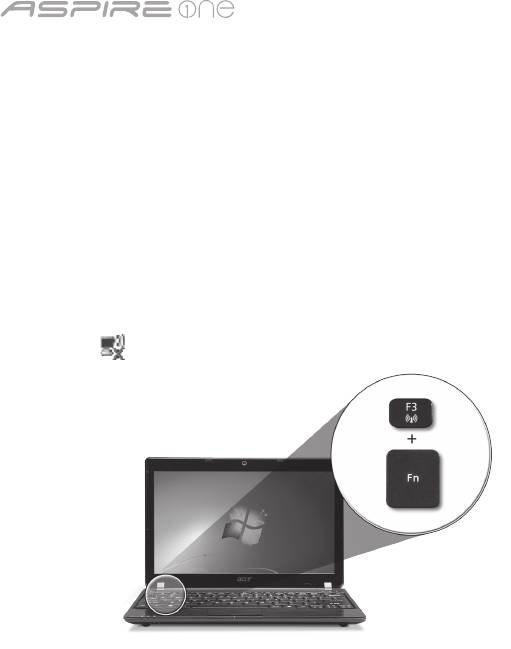
Network configuration
This guide will help you configure your LAN and wireless network settings to enable you to connect to the Internet.
Setting up LAN connection
Simply plug in the LAN cable to the Ethernet (RJ-45) port. Please refer to "Right view" on page 6 for the location of the Ethernet
port.
Setting up a wireless connection
1. Press <Fn> + <F3> to access the communication manager. Here you can turn on the Wi-Fi connection by clicking on the red
button next to Wi-Fi.
Note: 3G and Bluetooth are also accessible through the communication manager. Communication devices vary by model.
2. Click the
icon on your system tray and choose the wireless access point you want to connect to.
Inserting a 3G SIM card (only for certain models)
Remove the battery and carefully insert a 3G SIM card into the 3G SIM card slot. Please refer to "Rear & base views" on page 6
for the location of the 3G SIM card slot.
3
Quick Guide
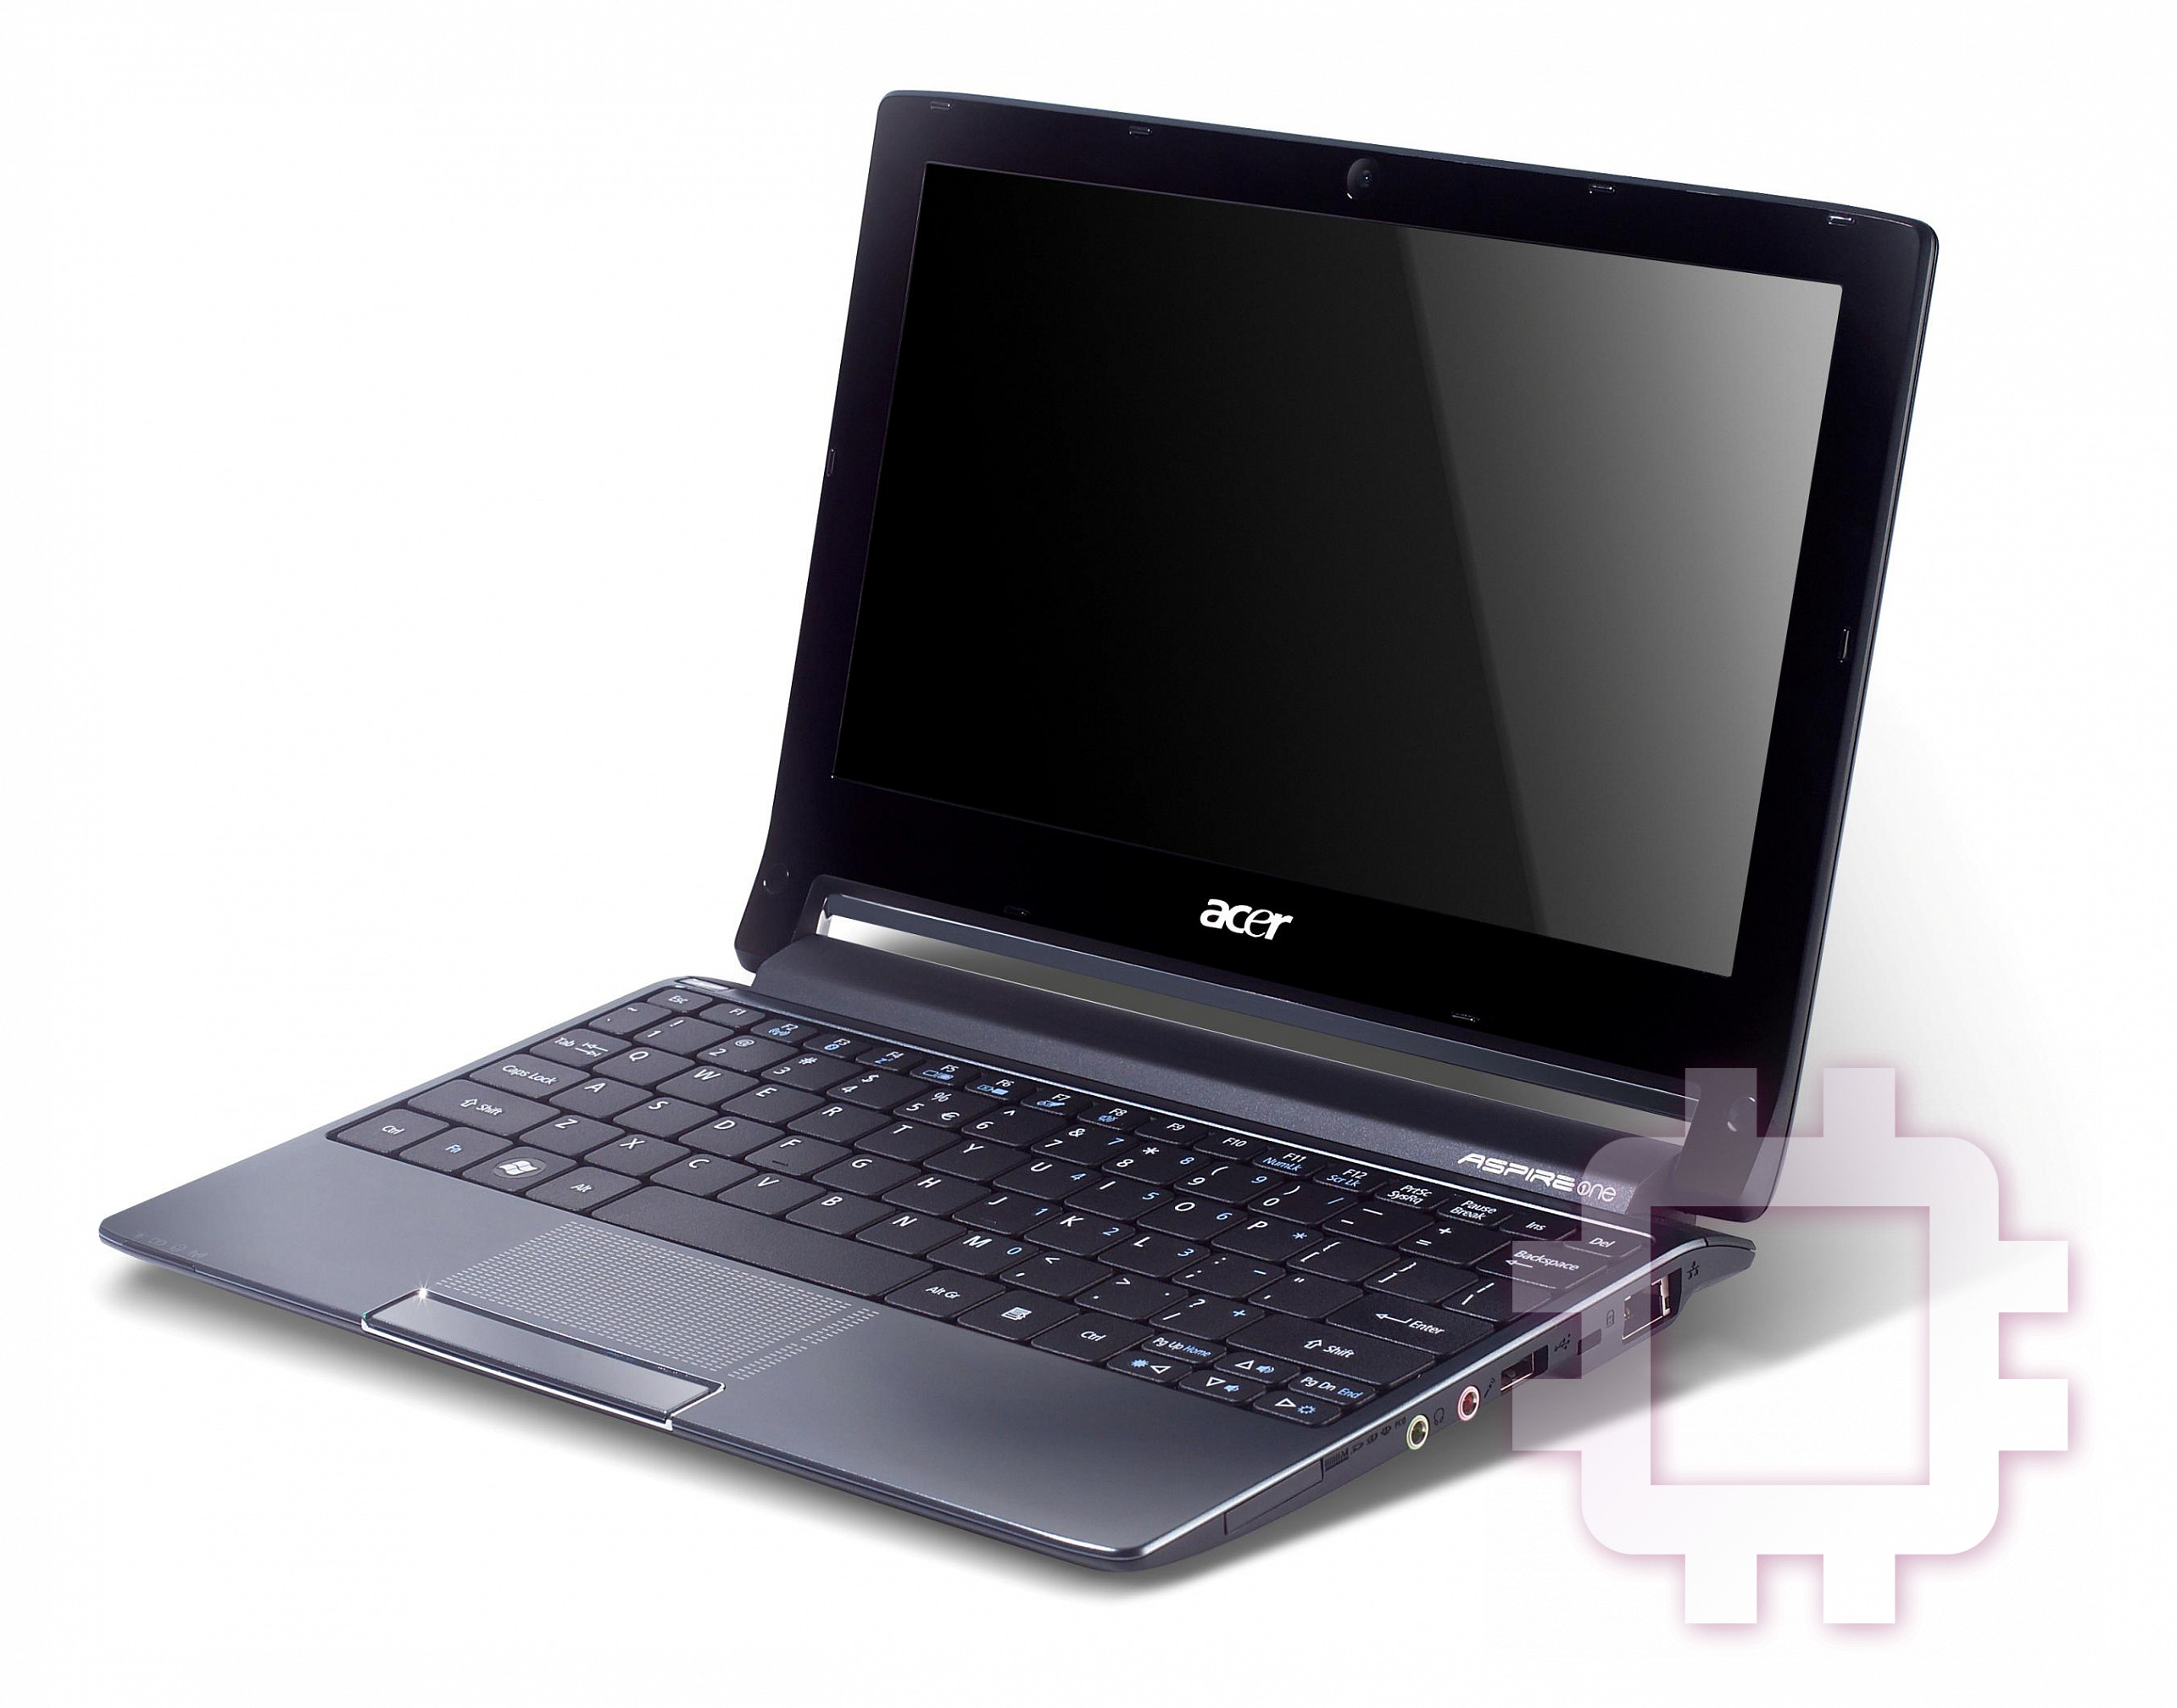
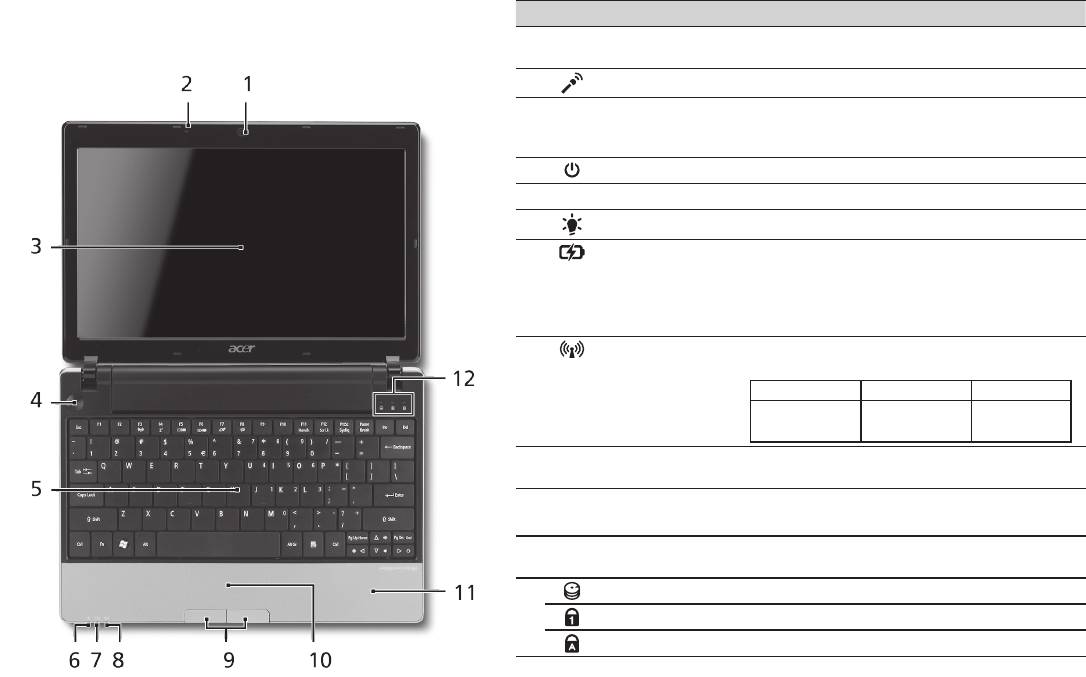
Top view
Your Aspire One tour
# Icon Item Description
After setting up your computer as illustrated in the Just
1
Acer Crystal Eye
Web camera for video communication
for starters section, let us show you around your new Acer
webcam
(configuration may vary by model).
notebook.
2
Microphone Internal microphone for sound recording.
3
Display screen Also called Liquid-Crystal Display (LCD),
displays computer output (configuration
may vary by model).
4
Power button Turns the computer on and off.
5
Keyboard For entering data into your computer.
1
6
Power indicator
Indicates the computer's power status.
1
7
Battery indicator
Indicates the computer's battery status.
1. Charging: The light shows amber when
the battery is charging.
2. Fully charged: The light shows blue when
in AC mode.
8
Communication
Indicates the status of 3G/Wireless LAN
1
indicator
communication.
Blue light on Orange light on Not lit
3G on / WiFi on
3G off / WiFi on 3G off / WiFi off
3G on / WiFi off
9
Click buttons (left
The left and right buttons function like the
and right)
left and right mouse buttons.
10
Touchpad Touch-sensitive pointing device which
functions like a computer mouse.
11
Palmrest Comfortable support area for your hands
when you use the computer.
12
HDD indicator Indicates when the hard disk drive is active.
Num Lock Lights up when Num Lock is activated.
Caps Lock Lights up when Caps Lock is activated.
1. The front panel indicators are visible even when the computer cover is closed.
4

Series
Closed front view
# Icon Item Description
1
Status indicators Light-Emitting Diodes (LED) that light up to
show the status of the computer's functions
and components.
Left view
2
External display
Connects to a display device (e.g., external
(VGA) port
monitor, LCD projector).
3
DC-in jack Connects to an AC adapter.
4
HDMI HDMI port Supports high definition digital video
connections.
5
Ventilation slots Enable the computer to stay cool, even
after prolonged use.
6
USB 2.0 port Connects to USB 2.0 devices (e.g., USB
mouse, USB camera).
5
Quick Guide
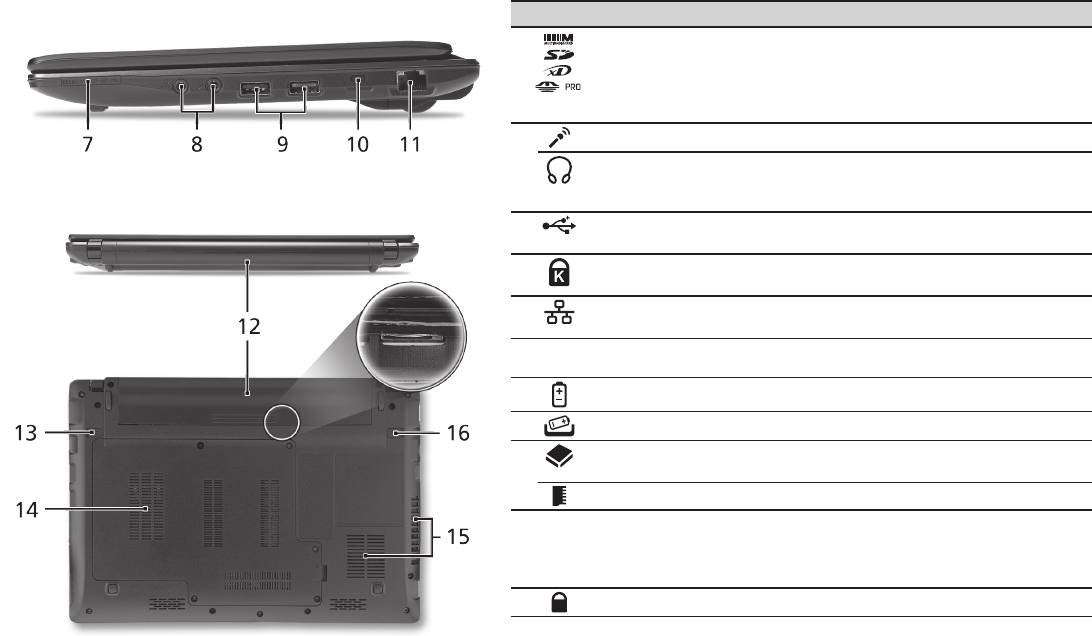
Right view
# Icon Item Description
7
Multi-in-1 card reader Accepts Secure Digital (SD), MultiMediaCard
(MMC), Memory Stick (MS), Memory Stick
PRO (MS PRO), xD-Picture Card (xD).
Note: Push to remove/install the card. Only
one card can operate at any given time.
8
Microphone-in jack Accepts inputs from external microphones.
Headphone/speaker/
Connects to audio line-out devices
line-out jack with
(e.g., speakers, headphones).
S/PDIF support
9
USB 2.0 port Connects to USB 2.0 devices (e.g., USB
mouse).
10
Kensington lock slot Connects to a Kensington-compatible
computer security lock.
11
Ethernet (RJ-45) port Connects to an Ethernet 10/100/1000-based
network.
Rear & base views
12
Battery bay Houses the computer's battery pack.
13
Battery release latch Releases the battery for removal.
14
Hard disk bay Houses the computer's hard disk
(secured with screws).
Memory compartmen Houses the computer's main memory.
15
Ventilation slots and
Enable the computer to stay cool, even
cooling fan
after prolonged use.
Note: Do not cover or obstruct the opening
of the fan.
16
Battery lock Locks the battery in position.
6

Series
Environment
Temperature:
Operating: 5 °C to 35 °C
Non-operating: -20 °C to 65 °C
Humidity (non-condensing):
Operating: 20% to 80%
Non-operating: 20% to 80%
7


