Sharp R-870B – страница 3
Инструкция к Микроволновой Печи Sharp R-870B
38
Zfövbnt rzjgre ”CGHFDRF“
Lbcgktq
Lbcgktq
Lbcgktq
Lbcgktq
Lbcgktq
Ifu
Ifu
Ifu
Ifu
Ifu
Jgthfwby
Jgthfwby
Jgthfwby
Jgthfwby
Jgthfwby
Lky ghjdthrb dhtvtzb ljcnfnjxzj zföfnm rzjgre ”XFCS“, b dhtvy dscdtnbncy zf lbcgktt.
Tckb gjckt ifuf 7 jnrhsnm ldthwe, nj lky ghjljkötzby hf<jns d htöbvt ”FDNJGECR“ cktletn pfrhsnm
ldthwe b zföfnm rzjgre ”GECR“.
Lky jnvtzs htöbvf ”FDNJGECR“ zfövbnt rzjgre ”CNJG/C>HJC“.
Njxzjt dhtvy cenjr ljközj <snm ecnfzjdktzj lj bcgjkmpjdfzby aezrwbb ”FDNJGECR“. J njv, rfr
ecnfzjdbnm xfcs, xbnfqnt zf cnh. 8.
Zfövbnt rzjgre ”XFCS“
Ddtlbnt zeözjt dhtvy gecrf.
Zfövbnt rzjgre c wbahjq 1.
4 3 2 6 5
1
Nfqvth zfxbzftn j<hfnzsq jncxtn. Gj
ljcnbötzbb zektdjuj pzfxtzby dct
bzlbrfnjhs ufczen b hfplftncy pderjdjq
cbuzfk.
Zfövbnt rzjgre ”>SCNHJT
GHBUJNJDKTZBT/GECR“.
7
COOK
GHBUJN.
Ghbujnjdktzbt zfxztncy d 4:30.
x 3
Ddtlbnt zeözjt dhtvy
ghbujnjdktzby.
0
0
0
2
1
AUTO
COOK
FDNJ
GHBUJN.
AUTO
fdnj
AUTO
fdnj
AUTO
fdnj
AUTO
fdnj
INSTANT COOK/START
>SCNHJT
GHBUJNJDKTZBT/
GECR
POWER LEVEL
VJOZJCNM
4
0
3
HELP
CGHFDRF
Rzjgrf
Rzjgrf
Rzjgrf
Rzjgrf
Rzjgrf
LHEUBT ELJ>ZST AEZRWBB
HELP
CGHFDRF
”Aezrwby ”Cghfdrf“ bvttn 5 hfpkbxzsü ghjuhfvv (drk+xfy aezrwb+
ljgjkzbntkmzjq gjlcrfprb d htöbvt fdnjvfnbxccrbü jgthfwbq)“
(1) Fdnjgecr
A
EZRWBY
”CGHFDRF“
Aezrwby ”Fdnjgecr“ gjpdjkytn pfghjuhfvvbhjdfnm gtxm zf fdnjvfnbxtcrbq gecr.
Aezrwb+ ”Fdnjgecr“ vjözj bcgjkmpjdfnm d htöbvfü vtlktzzjuj ghbujnjdktzby b ctzcjhzjuj
ghbu jnjdktzby hbcf c bcgjkmpjdfzbtv lfnxbrf.
* Ghtlgjkjöbv, ds üjnbnt ghbujnjdbnm pfgtrfzre pf 20 vbzen zf ehjdzt ”CHTLZBQ“ b zfxfnm
ghbujnjdktzbt d 4 xfcf 30 vbzen dtxthf. (Ghjdthmnt ghfdbkmzjcnm ecnfzjdrb dhtvtzb cenjr zf
lbcgktt.)
HELP
AUTO
FDNJ
%
AUTO
FDNJ
Pflfqnt zeözsq htöbv
ghbujnjdktzby. (Lky njuj,
xnj<s pflfnm ehjdtzm
”CHTLZBQ“, zfövbnt nhb
hfpf rzjgre ”VJOZJCNM“.)
XFCS
Njxrb zfxbzf+n vbufnm.
39
Ckexfqzsq gecr gtxb ghb jncencndbb d rfvtht ghjlernjd vjötn ghbdtcnb r tt gjdhtöltzb+.
Lky ghtljndhfotzby nfrbü ckexftd gtxm jczfotzf aezrwbtq ”pfobnf jn ltntq“, rjnjhe+ vjözj dscnfdbnm
zf dhtvy ztbcgjkmpjdfzby gtxb.
$
$$
$$ Lky dscnfdktzby aezrwbb ”Pfobnf jn ltntq“.
Lky dscnfdktzby aezrwbb ”Pfobnf jn ltntq“.
Lky dscnfdktzby aezrwbb ”Pfobnf jn ltntq“.
Lky dscnfdktzby aezrwbb ”Pfobnf jn ltntq“.
Lky dscnfdktzby aezrwbb ”Pfobnf jn ltntq“.
Gjckt ifuf 1 htöbvf fdnjgecrf.
(2) Pfobnf jn ltntq
Lbcgktq
Lbcgktq
Lbcgktq
Lbcgktq
Lbcgktq
Ifu
Ifu
Ifu
Ifu
Ifu
Jgthfwby
Jgthfwby
Jgthfwby
Jgthfwby
Jgthfwby
Zfövbnt rzjgre c wbahjq 2.
Lbcgktq
Lbcgktq
Lbcgktq
Lbcgktq
Lbcgktq
Ifu
Ifu
Ifu
Ifu
Ifu
Jgthfwby
Jgthfwby
Jgthfwby
Jgthfwby
Jgthfwby
Zfövbnt rzjgre ”CNJG/C>HJC“.
3
Ntgthm gfztkm eghfdktzby pf<kjrbhjdfzf. Ghb zföfnbb zf k+<e+ rzjgre zf lbcgktt gjydkytncy bzlbrfwby
”PFOBNF“.
$
$$
$$ Lky jnrk+xtzby aezrwbb ”Pfobnf jn ltntq“.
Lky jnrk+xtzby aezrwbb ”Pfobnf jn ltntq“.
Lky jnrk+xtzby aezrwbb ”Pfobnf jn ltntq“.
Lky jnrk+xtzby aezrwbb ”Pfobnf jn ltntq“.
Lky jnrk+xtzby aezrwbb ”Pfobnf jn ltntq“.
Gjckt dsgjkztzby ltqcndby 2, erfpfzzjuj dsit.
Zf lbcgktt gjydkytncy ntreott dhtvy.
Gtxm ujnjdf r bcgjkmpjdfzb+.
Zf lbcgktt gjydkytncy ntreott dhtvy.
Z f ö v b n t r z j g r e ” > S C N H J T
GHBUJNJDKTZBT/GECR“.
3 2
2
Rzjgrf
Rzjgrf
Rzjgrf
Rzjgrf
Rzjgrf
Rzjgrf
Rzjgrf
Rzjgrf
Rzjgrf
Rzjgrf
HELP
HELP
HELP
STOP/CLEAR
CNJG/C>HJC
INSTANT COOK/START
>SCNHJT
GHBUJNJDKTZBT/
GECR
40
Lbcgktq
Lbcgktq
Lbcgktq
Lbcgktq
Lbcgktq
Ifu
Ifu
Ifu
Ifu
Ifu
Jgthfwby
Jgthfwby
Jgthfwby
Jgthfwby
Jgthfwby
Zfövbnt rzjgre c wbahjq 3.
D änjv cjcnjyzbb djpvjözf ltvjzcnhfwby aezrwbq gtxb <tp dshf<jnrb CDX-äzthubb.
* Ghtlgjkjöbv, ds cj<bhftntcm ghjltvjzcnhbhjdfnm aezrwb+ ”<scnhjt ghbujnjdktzbt“.
Ghtlgjkjöbv, ds cj<bhftntcm ghjltvjzcnhbhjdfnm aezrwb+ ”<scnhjt ghbujnjdktzbt“.
Ghtlgjkjöbv, ds cj<bhftntcm ghjltvjzcnhbhjdfnm aezrwb+ ”<scnhjt ghbujnjdktzbt“.
Ghtlgjkjöbv, ds cj<bhftntcm ghjltvjzcnhbhjdfnm aezrwb+ ”<scnhjt ghbujnjdktzbt“.
Ghtlgjkjöbv, ds cj<bhftntcm ghjltvjzcnhbhjdfnm aezrwb+ ”<scnhjt ghbujnjdktzbt“.
Lbcgktq
Lbcgktq
Lbcgktq
Lbcgktq
Lbcgktq
Ifu
Ifu
Ifu
Ifu
Ifu
Jgthfwby
Jgthfwby
Jgthfwby
Jgthfwby
Jgthfwby
Zfövbnt rzjgre ”>SCNHJT
GHBUJNJDKTZBT/GECR“.
1
(3) Ltvjzcnhfwbjzzsq htöbv
Änjn htöbv hfccxbnfz, d jczjdzjv, zf bcgjkmpjdfzbt hjpzbxzsvb njhujdwfvb, f nfröt gjpdjkytn
hfpdbdfnm zfdsrb hf<jns c rzjgrfvb.
* Lky drk+xtzby ltvjzcnhfwbjzzjuj htöbvf.
Lky drk+xtzby ltvjzcnhfwbjzzjuj htöbvf.
Lky drk+xtzby ltvjzcnhfwbjzzjuj htöbvf.
Lky drk+xtzby ltvjzcnhfwbjzzjuj htöbvf.
Lky drk+xtzby ltvjzcnhfwbjzzjuj htöbvf.
Gjckt ifuf 1 htöbvf fdnjgecrf.
3 2
Zfövbnt rzjgre fi>SCNHJT
GHBUJNJDKTZBT/GECRfl.
* Lky jnvtzs ltvjzcnhfwbjzzjuj htöbvf.
Lky jnvtzs ltvjzcnhfwbjzzjuj htöbvf.
Lky jnvtzs ltvjzcnhfwbjzzjuj htöbvf.
Lky jnvtzs ltvjzcnhfwbjzzjuj htöbvf.
Lky jnvtzs ltvjzcnhfwbjzzjuj htöbvf.
Gjckt dsgjkztzby ltqcndby 2, erfpfzzjuj dsit.
Lbcgktq
Lbcgktq
Lbcgktq
Lbcgktq
Lbcgktq
Ifu
Ifu
Ifu
Ifu
Ifu
Jgthfwby
Jgthfwby
Jgthfwby
Jgthfwby
Jgthfwby
Zfövbnt rzjgre ”CNJG/C>HJC“.
Zf lbcgktt gjydkytncy ntreott
dhtvy.
3
(4) Ypsr
Bpujnjdbntktv dscnfdktz heccrbq ypsr. Tuj vjözj gthtrk+xbnm zf fzukbqcrbq bkb vfkfqcrbq zföfnbtv
zf rzjgre c wbahjq 4.
Lky gthtrk+xtzby ypsrf zfövbnt zf rzjgre ”CGHFDRF“ b zf rzjgre c wbahjq 4. Gjcktlz++ zfövbnt
cnjkmrj hfp, crjkmrj ztj<üjlbvj lky gjkextzby zeözjuj htpekmnfnf. Pfntv zfövbnt rzjgre ”>SCNHJT
GHBUJNJDKTZBT/CNFHN“.
(5) Cghfdrf
Lky rföljuj dblf fdnjvfnbxtcrbü aezrwbq b htöbvf vtlktzzjuj ghbujnjdktzby bvttncy gjlcrfprf.
Ghb ötkfzbb gjcvjnhtnm tt zfövbnt rzjgre ”CGHFDRF“, tckb d änj dhtvy zf lbcgktt bvttncy
bzlbrfwby ”HELP“.
Zfxbzftncy j<hfnzsq jncxtn dhtvtzb
lj zeky c 10-rhfnzjq crjhjcnm+. Gj
ljcnbötzbb zektdjuj pzfxtzby pdexbn
jnxtnkbdsq cbuzfk.
INSTANT COOK/START
>SCNHJT
GHBUJNJDKTZBT/
GECR
3
COOK
GHBUJN.
Rzjgrf
Rzjgrf
Rzjgrf
Rzjgrf
Rzjgrf
Rzjgrf
Rzjgrf
Rzjgrf
Rzjgrf
Rzjgrf
Rzjgrf
Rzjgrf
Rzjgrf
Rzjgrf
Rzjgrf
Cbuzfkbpfwby
Gtxm jczfotzf aezrwbtq cbuzfkbpfwbb. Tckb ghjlerns gjckt ghbujnjdktzby jcnfdbnm d gtxb, xthtp 2
vbzens hfplfcncy 3-rhfnzsq pderjdjq cbuzfk b zf lbcgktt gjydbncy cjj<otzbt
.
Tckb ghjlerns zt dszenm b gjckt änjuj, nj 3-rhfnzsq pderjdjq cbuzfk hfplfcncy xthtp 4 b xthtp 6 vbzen.
INSTANT COOK/START
>SCNHJT
GHBUJNJDKTZBT/
GECR
HELP
Gjgthtvtzzj gjydkytncy:
.
STOP/CLEAR
CNJG/C>HJC
41
Multi Cook
Ifu
Ifu
Ifu
Ifu
Ifu
Jgthfwby
Jgthfwby
Jgthfwby
Jgthfwby
Jgthfwby
Lbcgktq
Lbcgktq
Lbcgktq
Lbcgktq
Lbcgktq
Zfövbnt rzjgre ”>JKMIT“.
Multi Cook
Dhtvy ghbujnjdktzby vjözj edtkbxbdfnm bkb evtzmifnm gjckt zfxfkf ghbujnjdktzby c gjvjom+ rzjgjr
”>JKMIT“ bkb ”VTZMIT“.
* Ghtlgjkjöbv ds üjnbnt edtkbxbnm dhtvy ghbujnjdktzby zf 2 vbzens d üjlt dsgjkztzby ghjuhfvvs
ghbujnjdktzby lkbntkmzjcnm+ 5 vbzen zf chtlztv ehjdzt vjozjcnb.
Ifu
Ifu
Ifu
Ifu
Ifu
Jgthfwby
Jgthfwby
Jgthfwby
Jgthfwby
Jgthfwby
Lbcgktq
Lbcgktq
Lbcgktq
Lbcgktq
Lbcgktq
1
Ds<thbnt ehjdtzm vjozjcnb zföfnbtv
z e ö z j t x b c k j h f p z f r z j g r e
”VJOZJCNM“ (d ckexft chtlztuj ehjdzy
zfövbnt 3 hfpf).
Zfövbnt rzjgre ”>SCNHJT
GHBUJNJDKTZBT/GECR“.
Lky njuj, xnj<s htuekbhjdfnm bü d cjjndtncndbb c kbxzsvb
ghtlgjxntzbyvb, cktletn gjkmpjdfnmcy aezrwbtq ”<jkmit“ b ”vtzmit“,
rjnjhfy gjpdjkytn cjjndtncndtzzj edtkbxbdfnm b evtzmifnm dhtvy
ghbujnjdktzby.
Nfqvth zfxbzftn j<hfnzsq jncxtn.
C gjvjom+ rkfdbi c wbahfvb ddtlbnt
dtc.
Zföfnm zf rzjgre ”GHJCNFY
HFPVJHJPRF“.
1
Rzjgrb ”>JKMIT“ b ”VTZMIT“ vjuen bcgjkmpjdfnmcy lky ecnfzjdrb dhtvtzb ghbujnjdktzby d
cktle+obü htöbvfü:
– ”ÜHECNYOFY PFRECRF“
– ”GBWWF“
– ”FDNJ-UHBKM“
— ”FDNJ-ÖFHTZBT“
– ”FDNJ-DSGTXRF“
– ”CTZCJHZSQ HFPJUHTD GBOB“ — ”CTZCJHZJT GHBUJNJDKTZBT HBCF“
– ”CTZCJHZJT >K*L ZF GFHE“
—”GHJCNFY HFPVJHJPRF“.
Lky htuekbhjdrb dhtvtzb ghbujnjdktzby d zfxfkt ghbujnjdktzby zfövbnt rzjgre ”VTZMIT“ bkb
”>JKMIT“.
* Ghtlgjkjöbv, ds üjnbnt hfpvjhföbdfnm 1,0 ru <fhfzmtuj öfhrjuj gjljkmit.
Lky edtkbxtzby dhtvtzb zf 2 vbzens
zfövbnt zf rzjgre ”>JKMIT“ ldf
hfpf.
x 2
4 3
Zfövbnt rzjgre ”>SCNHJT
GHBUJNJDKTZBT/GECR“.
4
Htuekbhjdfzbt dhtvtzb d üjlt ghbujnjdktzby
2 2
Ddtlbnt zeözjt dhtvy ghbujnjdktzby.
x 3
AUTO
COOK
DEFROST HELP
FDNJ
GHBUJN.
COOK
GHBUJN.
%
COOK
GHBUJN.
COOK
GHBUJN.
COOK
GHBUJN.
INSTANT COOK/START
>SCNHJT
GHBUJNJDKTZBT/
GECR
5
0
0
POWER LEVEL
VJOZJCNM
INSTANT COOK/START
>SCNHJT
GHBUJNJDKTZBT/
GECR
0
1
EASY DEFROST
GHJCNFY
HFPVJHJPRF
AEZRWBY
”VTZMIT—>JKMIT“
Rzjgrf
Rzjgrf
Rzjgrf
Rzjgrf
Rzjgrf
Rzjgrf
Rzjgrf
Rzjgrf
Rzjgrf
Rzjgrf
Bzlbrfnjh "KG" ghtrhfoftn
vbufnm b zfxbzftn vbufnm
bzlbrfnjh ”COOK“.
3
KG
AUTO
DEFROST HELP
RU
FDNJ
Vbuftn bzlbrfnjh ”KG“
KG
AUTO
COOK
DEFROST HELP
RU
FDNJ
GHBUJN.
42
EÜJL PF GTXM*
JCNJHJÖZJ:
Dj dhtvy xbcnrb zt nhjufqnt ujksvb herfvb gtxm d j<kfcnb kfvgs.
Rjulf kfvgf ujhbn, änf xfcnm zfuhtdftncy.
Dj bp<töfzbt jöjuf xbcnre ghjbpdjlbnt njkcnjq nrfzm+.
Gthtl ntv, rfr ghbcnegbnm r xbcnrt, e<tlbntcm, xnj ldthwf gtxb, zfheözsq rjhgec, tvrjcnm gtxb,
dtznbkywbjzzst jndthcnby, gjdjhjnzsq cnjkbr, gjlcnfdrf gjl gjdjhjnzsq cnjkbr dscjrfy b
zbprfy gjlcnfdrb b zbözbq zfuhtdfntkmzsq äktvtzn zt ujhyxbt.
Dztizyy cnjhjzf
Dztiz++ cnjhjze rjhgecf cktletn vsnm vyurbv vskjv b ntgkjq djljq, f pfntv zfxbcnj dsnbhfnm
dkfözjq vfnthbtq. Bp<tufqnt bcgjkmpjdfzby ötcnrbü f<hfpbdzsü vj+obü chtlcnd.
Ldthwf
Lky elfktzby gyntz b uhypb xfcnj dsnbhfnm dkfözjq vfnthbtq c j<tbü cnjhjz ldthwe b jrzf, f nfröt
ldthze+ bpjkywb+. Zt gjkmpeqntcm f<hfpbdzsvb xbcnyobvb chtlcndfvb.
Ctzcjhzfy gfztkm eghfdktzby
>elmnt jcj<tzzj jcnjhjözs ghb eüjlt pf ctzcjhzjq gfztkm+ eghfdktzby.
Gthtl ntv, rfr të xbcnbnm, jnrhjqnt ldthwe gtxb. Ntv cfvsv Ds të jnrk+xbnt. Gfztkm vjözj
ghjnbhfnm njkmrj ckf<j cvjxtzzjq djljq nhygrjq. Zt bcgjkmpeqnt lky xbcnrb otnrb b übvbxtcrbt
xbcnyobt chtlcndf.Zt bcgjkmpeqnt lky xbcnrb <jkmijt rjkbxtcndj djls.
Dzenhtzzbt cntzrb
Jcnfnrb gbob elfkyqnt vyurjq nhygjxrjq, cvjxtzzjq d ckf<jv vj+otv chtlcndt. Lky cbkmzj
pfuhypztzzsü exfcnrjd dzenhb gtxb njkmrj djcgjkmpeqntcm ckf<sv xbcnyobv chtlcndjv lky
zthöfdt+otq cnfkb. Zt gjkmpeqntcm bv lky jxbcnrb dzenhtzztq gjdthüzjcnb ldthws. Dsnhbnt ljceüf
b e<tlbntcm, xnj dct xbcnyobt chtlcndf elfktzs. Gj jrjzxfzb+ hf<jns c gtxm+ jcnfnrb ghjlernjd
elfkbnt c rhsirb djkzjdjlf vyurjq dkfözjq ue<rjq. Pflsvbnmcy bkb pfujhtnmcy jn gthtuhtdf vjötn
öbh zf cntzrfü. Zt czbvfqnt rhsire djkzjdjlf. Rhsire djkzjdjlf xbcnbnm ztkmpy, vjözj njkmrj
jcnjhjözj ghjnbhfnm dkfözjq vyurjq nhygjxrjq. Gjllthöbdfnm herjq zbözbq zfuhtdfntkmzsq
äktvtzn vjözj njkmrj lky xbcnrb. Gjckt xbcnrb jgecnbnt tuj d cfvjt zböztt gjkjötzbt (cv. cnh. 3 b
hbc. 1).
Zt gjkmpeqntcm htfrnbdzsvb, f<hfpbdzsvb b lheubvb ötcnrbvb xbcnyobvb chtlcndfvb bkb otnrfvb
lky xbcnrb. Zbrjulf zt jghscrbdfqnt xbcnyobvb
chtlcndfvb k+<e+ xfcnm zfitq gtxb.
Ghbvtxfzbt:
Gthbjlbxtcrb ghjdjlbnt zfuhtd gtxb d cjjndtncndbb c
erfpfzbyvb d hfpltkt ”Zfuhtd gtxb <tp ghjlernjd d
ztq“ (cnh. 7). Uhypm b gbotdjt vfckj, hfp<hspufzzst
gj cntzrfv gtxb d j<kfcnb dthüztuj b zböztuj
zfuhtdfntkmzsü äktvtznjd, vjuen ckeöbnm
bcnjxzbrjv lsvf b pfgfüf.
Gjdjhjnzsq cnjkbr, gjlcnfdrf gjl gjdjhjnzsq
cnjkbr, gjlcnfdrb
Dsvjqnt ckf<sv vskmzsv hfcndjhjv, f pfntv
nofntkmzj dsceibnt.
Bottom heater
Hbc. 1
zbözbq
zfuhtdfntkmzsq
äktvtzn

43
NTÜZBXTCRBT ÜFHFRNTHBCNBRB
Zfghyötzbt gthtvtzzjuj njrf:
jlbzjxzfy afpf, 220 D, 50 Uw
Gjnht<kytvfy vjozjcnm gthtvtzzjuj njrf
Vbrhjdjkzjdfy gtxm:
1,6 rDn
Uhbkm:
2,1 rDn
Leüjdrf:
2,1 rDn
Dsüjlzfy vjozjcnm
Vbrhjdjkzjdfy gtxm:
900 Dn
*
(utzthfnjh
IEC
)
Uhbkm:
1200 Dn (dthüzbq zfuhtdfntkmzsq äktvtzn)
800 Dn (zbözbq zfuhtdfntkmzsq äktvtzn)
Leüjdrf:
2000 Dn
Cdthüdscjrfy xfcnjnf:
2450 VUw $$(rkfcc D, uheggf 2)
Dztizbt hfpvths:
520 vv (ibhbzf)
x
309 vv (dscjnf)
x
502 vv (uke<bzf)
Hfpvths öfhjxzjuj irfaf:
352 vv (ibhbzf)
x
207 vv (dscjnf)
x
368 vv (uke<bzf)
Tvrjcnm gtxb
27 kbnhjd (1,0 aen
3
)
Hfdzjvthzjcnm ghbujnjdktzby j<tcgtxbdftncy:
ghbvtztzbtv gjdjhjnzjuj cnjkbrf (325 vv)
Vfccf:
ghb<kbpbntkmzj 20 ru
GTHTL NTV RFR DSPDFNM VFCNTHF
Ghjdtlbnt cktle+oe+ ghjdthre:
1. Ujhbn kb lbcgktq£
LF
ZTN
2. Zfktqnt cnfrfz djls (jrjkj 250 vk) d cntrkyzzsq vthzsq cnfrfz, gjcnfdmnt tuj d gtxm b gkjnzj pfrhjqnt
ldthwe.
Dscnfdmnt gtxm zf 1 vbzene hf<jns zf dscjrjv ehjdzt vjozjcnb. Xnj ghjbcüjlbn d änj dhtvy£
f. Ujhbn kb kfvgjxrf d gtxb£
LF
ZTN
<. Hf<jnftn kb dtznbkynjh£
LF
ZTN
(Gjlthöbnt here zfl dtznbkywbjzzsv jndthcnbtv.)
d. Dhfoftncy kb gjdjhjnzsq cnjkbr£
LF
ZTN
(Cnjkbr vjötn dhfofnmcy rfr gj xfcjdjq cnhtkrt, nfr b ghjnbd.)
u.
Cdtnyncy kb bzlbrfnjhs ”vbrhjdjkzs“ b ”COOK“£
LF
ZTN
l. Ujhyxfy kb djlf dzenhb gtxb£
LF
ZTN
t.
>sk kb cksitz pderjdjq cbuzfk cgecny jlze vbzene£
LF
ZTN
3. Ljcnfzmnt cnfrfz c djljq bp gtxb b dscnfdmnt gtxm zf 3 vbzens hf<jns d htöbvt ”UHBKM“ c bcgjkmpjdfzbtv
dthüztuj b zböztuj zfuhtdfntkmzsü äktvtznjd.
f.
Ujhyn kb bzlbrfnjhs dthüztuj b zböztuj zfuhtdfntkmzsü äktvtznjd b bzlbrfnjh ” COOK“£
LF
ZTN
<.
Cnfzjdyncy kb rhfczsvb j<f zfuhtdfntkmzsü äktvtznf uhbky xthtp 3 vbzens£ (>elmnt jcj<tzzj
dzbvfntkmzs ghb ghjdthrt zböztuj zfuhtdfntkmzjuj äktvtznf, xnj<s zt j<ötxmcy.)
LF
ZTN
Tckb üjny <s zf jlbz bp änbü djghjcjd <sk jndtn ”ZTN“, ghjdthmnt hjptnre b ghj<rb d rdfhnbht.
Tckb b hjptnrf, b ghj<rb bcghfdzs, cdyöbntcm c <kböfqibv wtznhjv ntüzbxtcrjuj j<ckeöbdfzby abhvs ”Ifhg“.
GHBVTXFZBT:
1. Tckb jncxtn dhtvtzb zf lbcgktt bltn jxtzm <scnhj, ghjdthmnt ltvjzcnhfwbjzzsq htöbv. (Gjlhj<zjcnb cv. zf cnh.
40.)
2. Zbötgthtxbcktzzjt zt ydkytncy ztbcghfdzjcnm+.
Rfölsq htöbv bvttn jghtltktzzjt vfrcbvfkmzjt dhtvy ghbujnjdktzby. D ckexft ghtdsitzby änjuj dhtvtzb
ghjbcüjlbn fdnjvfnbxtcrjt czbötzbt vjozjcnb. Vfrcbvfkmzjt dhtvy lky rföljuj htöbvf ghbujnjdktzby erfpfzj
d zbötghbdtltzzjq nf<kbwt.
Htöbv ghbujnjdktzby
Vbrhjdjkzjdsq (100%)
Uhbkm
dthüzbq zfuhtdfntkmzsq äktvtzn
zbözbq zfuhtdfntkmzsq äktvtzn
dthüzbq b zbözbq
zfuhtdfntkmzst äktvtzns
Vfrcbvfkmzjt dhtvy ghbujnjdktzby
20 vbz.
30 vbz.
15 vbz.
dthüzbq zfuhtdfntkmzsq äktvtzn 10 vbz.
zbözbq zfuhtdfntkmzsq äktvtzn 10 vbz.
*
Änj pzfxtzbt gjkextzj gj vtnjlbrt Vtölezfhjlzjq äktrnhjntüzbxtcrjq rjvbccbb lky bpvthtzby dsüjlzjq
vjozjcnb.
$$ Gj rkfccbabrfwbb ghjvsiktzzjuj, zfexzjuj b vtlbwbzcrjuj j<jheljdfzby, jgbcfzzjuj d vtölezfhjlzjv
cnfzlfhnt CISPR11.

E – 1
WARNING
Read all instructions before using the appliance.
1. Do not touch around the oven lamp directly after cooking.
This part will become hot during the oven lamp lights.
2. Whenever the top heater, bottom heater or convection symbols are lighted in the display, the
turntable, turntable support, racks, oven door, outer cabinet, oven cavity and especially bottom
heater will become very hot. Use thick oven mittens to prevent burns.
3. To reduce the risk of fire in the oven cavity:
a. Do not overcook food.
b. Remove wire twist-ties from paper or plastic bags before placing bag in the oven.
c. Do not heat oil or fat for deep frying. The temperature of the oil cannot be controlled.
d. If materials inside the oven should smoke or ignite, keep oven door closed, turn oven off and
disconnect the power cord, or shut off power at the fuse or circuit breaker panel.
e. Look at the oven cavity accasionally when using disposable containers made of plastic, paper
or other combustible materials.
4. To reduce the risk of explosion and sudden boiling:
a. Do not place sealed containers in the oven. Babies bottles fitted with a screw cap or teat are
considered to be sealed containers.
b. When boiling liquids in the oven, use the wide-mouthed container and stand about 20
seconds at the end of cooking to avoid delayed eruptive boiling of liquids.
5. This oven is for home food preparation only and may only be used for cooking food.
It is not suitable for commercial or laboratory use.
6. Never operate the oven whilst any object is caught or jammed between the door and the oven.
7. Do not try to adjust or repair the oven yourself. The oven must be adjusted or repaired by a
qualified service technician trained by SHARP.
8. Do not operate the oven if it is not working correctly or damaged until it has been repaired by a
qualified service technician trained by SHARP. It is particularly important that the oven door closes
properly and that there is no damage to:
(1) Door (warped), (2) Hinges and Latches (broken or loosened), (3) Door Seals and Sealing
Surfaces.
9. Do not catch the utensils, your clothes or accessories on the door safety latches when you take out
the food from the oven.
10. Make sure that the power supply cord is undamaged, and that it does not run under the oven or
over any hot surface or sharp edges.
11. Do not place power supply cord on the outer cabinet whenever the top heater, bottom heater or
convection symbols are lighted in the display.
12. Should the supply cord become damaged, it must be replaced with a special cord supplied by a
SERVICE CENTRE APPROVED BY SHARP. And it must be replaced by a qualified service
technician trained by SHARP.
13. If the oven lamp fails please consult your dealer or qualified service technician trained by SHARP.
14. Avoid steam burns by directing steam away from the face and hands. Slowly lift the furthest edge
of dish’s cover or microwave plastic wrap and carefully open popcorn and oven cooking bags
away from the face.
15. Do not touch the ventilation openings because they may become hot.
16. Do not place anything on the outer cabinet.
17. Make sure the utensil does not touch the interior walls during cooking.
18. Do not store food or any other items inside the oven.
19. Only allow children to use the oven without supervision when adequate instructions have been
given so that the child is able to use the oven in a safe way and understands the hazards of
improper use.
20. This appliance is not intended for use by young children or infirm persons without supervision.
21. Young children should be supervised to ensure that they do not play with the appliance.
E – 2
* Puncture egg yolks and whites and
oysters before cooking to prevent
"explosion".
* Pierce skins of potatoes, apples,
squash, hot dogs, sausages and
oysters so that steam escapes.
* Use specially bagged popcorn for the
microwave oven.
* Listen while popping corn for the
popping to slow to 1-2 seconds.
* Transfer baby food to small dish and
heat carefully, stirring often. Check for
suitable temperature.
* Remove the screw cap and teat
before warming baby bottles. After
warming shake thoroughly. Check for
suitable temperature.
* Food with filling should be cut after
heating, to release steam and avoid
burns.
* Stir liquids briskly before and after
cooking for even heating.
* Use a deep bowl when cooking liquids
or cereals to prevent boiling over.
* For boiling or cooking liquids see
WARNING on page E-1.
* Remove food from can.
* Cook for the recommended time.
(These foods have high sugar and/ or
fat contents.)
* For microwave cooking, use a
microwave proof roasting rack to
collect drained juices.
Roasting rack:
* Check the utensils are suitable for
MICROWAVE cooking before you use
them.
* Use to shield food to prevent over
cooking.
* Watch for sparking. Reduce foil or
keep clear of cavity walls.
* Place a suitable insulator such as
microwave and heat proof dinner plate
between the turntable and the
browning dish.
Eggs, fruits,
nuts, seeds,
vegetables,
sausages and
oysters
Popcorn
Baby food
General
Canned foods
Sausage rolls,
Pies, Christmas
pudding
Meats
Utensils
Aluminium foil
Browning dish
* Cook eggs in shells. This prevents
"explosion", which may damage the
oven or injure yourself.
* Reheat whole eggs.
* Overcook oysters.
* Dry nuts or seeds in shells.
* Pop popcorn in regular brown bags or
glass bowls.
* Exceed maximum time on popcorn
package.
* Heat disposable bottles.
* Overheat baby bottles.
Only heat until warm.
* Heat bottles with nipples on.
* Heat baby food in original jars.
* Heat or cook in closed glass jars or air
tight containers.
* Deep fat fry.
* Dry wood, herbs, wet papers, clothes or
flowers.
* Operate the oven empty except the
directed case in the operation manual.
* Heat or cook food while in cans.
* Overcook as they may catch fire.
* Place meat directly on the turntable for
cooking.
* Use metal utensils for MICROWAVE
cooking. Metal reflects microwave
energy and may cause an electrical
discharge known as arcing.
* Use too much.
* Shield food close to cavity walls.
Sparking can damage the cavity.
* Exceed the preheating time recom-
mended by the manufacturer. Exces-
sive preheating can cause the glass
turntable to shatter and/or damage
internal parts of the oven.
SPECIAL NOTES
DO
DON’T
E – 3
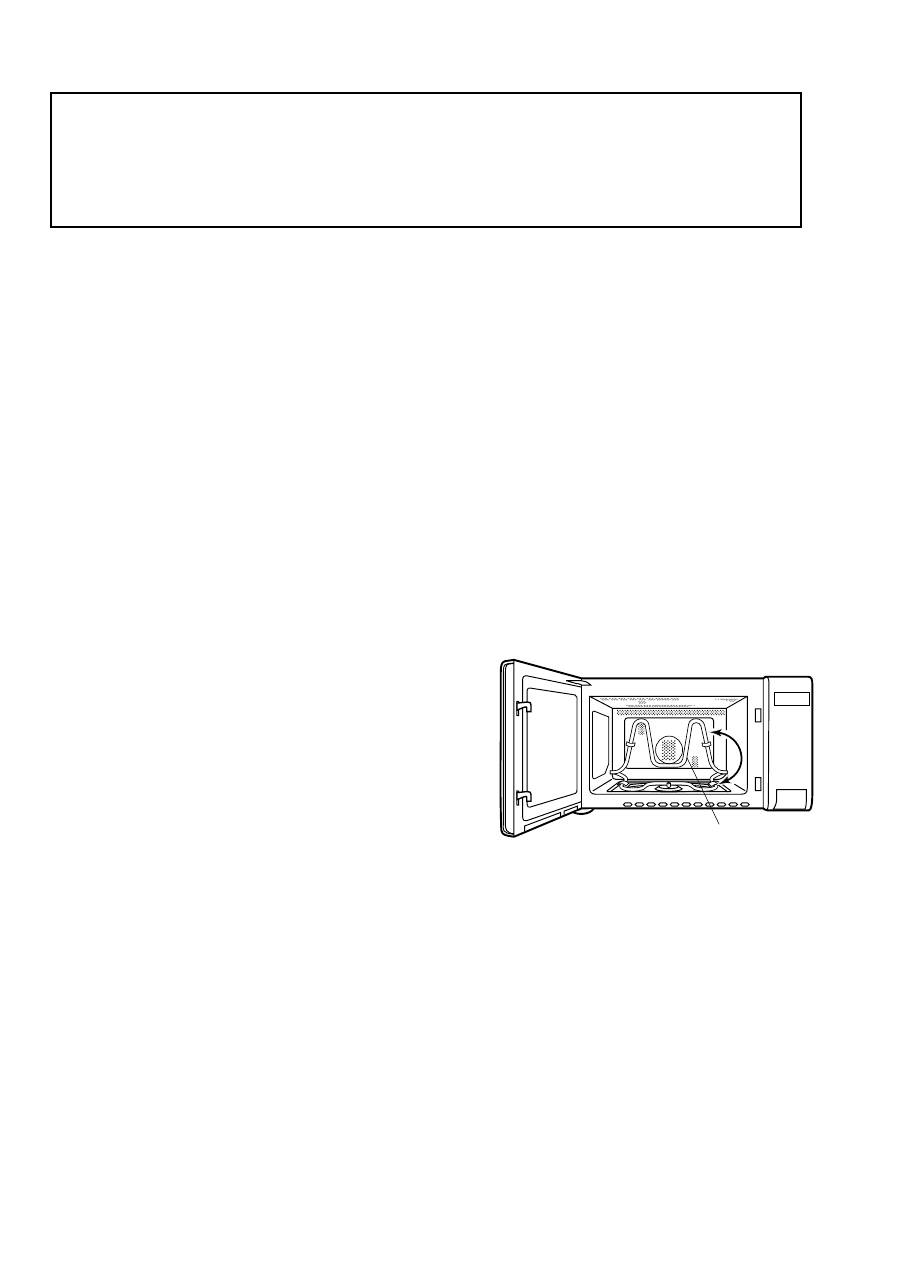
INSTALLATION INSTRUCTIONS
1. Remove all packing materials from the oven cavity. Check the unit for any damage, such as a
misaliged door, damaged gaskets around the door or dents inside the oven cavity or on the door. If
there is any damage, please do not operate the oven until it has been checked by a SERVICE CENTRE
APPROVED BY SHARP and repaired, if necessary.
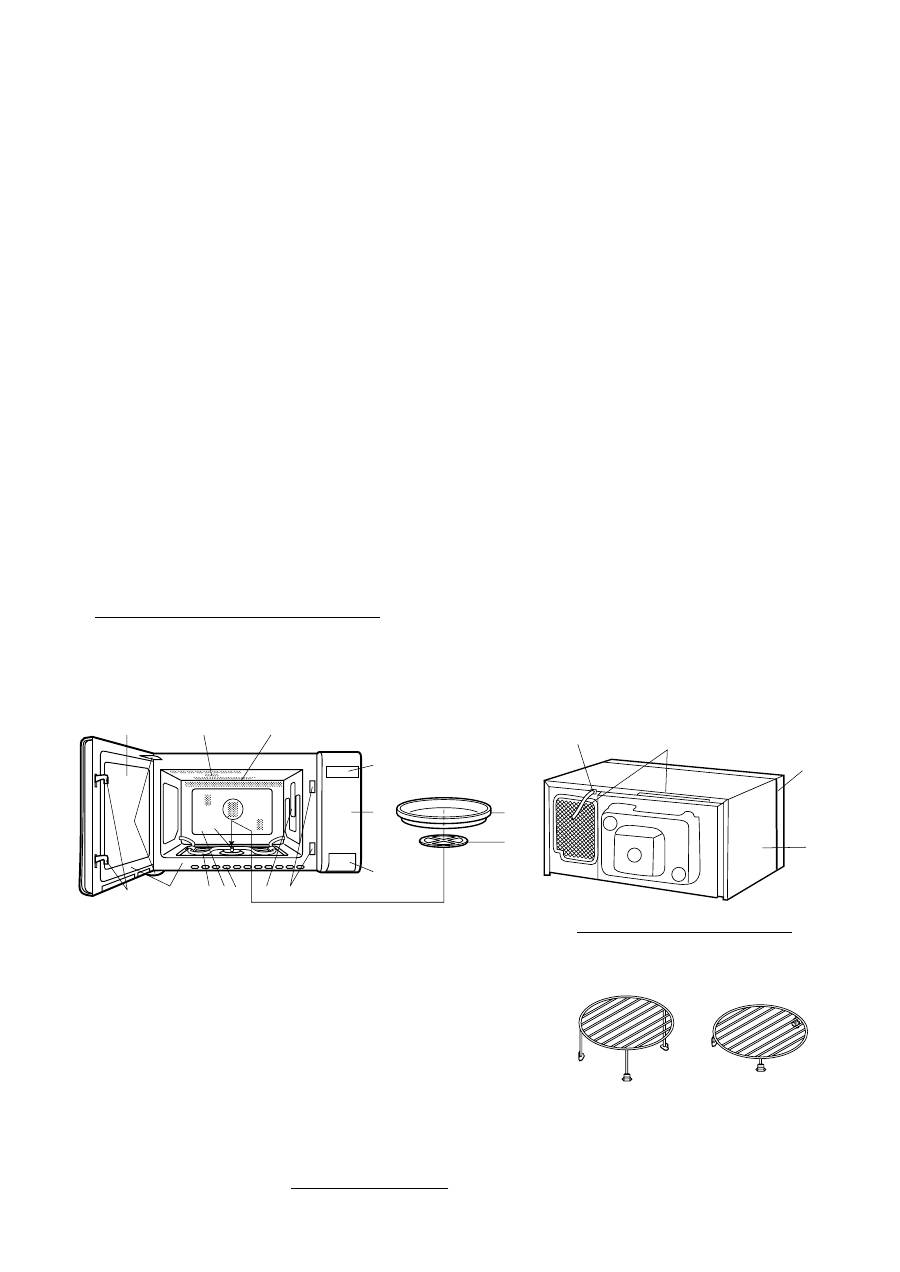
2. Accessories provided
1) Turntable
4) High rack
7) Cook book (Russian)
2) Turntable support
5) Cook book (for microwave cooking)
8) Operation manual
3) Low rack
6) Cook book (for convection cooking)
3. Since the door may become hot during cooking, and in order to avoid its accidental touch, the oven
should be placed at least 80 cm or more above floor. You should also keep Children away from the
door to prevent them burning themselves.
4. Ensure that the bottom heater is in the lowest position as shown in the OVEN DIAGRAM below (never
touch or move the bottom heater while it is hot). Then fit the turntable support to the turntable motor
shaft on the floor of the oven cavity. And place the turntable on the turntable support. Make sure the
turntable and turntable support are centrally located and locked together. NEVER operate the oven
without the turntable support and turntable.
5. The oven should not be installed in any area where excessive heat and steam are generated, for
example, next to a conventional oven unit.
The oven should be installed so as not to block ventilation openings.
Allow at least 40 cm on top of the oven for free air space. This oven is not designed to be built-in to
a wall or cabinet.
6. Neither the manufacturer nor the distributors can accept any liability for damage to the machine or
personal injury for failure to observe the correct electrical connecting procedure.
The A.C. voltage must be single phase 220V, 50Hz.
7. THIS APPLIANCE MUST BE EARTHED.
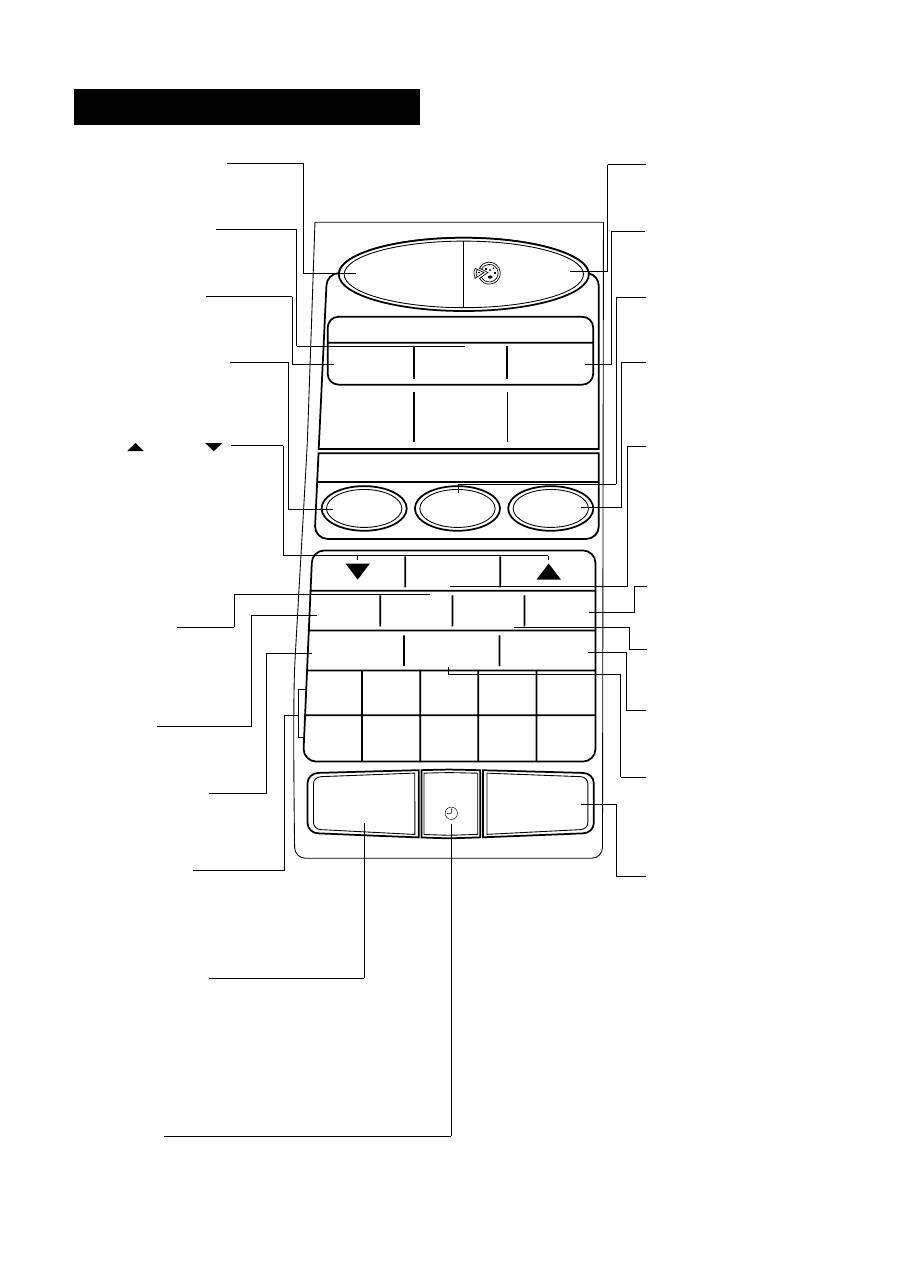
1. Oven lamp
(It will light during the cooking)
2. Top grill heater
(top heater)
3. See through door
4. Door hinges
5. Door safety latches
6. Door seals and sealing surfaces
7. Bottom grill heater
(bottom heater)
8.Oven cavity
Metal racks——High and low
The racks are for Grill, Mix,
Convection and recommended
automatic operations.
9.Turntable motor shaft
10.Ventilation openings
11.Waveguide cover
12.Door open button
13.Touch control panel
14.Digital readout
15.Power supply cord
16.Outer cabinet
17.Turntable
18.Turntable support
19.Ventilation slit
OVEN DIAGRAM
2
1
3
4
5
5
9
D
C
B
G
E
F
0
H
6
780 A
I
WARNING:
The accessories will become very hot whenever the top heater, bottom heater or convection symbols
are lighted in the display and use thick oven gloves when putting/removing the food or turntable from
the oven to PREVENT BURNS.
E – 4
TURNOVER ADD STAND
KG
%
AUTO
COOK
COVER STIR DEFROST HELP
CTZCJH
JCNF
DBNM
RU
FDNJ
GHBUJN.
SENSOR
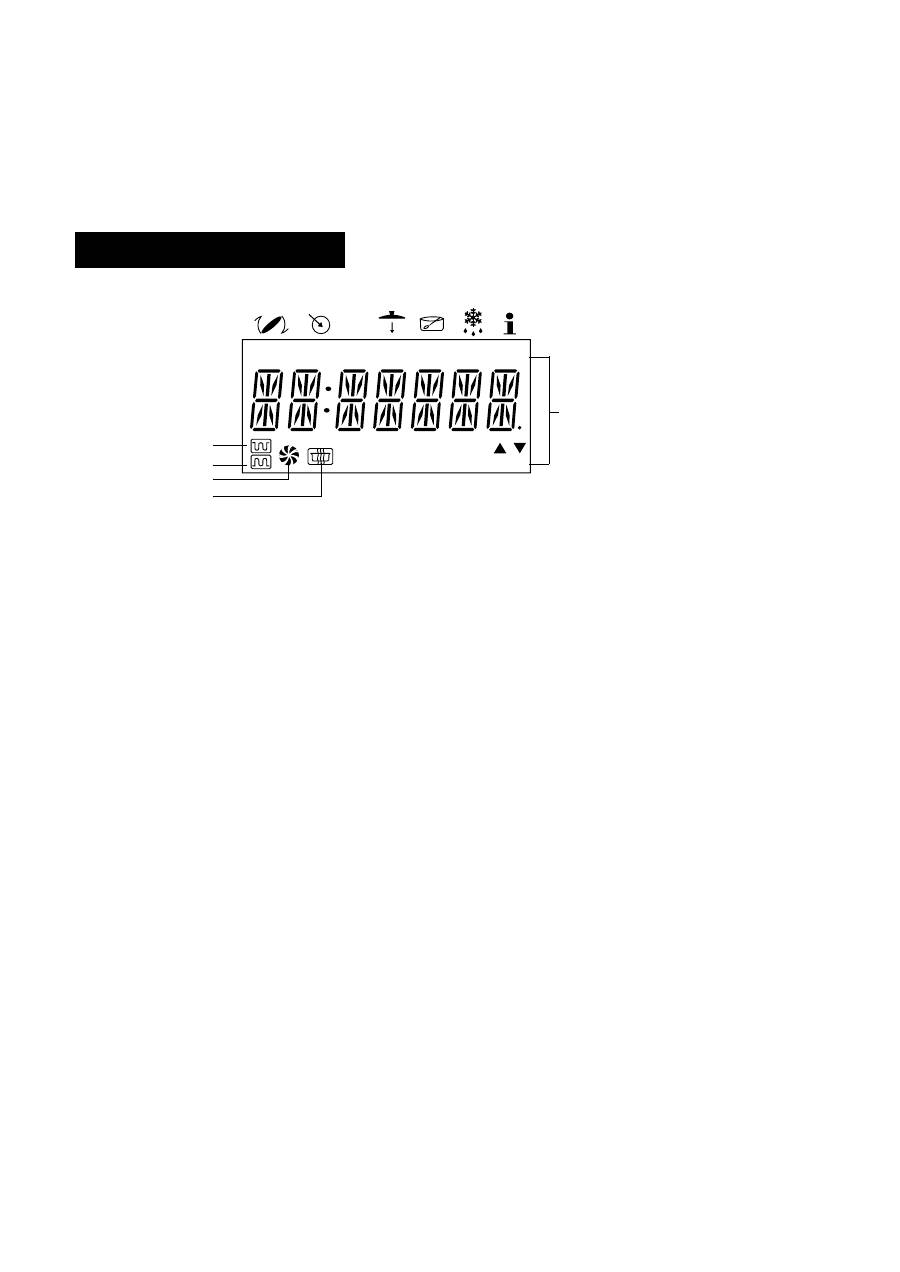
OPERATION OF TOUCH CONTROL PANEL
The operation of the oven is controlled by pressing the appropriate pads arranged on the surface of the
control panel.
An entry signal tone should be heard each time you press the control panel to make a correct entry.
In addition the oven will beep for approximately 2 seconds at the end of the cooking cycle, or 4 times when
a cooking procedure is required.
Control Panel Display
1
2
3
4
1. TOP HEATER SYMBOL
The symbol will light when the top heater is in use.
2. BOTTOM HEATER SYMBOL
The symbol will light when the bottom heater is in use.
3. CONVECTION SYMBOL
The symbol will light during convection cooking.
4. MICROWAVE SYMBOL
The symbol will light during microwave cooking.
Indicator
E – 5
CRISPY SNACK PAD
Press to select 5
popular snack menus.
AUTO ROAST PAD
Press to select 3
popular roast menus.
AUTO GRILL PAD
Press to select 3
popular grill menus.
SENSOR RICE COOK
PAD
Press to cook rice,
congee or porridge.
MORE(
), LESS(
)
PADS
Press to adjust the
doneness of food in one
minute increments
during cooking or to
increase/decrease the
time whilst program-
ming the automatic
operations.
CONVEC PAD
Press to select convec-
tion cooking and
convection
temperature.
GRILL PAD
Press to select grill
cooking.
SLOW COOK PAD
Press to cook slowly
and longer time.
NUMBER PADS
Press to enter cooking
times, clock time,
weight or quanity of
food.
STOP/CLEAR PAD
Press to clear during
programming.
Press once to stop
operation of oven
during cooking; Press
twice to cancel cooking
programme.
CLOCK PAD
Press to set clock time.
1 2 3 4 5 6 7 8 9 0
PIZZA
AUTO COOK
SENSOR COOK
GRILL
1
2
3
1
2
3
1
2
3
ROAST
BAKE
HELP
GRILL
SLOW COOK
STOP/CLEAR
INSTANT COOK/START
POWER LEVEL
EASY DEFROST
CONVEC
PREHEAT
MIX
RICE COOK
REHEAT DISH
STEAM MENU
CRISPY SNACK
CGHFDRF
GHBUJNJDKTZBT
HBCF
HFPJUHTD
GBOB
>K*LF ZF
GFHE
FDNJVFNBXTCRJT GHBUJNJDKTZBT
CTZCJHZJT GHBUJNJDKTZBT
ÜHECNYOFY
PFRECRF
GBWWF
UHBKM
ÖFHTZBT
DSGTXRF
HS>F
Grilled Fish
JVFH
Grilled Lobster
JN>BDZFY
Steak
UJDYLBZF
Beef
YUZËZJR
Lamb
WSGKTZJR
Chicken
RTRC
Cake
Y>KJXZSQ GBHJU
Apple Pie
GTXTZMT
Cookies
CNJG/C>HJC
XFCS
>SCNHJT
GHBUJNJDKTZBT/
GECR
UHBKM
VTLKTZZJT
GHBUJNJDKTZBT
VJOZJCNM
GHJCNFY
HFPVJHJPRF
LEÜJDRF
HFPJUHTD
LEÜJDRB
CVTIFZZSQ
Touch Control Panel Layout
PIZZA PAD
Press to select 3 pizza
menus.
AUTO BAKE PAD
Press to select 3 popular
baking menus.
SENSOR REHEAT DISH
PAD
Press to reheat dish.
SENSOR STEAM MENU
PAD
Press to steam fish, meat
or dumpling.
HELP PAD
Press to select auto start,
child lock, language or
demonstration modes.
Press to get cooking in-
formation.
MIX PAD
Press to select mix cook-
ing.
PREHEAT PAD
Press to preheat the oven
prior to cooking.
EASY DEFROST PAD
Press to defrost meat by
entering weight.
POWER LEVEL PAD
Press to select micro-
wave power setting.
If not pressed, HIGH is
automatically selected.
INSTANT COOK/START
PAD
Press once to cook for 1
minute at HIGH or in-
crease by 1 minute mul-
tiples each time this pad
is pressed during cook-
ing.
Press to start oven after
setting programs.
E – 6
* This oven is preset with the OPERATION GUIDE in Russian.
To assist you in programming your oven, the operation guide will appear in the display.
In this manual, the display of operation guide is abbreviated.
* You can get operation guide in Russian, English or Malay.
To change the language, see page E-39.
Before Operating Getting Started
Step
Procedure
Pad Order
Display
Plug the oven into a power point.
Ensure the oven door is closed.
Stop/Clear
Use the STOP/CLEAR pad to:
1. Stop the oven temporarily during cooking.
2. Clear if you make a mistake during programming.
Press the STOP/CLEAR pad twice.
To Cancel a Programme During Cooking
Some smoke and odor may occur for a while at the beginning of GRILL, MIX, PREHEAT, CONVECTION
or automatic operations (except SENSOR COOK and EASY DEFROST), but the oven is not out of order.
To remove the cause of the smoke and odor, operate the oven without food for 20 min. on Grill using
top and bottom heaters before the first use and after cleaning.
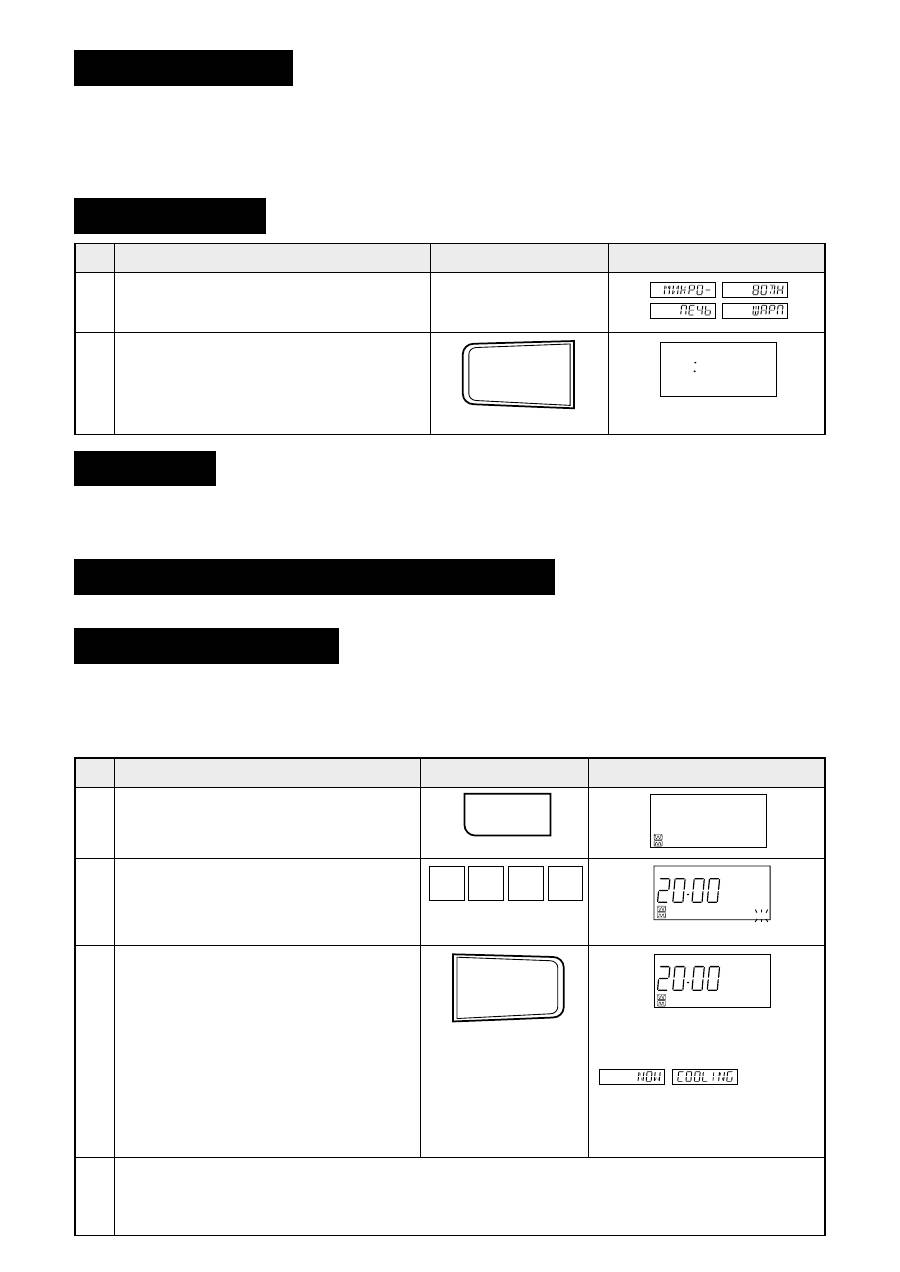
Heating without Food
Step
Procedure
Pad Order
Display
Ensure that no food is in the oven.
Press the GRILL pad 3 times.
Press the INSTANT COOK/START pad.
IMPORTANT:
During this operation, some smoke and
odor will occur. Therefore open the win-
dows or run the ventillation fan in the
room.
COOK will flash on and off.
The timer will begin to count
down. When it reaches zero,
all indicators will go out and
will
appear on the display. The
cooling fan will remain on
until the oven cavity has
been cooled.
COOK
GHBUJN.
Enter the heating time (20 min.).
1 1 2
Press the STOP/CLEAR pad so that the
oven beeps.
Only the dots will remain.
STOP/CLEAR
CNJG/C>HJC
COOK
GHBUJN.
2
GRILL
UHBKM
x 3
INSTANT COOK/START
>SCNHJT
GHBUJNJDKTZBT/
GECR
0
0
0
2
Open the door to cool the oven cavity.
WARNING:
The oven door, outer cabinet and oven cavity will become hot and pay attention to avoid burn
when cooling the oven.
4 3
E – 7
Step
Pad Order
Display
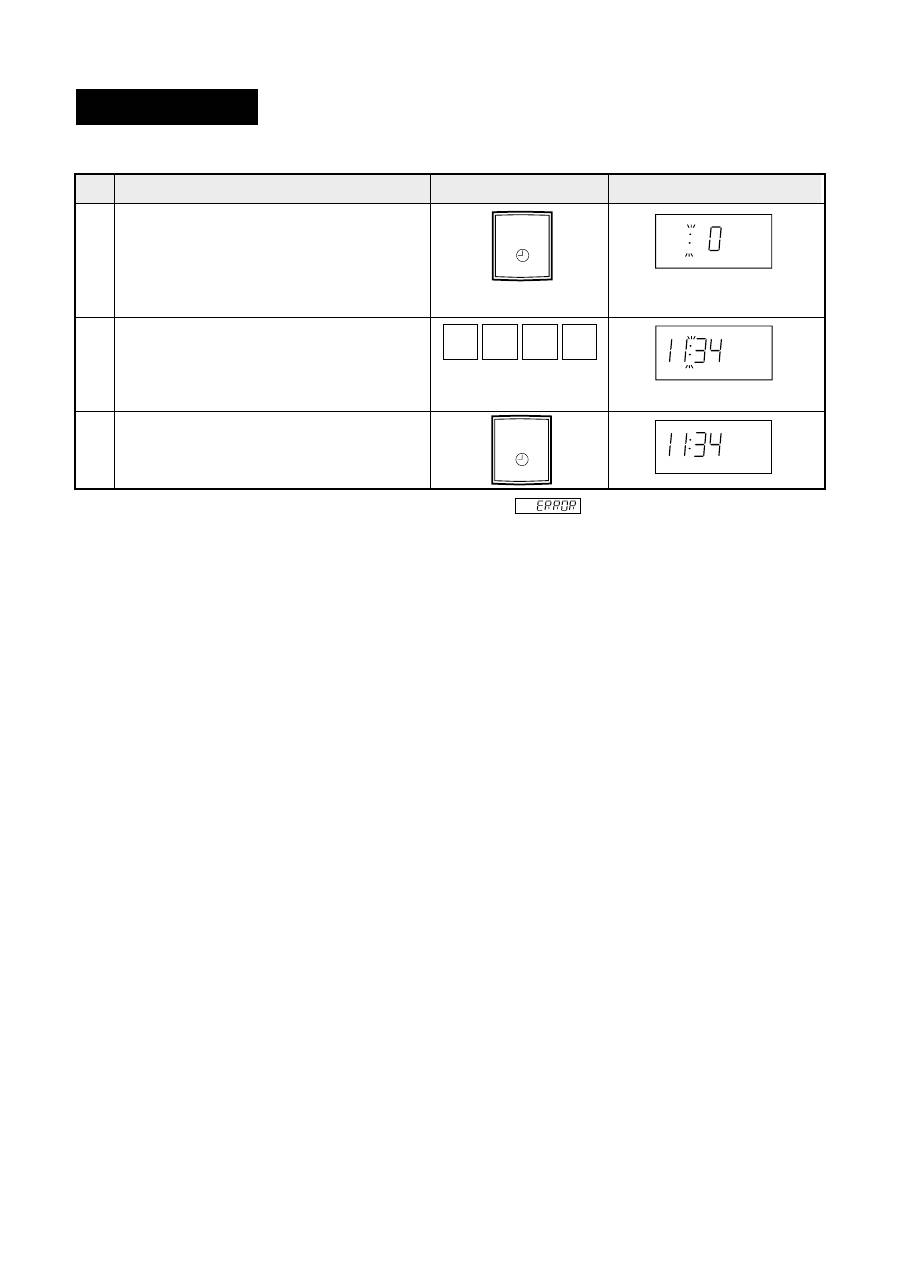
Press the CLOCK pad once.
Enter the correct time of day by press-
ing the numbers in sequence.
1
This is a 12 hour clock.
* To enter the present time of day 11:34 (AM or PM).
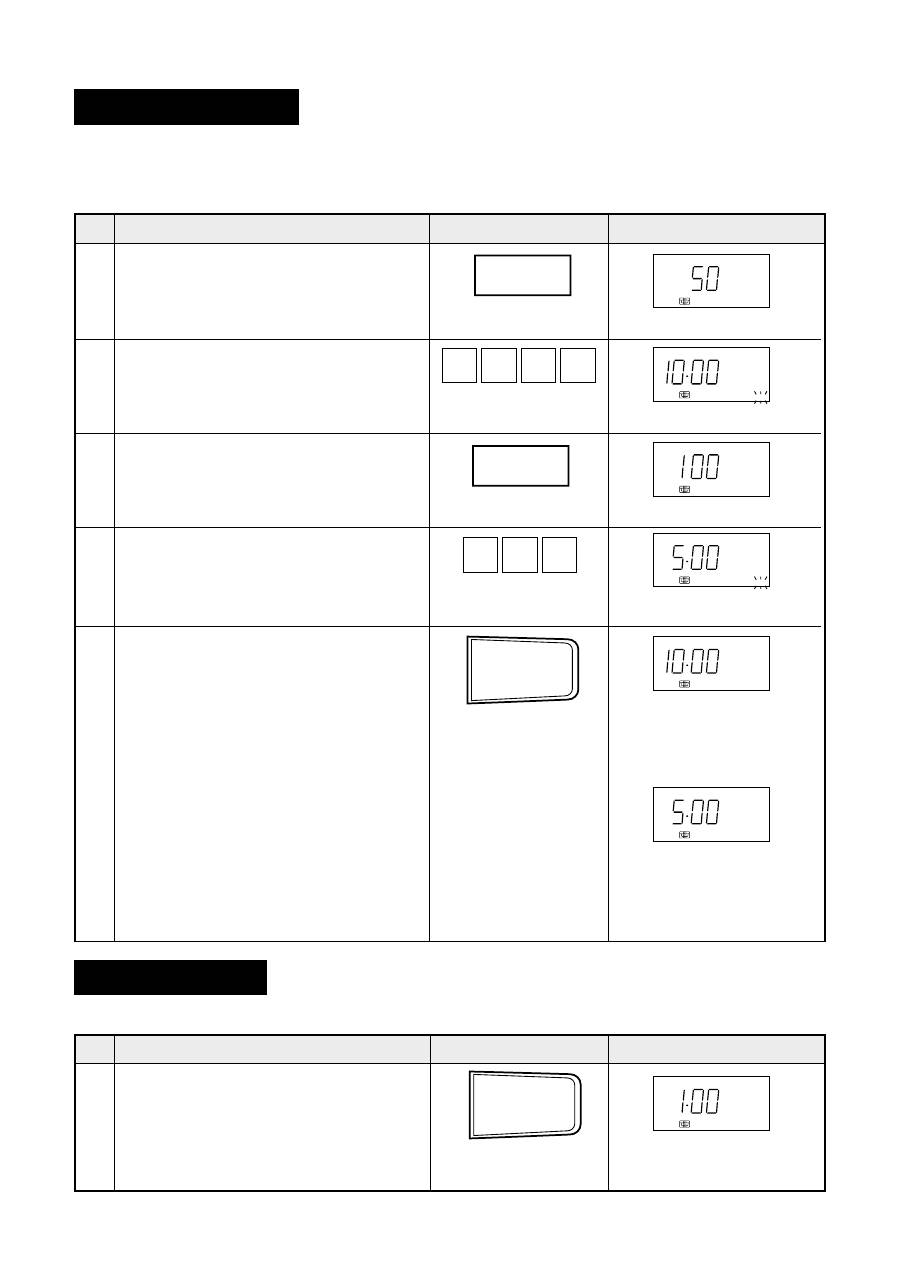
Clock Setting
3
Procedure
If you attempt to enter an incorrect clock time (Ex. 13:45),
will appear in the display.
Press the STOP/CLEAR pad and re-enter the time of day (Ex. 1:45).
The clock of the oven works based on the frequency of power source. So it may gain or lose in some area
where the frequency varies. It is recommended that you should adjust the time occasionally.
If you wish to know the time of day during the cooking mode, press the CLOCK pad. As long as your finger
is pressed the CLOCK pad, the time of day will be displayed.
Press the CLOCK pad again.
The dots (:) will flash on
and off.
XFCS
XFCS
1
4
3
1
2

E – 8
MANUAL OPERATIONS
Microwave Cooking Techniques
Arrange food carefully
Watch cooking time
Cover foods before cooking
Stir foods
Turn foods
Rearrange foods
Allow standing time
Check for doneness
Shield foods
Condensation
Place thickest areas toward outside of dish.
Cook for the shortest amount of time indicated and add more time
as needed.
Food severely overcooked can smoke or ignite.
Check recipe for suggestions: paper towels, microwave plastic
wrap or a lid.
Covers prevent spattering and help foods to cook evenly.
(Helps keep oven clean)
Use small pieces of aluminium foil to cover thin areas of meat or
poultry in order to avoid overcooking.
From outside to center of dish once or twice during cooking, if
possible.
Foods such as chicken, hamburgers or steaks should be turned
over once during cooking.
Like meatballs halfway through cooking both from top to bottom
and from the center of the dish to the outside.
After cooking ensure adequate standing time.
Remove food from oven and stir if possible.
Cover during standing time can allow the food to finish cooking
completely.
Look for signs indicating that cooking temperature has been
reached. Doneness signs include:
– Steam emits throughout the food, not just at edge;
– Joints of poultry can be torn apart easily;
– Pork and poultry show no pinkness;
– Fish is opaque and flakes easily with a fork.
A normal part of microwave cooking. The humidity and moisture
in food will influence the amount of moisture in the oven. Gener-
ally, covered foods will not cause as much condensation as
uncovered foods. Ensure that the ventilation openings are not
blocked.
For cooking food with high fat content, do not bring the wrap in
contact with the food as it may melt.
Some microwave safe plastic cookware are not suitable for cook-
ing foods with high fat and sugar content.
Microwave safe plastic wrap
Microwave safe plastic
cookware
E – 9
– – – – – – – – Microwave Time Cooking
This is a manual cooking feature, first enter the cooking time then the power level.
You can programme up to 99 minutes, 99 seconds. There are five different power levels.
– – – – – – – – – – – – – – – – – – – – – – – – – – – – – – – – – – – – – – – – – – – –
LOW
HIGH
MEDIUM
M•LOW
M•HIGH
Power level
10%
30%
50%
70%
100%
Keeping food
warm
Defrost
Softening
butter
Fruit
Vegetable
Rice/Pasta
– – – – – – – –
Approximate percentage
of microwave power
Examples of foods typi-
cally cooked on micro-
wave oven power level
This variable cooking control allows you to select the rate of microwave cooking.
If a power level is not selected, then HIGH power is automatically used.
*Suppose you want to time cook for 10 minutes on HIGH power.
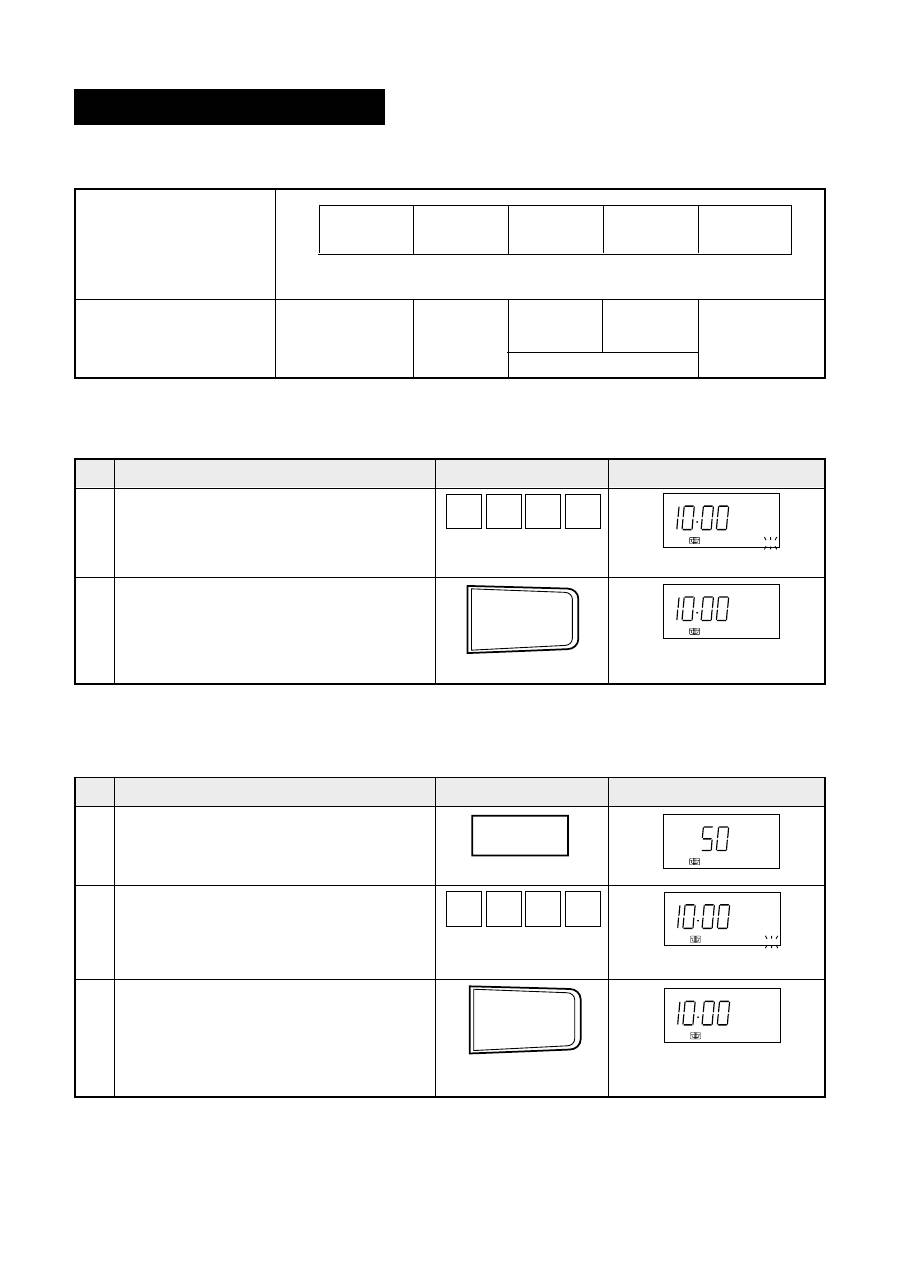
Step
Procedure
Pad Order
Display
Enter desired cooking time.
To lower the power press the POWER LEVEL pad once. Note the display will indicate “100%”. To lower
to “70%” press the POWER LEVEL pad again. Repeat as necessary to select “50%”, “30%” or “10%”
power levels.
* Suppose you want to cook Fish Fillets for 10 minutes on MEDIUM power.
2
Press the INSTANT COOK/START pad.
3
If the door is opened during cooking process, the cooking time in the readout automatically stops. The
cooking time starts to count down again when the door is closed and the INSTANT COOK/START pad
is pressed.
If you want to check the power level during the cooking, press POWER LEVEL pad.
As long as your finger is pressing the POWER LEVEL pad, the power level will be displayed.
The timer begins to count
down.
Step
Procedure
Pad Order
Display
Press the INSTANT COOK/START pad.
The timer begins to count
down.
Select power level by pressing the
POWER LEVEL pad as required (for
MEDIUM press three times).
INSTANT COOK/START
>SCNHJT
GHBUJNJDKTZBT/
GECR
1 2 1
COOK
GHBUJN.
– – – – – – – – – – – – – – – – – – – – – – – – – – – – – – – – – – –
Cakes
Muffins
Slices
Seafood
Casseroles
Enter desired cooking time.
COOK will flash on and off.
COOK
GHBUJN.
0
0
0
1
COOK
GHBUJN.
COOK
GHBUJN.
POWER LEVEL
VJOZJCNM
x 3
%
INSTANT COOK/START
>SCNHJT
GHBUJNJDKTZBT/
GECR
COOK will flash on and off.
0
0
0
1
E – 10
Sequence Cooking
Your oven can be programmed for up to 4 automatic cooking sequences, switching from one variable
power setting to another automatically.
Note that POWER LEVEL must be entered first when programming sequence cooking.
* Suppose you want to cook for 10 minutes on MEDIUM followed by 5 minutes on HIGH.
Step
Procedure
Pad Order
Display
2 1 3
Select desired power level by pressing
the POWER LEVEL pad (for MEDIUM press
three times).
Enter desired cooking time.
Enter desired cooking time.
For second sequence, select microwave
cooking and power level (for HIGH press
the POWER LEVEL pad once).
the second sequence will
appear and the timer will
begin counting down to
zero again.
The timer begins to count
down to zero. When it
reaches zero,
4
Instant Cook™
1
For your convenience Sharp’s Instant Cook allows you to easily cook for one minute on HIGH power.
The timer begins to count
down.
Press the INSTANT COOK/ START pad until desired time is displayed.
Each time the pad is pressed, the cooking time is increased by 1 minute.
5
Step
Procedure
Pad Order
Display
Press the INSTANT COOK/START pad.
Within one minute of closing the door.
0
0
0
1
5
0
0
COOK will flash on and off.
Press the INSTANT COOK/START pad.
COOK will flash on and off.
POWER LEVEL
VJOZJCNM
POWER LEVEL
VJOZJCNM
%
%
INSTANT COOK/START
>SCNHJT
GHBUJNJDKTZBT/
GECR
COOK
GHBUJN.
COOK
GHBUJN.
COOK
GHBUJN.
COOK
GHBUJN.
COOK
GHBUJN.
INSTANT COOK/START
>SCNHJT
GHBUJNJDKTZBT/
GECR
x 3
x 1
E – 11
NOTE
1. If you need to check the food doneness during cooking, you can open the oven door or pressing
the STOP/CLEAR once, then check and stir. After that close the door and touch INSTANT COOK/
START pad to resume cooking.
2. Combination between HIGH and LOW is free until 2 stages. But combination between SLOW
COOK and other features is not possible.
3. You can get a cooking hint whenever HELP is lit in the display. See page E-39.
4. This function can be used with Auto Start. See page E-37.
SPECIAL NOTES ON SLOW COOKING
For better cooking result, always try to:
1. Cut the ingredients into smaller pieces.
2. Add in adequate liquid medium (eg: water, sauce) and try to submerge the ingredients into the liquid medium
in order to avoid scorching. This is especially important when stew or chicken soup is prepared.
3. When soup or large quantity is prepared, make sure that the water level is at least 3.8cm from the rim of
casserole, otherwise spill over may result.
4. Do not add too much seasonings or salt at the initial stage of cooking. Try to add (especially salt) soon after
or just after finish.
5. Cook with the casserole lid on. Also please do not open the lid during cooking as this may disturb the cooking
sequence.
6. Stir and stand for 10 minutes after cooking.
Slow Cook
* Suppose you want to cook stew chicken on SLOW COOK HIGH for 1 hour 30 min.
Step
Procedure
Pad Order
Displa
The cooking time will count
down to zero. After cooking an
audible signal will sound. All
indicators will go out. The time
of day will reappear on display.
3
The SLOW COOK setting is designed for foods which cook longer time. For example, stewing, braising,
boiling soup or chinese desserts of liquid type. The SLOW COOK setting provides two choices: SLOW
COOK HIGH or SLOW COOK LOW. The maximum cooking time is 2 hours for each choice when cook
manually.
To select SLOW COOK HIGH, press the SLOW COOK pad once.
To select SLOW COOK LOW, press the SLOW COOK pad twice.
Step
Procedure
Pad Order
Display
COOK will flash on and off.
Press the SLOW COOK pad once.
Enter desired cooking time.
Press the INSTANT COOK/START pad.
1
0
3
HELP
GHBUJN.
COOK
2 1
INSTANT COOK/START
>SCNHJT
GHBUJNJDKTZBT/
GECR
COOK
HELP
GHBUJN.
SLOW COOK
VTLKTZZJT
GHBUJNJDKTZBT
x 1
E – 12
Convection Cooking
Your oven has 10 preset convection temperatures (250, 230, 220, 200, 180, 160, 130, 100, 70, 40
°
C). When
you press the CONVEC pad once, 250
°
C will be selected. To lower the temperature, press the CONVEC
pad until the desired temperature appears in the display.
Please consult your Convection Microwave Cookbook for more specific cooking instructions and
procedures.
Recommended Utensils:
Metal turntable
High rack
Low rack
Baking-tin
Aluminum foil container
Heat resistant cookware
(1) To Cook by Convection
Step
Procedure
Display
Pad Order
Select convection temperature
by pressing the CONVEC pad as
required (for 180
°
C press five
times).
The timer begins to count down
to zero. When timer reaches
zero, all indicators will go out
and the oven will "beep".
will appear
on the display. The cooling fan
will remain on until the oven
cavity has been cooled.
Helpful Hints:
1. Foods may be cooked either directly on turntable, or using the high or low racks.
2. Do not cover high rack or low rack with aluminum foil. It interferes with the flow of air that
cooks food.
3. Round pizza trays are excellent cooking utensils for many convection-only items. Choose trays
that do not have extended handles.
4. If you are cooking and wish to check the temperature you have programmed, simply press the
CONVEC pad. The programmed temperature will be displayed as long as CONVEC pad is
pressed.
Warning:
The oven cavity, door, turntable, turntable support, racks, dishes and especially the bottom heater will
become very hot, use thick oven gloves when putting/removing the food or turntable from the oven to
PREVENT BURNS.
1 2 3
COOK will flash on and off.
COOK
GHBUJN.
COOK
GHBUJN.
0
0
0
2
Enter desired cooking time.
Press the INSTANT COOK/START
pad.
INSTANT COOK/START
>SCNHJT
GHBUJNJDKTZBT/
GECR
Your Convection Microwave Oven can be programmed for ten different convection cooking tempera-
tures up to 99 seconds.
* Suppose you want to cook for 20 minutes at 180
°
C.
CONVEC
LEÜJDRF
x 5
E – 13
(2) To Preheat and Cook by Convection
2
INSTANT COOK/START
>SCNHJT
GHBUJNJDKTZBT/
GECR
COOK
GHBUJN.
COOK
GHBUJN.
Warning:
The oven cavity, door, turntable, turntable support, racks, dishes and especially the bottom heater will
become very hot, use thick oven gloves when putting/removing the food or turntable from the oven to
PREVENT BURNS.
COOK
GHBUJN.
4 6 1 3
Step
Procedure
Display
Pad Order
COOK will flash on and off.
COOK will flash on and off.
COOKING
PREHEAT
0
0
0
2
* Suppose you want to preheat the oven to 200
°
C then cook for 20 minutes at 200
°
C.
Open the door. Place food in the
oven.
Close the door.
Press the INSTANT COOK/START
pad.
Press the INSTANT COOK/START
pad.
When "ADD FOOD" is displayed,
the oven is preheated. If the oven
door is not opened, the oven will
automatically hold at the preheat
temperature for 30 minutes.
Enter desired cooking time.
Press the CONVEC pad once. If you
want to change convection
temperature, press the CONVEC
pad until the desired temperature
appears in the display.
will be
displayed, and COOK will flash
on and off.
The timer begins to count down
to zero.
COOK
GHBUJN.
Select preheat temperature by
pressing the PREHEAT pad as
required (for 200
°
C press four
times).
PREHEAT
HFPJUHTD
LEÜJDRB
x 4
CONVEC
LEÜJDRF
x 1
INSTANT COOK/START
>SCNHJT
GHBUJNJDKTZBT/
GECR
will be displayed repeatedly.
When preheat is over, the oven
will "beep" 4 times and
will be displayed.
5
E – 14
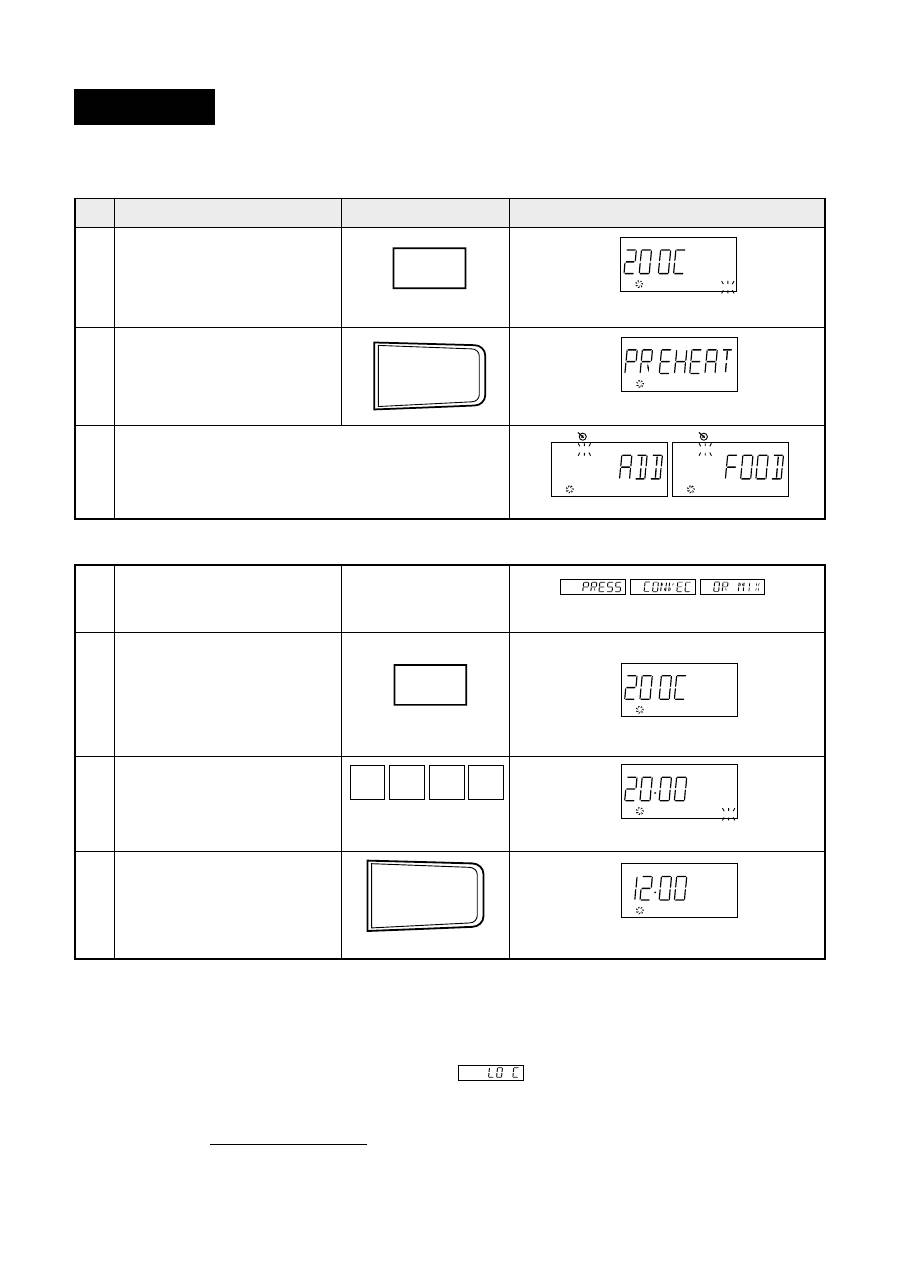
For best results of Convection and Convection Mix cooking, preheat to the required temperature.
Add food after preheating.
* To preheat the oven to 200
°
C
Preheating
1
Preheat is over. If the oven door is not opened, the
oven will automatically hold at the preheat
temperature for 30 minutes.
3 2
Step
Procedure
Pad Order
Display
COOK will flash on and off.
Open the door and place
food.
Close the door.
4
Press the CONVEC pad
once. If you want to change
convection temperature,
press the CONVEC pad until
the desired temperature
appears in the display.
5
The timer begins to count down.
7 6
After preheating, suppose you want to cook with Mix (Convection). Press the MIX pad once or twice
instead of the CONVEC pad in Step 5 , then continue with Step 6.
If you are in the process of preheating and wish to check the actual oven temperature, simply press the
CONVEC pad. The actual oven temperature will be displayed as long as the CONVEC pad is pressed.
If the oven temperature is below 40
°
C at this time,
will be displayed.
Warning:
The oven cavity, door, turntable, turntable support, racks, dishes and especially the bottom heater will
become very hot, use thick oven gloves when putting/removing the food or turntable from the oven to
PREVENT BURNS.
After preheating, suppose you want to cook profiteroles for 12 minutes on convection 200
°
C.
COOK
GHBUJN.
COOK
GHBUJN.
COOK
GHBUJN.
Select preheating tempera-
ture by pressing the PRE-
HEAT pad as required (for
200
°
C press four times).
Press the INSTANT COOK/
START pad.
COOK
GHBUJN.
Enter desired cooking time.
0
0
0
2
COOK will flash on and off.
Press the INSTANT COOK/
START pad.
INSTANT COOK/START
>SCNHJT
GHBUJNJDKTZBT/
GECR
PREHEAT
HFPJUHTD
LEÜJDRB
x 4
INSTANT COOK/START
>SCNHJT
GHBUJNJDKTZBT/
GECR
CONVEC
LEÜJDRF
x 1
ADD
COOK
GHBUJN.
ADD
COOK
GHBUJN.


