Beurer BM 75: Performing the blood pressure measurement Correct posture
Performing the blood pressure measurement Correct posture: Beurer BM 75
Table of contents
- 2. Important information 1. Getting to know your instrument Signs and symbols
- Advice on use
- Advice on batteries Storage and Care Repair and disposal
- 3. Device description
- Information on the display: USB interface System requirements for the Beurer „HealthManager“ PC software
- 4. Preparing the measurement Setting the hour format, date and time Inserting the batteries
- 5. Measuring blood pressure Positioning cuff Operation with the mains part
- Performing the blood pressure measurement Correct posture
- WHO classification: 6. Evaluating results Cardiac arrhythmia:
- Range of blood pressure values Systolic Resting indicator measurement (using HSD diagnostics) RED: Lack of haemodynamic stability GREEN: Haemodynamic stability
- 7. Displaying and deleting measurements
- 8. Transferring measurements USB interface NFC
- 9. Cleaning and storing the instrument 11. Specifications 10. Rectifying faults
- 12. Mains part
Now insert the cuff line into the
•
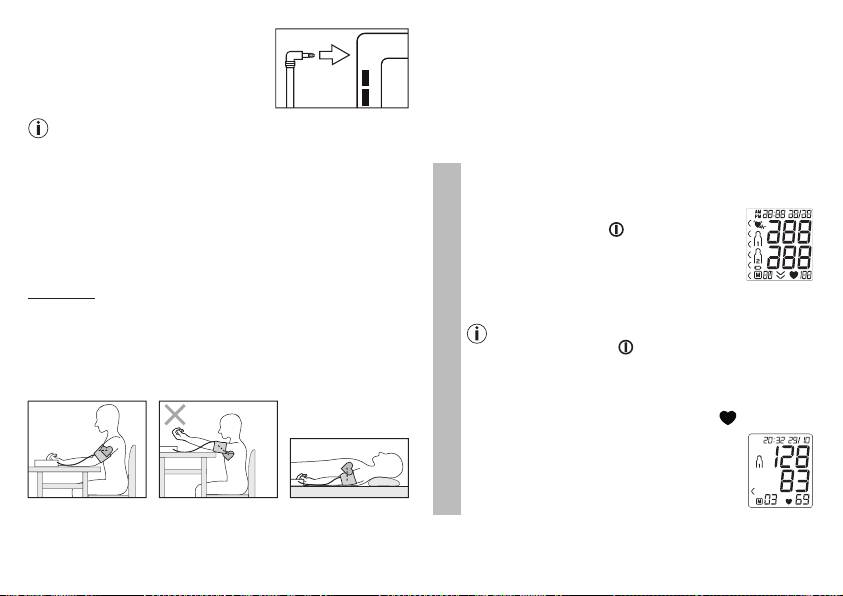
To carry out a blood pressure measurement, make sure you
connection for the cuff connector.
are sitting comfortably with your arms and back leaning on
something. Do not cross your legs. Place your feet flat on the
ground.
•
In order not to distort the result, it is important to keep still
If the measurement is performed on the right upper arm,
during the measurement and not talk.
the line should be located on the inside of your elbow. En-
Performing the blood pressure measurement
sure that your arm is not pressing on the line.
As described above, attach the cuff and adopt the pos-
Blood pressure may vary between the right and left arm, which
ture in which you want to perform the measurement.
may mean that the measured blood pressure values are differ-
ent. Always perform the measurement on the same arm.
•
To start the blood pressure monitor, press
the Start/stop button . All display ele-
If the values between the two arms are significantly different,
ments are briefly displayed.
please consult your doctor to determine which arm should be
used for the measurement.
The blood pressure monitor will begin the
measurement automatically after 3 seconds.
Important: The unit may only be operated with the original cuff.
The cuff is suitable for an arm circumference of 24 to 36 cm.
The cuff automatically inflates.
A larger cuff for upper-arm circumferences of 35 to 44 cm can
Measuring can be cancelled at any time by pressing
be obtained from specialist retailers or from the service ad-
the Start/stop button .
dress using order number 163.387.
The cuff’s air pressure is slowly released. If you already
Measurement
Correct posture
recognise a tendency for high blood pressure, you should
reinflate the cuff and increase the cuff’s pressure again. As
soon as a pulse is found, the pulse symbol is displayed.
•
Systolic pressure, diastolic pressure and
pulse measurements are displayed. The
resting indicator display (see chapter 6)
illuminates in accordance with the positive
or negative classification.
•
Rest for approx. 5 minutes before each measurement. Other-
wise there may be divergences.
•
You can perform the measurement either sitting or lying down.
Always make sure that the cuff is on a level with your heart.
24
