Beurer BM 75: 5. Measuring blood pressure Positioning cuff Operation with the mains part
5. Measuring blood pressure Positioning cuff Operation with the mains part: Beurer BM 75
Table of contents
- 2. Important information 1. Getting to know your instrument Signs and symbols
- Advice on use
- Advice on batteries Storage and Care Repair and disposal
- 3. Device description
- Information on the display: USB interface System requirements for the Beurer „HealthManager“ PC software
- 4. Preparing the measurement Setting the hour format, date and time Inserting the batteries
- 5. Measuring blood pressure Positioning cuff Operation with the mains part
- Performing the blood pressure measurement Correct posture
- WHO classification: 6. Evaluating results Cardiac arrhythmia:
- Range of blood pressure values Systolic Resting indicator measurement (using HSD diagnostics) RED: Lack of haemodynamic stability GREEN: Haemodynamic stability
- 7. Displaying and deleting measurements
- 8. Transferring measurements USB interface NFC
- 9. Cleaning and storing the instrument 11. Specifications 10. Rectifying faults
- 12. Mains part
•
After using the blood pressure monitor, unplug the mains
The day flashes on the display.
part from the mains socket first and then disconnect it from
•
Choose the desired day with the M1/M2
the blood pressure monitor. As soon as you unplug the
memory buttons and confirm with the
mains part, the blood pressure monitor loses the date and
Date
Start/stop button
.
time setting but the saved measurements are retained.
If the hour format is set as 12h, the day/month dis-
5. Measuring blood pressure
play sequence is reversed.
Please ensure the device is at room temperature before meas-
The hour flashes on the display.
uring.
•
Choose the desired hour with the M1/
The measurement can be performed on the left or right arm.
M2 memory buttons and confirm with the
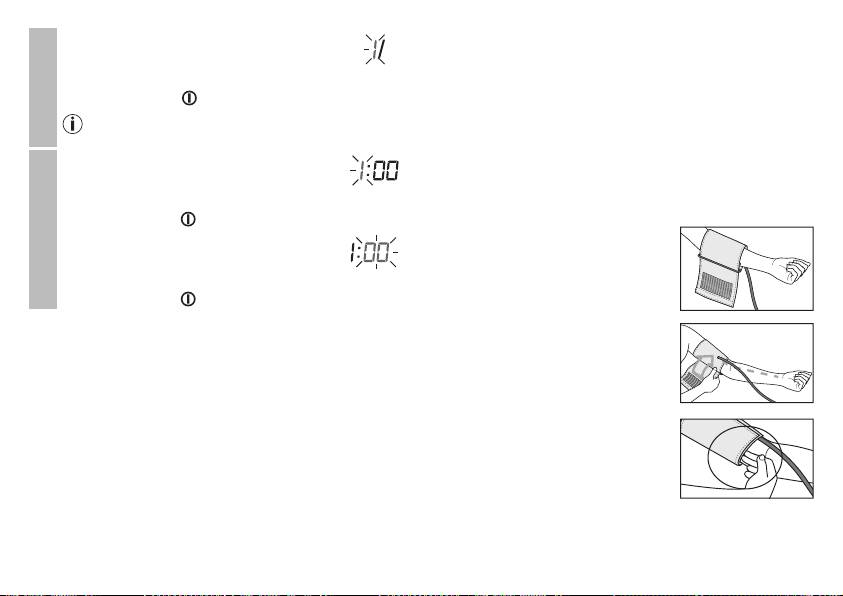
Positioning cuff
Start/stop button .
Fit the cuff round your bare left upper
Time
The minute flashes on the display.
arm. Blood circulation in the arm
•
Choose the desired minute with the M1/
should not be restricted by tight cloth-
M2 memory buttons and confirm with the
ing or other objects.
Start/stop button .
Operation with the mains part
The cuff should be placed on the upper
arm so that the lower edge is 2 to 3 cm
You can also operate this device with a mains part.
above the bend of the elbow and
When doing so, there must not be any batteries in the battery
above the artery. The tube should be in
compartment. The mains part can be obtained from specialist
line with the centre of the palm.
retailers or from the service address using order number
071.60
.
•
To prevent possible damage to the device, the blood pres-
Now tighten the free end of the cuff,
sure monitor must only be used with the mains part de-
but make sure that it is not too tight
scribed here.
around the arm and close the
•
Insert the mains part into the connection provided for this
hook-and-loop fastener. The cuff
purpose on the right-hand side of the blood pressure moni-
should be fastened so that two fingers
tor. The mains part must only be connected to the mains
fit under the cuff.
voltage that is specified on the type plate.
•
Then insert the mains plug of the mains part into the mains
socket.
23
