Beurer HK 125 XXL: instruction
Class: Health products
Type:
Manual for Beurer HK 125 XXL
Table of contents
- Explanation of symbols
- 1. Items included in the package 1.1 Description 2. Important instructions Retain for future use
- • Do not use if wet.
- 3. Intended use 4. Operation 4.1 Safety 4.2 Initial use 4.3 Additional information for HK 58 Cosy 4.4 Switching on 4.5 Setting the temperature
- 4.6 Automatic switch-off 4.7 Switching off 5. Cleaning and maintenance CAUTION CAUTION
- CAUTION CAUTION 6. Storage CAUTION 7. Disposal 8. What if there are problems? 9. Technical data
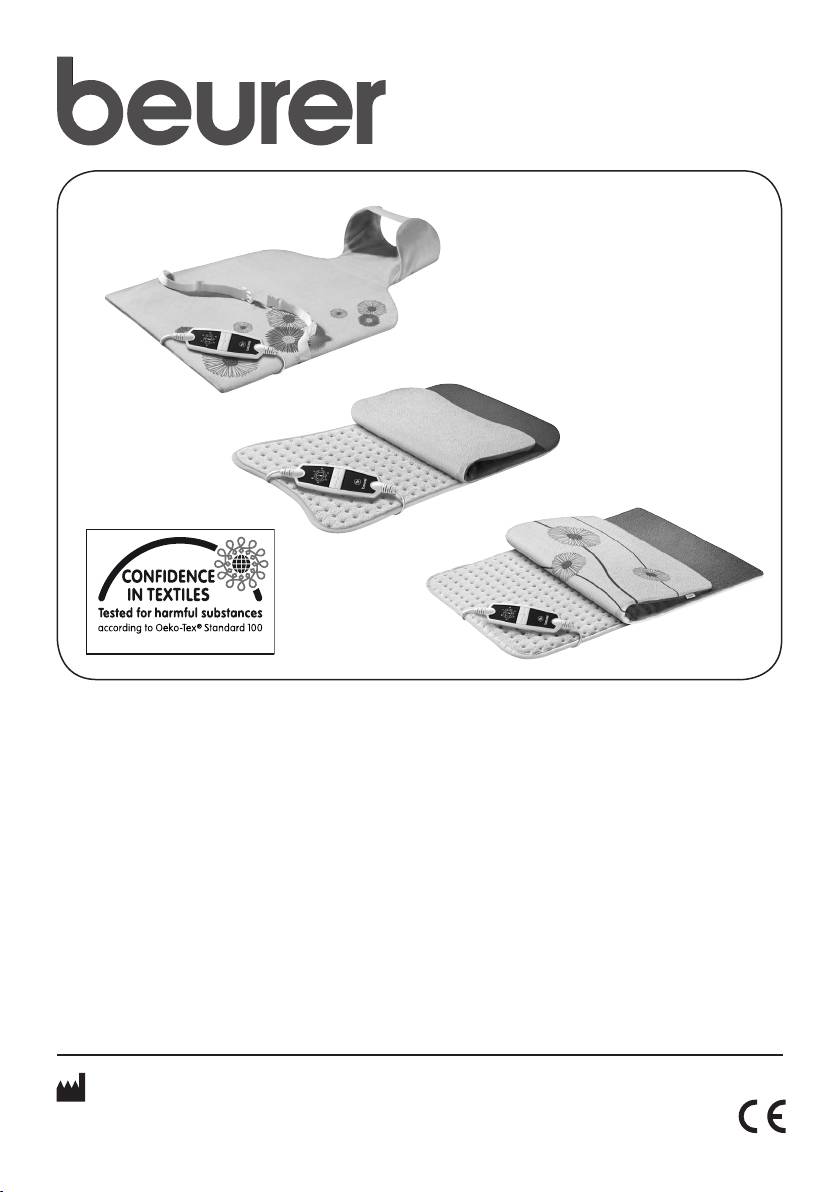
HK 58 Cosy
HK 115 Cosy
HK 125 XXL
06.0.43510
Hohenstein
D
Heizkissen
I
Cuscino riscaldante
Gebrauchsanweisung ........... 2
Instruzioni per l´uso ............ 29
G
Heating pad
T
Isıtmalı yastık
Instruction for Use ................ 9
Kullanma Talimatı ............... 35
F
Coussin chauffant
r
Электрическая грелка
Mode d´emploi .................... 15
Инструкция по применению .. 41
E
Almohadas eléctricas
Q
Poduszka elektryczna
Instrucciones para el uso ... 22
Instrukcja obsługi ............... 49
Beurer GmbH • Söinger Str. 218 • D-89077 Ulm, Germany
Tel.: +49 (0)7 31 / 39 89-144 • Fax: +49 (0)7 31 / 39 89-255
www.beurer.com • Mail: kd@beurer.de
DEUTSCH
Inhalt
1. Lieferumfang.......................................................3
4.5 Temperatur einstellen ................................... 6
1.1 Gerätebeschreibung ......................................... 3
4.6 Abschaltautomatik ........................................6
2. Wichtige Anweisungen
4.7 Ausschalten .................................................. 6
Für den späteren Gebrauch aufbewahren .......... 3
5. Reinigung und Pflege .........................................6
3. Bestimmungsgemäße Verwendung ...................5
6. Aufbewahrung ....................................................7
4. Bedienung ..........................................................5
7. Entsorgung .........................................................8
4.1 Sicherheit ......................................................5
8. Was tun bei Problemen? ....................................8
4.2 Inbetriebnahme.............................................5
9. Technische Daten ............................................... 8
4.3 Zusatzhinweise HK 58 Cosy .........................5
10. Garantie ............................................................ 8
4.4 Einschalten ...................................................5
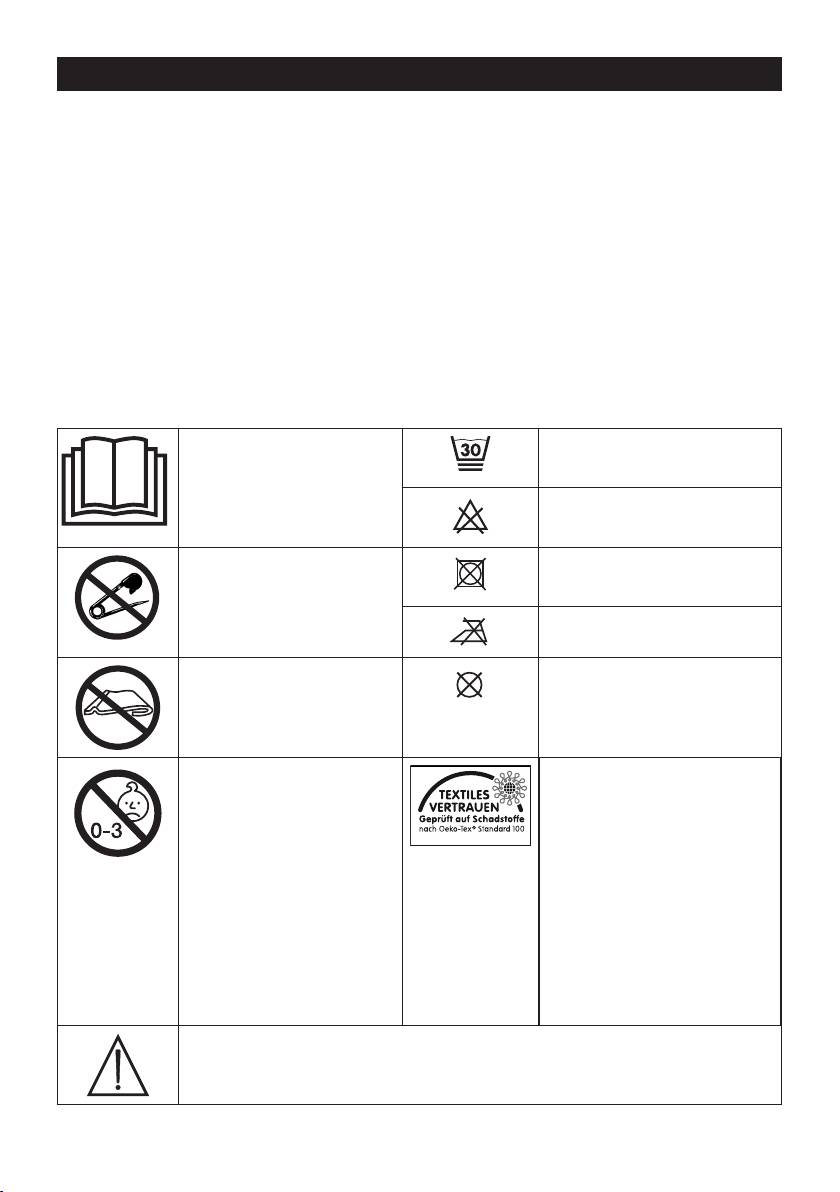
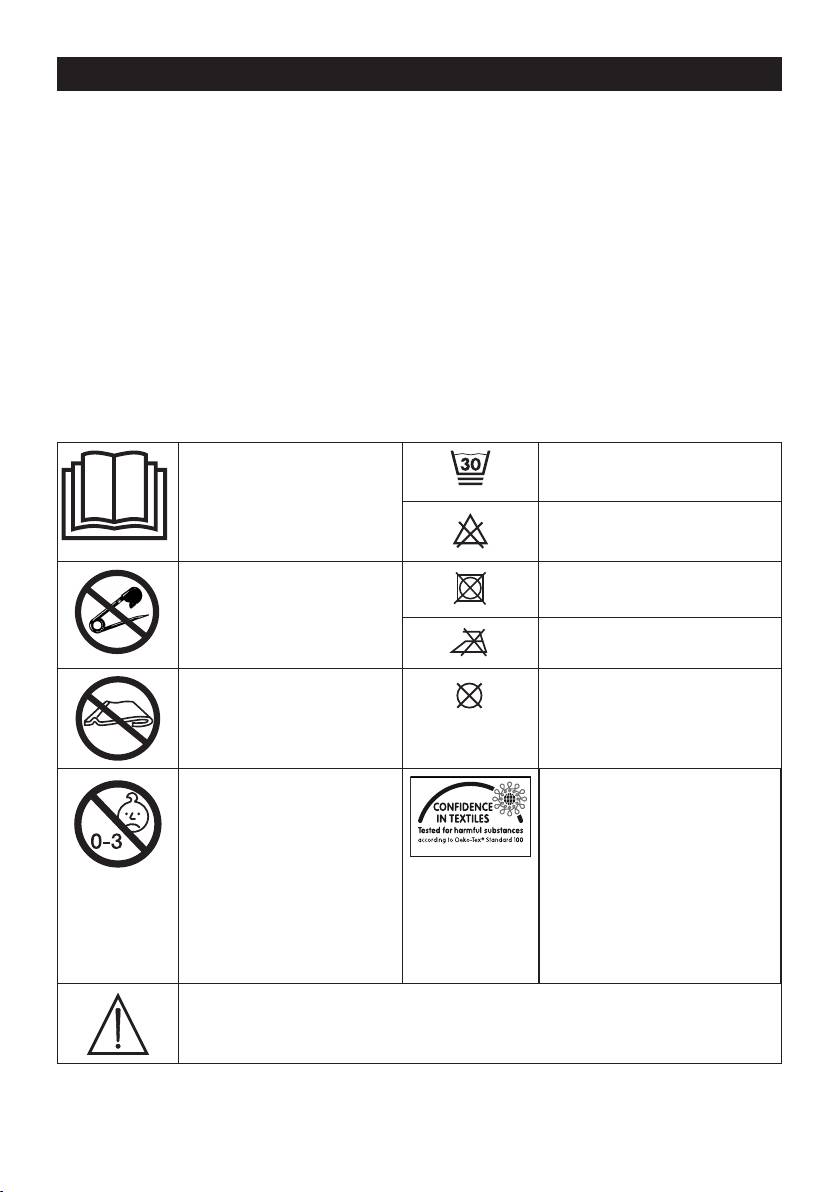
Zeichenerklärung
Anweisungen lesen Extra Schonwasch-
gang mit 30°C
Nicht bleichen
Keine Nadeln hinein-
Nicht im Trockner
stecken
trocknen
Nicht bügeln
Nicht gefaltet oder
Nicht chemisch
zusammengescho-
reinigen
ben gebrauchen!
Darf nicht von sehr
Die bei diesem Gerät
jungen Kindern (0-3
eingesetzten Textili-
Jahren) benutzt wer-
en erfüllen die hohen
06.0.43510
Hohenstein
den.
humanökologischen
Anforderungen des
Öko-Tex Standards
100, wie durch das
Forschungsinstitut
Hohenstein nachge-
wiesen.
WARNUNG; Warnhinweis auf Verletzungsgefahren oder
Gefahren für ihre Gesundheit
2

ACHTUNG; Sicherheitshinweis auf mögliche Schäden am
Gerät/Zubehör.
HINWEIS; Hinweis auf wichtige Informationen.
1. Lieferumfang
1 Heizkissen
1 Bezug
6
1 Schalter
5
1 Gebrauchsanweisung
4
5
6
4
1
3
2
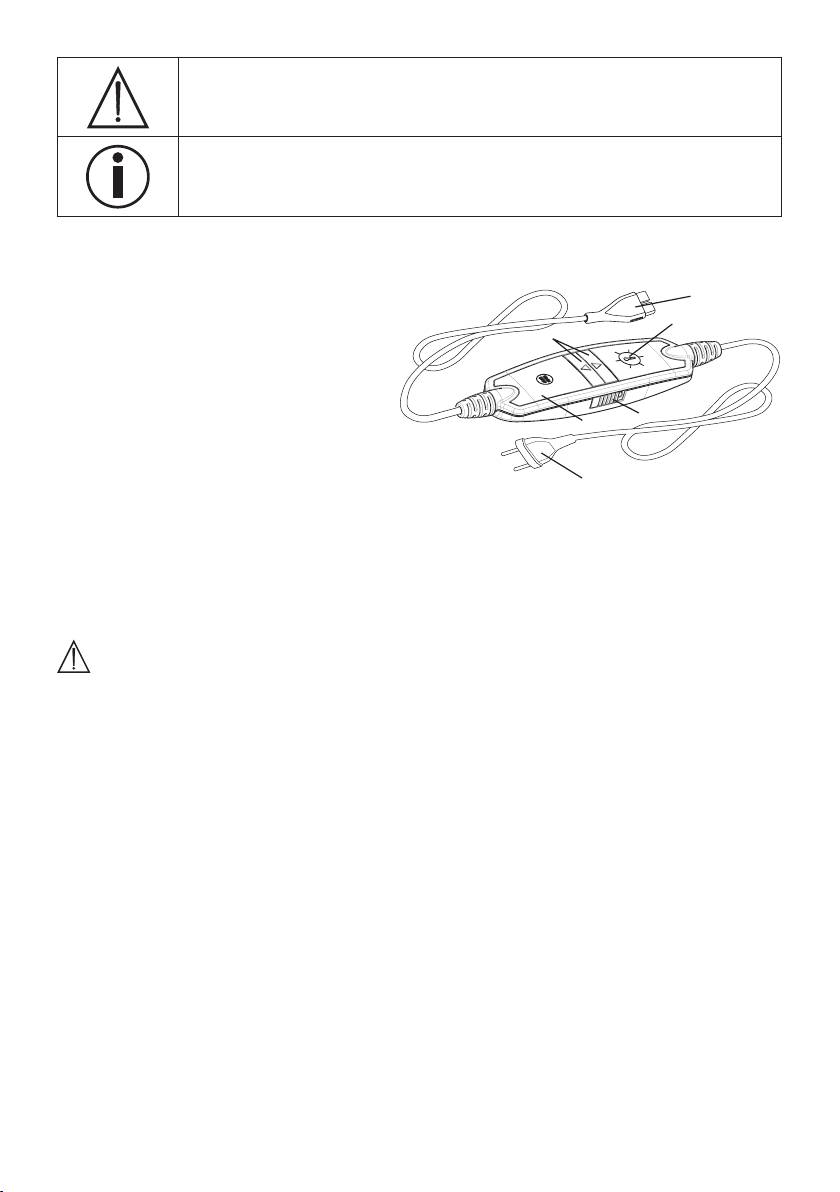
1.1 Gerätebeschreibung
1. Netzstecker
3
2
2. Schalter
3. Schiebeschalter (EIN = I / AUS = 0 )
4. Tasten zur Temperatureinstellung
1
5. Beleuchtete Anzeige der Temperaturstufen
6. Steckkupplung
2. Wichtige Anweisungen
Für den späteren Gebrauch aufbewahren
WARNUNG
• Ein Nichtbeachten der nachfolgenden Hinweise kann Personen- oder
Sachschaden (elektrischer Schlag, Hautverbrennung, Brand) verur-
sachen. Die folgenden Sicherheits- und Gefahrenhinweise dienen
nicht nur zum Schutz Ihrer Gesundheit bzw. der Gesundheit Dritter,
sondern auch zum Schutz des Produktes. Beachten Sie daher diese
Sicherheitshinweise und übergeben Sie diese Anleitung bei Weiterga-
be des Artikels.
• Dieses Heizkissen darf nicht von Personen benutzt werden, die
unempfindlich gegen Hitze sind und von anderen schutzbedürftigen
Personen, die nicht auf eine Überhitzung reagieren können.
• Dieses Heizkissen darf nicht bei sehr jungen Kindern (0-3 Jahre)
angewandt werden, weil diese nicht auf eine Überhitzung reagieren
können.
• Dieses Heizkissen darf nicht von jungen Kindern (3-8 Jahre) benutzt
werden, es sei denn der Schalter wurde von einem Elternteil oder
einer Aufsichtsperson eingestellt und das Kind wurde ausreichend
eingewiesen wie es das Heizkissen sicher betreibt.
3

• Dieses Heizkissen kann von älteren Kindern ab 8 Jahren und darüber
sowie von Personen mit verringerten physischen, sensorischen oder
mentalen Fähigkeiten oder Mangel an Erfahrung und Wissen benutzt
werden, wenn Sie beaufsichtigt werden und bezüglich des sicheren
Gebrauchs des Heizkissens unterwiesen wurden und die daraus
resultierenden Gefahren verstehen.
• Kinder dürfen nicht mit dem Heizkissen spielen.
• Reinigung und Benutzer-Wartung dürfen nicht von Kindern ohne
Beaufsichtigung durchgeführt werden.
• Dieses Heizkissen ist nicht für den Gebrauch in Krankenhäusern
bestimmt.
• Keine Nadeln hineinstechen
• Nicht gefaltet oder zusammengeschoben benutzen
• Nicht nass benutzen
• Dieses Heizkissen darf nur in Verbindung mit dem auf dem Etikett
angegeben Schalter betrieben werden.
• Die von diesem Heizkissen ausgehenden elektrischen und magne-
tischen Felder können unter Umstanden die Funktion Ihres Herz-
schrittmachers stören. Sie liegen jedoch weit unter den Grenzwerten:
elektrische Feldstarke: max. 5000 V/m, magnetische Feldstärke: max.
80 A/m, magnetische Flussdichte: max. 0,1 Milli-Tesla.
Bitte befragen Sie deshalb Ihren Arzt und den Hersteller Ihres Herz-
schrittmachers vor der Benutzung dieses Heizkissens.
• Nicht an den Leitungen ziehen, drehen oder sie scharf knicken.
• Dieses Heizkissen ist häufig dahingehend zu prüfen, ob es Anzeichen
von Abnutzung oder Beschädigung zeigt.
Falls solche Anzeichen vorhanden sind, das Heizkissen unsachge-
mäß gebraucht wurde oder es sich nicht mehr erwärmt, muss es vor
erneutem Einschalten erst durch den Hersteller überprüft werden.
• Wenn die Netzanschlussleitung dieses Heizkissens beschädigt wird,
muss sie durch den Hersteller oder seinen Kundendienst oder eine
ähnlich qualifizierte Person ersetzt werden, um Gefährdungen zu
vermeiden.
• Während dieses Heizkissen eingeschaltet ist, darf
– kein Gegenstand (z. B. Koffer oder Wäschekorb) daraufgelegt
werden,
– keine Wärmequelle wie Bettflasche, Heizkissen oder ähnliches
daraufgelegt werden.
• Die elektronischen Bauteile im Schalter erwärmen sich beim Ge-
brauch des Heizkissens. Der Schalter darf deshalb nicht abgedeckt
werden oder auf dem Heizkissen liegen wenn es betrieben wird.
4
• Beachten Sie unbedingt die Hinweise zur Bedienung (Kapitel 4), zur
Reinigung und Pflege (Kapitel 5) und zur Aufbewahrung (Kapitel 6).
• Sollten Sie noch Fragen zur Anwendung unserer Geräte haben, so
wenden Sie sich bitte an unseren Kundenservice.
3. Bestimmungsgemäße Verwendung
ACHTUNG
Dieses Heizkissen ist nur zur Erwärmung des menschlichen Körpers bestimmt.
4. Bedienung
4.1 Sicherheit
ACHTUNG
D
as Heizkissen ist mit einem SICHERHEITS-SYSTEM ausgestattet. Diese Sensortechnik verhindert
eine Überhitzung des Heizkissens auf seiner gesamten Fläche durch automatische Abschaltung im
Fehlerfall. Wenn das SICHERHEITS-SYSTEM das Heizkissen abgeschaltet hat, werden die Tempera-
turstufen im eingeschalteten Zustand nicht mehr beleuchtet. Bitte beachten Sie, dass das Heizkissen
nach einem Fehlerfall aus Gründen der Sicherheit nicht mehr betrieben werden kann und an die
angegebene Service-Adresse eingesendet werden muss.
4.2 Inbetriebnahme
ACHTUNG
Stellen Sie sicher, dass sich das Heizkissen im Gebrauch nicht zusammenschiebt oder Falten bildet.
•
Verbinden Sie zuerst den Schalter mit dem Heizkörper in dem Sie die
Steckkupplung zusammenfügen.
•
Stecken Sie danach den Netzstecker in die Steckdose.
4.3 Zusatzhinweise HK 58 Cosy
Die besondere Form dieses Heizkissens wurde speziell für die Anwendung in
der Rücken- und Nackenpartie entwickelt. Positionieren Sie das Heizkissen
so am Rücken, dass sich der Klettverschluss des Nackenteils im Bereich des
Halses befindet. Schließen Sie danach zuerst den Klettverschluss. Passen
Sie dann die Länge des Bauchgurtes individuell an und fügen Sie die beiden
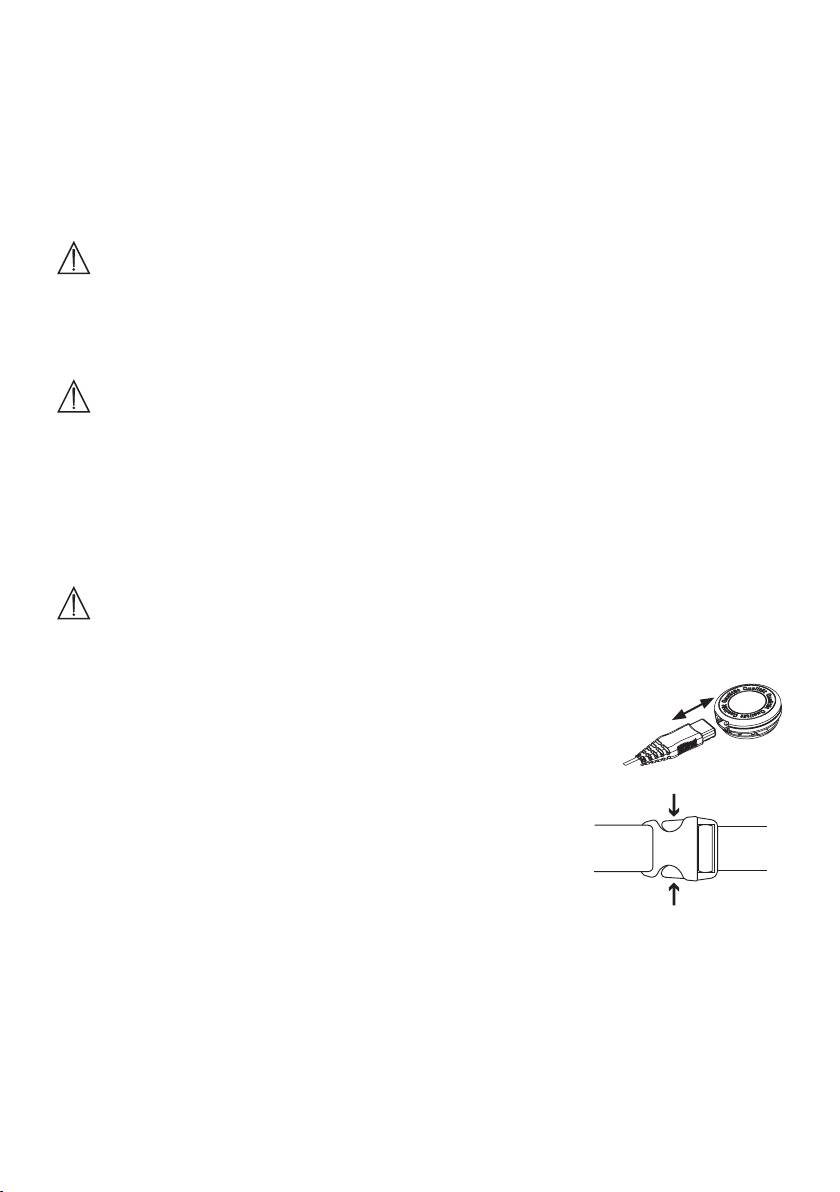
Enden des Steckverbinders ineinander, um ihn zu schließen.
Drücken Sie zum Öffnen des Steckverbinders gleichzeitig die Entriegelungen,
wie abgebildet.
4.4 Einschalten
Stellen Sie den Schiebeschalter (3) auf der rechten Seite des Schalters auf Stufe „I“ (EIN) - siehe Abb. Schalter.
Im eingeschalteten Zustand ist die Anzeige der Temperaturstufen beleuchtet.
5
la banda abdominal y aproxime los dos extremos conectores para
cerrarlos. Para separar los extremos conectores, apriete a la vez
el dispositivo de desbloqueo tal como se indica en la imagen.
Compruebe primero que el interruptor está conectado a la almo-
hada eléctrica. Conecte el enchufe a la toma de red.
5
3.3 Selección de temperatura
La almohada eléctrica se calienta más rápidamente si se ajusta el escalón de temperatura
más alto. Posteriormente, si es necesario, se puede pasar a un escalón más bajo. Tras
encender la almohada eléctrica, el indicador del escalón de temperatura seleccionado
parpadea brevemente y después se enciende. Se recomienda utilizar el escalón de
temperatura más bajo en caso de uso prolongado de la almohada eléctrica.
3.4 Escalones de temperatura
Escalón: 0 = apagada
1 = calor mínimo
2 = calor medio
3 = calor máximo
3.5 Calentamiento rápido
Esta almohada eléctrica cuenta con un sistema calentamiento rápido que permite que
se caliente rápidamente en 10 minutos.
3.6 Sistema de desconexión automática
La almohada eléctrica se desconecta automáticamente después de unos 90 minutos. En
este momento el indicador del escalón de temperatura comienza a parpadear. Para volver
a encender la almohada eléctrica, coloque el interruptor en la posición “0” y después
de unos 5 segundos seleccione el escalón de temperatura deseado. Desconecte la
almohada eléctrica (escalón “0”) o desenchufe el cable de la caja de toma de red, si la
almohada eléctrica no se continuará utilizando después de apagarla.
4. Datos técnicos
Tipo: P10 F
Alimentación de tensión: 220–240 V / 50-60 Hz
Potencia absorbida: 100 W
Dimensiones: aproximadamente 54 x 38 cm
Fabricante: MGG Elektro GmbH, Königsbrückerstr. 61, 01099 Dresden, Germany
5. Limpieza y cuidado
Antes de limpiar la almohada
eléctrica desenchufe siemp-
re el cable de la caja de toma de red.
Primero abra la cremallera de la funda textil y
extraiga la almohada eléctrica. La funda textil
puede lavarse de acuerdo con los símbolos
de limpieza indicados en la etiqueta.
Las pequeñas manchas de la almohada eléc-
trica pueden ser eliminadas mediante
un paño o una esponja húme-
da y eventualmente con un
detergente líquido para ropa
blanca fina. Para la limpieza nunca utilice
detergentes que contengan diluyentes.
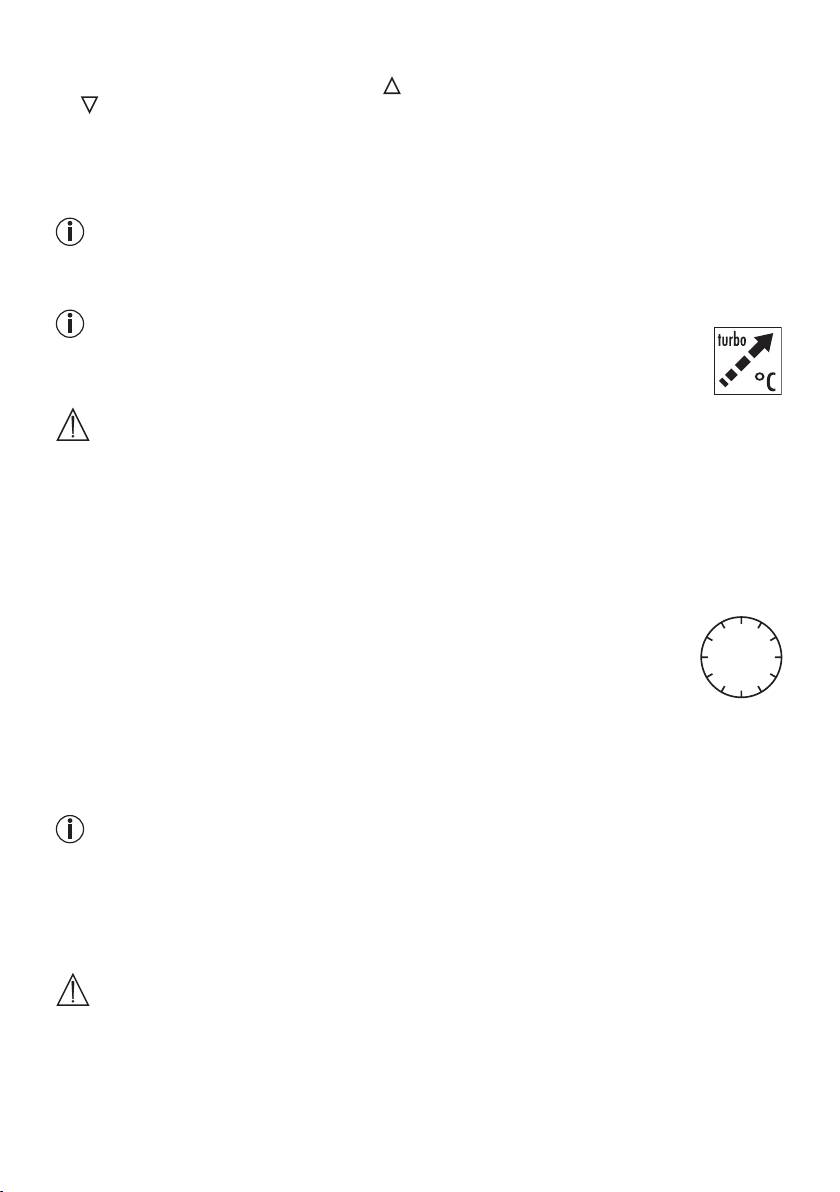
4.5 Temperatur einstellen
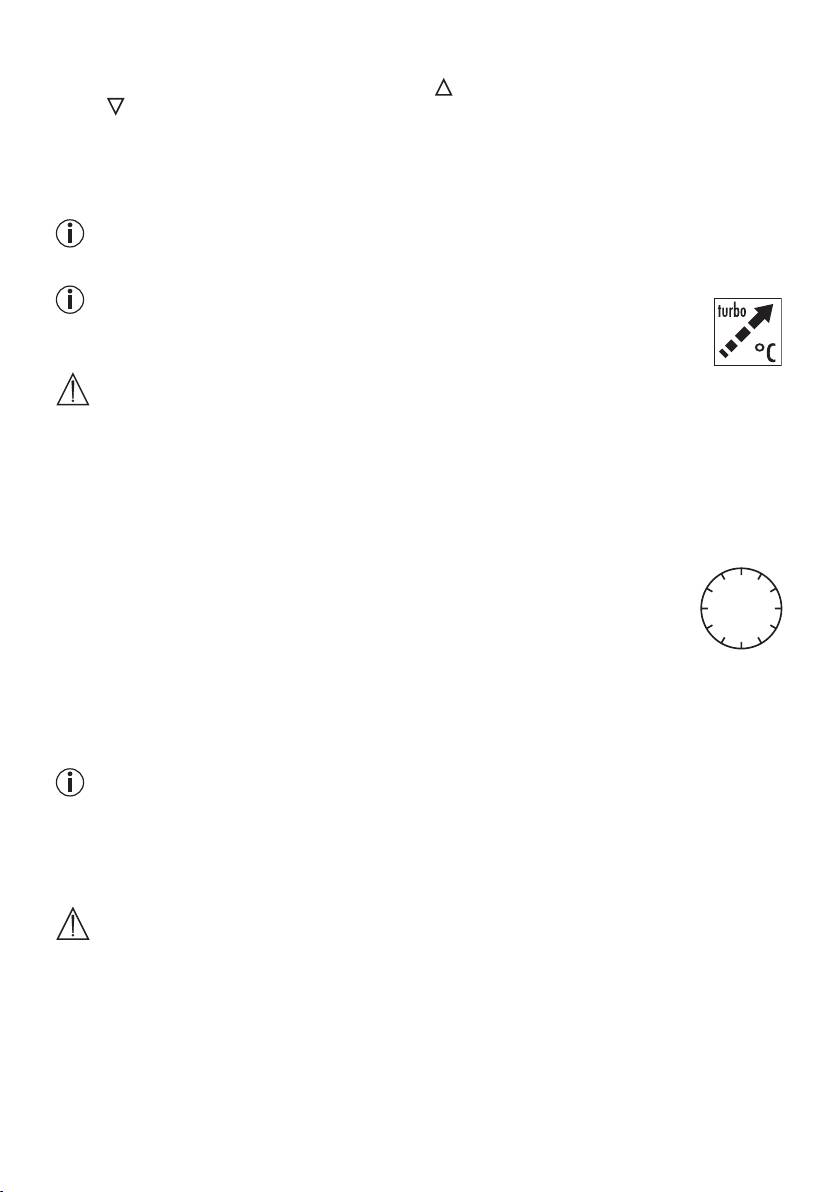
Um die Temperatur zu erhöhen, drücken Sie die -Taste (4). Um die Temperatur zu verringern, drücken Sie
die
-Taste (4).
Stufe 1: Minimale Wärme
Stufe 2-5: Individuelle Wärme
Stufe 6: Maximale Wärme
HINWEIS
Die schnellste Erwärmung des Heizkissens erreichen Sie, indem Sie zuerst die höchste Temperatur-
stufe einstellen.
HINWEIS
Diese Heizkissen verfügen über eine Schnellheizung, die zu einer schnellen Erwärmung
innerhalb der ersten 10 Minuten führt.
WARNUNG
Wenn das Heizkissen über mehrere Stunden benutzt wird, empfehlen
wir die niedrigste Temperaturstufe am Schalter einzustellen, um eine
Überhitzung des erwärmten Körperteils, und in Folge ggf. eine Haut-
verbrennung zu vermeiden.
4.6 Abschaltautomatik
Dieses Heizkissen ist mit einer Abschaltautomatik ausgestattet. Diese stoppt die Wärmezufuhr
ca. 90 Minuten nach der Inbetriebnahme des Heizkissens. Ein Teil der angezeigten Tempera-
90 min
turstufen am Schalter beginnt dann zu blinken. Um das Heizkissen erneut in Betrieb nehmen
STOP
zu können, stellen Sie den seitlichen Schiebeschalter (3) zunächst auf Stufe „0“ (AUS). Nach
ungefähr 5 Sekunden ist ein erneutes Einschalten möglich.
4.7 Ausschalten
Stellen Sie den seitlichen Schiebeschalter am Schalter auf die Stufe „0“ (AUS), um das Heizkissen auszu-
schalten. Die Anzeige der Temperaturstufen ist dann nicht mehr beleuchtet.
HINWEIS
Falls das Heizkissen nicht verwendet wird, stellen Sie den seitlichen Schiebeschalter für EIN/AUS
auf die Stufe „0“ (AUS) und ziehen Sie den Netzstecker aus der Steckdose. Trennen Sie anschlie-
ßend die Steckkupplung und somit den Schalter vom Heizkissen.
5. Reinigung und Pflege
WARNUNG
Ziehen Sie vor der Reinigung immer zuerst den Netzstecker aus der
Steckdose. Trennen Sie anschließend die Steckkupplung und somit
den Schalter vom Heizkissen.
6
ACHTUNG
• Der Schalter darf niemals mit Wasser oder mit anderen Flüssigkeiten in Kontakt kommen. Er kann
sonst beschädigt werden.
Verwenden Sie zur Reinigung des Schalters ein trockenes fusselfreies Tuch. Verwenden Sie keine chemischen
Reiniger oder Scheuermittel.
Der Textilbezug kann gemäß den Symbolen auf dem Etikett gereinigt werden und muss zu diesem Zweck
zuvor entfernt werden.
Kleine Flecken auf dem Heizkissen können mir einem angefeuchteten Tuch sowie ggf. mit etwas flüssigem
Feinwaschmittel entfernt werden.
ACHTUNG
• B eachten Sie, dass das Heizkissen nicht chemisch gereinigt, ausgewrungen, maschinell getrocknet,
gemangelt oder gebügelt werden darf.
Dieses Heizkissen ist maschinenwaschbar. Stellen Sie die Waschmaschine auf einen besonders schonenden
Waschgang bei 30 °C ein (Wollwaschgang). Benutzen Sie ein Feinwaschmittel und dosieren Sie es nach
Angaben des Herstellers.
ACHTUNG
• Bitte beachten Sie, dass das Heizkissen durch allzu häufiges Waschen beansprucht wird.
Das Heizkissen sollte deshalb während der gesamten Lebensdauer max. 10 Mal in einer
Waschmaschine gewaschen werden.
Ziehen Sie direkt nach dem Waschen das noch feuchte Heizkissen auf das Originalmaß in Form und lassen
Sie es flach ausgebreitet auf einem Wäscheständer trocknen.
ACHTUNG
• Verwenden Sie keine Wäscheklammern oder ähnliches um das Heizkissen am Wäscheständer zu
befestigen. Andernfalls kann das Heizkissen beschädigt werden.
• Verbinden Sie den Schalter erst wieder mit dem Heizkissen wenn die Steckkupplung, das
Heizkissen und der Textilbezug vollständig trocken sind. Andernfalls kann das Heizkissen
beschädigt werden.
WARNUNG
•
Schalten Sie das Heizkissen auf keinen Fall zum Trocknen ein! Andernfalls besteht die Gefahr
eines elektrischen Schlages.
6. Aufbewahrung
Wenn Sie das Heizkissen längere Zeit nicht verwenden, empfehlen wir Ihnen, es in der Originalverpackung
aufzubewahren.
7
ACHTUNG
B
itte lassen Sie das Heizkissen zuvor abkühlen. Andernfalls kann das Heizkissen beschädigt
werden. Legen Sie während der Lagerung keine Gegenstände auf dem Heizkissen ab um zu ver-
meiden, dass es scharf geknickt wird.
7. Entsorgung
Bitte entsorgen Sie das Heizkissen gemäß der Elektro- und Elektronik Altgeräte Verordnung 2002/96/EC
– WEEE (Waste Electrical and Electronic Equipment). Bei Rückfragen wenden Sie sich
bitte an die für die Entsorgung zuständige kommunale Behörde.
8. Was tun bei Problemen?
Problem Ursache Behebung
Die Temperaturstufen werden nicht beleuchtet während
Das Sicherheitssystem
Senden Sie das
-
der Schalter vollständig mit dem Heizkissen verbunden
hat das Heizkissen irre-
Heizkissen und den
ist
versibel abgeschaltet.
Schalter zum Service
- der Netzstecker mit einer funktionierenden Steckdose
ein.
verbunden ist
- der seitliche Schiebeschalter am Schalter auf Stufe „I“
(EIN) steht
9. Technische Daten
Siehe Typschild-Etikett am Heizkissen.
10. Garantie
Wir leisten 3 Jahre Garantie für Material- und Fabrikationsfehler des Produktes. Die Garantie gilt nicht:
• im Falle von Schäden, die auf unsachgemäßer Bedienung beruhen,
• für Verschleißteile,
• für Mängel, die dem Kunden bereits beim Kauf bekannt waren,
• bei Eigenverschulden des Kunden,
• bei Fremdeingriffen.
Die gesetzlichen Gewährleistungen des Kunden bleiben durch die Garantie unberührt. Für Geltendmachung
eines Garantiefalles innerhalb der Garantiezeit ist durch den Kunden der Nachweis des Kaufes zu führen.
Die Garantie ist innerhalb eines Zeitraumes von 3 Jahren ab Kaufdatum gegenüber der Beurer GmbH, Söf-
linger Straße 218, 89077 Ulm, Deutschland geltend zu machen. Der Kunde hat im Garantiefall das Recht zur
Reparatur der Ware bei unseren eigenen oder bei von uns autorisierten Werkstätten. Weitergehende Rechte
werden dem Kunden (aufgrund der Garantie) nicht eingeräumt.
8
ENGLISH
Contents
1. Items included in the package ......................10
4.4 Switching on ............................................12
1.1 Description ..............................................10
4.5 Setting the temperature ...........................12
2. Important instructions
4.6 Automatic switch-off ...............................13
Retain for future use .....................................10
4.7 Switching off ............................................13
3. Intended use ..................................................12
5. Cleaning and maintenance ............................13
4. Operation .......................................................12
6. Storage ..........................................................14
4.1 Safety ......................................................12
7. Disposal .........................................................14
4.2 Initial use..................................................12
8. What if there are problems? ..........................14
4.3 Additional information for HK 58 Cosy ....12
9. Technical data ...............................................14
Explanation of symbols
Read the instructions 30°C extra gentle
washing program
Do not bleach
Do not insert pins Do not tumble dry
Do not iron
Do not use folded or
Do not dry-clean
rucked
Not to be used by
The textiles used for
very young children
this device meet the
(0 - 3 years).
stringent human eco-
06.0.43510
Hohenstein
logical requirements
of Oeko Tex Standard
100, as verified by
Hohenstein Research
Institute.
WARNING: Warning of risks of injury or health hazards
9
CAUTION: Safety information about possible damage to
appliance/accessories.
NOTE: Important information.
1. Items included in the package
1 Heating pad
1 Cover
6
1 Controller
5
1 Instructions for use
4
5
6
4
1
3
2
1.1 Description
1. Supply plug
3
2
2. Controller
3. Sliding switch (ON = I / OFF = 0 )
4. Buttons for setting temperature
1
5. Illuminated display for temperature settings
6. Plug-in coupling
2. Important instructions
Retain for future use
WARNING
• Non-observance of the following notes may result in personal injury
or material damage (electric shock, skin burns, fire). The following
safety and hazard information is not only intended to protect your
health and the health of others, it should also protect the product.
For this reason, pay attention to these safety notes and include these
instructions when handing over the product to others.
• This heating pad must not be used by people who are not sensitive
to heat or by vulnerable people who may not be able to react to over-
heating.
• This heating pad may not be used by very young children (0-3 years
old) as they are unable to respond to overheating.
• This heating pad may not be used by young children (3-8 years old)
unless the controller has been set by a parent or responsible adult
and the child has been given adequate instructions on how to use the
heating pad safely.
• This heating pad may be used by children over the age of 8 and by
people with reduced physical, sensory or mental skills or a lack of ex-
10

perience or knowledge, provided that they are supervised and have
been instructed on how to use the heating pad safely, and are fully
aware of the consequent risks of use.
• Children must not play with the heating pad.
• Cleaning and user maintenance must not be performed by children
unless supervised.
• This heating pad is not designed for use in hospitals.
• Do not insert needles.
• Do not use when folded or bunched up.
• Do not use if wet.
• This heating pad may only be used in conjunction with the controller
specified on the label.
• The electrical and magnetic fields emitted by this heating pad may
interfere with the function of a pacemaker. However, they are still well
within the limits: electrical field strength: max. 5000 V/m, magnetic
field strength: max. 80 A/m, magnetic flux density: max. 0.1 millitesla.
Please consult your doctor and the manufacturer of your pacemaker
before using this heating pad.
• Do not pull, twist or make sharp bends in the cables.
• Please check this heating pad frequently for signs of wear and tear or
damage.
If any such signs are evident, if the heating pad has been used incor-
rectly or if it no longer heats up, it must be checked by the manufac-
turer before being switched on again.
• If the mains connection cable of the heating pad is damaged, it must
be replaced by the manufacturer, its customer service department or
a similarly qualified person to avoid any risk.
• While the heating pad is switched on, the following conditions must
be observed:
– Objects must not be placed on the pad (e.g. suitcase or washing
basket).
– Heat sources, such as hot water bottles, heating pads or similar,
must not be placed on the pad.
• The electronic components in the controller warm up when the
heating pad is in use. For this reason, the controller must never be
covered or placed on the heating pad when it is in use.
• Always observe the notes on operation (section 4), cleaning and
maintenance (section 5) and storage (section 6).
• If you should have any questions about using our devices, please
contact Customer Services.
11
3. Intended use
CAUTION
This heating pad is only designed to warm up the human body.
4. Operation
4.1 Safety
CAUTION
The heating pad is fitted with a SAFETY SYSTEM. This sensor technology provides protection against
overheating across the entire surface of the heating pad with an automatic switch-off in the event of a
fault. If the SAFETY SYSTEM has switched off the heating pad, the temperature settings are no longer
illuminated when switched on. Please note that for safety reasons, the heating pad can no longer be
operated after a fault has occurred and must be sent to the specified service address.
4.2 Initial use
CAUTION
Ensure that the heating pad will not bunch up or become folded during use.
• First, connect the controller to the heating pad by inserting the plug-in coupling.
• Then plug the mains plug into the socket.
4.3 Additional information for HK 58 Cosy
The exclusive shape of this heating pad was developed specifically for use
on the back and neck. Position the heating pad on the back so that the hook
and loop fastener on the neck part is in line with your neck. Then close the
hook and loop fastener. Adjust the length of the abdominal belt so that you
are comfortable and fasten the buckle by fitting one end into the other.
To undo the buckle, push both sides of the clasp together as shown in the
image.
4.4 Switching on
Push the sliding switch (3) on the right side of the controller to the setting “I” (ON) – see image of controller.
When the switch is on, the temperature settings display is illuminated.
4.5 Setting the temperature
To increase the temperature, press the button (4). To reduce the temperature, press the button (4).
Level 1: minimum heat
Level 2-5: individual heat setting
Level 6: maximum heat
NOTE:
• The fastest way to warm up the heating pad is to initially set the highest temperature setting.
NOTE:
These heating pads have a fast heating function, which allows the pad to warm up faster
in the first 10 minutes.
12
la banda abdominal y aproxime los dos extremos conectores para
cerrarlos. Para separar los extremos conectores, apriete a la vez
el dispositivo de desbloqueo tal como se indica en la imagen.
Compruebe primero que el interruptor está conectado a la almo-
hada eléctrica. Conecte el enchufe a la toma de red.
5
3.3 Selección de temperatura
La almohada eléctrica se calienta más rápidamente si se ajusta el escalón de temperatura
más alto. Posteriormente, si es necesario, se puede pasar a un escalón más bajo. Tras
encender la almohada eléctrica, el indicador del escalón de temperatura seleccionado
parpadea brevemente y después se enciende. Se recomienda utilizar el escalón de
temperatura más bajo en caso de uso prolongado de la almohada eléctrica.
3.4 Escalones de temperatura
Escalón: 0 = apagada
1 = calor mínimo
2 = calor medio
3 = calor máximo
3.5 Calentamiento rápido
Esta almohada eléctrica cuenta con un sistema calentamiento rápido que permite que
se caliente rápidamente en 10 minutos.
3.6 Sistema de desconexión automática
La almohada eléctrica se desconecta automáticamente después de unos 90 minutos. En
este momento el indicador del escalón de temperatura comienza a parpadear. Para volver
a encender la almohada eléctrica, coloque el interruptor en la posición “0” y después
de unos 5 segundos seleccione el escalón de temperatura deseado. Desconecte la
almohada eléctrica (escalón “0”) o desenchufe el cable de la caja de toma de red, si la
almohada eléctrica no se continuará utilizando después de apagarla.
4. Datos técnicos
Tipo: P10 F
Alimentación de tensión: 220–240 V / 50-60 Hz
Potencia absorbida: 100 W
Dimensiones: aproximadamente 54 x 38 cm
Fabricante: MGG Elektro GmbH, Königsbrückerstr. 61, 01099 Dresden, Germany
5. Limpieza y cuidado
Antes de limpiar la almohada
eléctrica desenchufe siemp-
re el cable de la caja de toma de red.
Primero abra la cremallera de la funda textil y
extraiga la almohada eléctrica. La funda textil
puede lavarse de acuerdo con los símbolos
de limpieza indicados en la etiqueta.
Las pequeñas manchas de la almohada eléc-
trica pueden ser eliminadas mediante
un paño o una esponja húme-
da y eventualmente con un
detergente líquido para ropa
blanca fina. Para la limpieza nunca utilice
detergentes que contengan diluyentes.
WARNING
If the heating pad is being used over several hours, we recommend
that you set the lowest temperature setting on the controller to avoid
overheating the heated body part, which may lead to burns to the skin.
4.6 Automatic switch-off
This heating pad is equipped with an automatic switch-off function. This turns off the heat supply
approx. 90 minutes after the initial use of the heating pad. A part of the displayed temperature
90 min
settings on the controller then begins to flash. So that the heating pad can be switched back
STOP
on, the side sliding switch (3) must first be set to setting “0” (OFF). After about 5 seconds it is
possible to switch it on again.
4.7 Switching off
To switch the heating pad off, set the sliding switch on the side of the controller to setting “0” (OFF). The
temperature settings display is no longer illuminated.
NOTE:
If the heating pad is not in use, switch the side sliding switch for ON/OFF to setting “0” (OFF) and
unplug the mains plug from the socket. Then disconnect the controller from the heating pad by un-
plugging the plug-in coupling.
5. Cleaning and maintenance
WARNING
Before cleaning, always remove the mains plug from the socket first.
Then disconnect the controller from the heating pad by unplugging
the plug-in coupling.
CAUTION
• The controller must never come into contact with water or other liquids, as this may cause damage.
To clean the controller, use a dry, lint-free cloth. Do not use any chemical or abrasive cleaning agents.
The textile cover can be cleaned in accordance with the symbols on the label and must be removed from
the heating pad prior to cleaning.
Small marks on the heating pad can be removed with a damp cloth and if necessary, with a little liquid
detergent for delicate laundry.
CAUTION
• Please note that the heating pad may not be chemically cleaned, wrung out, tumble dried, put
through a mangle or ironed.
This heating pad is machine-washable. Set the washing machine to a particularly gentle wash cycle at 30°C
(wool cycle). Use a delicate laundry detergent and measure it out according to the manufacturer’s instructions.
13
CAUTION
• Please note that frequent washing of the heating pad has a negative effect on the product. The
heating pad should therefore be washed in a washing machine a maximum of 10 times during its
life.
Immediately after washing, reshape the heating pad to its original dimensions while it is still damp and spread
it out flat on a clothes horse to dry.
CAUTION
• Do not use pegs or similar items to attach the heating pad to the clothes horse. Otherwise the
heating pad may be damaged.
• Do not reconnect the controller to the heating pad until the plug-in coupling, heating pad and textile
cover are completely dry. Otherwise the heating pad may be damaged.
WARNING
• Never switch the heating pad on to dry it! Otherwise there is a risk of electric shock.
6. Storage
If you do not plan to use the heating pad for a long period of time, we recommend that you store it in the
original packaging.
CAUTION
Please allow the heating pad to cool down before storing. Otherwise the heating pad may be damaged.
To avoid sharp folds in the heating pad, do not place any objects on top of it while it is being stored.
7. Disposal
Please dispose of the heating pad in accordance with Directive 2002/96/EC on
Waste Electrical and Electronic Equipment (WEEE). In case of queries, please contact the
municipal authorities responsible for waste disposal in your area.
8. What if there are problems?
Problem Cause Solution
The temperature settings are not illuminated while
The safety system has
Send the heating pad
- the controller is properly connected to the heating pad
switched the heating
and the controller for
- the mains plug is connected to a working socket
pad off permanently.
servicing.
- the side sliding switch on the controller is set to setting
“I” (ON)
9. Technical data
See the rating plate label on the heating pad.
14
FRANÇAIS
Sommaire
1. Livraison ......................................................... 16
4.4 Mise sous tension ..................................... 19
1.1 Description de l’appareil ........................... 16
4.5 Réglage de la température ....................... 19
2. Consignes importantes
4.6 Arrêt automatique ..................................... 19
À conserver pour un usage ultérieur !............. 18
4.7 Mise hors tension ..................................... 19
3. Utilisation conforme aux recommandations ... 18
5. Nettoyage et entretien .................................... 19
4. Utilisation ........................................................ 18
6. Rangement ..................................................... 20
4.1 Sécurité .................................................... 18
7. Élimination ...................................................... 21
4.2 Mise en service ......................................... 18
8. Que faire en cas de problèmes ?.................... 21
4.3 Remarques supplémentaires HK 58 Cosy 18
9. Données techniques ....................................... 21
Explication des symboles
Lire les consignes! Lavable en machine
en cycle extra-délicat
30 °C
Ne pas blanchir
Ne pas enfoncer une
Ne pas blanchir
aiguille!
Ne pas repasser
Ne pas utiliser plié ou
Ne pas nettoyer à sec
comprimé!
Ne doit pas être utili-
Les textiles employés
sé par des enfants en
sur cet appareil ont
bas âge (0-3 ans).
subi le contrôle des
matières indésirables
du point de vue de
l‘écologie humaine et
ont reçu le label Öko-
Tex Standards 100,
certifié par l’institut de
recherche Hohenstein.
AVERTISSEMENT: Avertissement, risque de blessure ou
danger pour votre santé.
15

ATTENTION: Remarque de sécurité relative à la possibilité
de dommages sur l’appareil/ les accessoires.
REMARQUE: Remarque relative à des informations impor-
tantes.
1. Livraison
1 Coussin chauffant
1 Taie
1 Interrupteur
6
1 Mode d‘emploi
5
4
5
6
4
1.1 Description de l’appareil
1
3
2
1. Fiche secteur
2. Prise
3
3. Interrupteur
2
4. Commutateur coulissant
(MARCHE = I / ARRÊT = 0)
1
5. Touches de réglage de la température
6. Affichage lumineux des niveaux de température
2. Consignes importantes
À conserver pour un usage ultérieur !
AVERTISSEMENT
• Le non-respect des instructions ci-après est susceptible d‘entraîner
des dommages corporels ou matériels (chocs électriques, brûlures
de la peau, incendie). Ces consignes de sécurité et avertissements
ne sont pas uniquement destinés à protéger votre santé ou celle
d‘autres personnes, mais aussi à protéger le produit. Par conséquent,
veuillez respecter ces consignes de sécurité et, si vous transmettez
l‘appareil à quelqu‘un, remettez-lui également ces instructions.
• Ce coussin chauffant ne doit pas être utilisé par des personnes
insensibles ou vulnérables à la chaleur, car elles pourraient ne pas
réagir en cas de surchauffe.
• Ce coussin chauffant ne doit pas être utilisé par de très jeunes
enfants (de 0 à 3 ans), car ils pourraient ne pas réagir en cas de
surchauffe.
• Ce coussin chauffant ne doit pas être utilisé par de jeunes enfants
(de 3 à 8 ans), sauf si l‘interrupteur a été réglé par un parent ou un
tuteur et que l‘enfant a reçu suffisamment d‘informations pour utiliser
le coussin chauffant en toute sécurité.
16

• Ce coussin chauffant peut être utilisé par les enfants de plus de 8
ans ainsi que par les déficients physiques, sensoriels ou mentaux et
les personnes ayant peu de connaissances ou d‘expérience à la con-
dition qu‘ils soient surveillés ou sachent comment l‘utiliser en toute
sécurité et en comprennent les risques.
• Les enfants ne doivent pas jouer avec le coussin chauffant.
• Le nettoyage et l‘entretien ne doivent pas être effectués par des en-
fants sans surveillance.
• Ce coussin chauffant n‘est pas conçu pour une utilisation en milieu
hospitalier.
• N‘enfoncez pas d‘aiguilles
• N‘utilisez pas le coussin chauffant plié ou froissé
• N‘utilisez pas le coussin chauffant mouillé
• Vous ne devez utiliser ce coussin chauffant qu‘en association avec
l‘interrupteur mentionné sur l‘étiquette.
• Les champs électriques et magnétiques émanant de ce coussin
chauffant peuvent éventuellement perturber le fonctionnement des
stimulateurs cardiaques. Ils sont pourtant bien inférieurs aux limites :
puissance des champs électriques : 5 000 V/m max., puissance des
champs magnétiques : 80 A/m max., induction magnétique : 0,1 mT
max.
Veuillez donc consulter votre médecin et le fabricant de votre stimula-
teur cardiaque avant d‘utiliser ce coussin chauffant.
• Ne tirez, ne tordez ou ne pliez pas trop fortement les câbles.
• Ce coussin chauffant doit être régulièrement vérifié pour détecter la
présence de tout signe d‘usure ou d‘endommagement.
Le cas échéant, ou si ce coussin chauffant a été utilisé de façon
inappropriée ou s‘il ne chauffe plus, il doit être vérifié par le fabricant
avant d‘être utilisé à nouveau.
• Si le câble d‘alimentation électrique du coussin chauffant est en-
dommagé, il doit être remplacé par le fabricant, son service client ou
toute autre personne qualifiée afin d‘éviter tout danger.
• Pendant que ce coussin chauffant fonctionne, vous ne devez pas
– poser d‘objet dessus (par ex. valise ou corbeille à linge),
– poser de source de chaleur dessus, comme des bouillottes, des
coussins chauffants, etc.
• Les composants électroniques de l‘interrupteur chauffent lors de
l‘utilisation du coussin chauffant. Vous ne devez donc pas couvrir
l‘interrupteur ou le poser sur le coussin chauffant lorsque ce dernier
est utilisé.
17
• Respectez impérativement les consignes d‘utilisation (chapitre 4) ain-
si que celles d‘entretien et de nettoyage (chapitre 5) et de rangement
(chapitre 6).
• Pour toute question concernant l’utilisation de nos appareils,
adressez-vous à notre service clients.
3. Utilisation conforme aux recommandations
ATTENTION
C
e coussin chauffant est exclusivement conçu pour réchauffer le corps humain.
4. Utilisation
4.1 Sécurité
ATTENTION
L
e coussin chauffant est équipé d‘un SYSTÈME DE SÉCURITÉ. Cette technologie de capteur empêche
la surchauffe du coussin chauffant sur toute sa surface grâce à l‘arrêt automatique en cas de défail-
lance. Lorsque le SYSTÈME DE SÉCURITÉ a désactivé le coussin chauffant, les niveaux de température
qui montrent qu‘il est allumé ne sont plus éclairés. Veuillez noter qu‘après une défaillance due à la
sécurité, vous ne pouvez plus utiliser le coussin chauffant et devez l‘envoyer au service après-vente
indiqué.
4.2 Mise en service
ATTENTION
Lorsque vous l‘utilisez, assurez-vous que le coussin chauffant n‘est pas froissé et qu‘aucun pli ne
s‘est formé.
• Branchez d‘abord l‘interrupteur au corps chauffant en connectant la fiche
secteur.
• Branchez la prise au secteur.
4.3 Remarques supplémentaires HK 58 Cosy
La forme particulière de ce coussin chauffant a été conçue spécialement pour
une utilisation dans la zone du dos et de la nuque. Placez le coussin chauffant
dans votre dos de sorte que le velcro se trouve au niveau de la nuque. Fixez
tout d‘abord le velcro. Ajustez ensuite la longueur de la ceinture abdominale
et fermez le connecteur en joignant chaque extrémité.
Pour ouvrir, appuyez simultanément sur les deux connecteurs de déverrouil-
lage, comme indiqué sur l‘illustration.
4.4 Mise sous tension
Réglez le commutateur coulissant (3) sur le côté droit de l‘interrupteur sur le niveau « I » (MARCHE), voir Fig.
commutateur. Lorsqu‘il est allumé, l‘affichage des niveaux de température s‘éclaire.
18
la banda abdominal y aproxime los dos extremos conectores para
cerrarlos. Para separar los extremos conectores, apriete a la vez
el dispositivo de desbloqueo tal como se indica en la imagen.
Compruebe primero que el interruptor está conectado a la almo-
hada eléctrica. Conecte el enchufe a la toma de red.
5
3.3 Selección de temperatura
La almohada eléctrica se calienta más rápidamente si se ajusta el escalón de temperatura
más alto. Posteriormente, si es necesario, se puede pasar a un escalón más bajo. Tras
encender la almohada eléctrica, el indicador del escalón de temperatura seleccionado
parpadea brevemente y después se enciende. Se recomienda utilizar el escalón de
temperatura más bajo en caso de uso prolongado de la almohada eléctrica.
3.4 Escalones de temperatura
Escalón: 0 = apagada
1 = calor mínimo
2 = calor medio
3 = calor máximo
3.5 Calentamiento rápido
Esta almohada eléctrica cuenta con un sistema calentamiento rápido que permite que
se caliente rápidamente en 10 minutos.
3.6 Sistema de desconexión automática
La almohada eléctrica se desconecta automáticamente después de unos 90 minutos. En
este momento el indicador del escalón de temperatura comienza a parpadear. Para volver
a encender la almohada eléctrica, coloque el interruptor en la posición “0” y después
de unos 5 segundos seleccione el escalón de temperatura deseado. Desconecte la
almohada eléctrica (escalón “0”) o desenchufe el cable de la caja de toma de red, si la
almohada eléctrica no se continuará utilizando después de apagarla.
4. Datos técnicos
Tipo: P10 F
Alimentación de tensión: 220–240 V / 50-60 Hz
Potencia absorbida: 100 W
Dimensiones: aproximadamente 54 x 38 cm
Fabricante: MGG Elektro GmbH, Königsbrückerstr. 61, 01099 Dresden, Germany
5. Limpieza y cuidado
Antes de limpiar la almohada
eléctrica desenchufe siemp-
re el cable de la caja de toma de red.
Primero abra la cremallera de la funda textil y
extraiga la almohada eléctrica. La funda textil
puede lavarse de acuerdo con los símbolos
de limpieza indicados en la etiqueta.
Las pequeñas manchas de la almohada eléc-
trica pueden ser eliminadas mediante
un paño o una esponja húme-
da y eventualmente con un
detergente líquido para ropa
blanca fina. Para la limpieza nunca utilice
detergentes que contengan diluyentes.
4.5 Réglage de la température
Pour augmenter la température, appuyez sur la touche (4). Pour baisser la température, appuyez sur la
touche
(4).
Niveau 1 : chaleur minimale
Niveau 2-5 : chaleur personnalisée
Niveau 6 : chaleur maximale
REMARQUE :
• Le coussin se réchauffe plus rapidement lorsque vous réglez le niveau de température au plus haut.
REMARQUE :
Ce coussin chauffant dispose d‘un chauffage rapide permettant un chauffage plus rapide
lors des 10 premières minutes.
AVERTISSEMENT
Lorsque vous utilisez le coussin chauffant pendant plusieurs heures, il
est recommandé de régler l‘interrupteur sur le niveau de température le
plus bas pour éviter toute surchauffe de votre corps et le cas échéant
des brûlures de la peau.
4.6 Arrêt automatique
Ce coussin chauffant est équipé d’un arrêt automatique. Il désactive la fonction de chauffage
après environ 90 minutes d‘utilisation du coussin. Une partie des niveaux de température affi-
90 min
chés sur l‘interrupteur commence à clignoter. Pour que le coussin chauffant puisse redémarrer,
STOP
commencez par régler le commutateur coulissant latéral (3) sur le niveau « 0 » (ARRÊT). Après
environ 5 secondes, vous pouvez remettre le chauffe-matelas sous tension.
4.7 Mise hors tension
Réglez le commutateur coulissant latéral de l‘interrupteur sur la position « 0 » (ARRÊT) pour éteindre le coussin
chauffant. L‘affichage des niveaux de température n‘est plus éclairé.
REMARQUE :
Si vous n‘utilisez pas le coussin chauffant, réglez le commutateur latéral MARCHE/ARRÊT sur la
position « 0 » (ARRÊT) et débranchez la prise secteur. Déconnectez ensuite la fiche secteur et donc
l‘interrupteur du coussin chauffant.
5. Nettoyage et entretien
AVERTISSEMENT
Pour commencer, débranchez toujours le câble d‘alimentation de la
prise avant de nettoyer l‘appareil. Déconnectez ensuite la fiche secteur
et donc l‘interrupteur du coussin chauffant.
19
ATTENTION
• L‘interrupteur ne doit jamais entrer en contact avec de l‘eau ou d‘autres liquides. Il peut être
endommagé.
Pour le nettoyage de l‘interrupteur, utilisez un chiffon sec non pelucheux. N’utilisez pas de produit abrasif
ou autre détergent.
La housse en tissu peut être lavée conformément aux symboles figurant sur l‘étiquette et doit être retirée
à cet effet.
Vous pouvez nettoyer les petites taches du coussin chauffant à l‘aide d‘un chiffon humide et un peu de
lessive liquide pour linge délicat.
ATTENTION
• Le coussin chauffant ne doit pas être nettoyé avec des produits chimiques, essoré, séché en
machine, cylindré ou repassé.
Le coussin chauffant est lavable en machine. Réglez la machine sur un cycle très doux à 30 °C (cycle laine).
Utilisez une lessive pour linge délicat et dosez-la selon les instructions du fabricant.
ATTENTION
•
Le coussin chauffant est lavable en machine. Réglez la machine sur un cycle très doux à 30 °C (cycle
laine). Utilisez une lessive pour linge délicat et dosez-la selon les instructions du fabricant.
Étirez le coussin chauffant encore humide juste après le lavage pour qu‘il retrouve sa taille d‘origine et laissez-
le sécher à plat sur un étendage.
ATTENTION
• N‘utilisez pas de pinces à linge ou autres pour accrocher le coussin chauffant sur l‘étendage. Sinon,
il pourrait être endommagé.
• Ne reconnectez l‘interrupteur au coussin chauffant qu‘une fois que la fiche secteur, le coussin
chauffant et la housse en tissu sont complètement secs. Sinon, il pourrait être endommagé.
AVERTISSEMENT
• Ne mettez en aucun cas le coussin chauffant en marche lors du séchage ! Sinon, vous vous exposez
à un risque de choc électrique.
6. Rangement
Si vous n’utilisez pas le coussin chauffant pendant une période prolongée, nous vous recommandons de le
ranger dans son emballage d‘origine.
ATTENTION
V
euillez laisser refroidir le coussin chauffant. Sinon, il pourrait être endommagé. Ne posez pas d‘objet
sur le coussin chauffant lors de son stockage pour éviter qu‘il ne se plie trop fortement.
20
