Canon VIXIA HF G30: инструкция
Раздел: Видео Аудио Фото Оборудование
Тип: Экшн Камера
Инструкция к Экшн Камере Canon VIXIA HF G30
PUB. DIM-1076-000
Wi-Fi Basic Setup Guide
EN
Guide de réglage de base du Wi-Fi
FR
Anleitung für Wi-Fi-Grundeinstellung
DE
Guida per la configurazione Wi-Fi di base
IT
Guía de configuración básica de Wi-Fi
ES
Руководство по базовой настройке Wi-Fi
RU
Wi-Fi基本设置指南
ZH
在使用本产品之前,请务必先仔细阅读本使用说明书。
请务必妥善保管好本书,以便日后能随时查阅(保留备用)。
请在充分理解内容的基础上,正确使用。
COPY

Table of Contents
Wi-Fi Functions
03 Getting Started
03 Introduction to Wi-Fi
06 Remote Operation Via the Wi-Fi Remote Application
07 Remote Browse: Viewing Recordings Using a Web Browser
on Your iOS or Android Device
08 Uploading Recordings Using an iOS Device
2
09 Playback on a Computer
10 Transferring Files to a Computer or FTP Server
11 Sharing Recordings with CANON iMAGE GATEWAY
11 Wi-Fi Connection Using an Access Point
12 Troubleshooting
Trademark Acknowledgements
• Microsoft and Windows are trademarks or registered trademarks of Microsoft Corporation in the United States
and/or other countries.
• App Store, iPad, iPhone, iPod, iTunes and Mac OS are trademarks of Apple Inc., registered in the U.S. and other
countries.
• Google, Android, Google Play, YouTube are trademarks of Google Inc.
• Facebook is a registered trademark of Facebook, Inc.
• IOS is a trademark or registered trademark of Cisco in the U.S. and other countries and is used under license.
• The Twitter name and marks are trademarks of Twitter, Inc.
• Wi-Fi is a registered trademark of the Wi-Fi Alliance.
• Wi-Fi Certified, WPA, WPA2, and the Wi-Fi Certified logo are trademarks of the Wi-Fi Alliance.
• WPS as used on the camcorder’s settings, onscreen displays and in this manual signifies Wi-Fi Protected Setup.
• The Wi-Fi Protected Setup Identifier Mark is a mark of the Wi-Fi Alliance.
• JavaScript is a trademark or registered trademark of Oracle Corporation, its affiliates or subsidiaries in the United
States and other countries.
• Other names and products not mentioned above may be trademarks or registered trademarks of their respective
companies.
COPY
Getting Started
Getting Started
This manual will get you started on using your camcorder's Wi-Fi functions. To learn more about Wi-Fi
functions and to see more detailed procedures, refer to the full-version Instruction Manual (PDF file on
the supplied CD-ROM). When this manual refers you to a section in the camcorder's Instruction
Manual, use the table of contents or the PDF's search feature to help find the section. To install the full-
version Instruction Manual, see Installing the Camcorder's Instruction Manual (PDF file) in the supplied
3
Quick Guide.
The following are basic terms used frequently in this text.
Access point
A wireless access point (WAP) is a device that allows wireless devices, like your camcorder, to connect
to a wired network (including to the Internet) using the Wi-Fi standard. In most cases, this will be your
wireless router.
SSID
Service Set Identifier. This is simply the public name of a Wi-Fi network.
Wi-Fi network
A group of computers and/or other devices in your home, office, or other location connected
wirelessly using Wi-Fi.
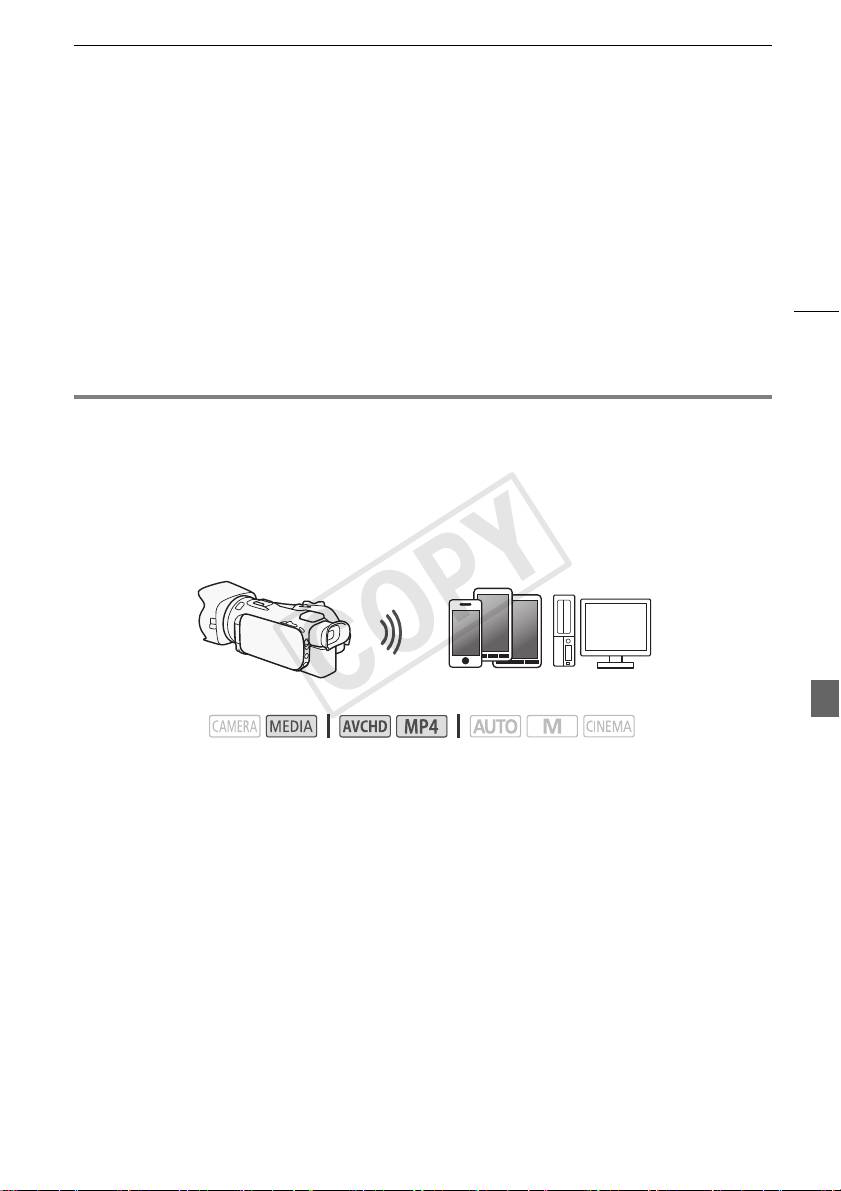
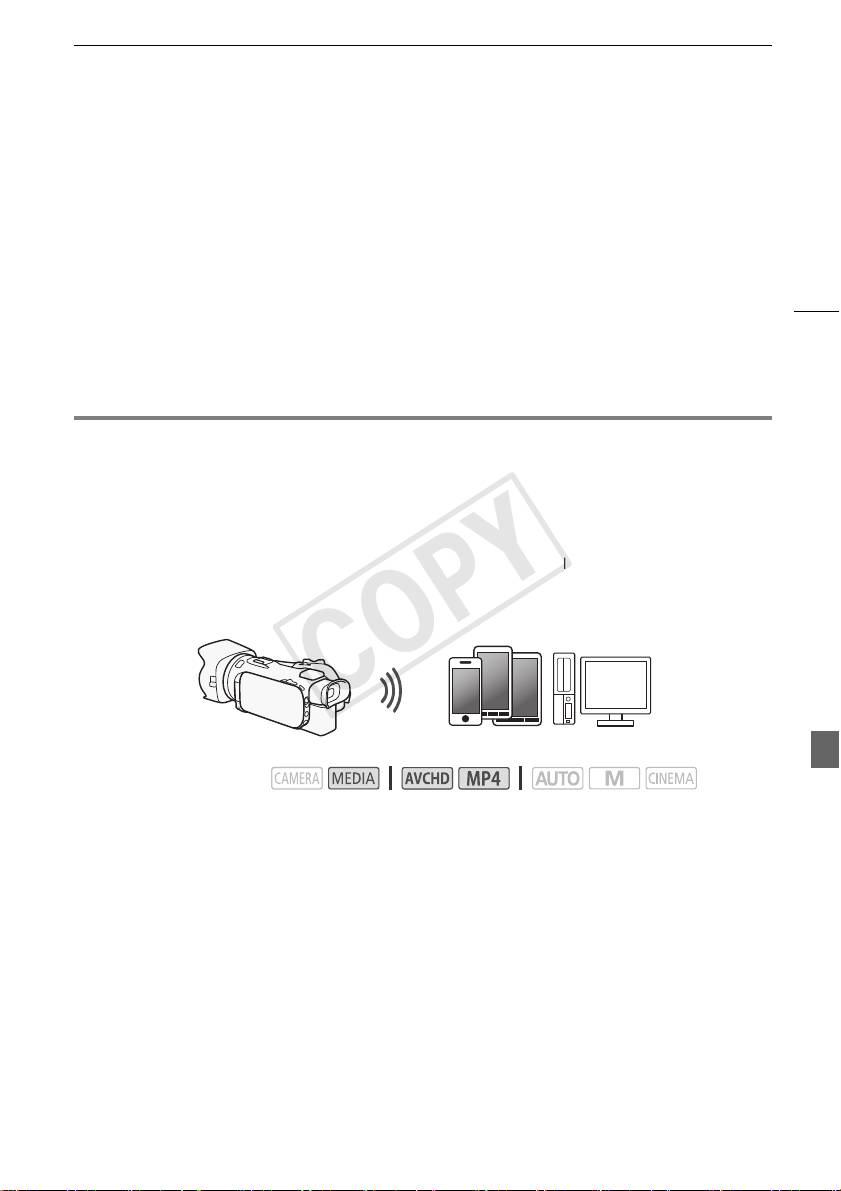
Introduction to Wi-Fi
When you use the camcorder’s Wi-Fi function to connect to a smartphone or tablet, you can wirelessly
save, play back and upload your recordings. You can even use a smartphone or tablet (iOS or Android
1
device
) as a remote control and record using the device’s Web browser.
1
“iOS device” is used in this text to refer to Wi-Fi-enabled iPhones, iPods and iPads while "Android
device" refers to Wi-Fi-enabled Android smartphones and tablets.
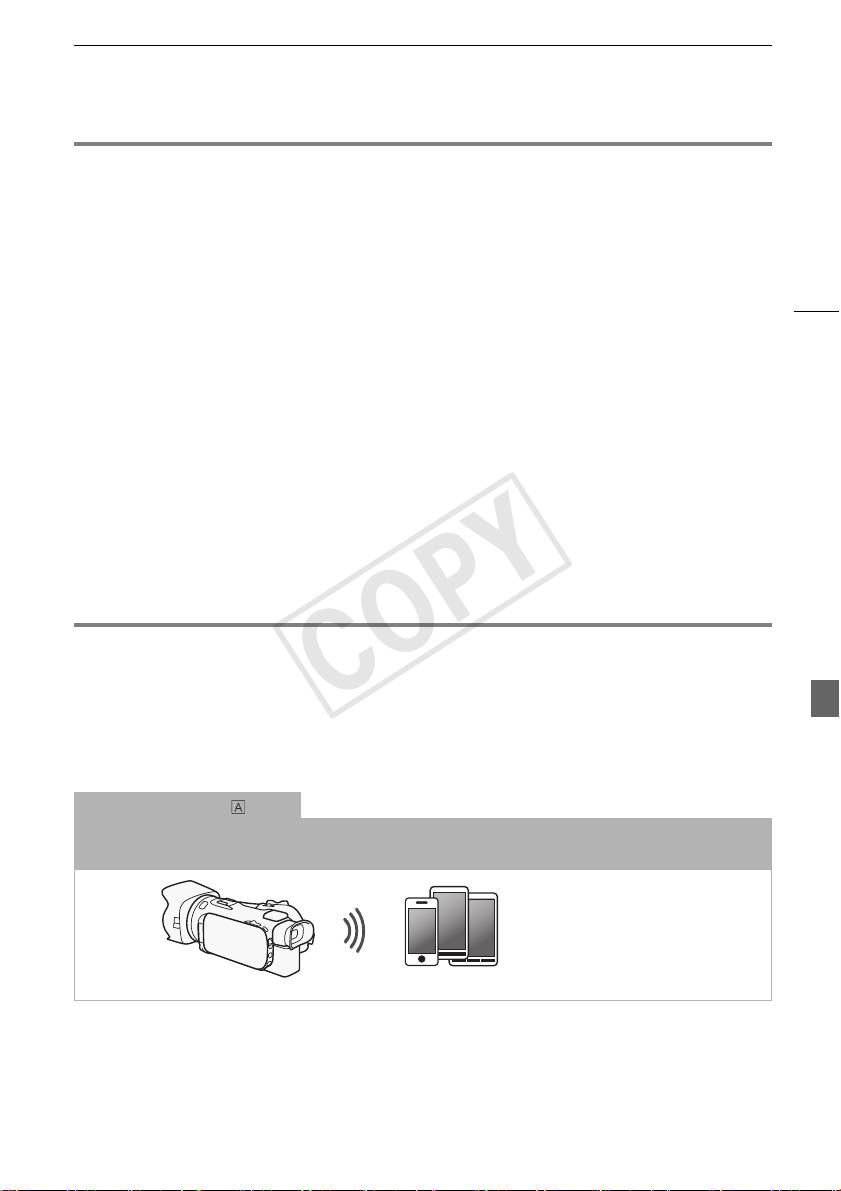
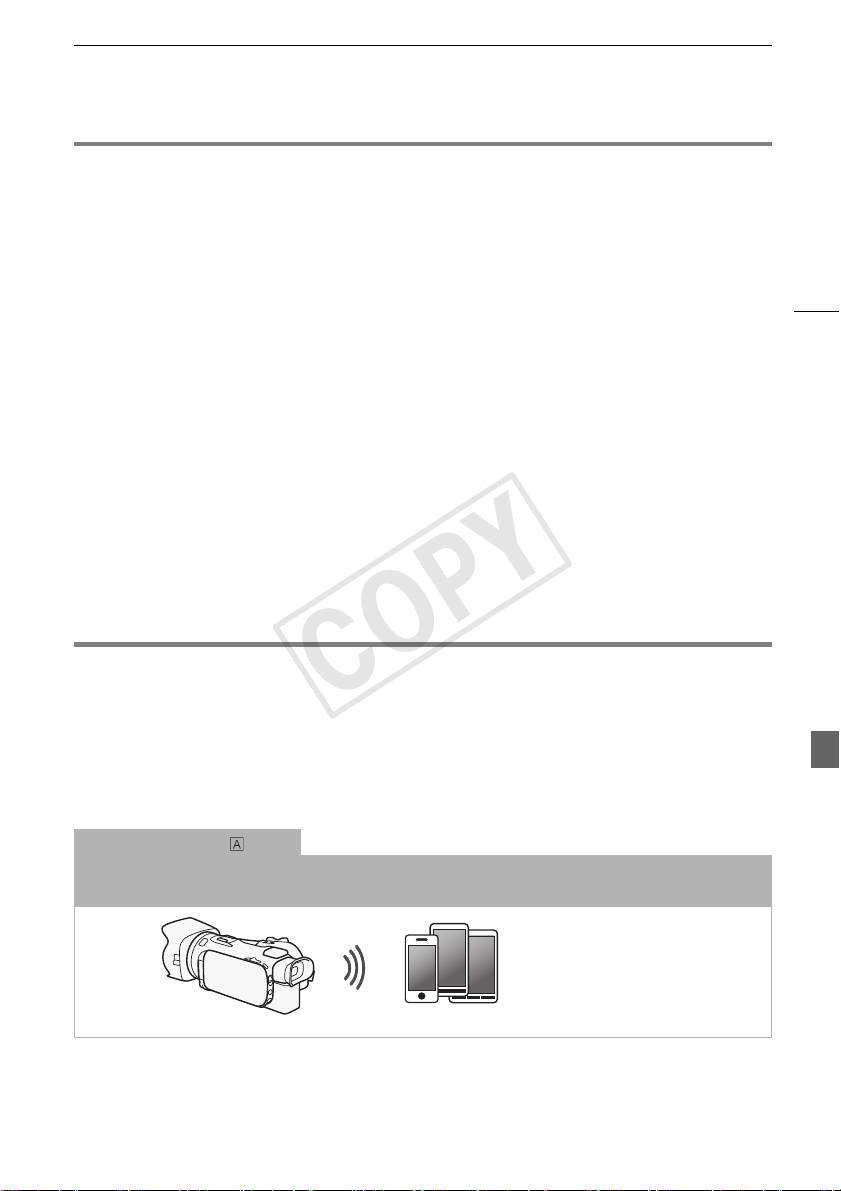
Wi-Fi connection
When you use the Wi-Fi Remote app, you can use your iOS or Android device to remotely control the camcorder and
make recordings (A 6).
iOS or Android device
COPY

Introduction to Wi-Fi
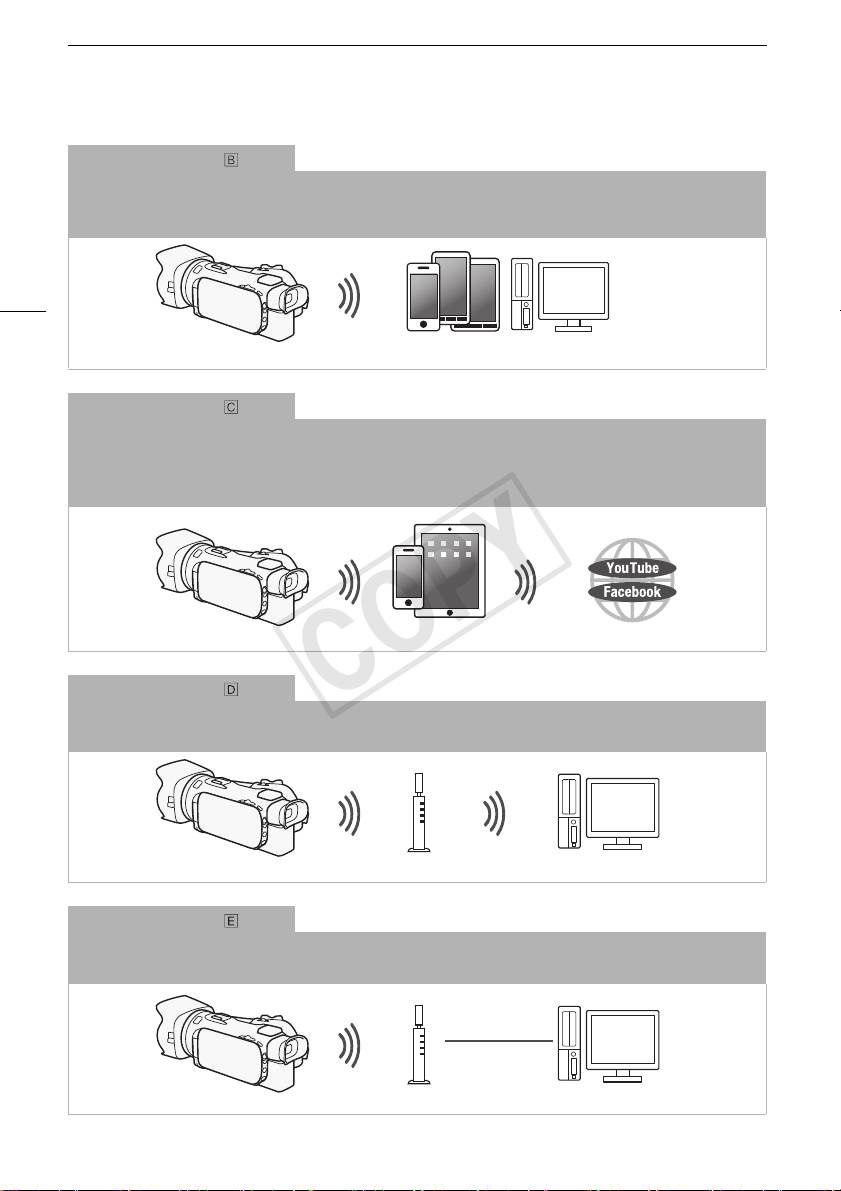
Wi-Fi connection
2
Wirelessly connect the camcorder to your iOS device, Android device or computer
and use the device’s Web
browser to view recordings in the camcorder (A 7).
2
You can also use a computer connected via an access point.
4
iOS device, Android device, etc.
Wi-Fi connection
3
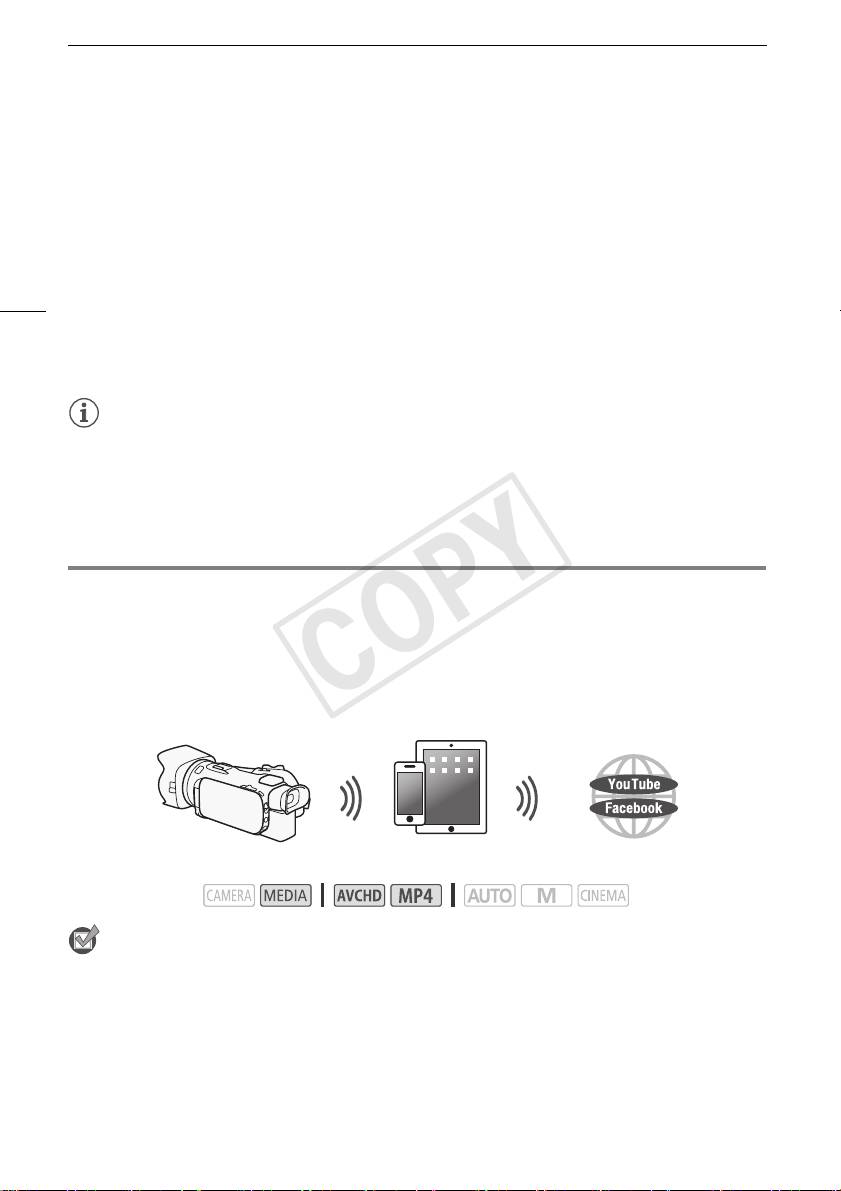
After you download the Movie Uploader app
, wirelessly connect the camcorder to an iOS device (A 8) to save,
play back and upload your recordings. You can even use this connection type if you plan to share videos on YouTube
and Facebook on the go.
3
The Movie Uploader app, provided by PIXELA, is available for free from the App Store.
iOS device
Wi-Fi connection
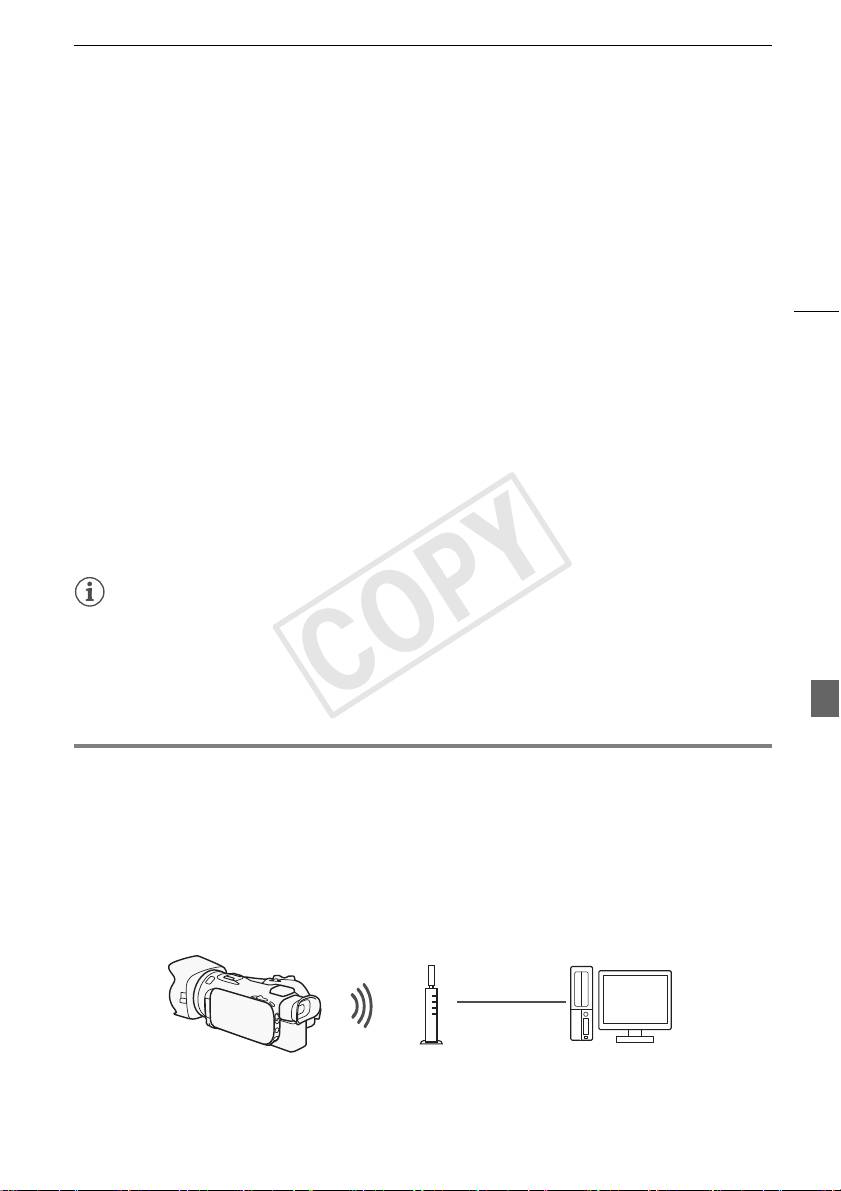
Wirelessly connect the camcorder to a wireless router (access point) on a Wi-Fi network (A 11). Use this
connection if you plan to save your recordings on a computer or FTP server (A 10).
Access point Computer
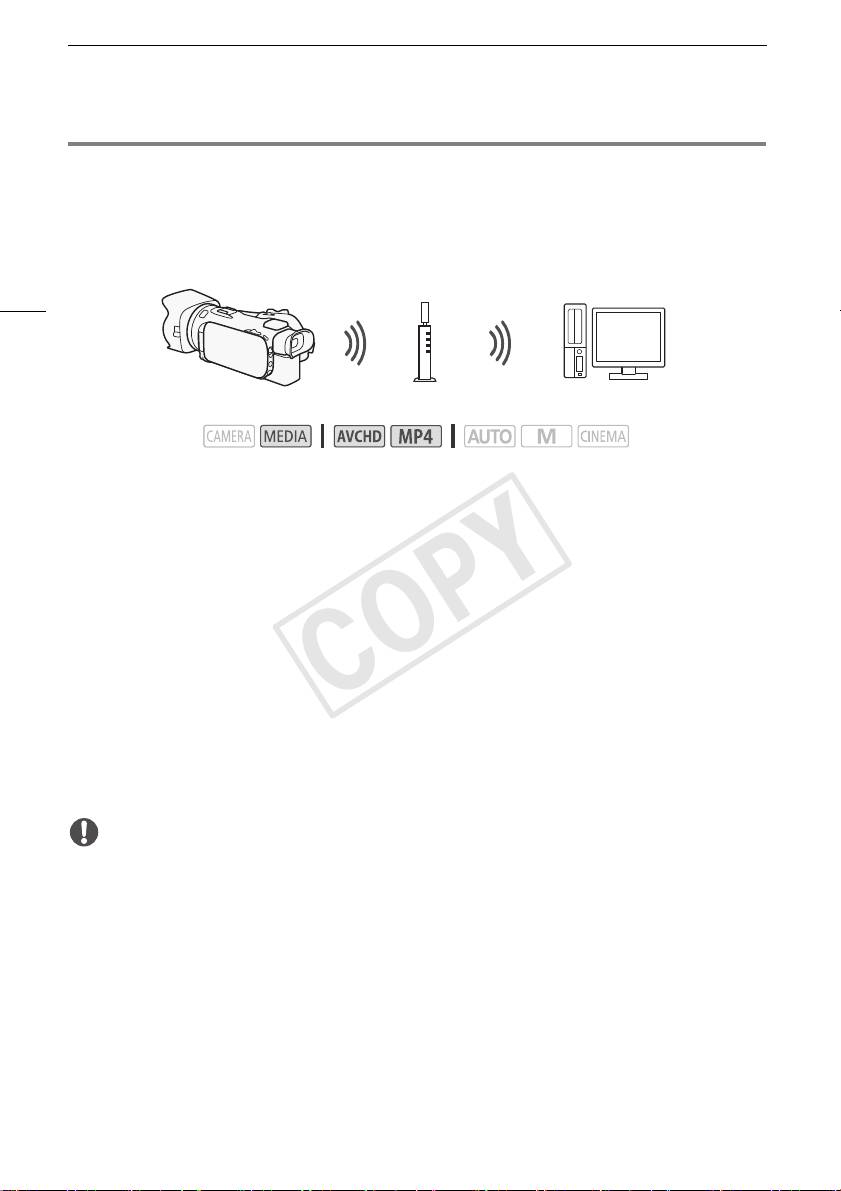
Wi-Fi connection
Wirelessly connect the camcorder to a network and use the media server function and play back your recordings on
a device connected to the network using a LAN cable (A 9).
LAN cable
Access point
Computer
COPY
Introduction to Wi-Fi
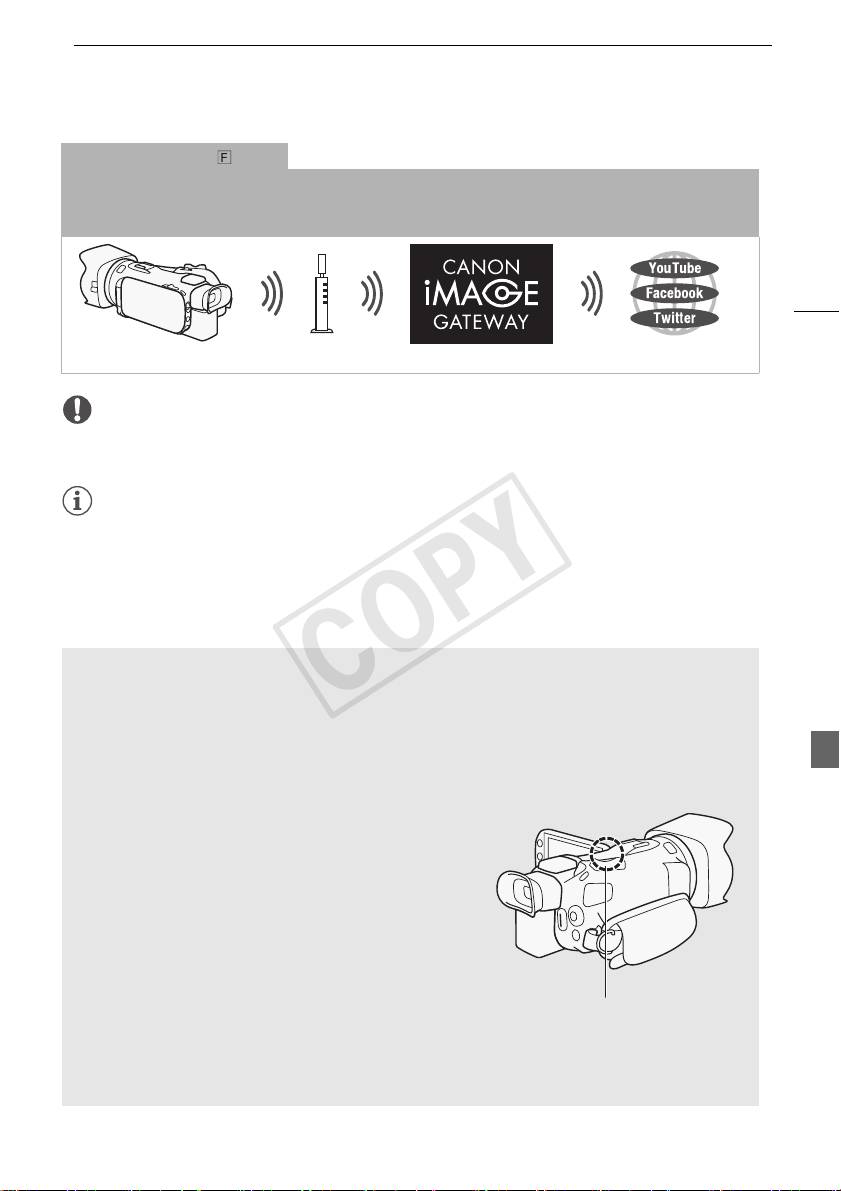
Wi-Fi connection
Wirelessly connect the camcorder to a wireless router (access point) on a Wi-Fi network. Use this connection if you
plan to connect to CANON iMAGE GATEWAY (A 11). After doing so, you can even share videos on YouTube and
Facebook.
5
Access point
IMPORTANT
• Using an unprotected Wi-Fi network can expose your files and data to monitoring by unauthorized
third parties. Be aware of the risks involved.
NOTES
• While using Wi-Fi functions other than remotely controlling the camcorder using the Wi-Fi Remote
application, do not open the double memory card slot cover.
• While using Wi-Fi functions other than remotely controlling the camcorder using the Wi-Fi Remote
application, the camcorder’s automatic power off function will be disabled.
Before using Wi-Fi functions
Based on the function, the camcorder will wirelessly connect to a Wi-Fi-enabled device, such as a
smartphone, directly or to a Wi-Fi network via an access point (wireless router)*. After selecting the
function you want to use, follow the onscreen directions to connect the camcorder.
* Depending on the manufacturer, the access point may be referred to using a different name, such
as wireless LAN router or wireless network router.
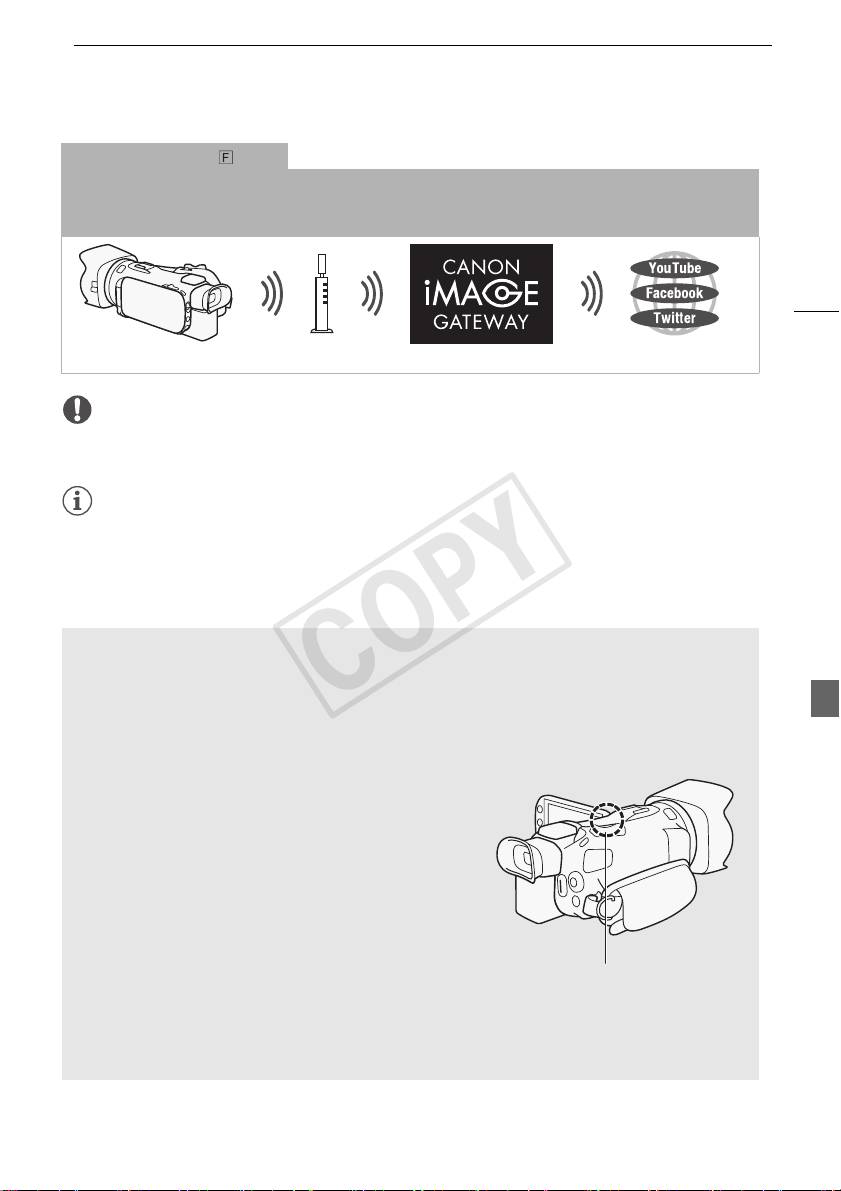
About the Wi-Fi antenna
When using the camcorder's Wi-Fi functions, do not cover
the back portion of the camcorder with your hand or other
object. The Wi-Fi antenna is located in the back portion and
covering it may interfere with wireless signals.
Wi-Fi antenna
About the camcorder’s Wi-Fi standard
For details about the camcorder's Wi-Fi standard, refer to About the camcorder's Wi-Fi standard in
the camcorder's Instruction Manual (PDF file).
COPY
Remote Operation Via the Wi-Fi Remote Application
Remote Operation Via the Wi-Fi Remote Application
You can operate the camcorder remotely via Wi-Fi Remote, a Web browser application that can be
accessed using the Web browser* of devices compatible with Wi-Fi networks**. The Wi-Fi Remote
application lets you monitor the image through live view, start and stop recording, and remotely control
the shooting mode, exposure, white balance, aperture, gain, shutter speed, focus and zoom.
* A Web browser that has JavaScript and cookies enabled is required.
6
** For details about compatible devices, operating systems, Web browsers, etc. please visit your local
Canon Web site.
Operating modes:
iOS or Android device
Setting the Camcorder's Password
For Wi-Fi functions that require an iOS or Android device, you will need to set the camcorder's
password. After you enter the password once, you will not need to enter it again (unless you reset or
overwrite the camcorder's settings).
1 Open the [Smartphone Connection] screen.
[FUNC.] > [MENU] > p/s* > [Wi-Fi] > [Smartphone Connection]
* Touch s for the Remote Browse and Media Server functions.
2 Touch the camcorder's password.
3 Enter an 8-character password and touch [OK].
4Touch [K] and then touch [X].
NOTES
• After setting the camcorder's password, it will not be displayed on the screen for you to check.
Please make a note of your password so that you do not forget it. To change the password, perform
the procedure above again.
Operating the Camcorder Remotely
1 Camcorder: Open the [Wi-Fi Remote] screen.
[FUNC.] > [„ Wi-Fi Remote]
2 Camcorder: Touch [ON].
• The camcorder’s SSID (network name) and the URL to be entered in the Web browser will
appear.
• The camcorder will be ready to connect with the device.
COPY
Remote Browse: Viewing Recordings Using a Web Browser on Your iOS or Android Device
3 iOS/Android device: Activate Wi-Fi in the settings screen.
• The network names of detected access points will appear.
4 iOS/Android device: Touch the access point with the same SSID displayed in step 2.
• If you have performed this procedure before and you have not changed the camcorder's
password, the connection will be established automatically.
5 iOS/Android device: Enter the camcorder’s password set previously.
6 iOS/Android device: Enter the URL displayed on the camcorder’s screen into the Web
7
browser to start the Wi-Fi Remote application.
• For details about this function, refer to Remote Operation Via the Wi-Fi Remote Application in the
camcorder's Instruction Manual (PDF file).
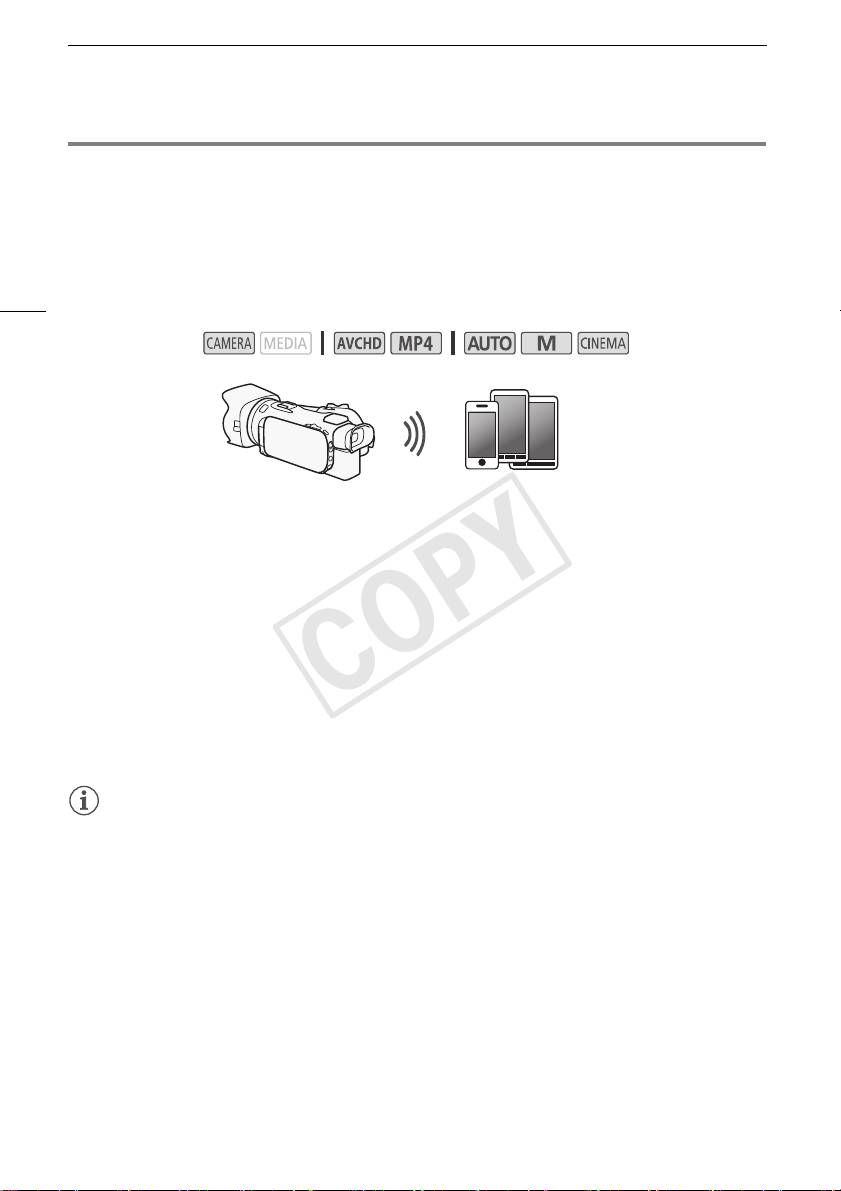
Remote Browse: Viewing Recordings Using a Web Browser on
Your iOS or Android Device
With the Remote Browse function, you can use the Web browser on your iOS device, Android device,
computer or similar device to show a list of recordings in the camcorder, play them back and even
download them.* This conveniently allows you to view your recordings while you are out.
* Depending on the device, OS, browser, movie format and recording mode, you may not be able to play
back or download recordings. For details, visit your local Canon Web site.
iOS device, Android device, etc.
Operating modes:
1 Camcorder: Open the desired index screen.
2 Camcorder: Open the [Playback via Browser] screen.
[MENU] > s > [Wi-Fi] > [Playback via Browser]
• The camcorder’s SSID (network name) will appear.
• The camcorder will be ready to connect with the device.
• To set or change the camcorder's password, perform the procedure in Setting the Camcorder's
Password (A 6) starting from step 2.
3 iOS/Android device: Activate Wi-Fi in the settings screen.
• The network names of detected access points will appear.
4 iOS/Android device: Touch the access point with the same SSID displayed in step 2.
• If you have performed this procedure before and you have not changed the camcorder's
password, the connection will be established automatically.
5 iOS/Android device: Enter the camcorder's password set previously.
• [Connected] will appear on the camcorder’s screen and the connection will be established.
6 iOS/Android device: Start the Web browser.
COPY
Uploading Recordings Using an iOS Device
7 iOS/Android device: Enter the URL that appears on the camcorder’s screen into the Web
browser’s address bar.
• The Remote Browse screen will appear.
• As long as you do not change the port settings, the URL is always the same so you may find it
convenient to bookmark the URL.
8 iOS/Android device: Touch [6·] on the upper left of the screen and open the desired
index screen. Next, touch the desired recording.
8
• For movies, touch the playback icon to start playback. For photos, the photo will be displayed.
9 Camcorder: Touch [End] > [OK] when finished.
• For details about this function, refer to Remote Browse: Viewing Recordings Using a Web
Browser on Your iOS or Android Device in the camcorder's Instruction Manual (PDF file).
NOTES
• The following types of MP4 scenes will be recognized as multiple files on other devices.
- Scenes exceeding 4 GB
- Scenes recorded at 35 Mbps exceeding 30 minutes
- Scenes recorded with a recording mode other than 35 Mbps exceeding 1 hour
• Only one device may be connected to the camcorder at a time.
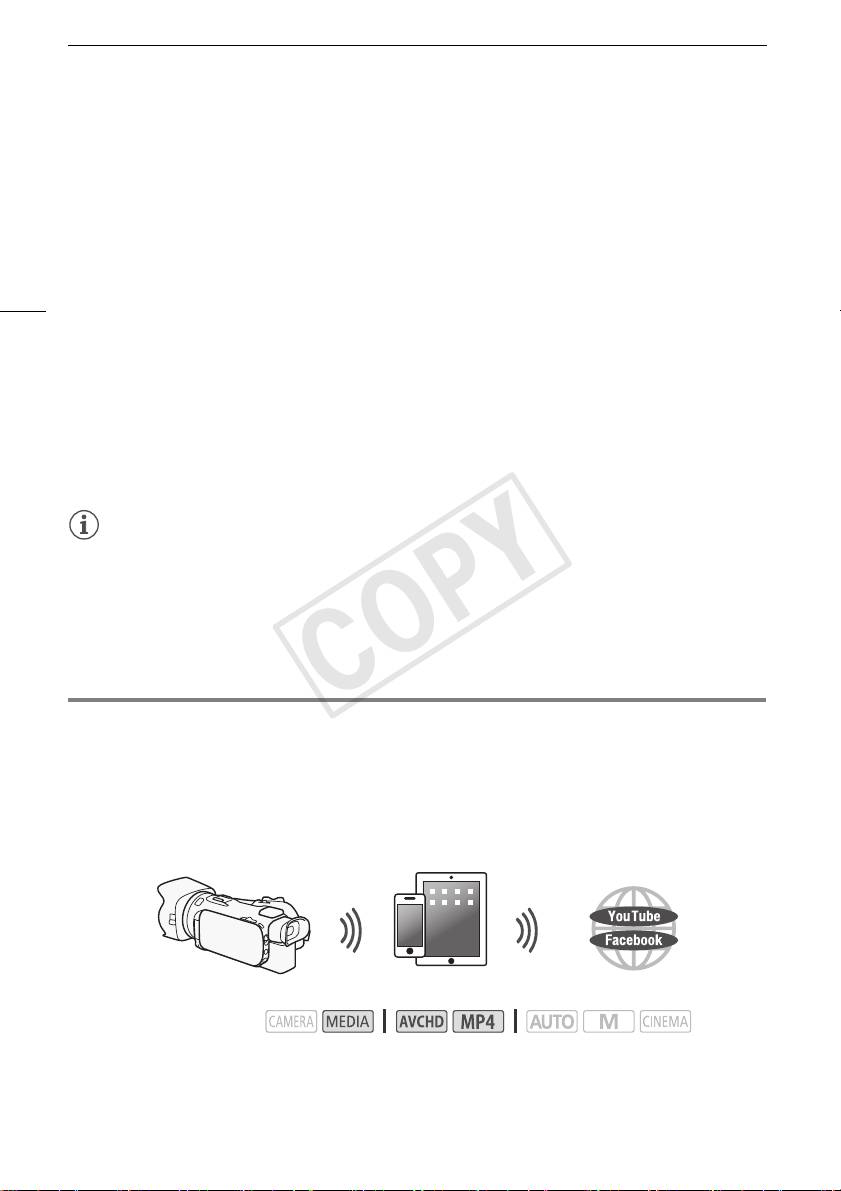
Uploading Recordings Using an iOS Device
Using the Movie Uploader app* for iOS devices, you can wirelessly connect the camcorder to the
device to upload your movies to YouTube and your movies and photos to Facebook even when you
are away from your home network. You can even save** and play back MP4 movies and photos on
the iOS device.
* The Movie Uploader app, provided by PIXELA, is available for free from the App Store.
** Not available for MP4 movies recorded at 35 Mbps.
iOS device
Operating modes:
POINTS TO CHECK
• Before you perform this procedure for the first time, install the Movie Uploader app on your iOS
device. The app can be downloaded for free from the following site.
http://appstore.com/movieuploader
1 Camcorder: Open the desired movie index screen.
COPY
Playback on a Computer
2 Camcorder: Open the [Movie Uploader] screen.
[MENU] > s > [Wi-Fi] > [Movie Uploader]
• The camcorder’s SSID (network name) will appear.
• The camcorder will be ready to connect with the iOS device.
• To set or change the camcorder's password, perform the procedure in Setting the Camcorder's
Password (A 6) starting from step 2.
3 iOS device: Activate Wi-Fi in the settings screen.
9
• The network names of detected access points will appear.
4 iOS device: Touch the access point with the same SSID displayed in step 2.
• If you have performed this procedure before and you have not changed the camcorder's
password, the connection will be established automatically.
5 iOS device: Enter the camcorder's password set previously.
• [Connected] will appear on the camcorder’s screen and the connection will be established.
6 iOS device: Use the Movie Uploader app to upload the camcorder’s movies (and photos, if
applicable).
• For details about the Movie Uploader app, visit PIXELA’s Web site.
http://www.pixela.co.jp/oem/canon/e/movieuploader/ (English only)
• For details about this function, refer to Uploading Recordings Using an iOS Device in the
camcorder's Instruction Manual (PDF file).
NOTES
• The following types of MP4 scenes will be recognized as multiple files on other devices.
- Scenes exceeding 4 GB
- Scenes recorded at 35 Mbps exceeding 30 minutes
- Scenes recorded with a recording mode other than 35 Mbps exceeding 1 hour
Playback on a Computer
Using the Media Server function, you can wirelessly view your movies and photos from your computer
or similar device. You will need an access point connected to your home network and software
installed on your computer that can play back movies and photos on the media server. We
recommend that you connect the computer to the access point using a LAN cable. Refer also to the
instruction manuals for the computer, software and access point.
• For details about this function, refer to Playback on a Computer in the camcorder's Instruction
Manual (PDF file).
LAN cable
Access point
Computer
COPY
Transferring Files to a Computer or FTP Server
Transferring Files to a Computer or FTP Server
You can wirelessly transfer files (recordings) directly to a computer or an FTP server. You will need a
correctly configured FTP server. During the manual setup procedure, you will need to enter the FTP
server's IP address, port, user name, password and file transfer destination (where the files will be
transferred to).
10
Access point
Computer
Operating modes:
1 Camcorder: Open the desired movie index screen.
2 Open the [FTP Transfer] screen.
[MENU] > s > [Wi-Fi] > [FTP Transfer]
3 Enter the FTP server's IP address for [FTP Server] and the port number for [Port].
4 Touch [Next].
5 Enter the user name and password and then touch [Next].
6 Enter [/] for [Destination Folder] and then touch [OK].
• Depending on the FTP server's settings, the required text for the port number and destination
folder may differ. Check the settings on your FTP server.
• The camcorder will connect to the access point selected in Wi-Fi Connection Using an Access
Point (A 11).
7 When [Save the access point] appears on the screen, touch [OK] and then perform the
procedure in Wi-Fi Connection Using an Access Point (A 11).
• For details about this function, refer to Transferring Files to a Computer or FTP Server in the
camcorder's Instruction Manual (PDF file).
IMPORTANT
• Observe the following precautions when transferring files. Failing to do so may interrupt the transfer
and incomplete files may remain at the transfer destination.
- Do not open the double memory card slot cover.
- Do not disconnect the power source or turn off the camcorder.
• If the file transfer is interrupted, select [New files] and perform the file transfer again.
• If incomplete files remain at the transfer destination, check the content and make sure they are safe
to delete before deleting them.
COPY
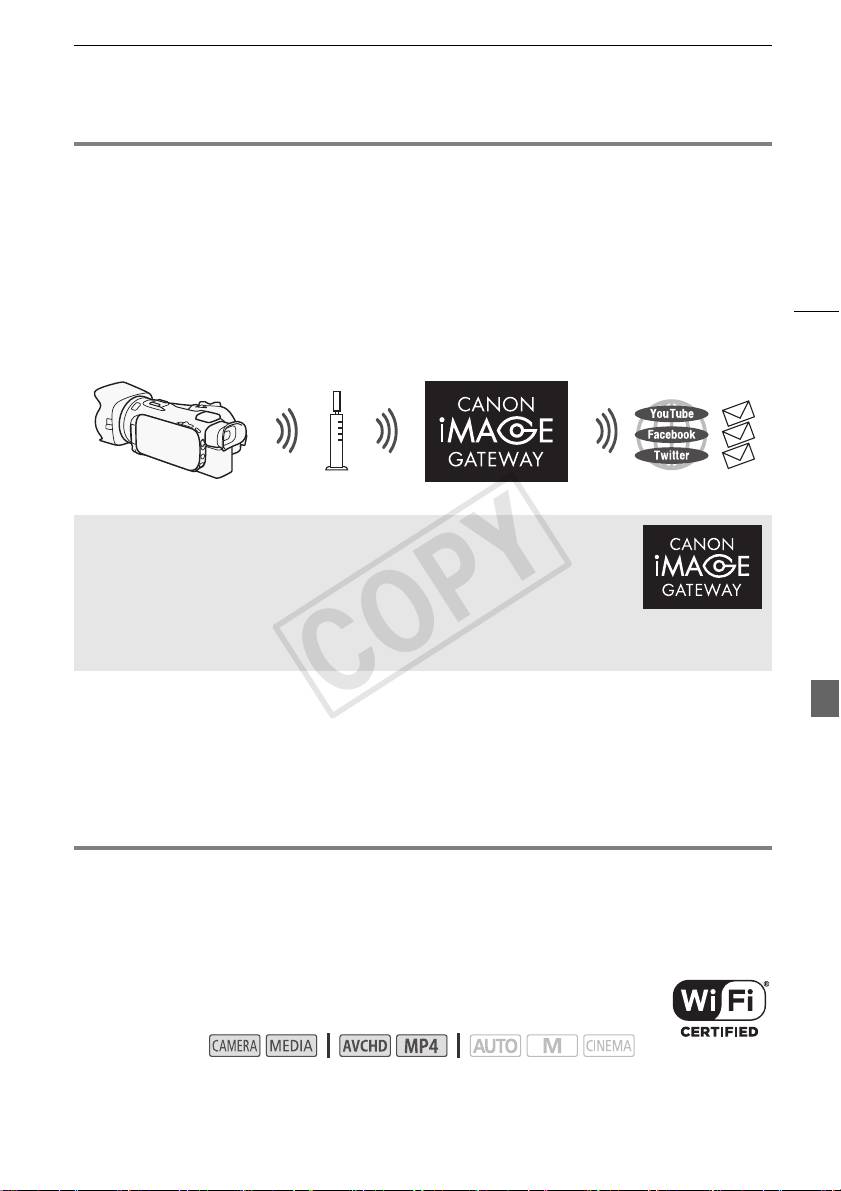
Sharing Recordings with CANON iMAGE GATEWAY
Sharing Recordings with CANON iMAGE GATEWAY
After you register for CANON iMAGE GATEWAY*, you will be able to access various Web services**.
You will be able to upload movies and photos to online albums, share the albums on Twitter, upload
movies to Facebook and YouTube, send links to your online albums by e-mail to friends and family,
and more! To use this function, you will need an access point connected to the Internet.
• For details about this function, refer to Sharing Recordings with CANON iMAGE GATEWAY in the
11
camcorder's Instruction Manual (PDF file).
* Availability differs from area to area.
** “Web services” is used in this text to refer to various Internet services supported by CANON iMAGE
GATEWAY.
Wireless router
(access point)
CANON iMAGE GATEWAY
CANON iMAGE GATEWAY is a site that provides various photo-related services
for owners of qualified Canon products. After you complete the free registration
online, you can use the Web services, create online photo albums, and more.
Visit Canon’s Web site for information on registration and countries/regions
where you can use this service.
http://canon.com/cig
General requirements
• Computer with the supplied software ImageBrowser EX and CameraWindow correctly installed.
For details on installing the software, refer to Saving MP4 Movies and Photos Using ImageBrowser
EX in the camcorder's Instruction Manual (PDF file).
• Completed free registration online for CANON iMAGE GATEWAY.
• Account settings for YouTube, Facebook and Twitter (depending on the services you plan to use).
Wi-Fi Connection Using an Access Point
The camcorder can connect to a Wi-Fi network using a wireless router (access point) and even
remember the settings for the four most recently used access points.
General requirements
• Correctly configured router that uses a Wi-Fi protocol used by the camcorder, is
Wi-Fi certified (bears the logo shown on the right) and is on your home network.
Operating modes:
Select the desired connection method.
COPY

Troubleshooting
Options
[WPS: Button]* Simply press and hold the WPS button on your access point and then touch the
camcorder’s screen. This is the easiest connection method if you are using a WPS-compatible
router.
[WPS: PIN Code]* Access the access point’s configuration screen using your Web browser. The
camcorder will give you a PIN code, which you will enter into the browser. You will need a WPS-
compatible router and a computer or other device connected to it. For details, see Wi-Fi Protected
12
Setup (WPS) in the camcorder's Instruction Manual (PDF file).
[Search for Access Points] Following the camcorder’s onscreen instructions, you select your
access point from a list of detected SSIDs and then enter your password. For details, see Searching
for Access Points in the camcorder's Instruction Manual (PDF file).
[Manual Setup] You manually enter the access point’s SSID, password and other network settings.
This method is recommended for advanced users of Wi-Fi networks. For details, see Manual Setup
in the camcorder's Instruction Manual (PDF file).
* WPS, which stands for Wi-Fi Protected Setup, is a standard that makes connecting to a access point
easier.
Wi-Fi Protected Setup (WPS)
If your access point is WPS-compatible (bears the logo shown on the right),
connecting the camcorder to it can be very easy. With WPS, you will either use
the [WPS: Button] method or [WPS: PIN Code] method (see the description in
the previous section). If you cannot successfully connect the camcorder using
WPS, try using the [Search for Access Points] method. Refer also to the router’s instruction manual.
Troubleshooting
If you cannot successfully establish a Wi-Fi connection, check below. Refer also to the instruction
manual of the other Wi-Fi-enabled devices you are using. Consult your dealer or a Canon Service
Center if the problem persists.
Cannot connect with the Wi-Fi-enabled device.
- The effective communication range between the camcorder and device may vary depending on
the strength of the wireless signal. Try using the camcorder closer to the device.
- Cordless phones, microwave ovens, refrigerators and other appliances in the line of sight
between the wireless router and the camcorder may interfere with the wireless signal. Try using
the camcorder in a location farther away from such appliances.
COPY

Troubleshooting
List of Messages
(in alphabetical order)
Refer to the following if a message appears on the camcorder’s screen. If a message not listed below
appears, refer to List of Messages in the camcorder's Instruction Manual (PDF file).
Another user is already controlling the camcorder. Try again later.
- This message appears on the screen of the Wi-Fi device. Multiple Wi-Fi devices are trying to
connect with the camcorder. Make sure only one Wi-Fi device is trying to connect and then
touch Retry.
13
Memory card cover is open
- The memory card cover was opened while the memory card was being accessed. Stop the
Wi-Fi function in use and end the Wi-Fi connection.
Wi-Fi connection terminated
- Cordless phones, microwave ovens, refrigerators and other appliances may interfere with the
wireless signal. Try using the camcorder in a location farther away from such appliances.
- The camcorder may not be able to connect to the wireless router if too many devices are
accessing the wireless access point.
COPY

Table des matières
Fonctions Wi-Fi
03 Démarrage
03 Présentation du Wi-Fi
06 Commande à distance via l'application Wi-Fi Distant
07 Navigateur distant : visionner les enregistrements avec un navigateur Web sur votre
périphérique iOS ou Android
08 Transfert des enregistrements en utilisant un périphérique iOS
2
10 Lecture sur un ordinateur
10 Transfert des fichiers sur un ordinateur ou un serveur FTP
11 Partage des enregistrements avec CANON iMAGE GATEWAY
12 Connexion Wi-Fi utilisant un point d’accès
13 Dépannage
Marques de commerce
• Microsoft et Windows sont des marques de commerce ou des marques déposées de Microsoft Corporation aux
États-Unis et/ou dans les autres pays.
• App Store, iPad, iPhone, iPod, iTunes et Mac OS sont des marques de commerce d'Apple Inc., enregistrées aux
États-Unis et dans les autres pays.
• Google, Android, Google Play, YouTube sont des marques commerciales de Google Inc.
• Facebook est une marque déposée de Facebook, Inc.
• IOS est une marque commerciale ou déposée de Cisco aux Etats-Unis et dans d’autres pays et est utilisée avec
une licence.
• Le nom et les repères Twitter sont des marques commerciales de Twitter, Inc.
• Wi-Fi est une marque de commerce de Wi-Fi Alliance.
• Wi-Fi Certified, WPA, WPA2, et le logo Wi-Fi Certified sont des marques de commerce de Wi-Fi Alliance.
• WPS, lorsqu’il est utilisé pour les réglages du caméscope, les affichages sur l’écran et dans ce manuel, signifie
Wi-Fi Protected Setup.
• Le repère d’identification de réglage protégé Wi-Fi est un repère de Wi-Fi Alliance.
• JavaScript est une marque commerciale ou une marque commerciale déposée d’Oracle Corporation, de ses
filiales ou de ses sociétés affiliées aux États-Unis et dans d’autres pays.
• Les autres noms et produits non mentionnés ci-dessus peuvent être des marques de commerce ou des marques
déposées de leurs compagnies respectives.
COPY
Démarrage
Démarrage
Ce manuel vous aide à commencer à utiliser les fonctions Wi-Fi de votre caméscope. Pour en savoir
plus sur les fonctions Wi-FI et connaître des procédures plus détaillées, reportez-vous à la version
complète du manuel d'instruction (fichier PDF sur le CD-ROM fourni). Lorsque ce manuel vous renvoie
à une section dans le manuel d’instructions du caméscope, utilisez la table des matières ou la fonction
de recherche du PDF pour trouver la dite section. Pour installer la version complète du manuel
3
d’instructions, reportez-vous à Installation du manuel d'instruction du caméscope (fichier PDF) dans le
guide rapide fourni.
Vouci les termes de base utilisés fréquemment dans ce texte.
Point d’accès
Un point d’accès sans fil (WAP) est un dispositif qui permet aux appareils sans fil, tels que votre
caméscope, de se connecter à un réseau câblé (y compris Internet) en utilisant le standard Wi-Fi.
Dans la plupart des cas, c’est votre routeur sans fil.
Réseau Wi-Fi
Un ensemble d’ordinateurs et/ou d’autres dispositifs à votre domicile, bureau, ou tout autre endroit
connecté sans fil avec la Wi-Fi.
SSID
Service Set Identifier (identifiant du service). C’est simplement le nom public d’un réseau Wi-Fi.
Présentation du Wi-Fi
Lorsque vous utilisez la fonction Wi-Fi du caméscope pour la connexion à un smartphone ou une
tablette, vous pouvez sauvegarder, lire et transférer vos enregistrements sans fil. Vous pouvez même
1
utiliser un smartphone ou une tablette (périphérique iOS ou Android
) comme télécommande et
enregistrer avec le navigateur web du périphérique.
1
“Périphérique iOS” est utilisé dans ce manuel pour faire référence aux iPhones, iPods et iPads
compatibles Wi-Fi tandis que “périphérique Android” fait référence aux smartphones et aux tablettes
Android.
Connexion Wi-Fi
Lors de l'utilisation de l'App Wi-Fi Distant, vous pouvez utiliser votre périphérique iOS ou Android pour commander le
caméscope à distance et faire des enregistrements (A 6).
Périphérique iOS ou Android
COPY
Présentation du Wi-Fi
Connexion Wi-Fi
2
Connectez sans fil le caméscope à votre périphérique iOS, votre périphérique Android ou votre ordinateur
et utilisez
le navigateur Web pour visionner les enregistrements du caméscope (A 7).
2
Vous pouvez aussi utiliser un ordinateur connecté via un point d’accès.
4
Périphérique iOS, périphérique Android, etc.
Connexion Wi-Fi
3
Après avoir téléchargé Movie Uploader
, connectez sans fil le caméscope à un périphérique iOS (A 8) pour
sauvegarder, lire et transférer vos enregistrements. Vous pouvez même utiliser ce type de connexion si vous projetez
de partager des séquences vidéo sur YouTube et Facebook où que vous soyez.
3
L’application Movie Uploader, fournie par PIXELA, est disponible gratuitement dans App Store.
Périphérique iOS
Connexion Wi-Fi
Connectez sans fil le caméscope à un routeur sans fil (point d'accès) sur un réseau Wi-Fi (A 12). Utilisez cette
connexion si vous projetez de sauvegarder vos enregistrements sur un ordinateur ou un serveur FTP (A 10).
Point d'accès Ordinateur
Connexion Wi-Fi
Connectez sans fil le caméscope à un réseau et utilisez la fonction de serveur multimédia et lisez vos enregistrement
sur un périphérique connecté au réseau en utilisant un câble LAN (A 10).
Câble réseau
Point d'accès
Ordinateur
COPY
Présentation du Wi-Fi
Connexion Wi-Fi
Connectez sans fil le caméscope à un routeur sans fil (point d'accès) sur un réseau Wi-Fi. Utilisez cette connexion si
vous projetez de vous connectez à CANON iMAGE GATEWAY (A 11). Après cela, vous pouvez même partager des
séquences vidéo sur YouTube et Facebook.
5
Point d'accès
IMPORTANT
• L’utilisation d’un réseau Wi-Fi non protégé peut exposer vos fichiers et vos données à la surveillance
de tiers non autorisés. Soyez conscient des risques que vous encourez.
NOTES
• Lors de l'utilisation d'autres fonctions Wi-Fi que la commande à distance du caméscope en utilisant
l'application Wi-Fi Distant, n'ouvrez pas la double fente de carte mémoire.
• Lors de l'utilisation de fonctions Wi-Fi autres que la commande à distance du caméscope via
l'application Wi-Fi Distant, la fonction de mise hors tension automatique du caméscope ne
fonctionne pas.
Avant d’utiliser les fonctions Wi-Fi
Selon la fonction, le caméscope se connecte sans fil à un appareil Wi-Fi, tel qu’un smartphone, ou
directement à un réseau Wi-Fi via un point d’accès (routeur sans fil)*. Après avoir sélectionné la
fonction que vous voulez utiliser, suivez les instructions sur l’écran pour la connexion au
caméscope.
* En fonction du fabricant, le point d'accès peut être défini par un autre nom, tel que routeur LAN
sans fil ou routeur réseau sans fil.
À propos de l’antenne Wi-Fi
Lors de l’utilisation des fonctions Wi-Fi du caméscope, ne
recouvrez pas la partie arrière du caméscope avec votre
main ou un autre objet. L’antenne Wi-Fi est située sur la
partie arrière et la recouvrir peut interférer avec les signaux
sans fil.
Antenne Wi-Fi
À propos du standard Wi-Fi du caméscope
Pour plus de détails sur le standard Wi-Fi du caméscope, reportez-vous à À propos du standard
Wi-Fi du caméscope dans le manuel d'instructions du caméscope (fichier PDF).
COPY

Commande à distance via l'application Wi-Fi Distant
Commande à distance via l'application Wi-Fi Distant
Vous pouvez commander le caméscope à distance via Wi-Fi Distant, une application web qui est
accessible en utilisant le navigateur web* de périphériques compatibles avec les réseaux Wi-Fi**.
L'application Wi-Fi Distant vous permet de contrôler l'image grâce à une vue en direct, le démarrage
et l'arrêt de l'enregistrement, et la commande à distance du mode de prise de vue, de l'exposition, de
la balance des blancs, de l'ouverture, du gain, de la vitesse d'obturation et du zoom.
6
* Un navigateur web compatible avec JavaScript et les cookies est requis.
** Pour les détails sur les périphériques compatibles, les systèmes d'exploitation, les navigateurs web,
etc, veuillez visiter votre site Web Canon local.
Modes de fonctionnement :
Périphérique iOS ou Android
Réglage du mot de passe du caméscope
Pour les fonctions Wi-Fi qui nécessitent un périphérique iOS ou Android, vous devez régler le mot de
passe du caméscope. Après avoir entré une fois le mot de passe, vous n'avez pas besoin de l'entrer à
nouveau (sauf si les réglages du caméscope sont réinitialisés ou écrasées).
1 Ouvrez l'écran [Régl. de connex. smartphone].
[FUNC.] > [MENU] > p/s* > [Wi-Fi] > [Régl. de connex. smartphone]
* Touchez s pour les fonction de Navigateur distant et de Serveur multimédia.
2 Touchez le mot de passe du caméscope.
3 Entrez un mot de passe de 8 caractères touchez [OK].
4 Touchez [K] puis touchez [X].
NOTES
• Après le réglage du mot de passe du caméscope, il n'apparaît pas sur l'écran pour vérification.
Veuillez noter votre mot de passe de façon à ne pas l'oublier. Pour chanter le mot de passe, réalisez
de nouveau la procédure ci-dessus.
Commande à distance du caméscope
1 Caméscope : ouvrez l'écran [Wi-Fi Distant].
[FUNC.] > [„ Wi-Fi Distant]
2 Caméscope : touchez [ON].
• Le code SSID du caméscope (nom de réseau) et l'URL à entrer dans le navigateur web
apparaissent.
• Le caméscope sera prêt pour la connexion avec le périphérique.
COPY
Navigateur distant : visionner les enregistrements avec un navigateur Web sur votre périphérique
3 Périphérique iOS/Android : activez le Wi-Fi dans l’écran de réglage.
• Les noms de réseau des points d’accès détectés apparaissent.
4 Périphérique iOS/Android : touchez le point d'accès avec le même SSID affiché à
l'étape 2.
• Si vous avez déjà réalisé cette procédure et que vous n'avez pas changé le mot de passe du
caméscope, la connexion est établie automatiquement.
5 Périphérique iOS/Android : entrez le mot de passe du caméscope réglé précédemment.
7
6 Périphérique iOS/Android : entrez l'URL affiché sur l'écran du caméscope sur le
navigateur Web pour démarrer l'application Wi-Fi Distant.
• Pour les détails sur cette fonction, reportez-vous à Commande à distance via l'application Wi-Fi
Distant dans le manuel d’instructions du caméscope (fichier PDF).
Navigateur distant : visionner les enregistrements avec un
navigateur Web sur votre périphérique iOS ou Android
Avec la fonction de navigateur distant, vous pouvez utiliser le navigateur Web de votre périphérique
iOS, périphérique Android, ordinateur ou périphérique similaire pour montrer une liste
d’enregistrements dans le caméscope, les lire et même les télécharger.* Ceci vous permet de
visualiser de manière pratique vos enregistrements lorsque vous êtes à l’extérieur.
* En fonction du périphérique, du SE, du navigateur, du format de film et du mode d'enregistrement,
vous ne pourrez peut-être pas lire ou télécharger des enregistrements. Pour les détails, veuillez visiter
votre site Internet Canon local.
Périphérique iOS, périphérique Android, etc.
Modes de fonctionnement :
1 Caméscope : ouvrez l’écran d’index souhaité).
2 Caméscope : ouvrez l'écran [Lecture via navigateur].
[MENU] > s > [Wi-Fi] > [Lecture via navigateur]
• Le SSID du caméscope (nom du réseau) apparaît.
• Le caméscope est prêt pour la connexion avec le périphérique.
• Pour régler ou changer le mot de passe du caméscope, réalisez la procédure de Réglage du mot
de passe du caméscope (A 6) à partir de l'étape 2.
3 Périphérique iOS/Android : activez le Wi-Fi dans l’écran de réglage.
• Les noms de réseau des points d’accès détectés apparaissent.
4 Périphérique iOS/Android : touchez le point d'accès avec le même SSID affiché à
l'étape 2.
• Si vous avez déjà réalisé cette procédure et que vous n'avez pas changé le mot de passe du
caméscope, la connexion est établie automatiquement.
COPY
Transfert des enregistrements en utilisant un périphérique iOS
5 Périphérique iOS/Android : entrez le mot de passe du caméscope réglé précédemment.
• [Connecté] apparaît sur l’écran du caméscope et la connexion est établie.
6 Périphérique iOS/Android : démarrez le navigateur Web.
7 Périphérique iOS/Android : saisissez l’URL qui apparaît sur l’écran du caméscope dans la
barre d’adresse du navigateur Web.
• L’écran de navigation à distance apparaît.
• Tant vous ne changez pas les réglages du port, l'URL reste le même, il peut alors s'avérer
8
pratique de le mettre en signet.
8 Périphérique iOS/Android : touchez [6·] en haut à gauche de l’écran et ouvrez l’écran
d’index souhaité. Touchez ensuite l'enregistrement souhaité.
• Pour les séquences vidéo, touchez l'icône de lecture pour démarrer la lecture. Pour les photos, la
photo sélectionnée s’affiche.
9 Caméscope : touchez [Fin] > [OK] lorsque vous avez terminé.
• Pour les détails sur cette fonction, reportez-vous à Navigateur distant : visionner les
enregistrements avec un navigateur Web sur votre périphérique iOS ou Android dans le manuel
d’instructions du caméscope (fichier PDF).
NOTES
• Les types suivants des scènes MP4 sont reconnus comme fichiers multiples sur d’autres
dispositifs.
- Scènes dépassant 4 Go
- Scènes enregistrées à 35 Mbps dépassant les 30 minutes
- Scènes enregistrées avec un mode d'enregistrement autre que 35 Mbps dépassant 1 heure
• Un seul périphérique à la fois peut être connecté au caméscope.
Transfert des enregistrements en utilisant un périphérique iOS
Avec l’application Movie Uploader* pour les périphériques iOS, vous pouvez raccorder le caméscope
sans fil au périphérique pour transférer vos séquences vidéo sur YouTube et vos séquences vidéo et
photos sur Facebook, même quand vous êtes éloigné de votre réseau domestique. Vous pouvez
même sauvegarder** et lire vos séquences vidéo MP4 et photos sur un périphérique iOS.
* L’application Movie Uploader, fournie par PIXELA, est disponible gratuitement dans App Store.
** Non disponible pour les séquences vidéo MP4 enregistrées à 35 Mbps.
Périphérique iOS
Modes de fonctionnement :
