Toshiba JournE Air800-801 – страница 2
Инструкция к Toshiba JournE Air800-801
Оглавление
- Содержание
- Программное обеспечение 3D Album ................................................37
- Введение Проверьте наличие компонентов Что в коробке Что еще вам понадобится:
- Важная информация Меры предосторожности и обслуживание
- Уход за цифровой рамкой Утилизация Заявление об авторских правах
- Отказ от ответственности Товарные знаки
- Обзор фоторамки Journe Air Вид спереди Вид снизу
- Вид сзади Вид слева Требования к системе
- Приступаем к работе Размещение устройства Подключение к источнику переменного тока Включение цифровой рамки
- Встроенная батарея (только в модели Journe Air 801)
- Соединения Карта памяти: Подключение через шину USB
- Значение значков Wi-Fi
- Основные операции Фоторежим Последовательность демонстрации слайдов
- 3. Выберите Последовательность демонстрации слайдов (Slideshow Sequence) и нажмите кнопку OK.
- Эффект перехода
- Частота
- Цвет фона
- Эффект
- Поворот
- Навигация по фотографиям Flickr/Picasa
- Активация учетной записи Порядок включения и выключения учетных записей:
- Добавление учетной записи
- Удаление учетной записи
- Режим времени и даты Установка времени и даты
- Установка времени Установка даты
- Установка будильника и выбор его звукового сигнала Установка будильника Включение и выключение
- Выбор звукового сигнала будильника Чтобы внести аудиофайл в список звуковых сигналов будильника:
- Вставка фотографий в фотокалендарь
- Режим «Фото + Аудио»
- Видеорежим Чтобы перейти в видеорежим:
- Значения значков режима воспроизведения видеозаписей
- Аудиорежим
- Вы также можете выполнять следующие действия: Воспроизведение одним нажатием
- Копирование и удаление файлов Чтобы скопировать или удалить файлы:
- Чтобы скопировать файлы на другое устройство хранения данных: Чтобы скопировать все файлы, находящиеся на устройстве хранения данных, на другое устройство:
- Чтобы удалить файлы: Чтобы удалить все файлы, находящиеся на устройстве хранения данных:
- Программное обеспечение 3D Album Установка 3D Album 1. Вставьте компакт-диск с программным обеспечением в компьютер
- 2. Щелкните Да, соглашаюсь (Yes, I agree), чтобы принять условия 3. В поле Путь установки (Install path) выберите место установки
- 4. После того, как установка будет выполнена, откроется окно
- Функции 3D Album Преобразование фотографий
- 1. Выберите место расположения фотографий в поле Исходная папка (From Folder).
- Создание трехмерного альбома
- Настройки системы Яркость
- Язык Сеть
- WPS
- Мастер Wi-Fi
- Дополнительная настройка Чтобы использовать DHCP:
- 3. Выберите Да (Yes) и нажмите кнопку OK. Чтобы настроить параметры вручную: 1. Выберите Дополнительная настройка (Advance Configuration) и нажмите кнопку OK.
- 4. Выберите Да (Yes) и нажмите кнопку OK. См. раздел Мастер Wi-Fi.
- Список профилей
- Веб-альбом
- Функция таймера (автоматическое включение и выключение) 1. Выберите Авто вкл/выкл (Auto On/Off) и нажмите кнопку OK.
- 3. Чтобы задать время выключения, выберите «Авто выкл» (Auto Off) и нажмите кнопку OK.
- Автонаклон
- Автосвет Чтобы активировать функцию «Автосвет»:
- Восстановление настроек, используемых по умолчанию Режим USB
- Дополнительное представление
- Чтобы перевести цифровую рамку в режим «Расширенный»:
- n Снимите флажок Расширить рабочий стол на этот монитор (Extend my Windows desktop onto this monitor). Во вкладке «Параметры» (Settings) можно разместить значки мониторов в соответствии с их расположением.
- Печать с PictBridge
- Информация о состоянии Информация о состоянии Wi-Fi
- Обновление встроенного программного обеспечения Поддерживаемые видеоформаты
- Ответы на часто задаваемые вопросы Поддержка корпорации TOSHIBA
- Регламентирующие положения Страны Ограничения по использованию
- Условия эксплуатации
- Изложенная далее информация актуальна только в странах-членах ЕС:
- Утилизация батарей и/или аккумуляторов
3. Select the account, and then press OK.
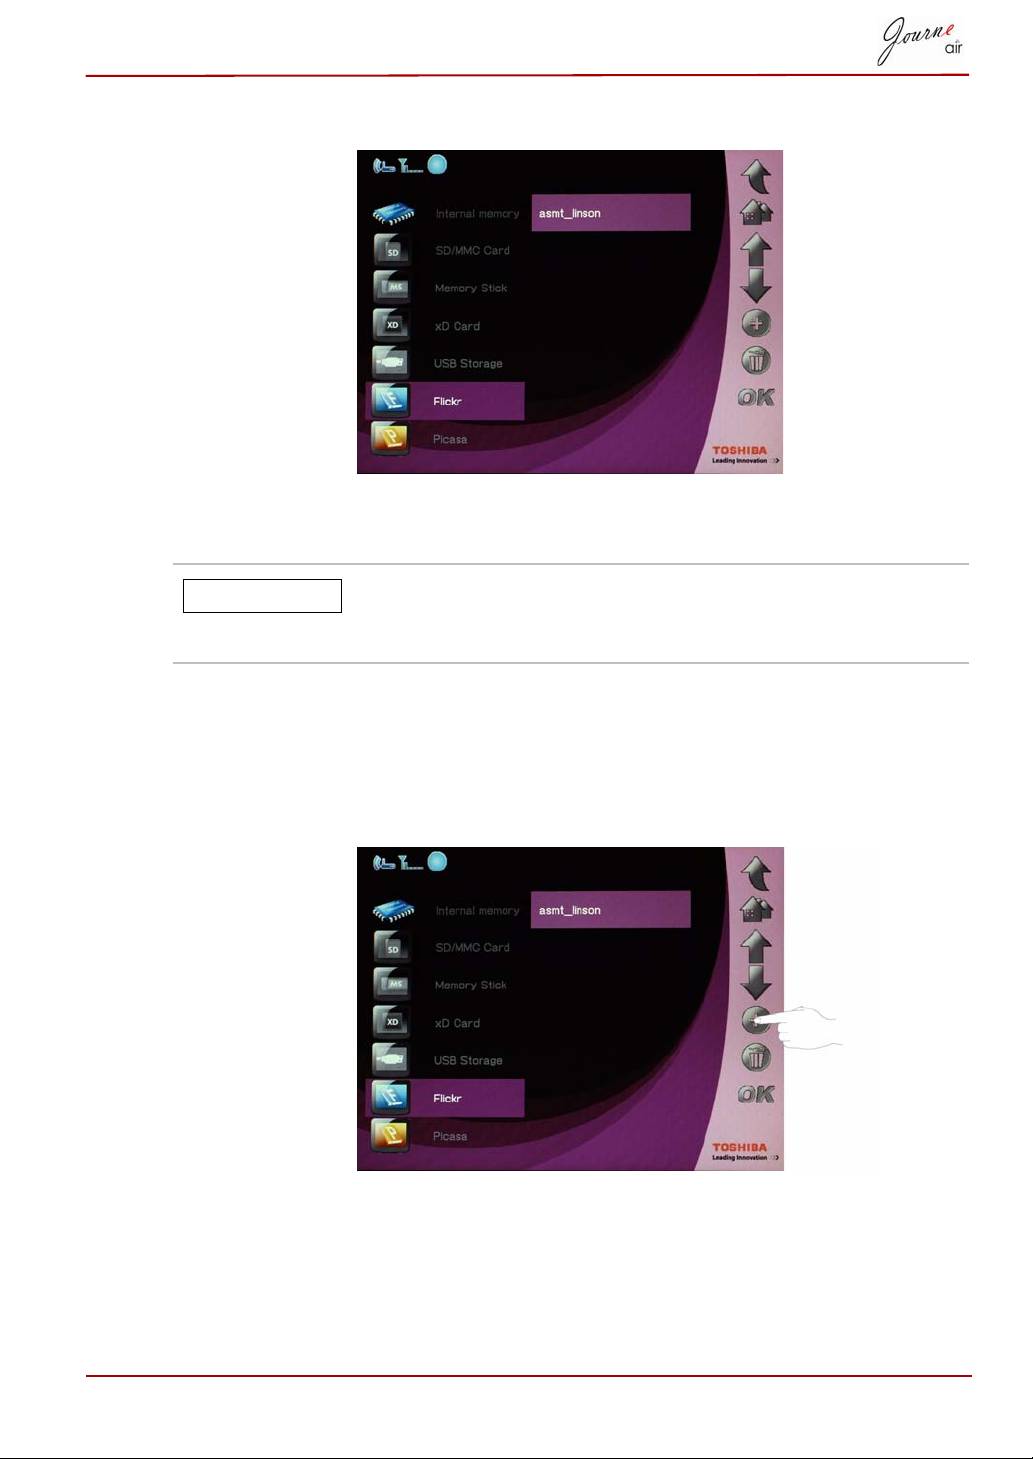
Add an Account
Each time the digital frame searches external memory
cards for RSS feeds, new RSS feeds are automatically
added to your list as accounts.
You can save a maximum of 32 accounts; 16 for Flickr, and 16 for Picasa.
1. In the main menu, select Photo and press OK to enter Photo Mode.
2. Select Flickr or Picasa, and then press OK.
3. Scroll down to an empty field, and then press Add.
User’s Manual EN-21
NOTE

4. Enter the account name, and then press Enter to save the new account.
Delete an Account
1. In the main menu, select Photo and press OK to enter Photo Mode.
2. Select Flickr or Picasa, and then press OK.
3. Select the account you wish to delete, and then press Delete.
4. Select Yes and press OK to confirm.
EN-22 User’s Manual
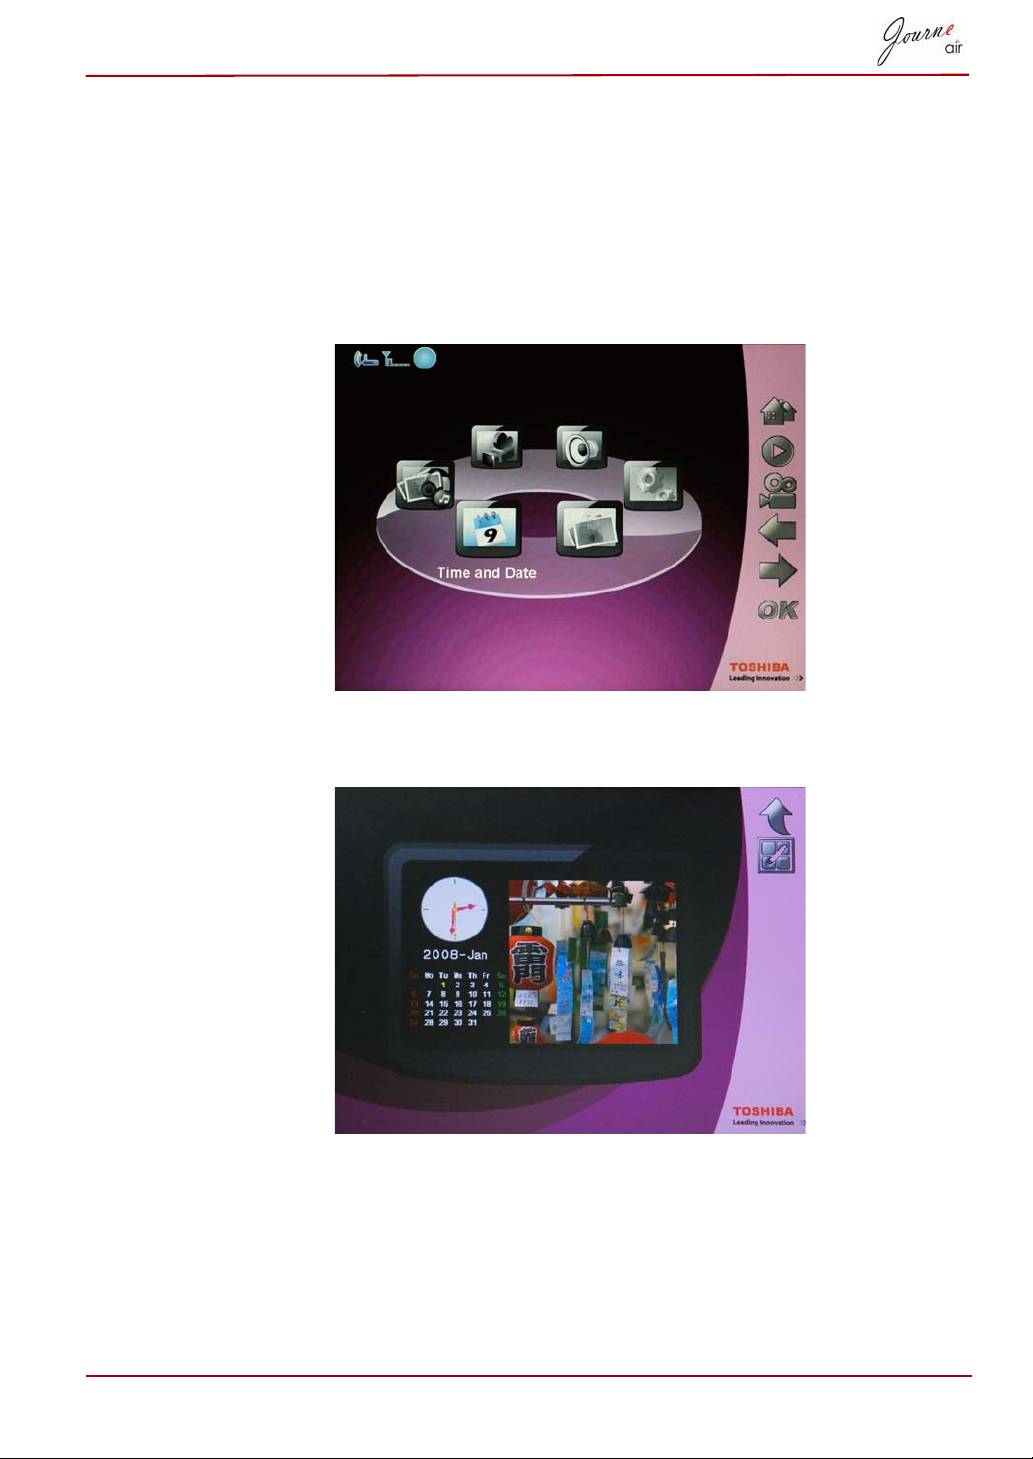
Time and Date Mode
In Time and Date Mode you can set the time, date and alarm clock of the
digital frame. A photo calendar is also included in this mode.
Set Time and Date
1. In the main menu, select Time and Date and press OK to enter Time
and Date Mode.
2. After entering Time and Date Mode, the photo calendar is displayed.
Press the Home button to enter the time and date setting screen.
User’s Manual EN-23
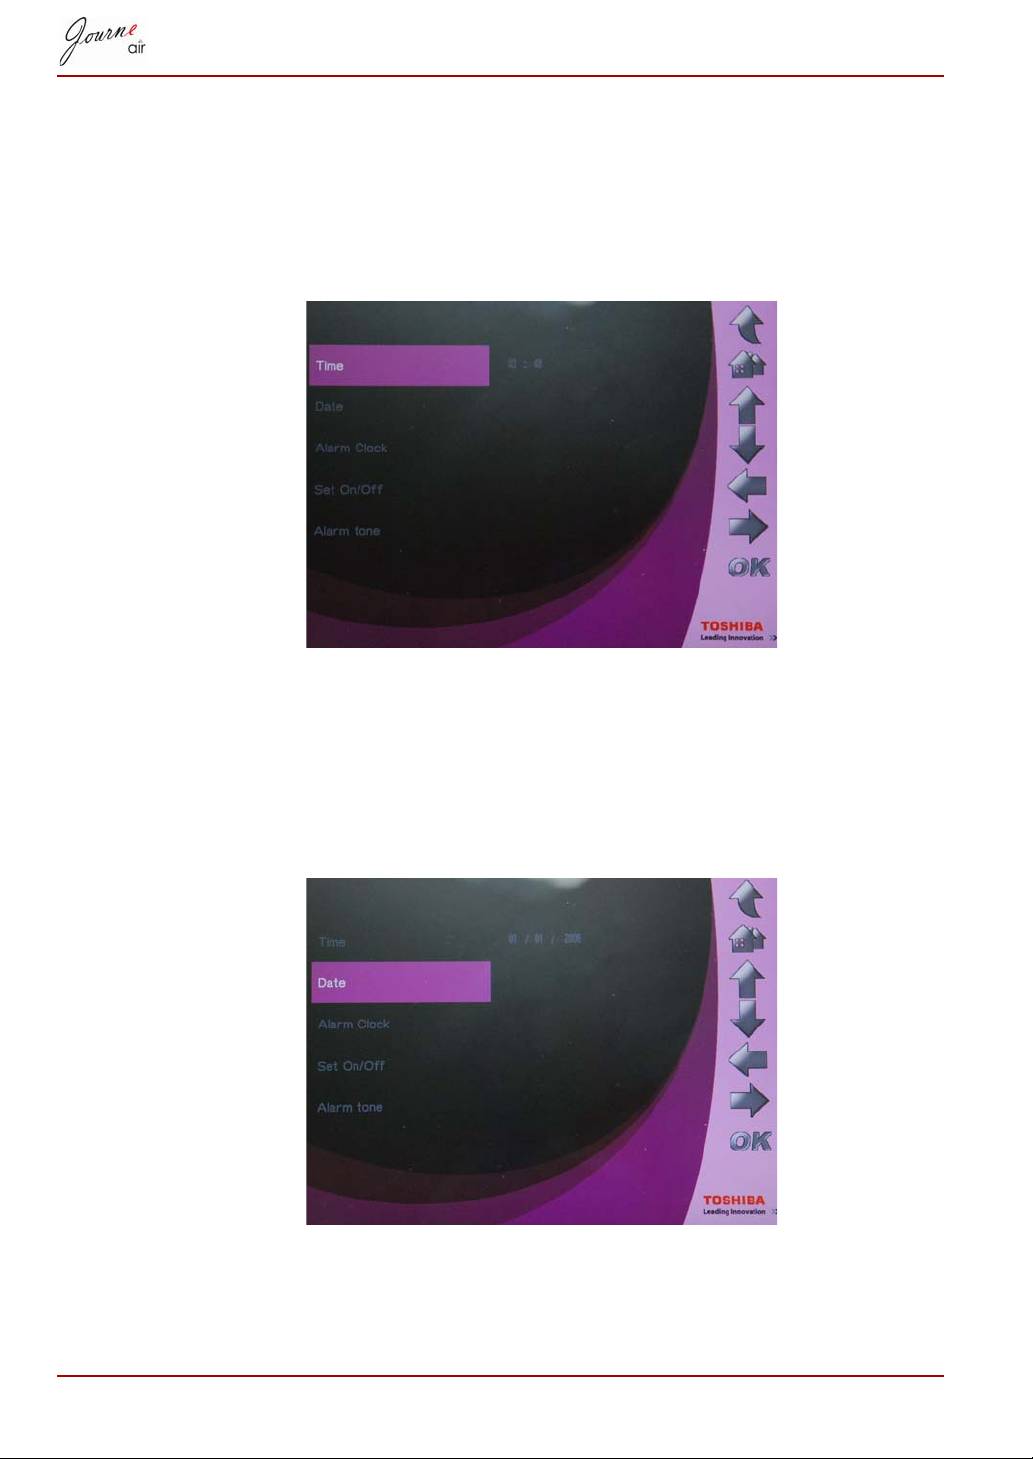
Time Setting
1. Select Time and press OK to set the time.
2. Press Up and Down to select the time.
3. Press Left and Right to move between hours and minutes.
4. When the time is set, press OK to confirm.
Date Setting
1. Select Date and press OK to set the date.
2. Press Up and Down to select the date.
3. Press Left and Right to move between days, months and years.
4. When the date is set, press OK to confirm.
EN-24 User’s Manual
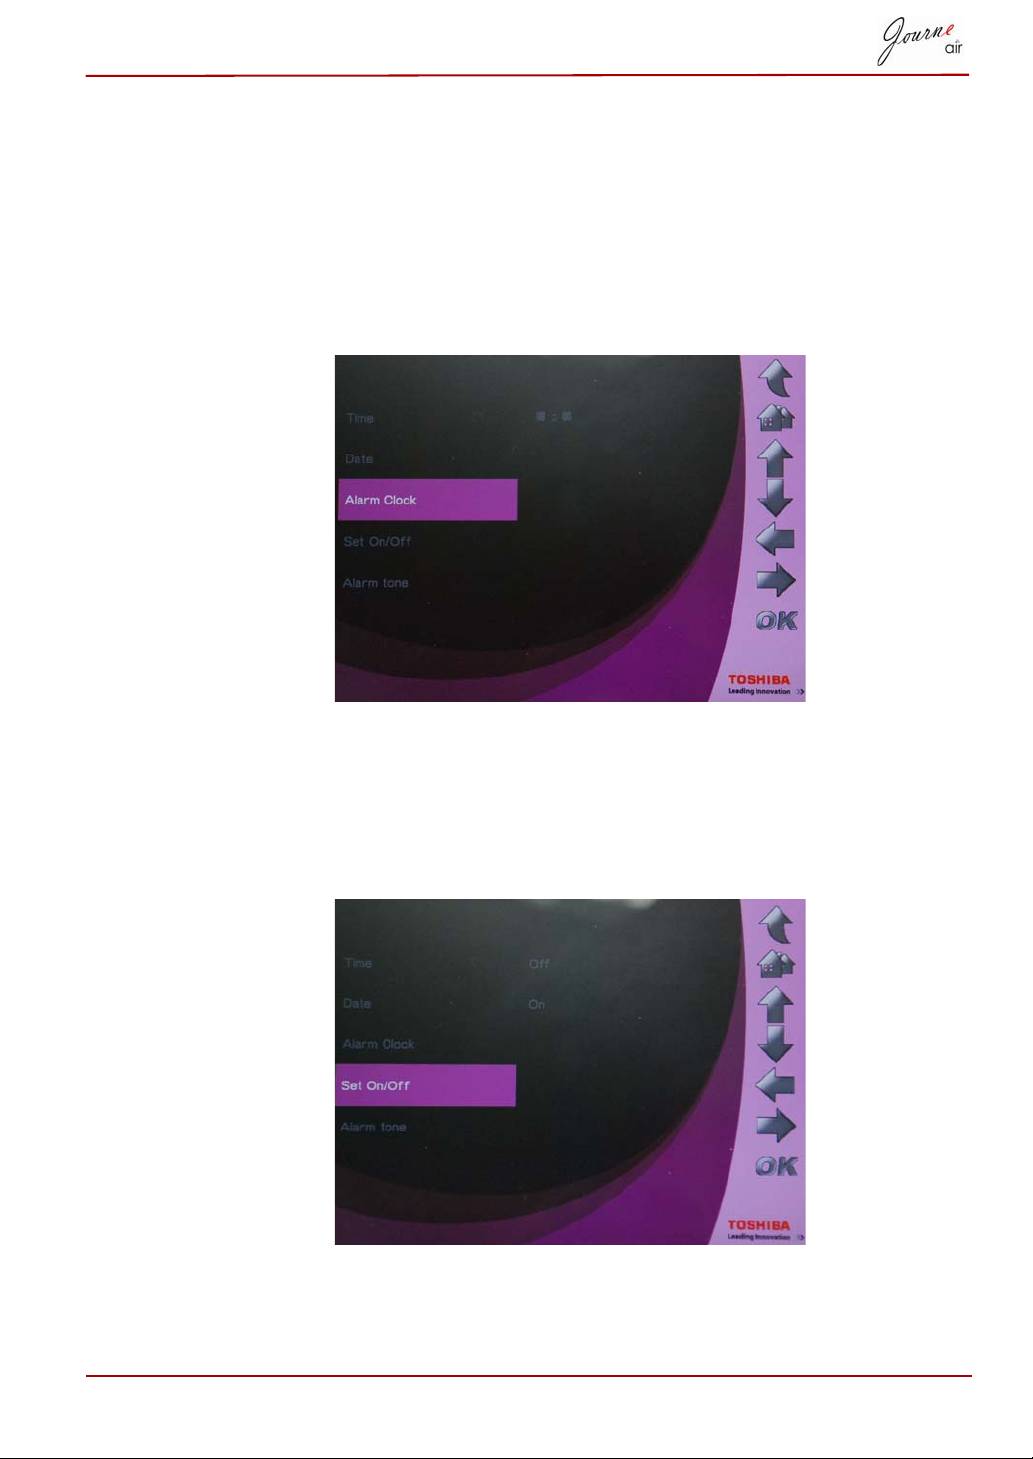
Set Alarm Clock and Alarm Tone
Set Alarm Clock
1. Select Alarm Clock and press OK to set the time of the alarm.
2. Press Up and Down to select the time.
3. Press Left or Right to move between hours and minutes.
4. When the time is set, press OK to confirm.
Set On/Off
1. Select Set On/Off and press OK to turn on or off the alarm.
2. To turn on the alarm clock, select On and press OK.
3. To Turn off the alarm clock, select Off and press OK.
User’s Manual EN-25
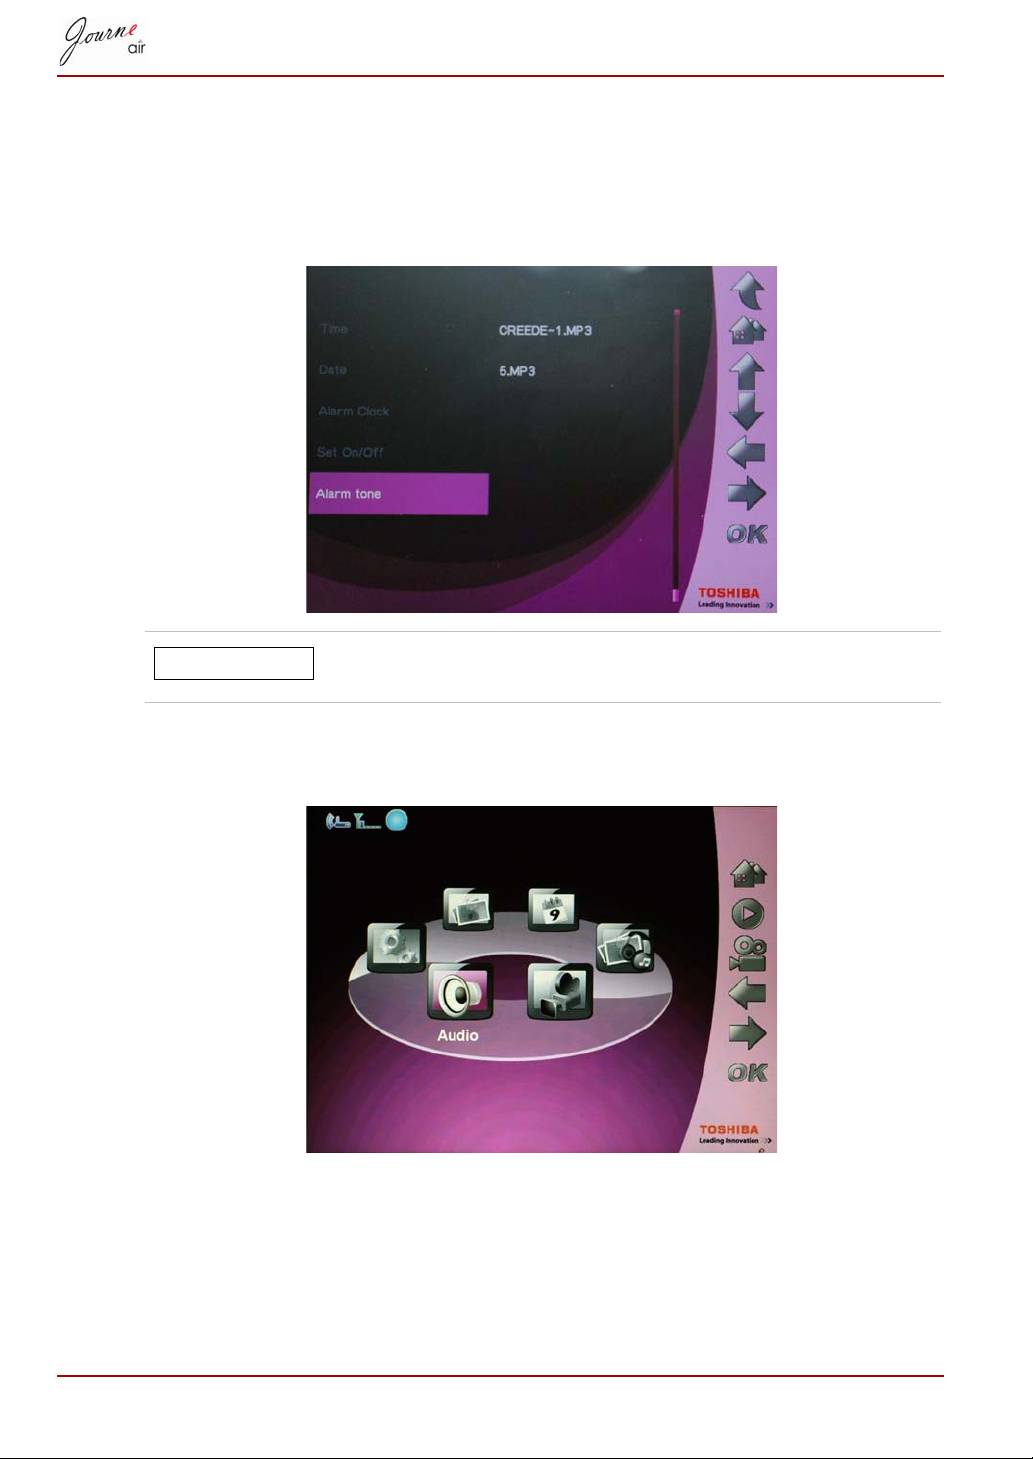
Set Alarm Tone
1. Select Alarm tone and press OK to enter the alarm tone list.
2. Press Up or Down to select an audio file.
3. After the audio file is selected, press OK to confirm.
You can set any audio file digital frame supports (MP3,
OGG) as the alarm tone.
To set an audio file in the alarm tone list:
1. In the main menu, select Audio Mode and press OK.
2. Select a storage device and press OK.
3. Select ALL and press OK to display audio files in the storage device.
4. Select the file you want to set as alarm tone and press Home.
EN-26 User’s Manual
NOTE

5. Select Set as alarm and press OK to confirm, then the audio file will be
show in the alarm tone list.
Put Photos in the Photo Calendar
To put photos in the photo calendar, copy the photos to the folder
DEFAULT in the internal memory.
User’s Manual EN-27
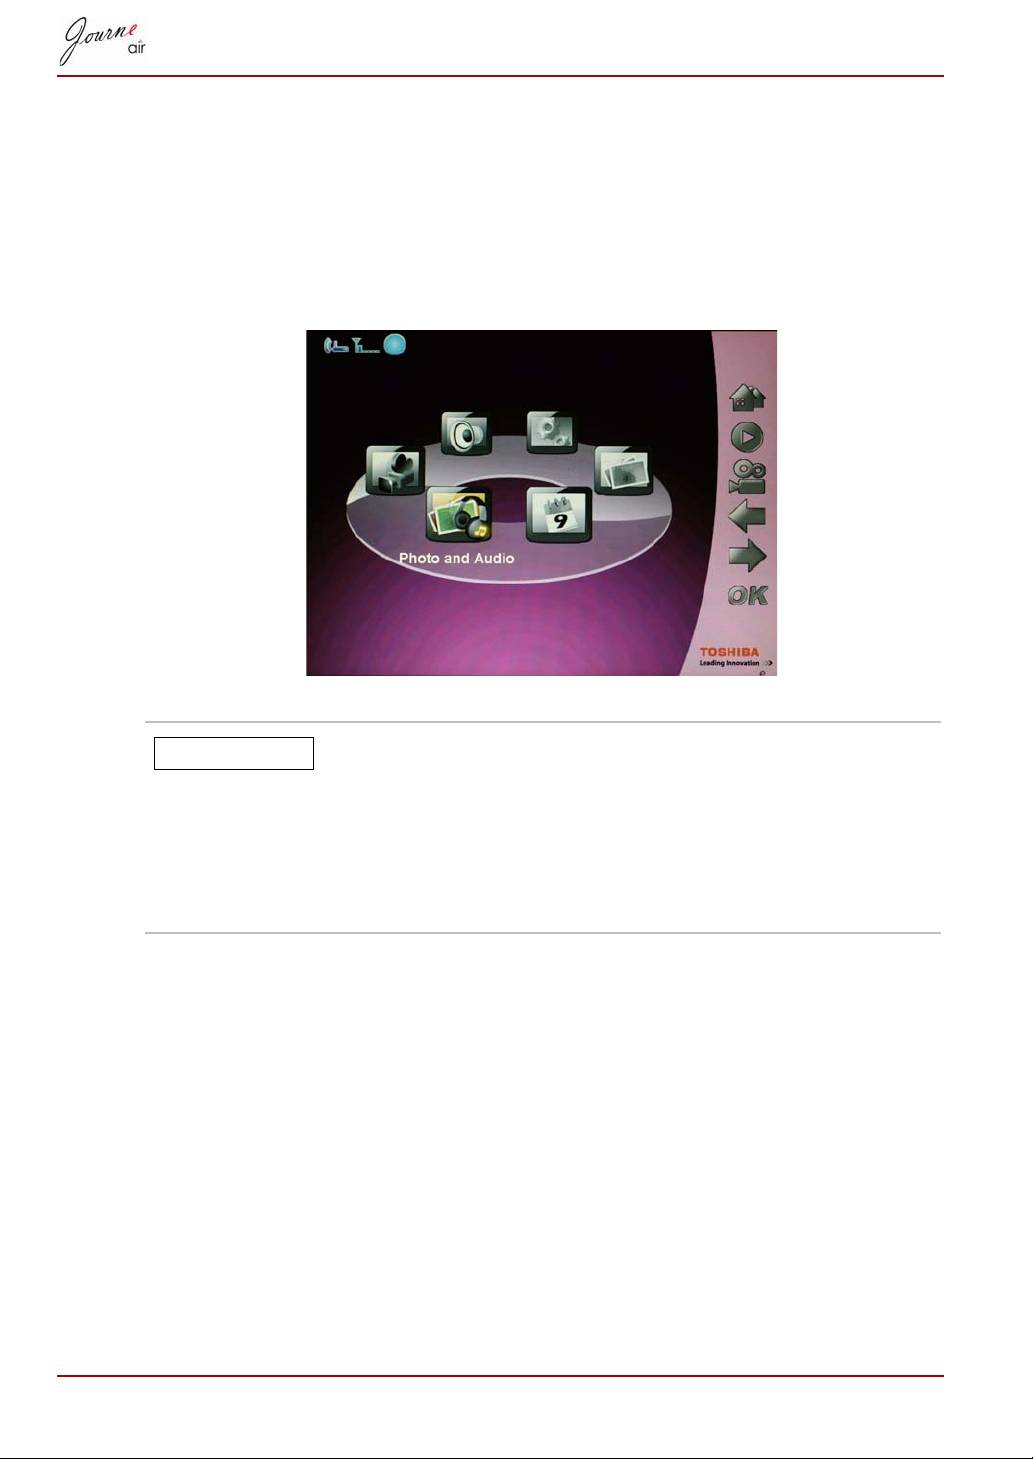
Photo + Audio Mode
In Photo + Audio Mode, the digital frame can display photos in slideshow
mode and play audio files simultaneously.
To enter Photo + Audio Mode:
1. In the main menu, select Photo + Audio and press OK to enter the
mode.
After entering Photo + Audio Mode, the digital frame
displays photos and plays audio files in the memory card
first. If there is no memory card, the digital frame
displays photos and plays audio files in the internal
memory.In this mode digital frame can access only one
storage device at a time and the memory card has
priority.
EN-28 User’s Manual
NOTE
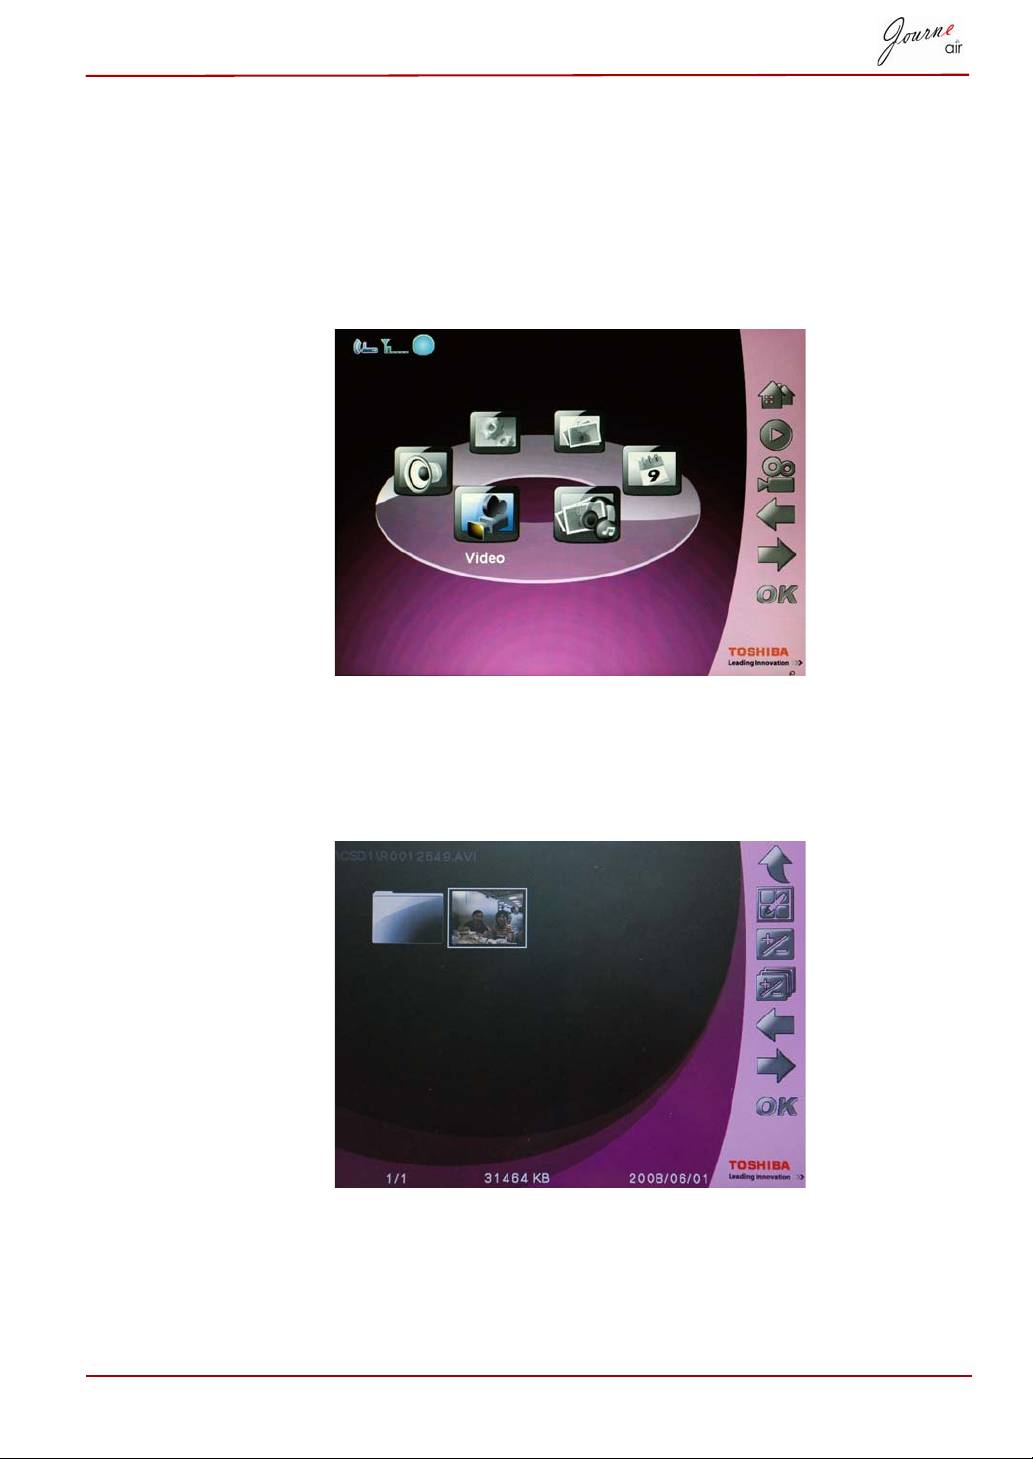
Video Mode
The digital frame is able to play video files it supports (For video file formats
supported, refer to Technical Data).
To enter Video Mode:
1. In the main menu, select Video Mode and press OK to enter video
mode.
2. Select the storage device you want to access, and then press OK.
3. Select ALL to display all the video files and folders in the storage
device.
4. Select a video file and press OK to play the file.
User’s Manual EN-29
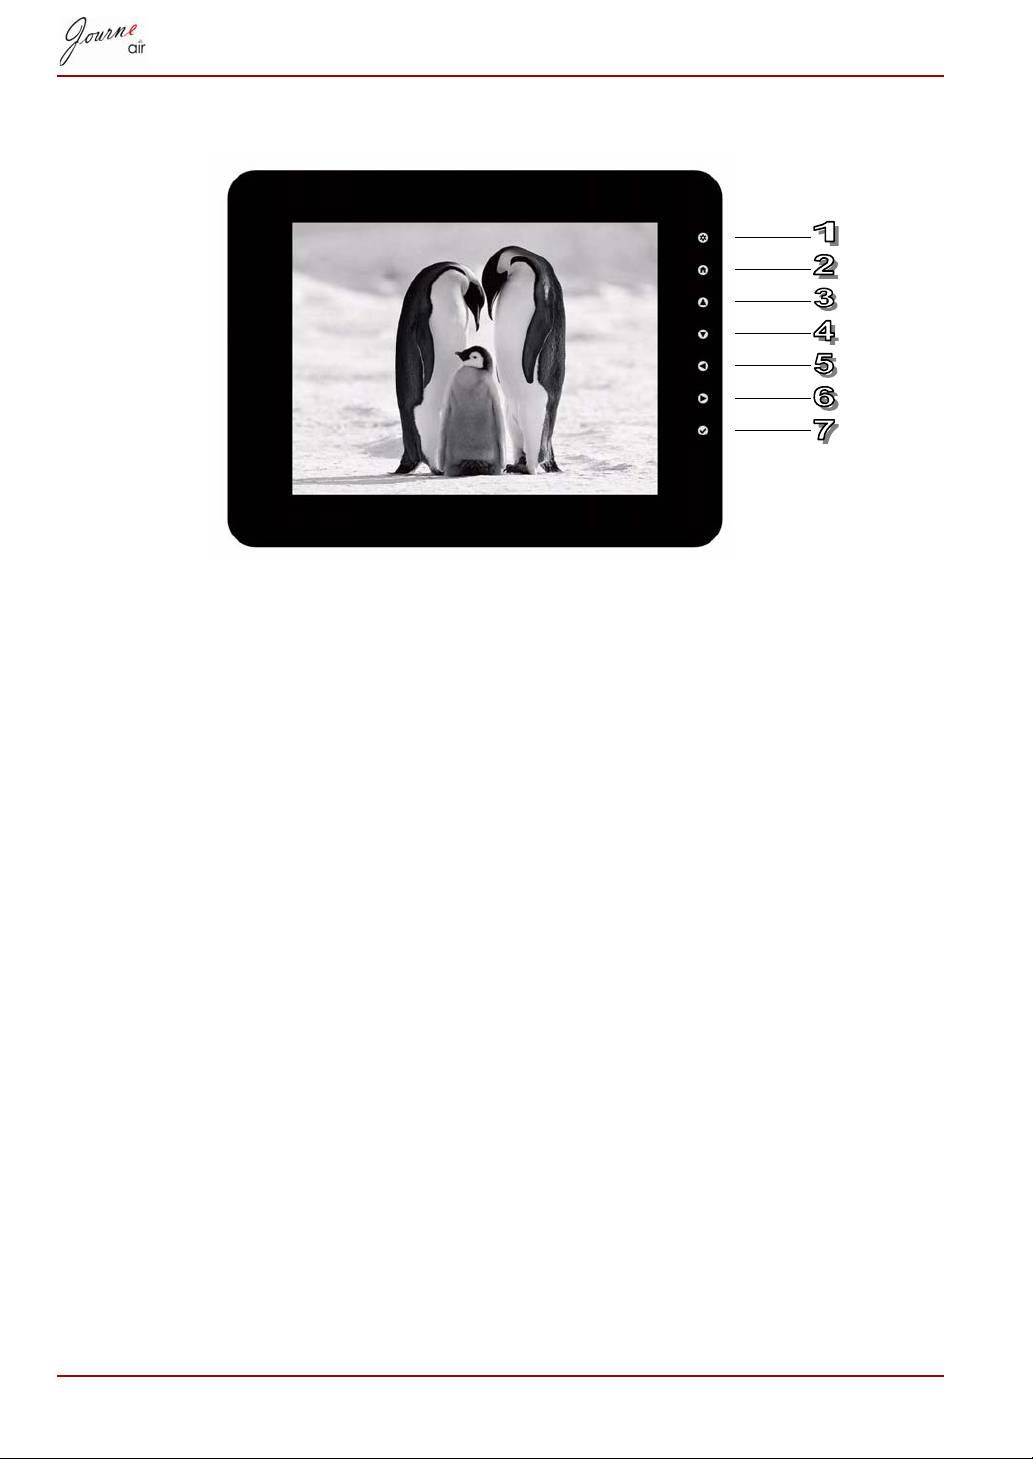
Video Playback Mode Icons Definition
1. Return to the previous menu;
2. Return to the main menu;
3. Volume up;
4. Volume down;
5. Play the previous video;
6. Play the next video;
7. Pause/Play.
EN-30 User’s Manual
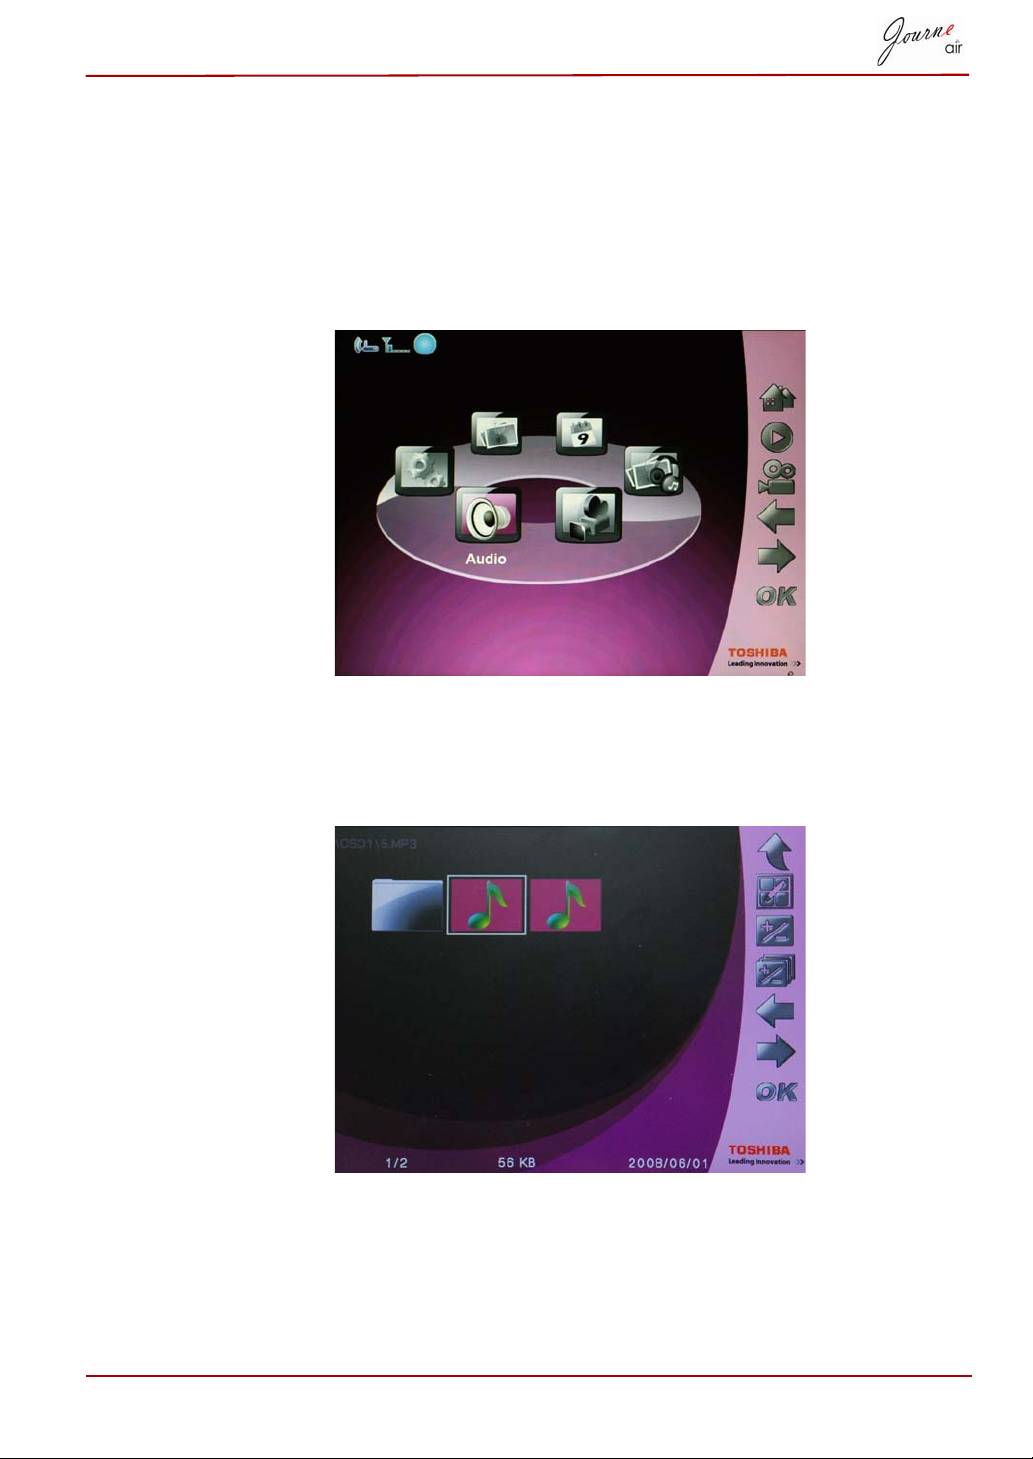
Audio Mode
The digital frame is able to play audio files it supports (For audio file formats
supported, refer to Technical Data).
To enter Audio Mode:
1. In the main menu, select Audio Mode and press OK to enter audio
mode.
2. Select the storage device you want to access, and then press OK.
3. Select ALL to display all the audio files and folders in the storage device
4. Select an audio file and press OK to play the file.
User’s Manual EN-31
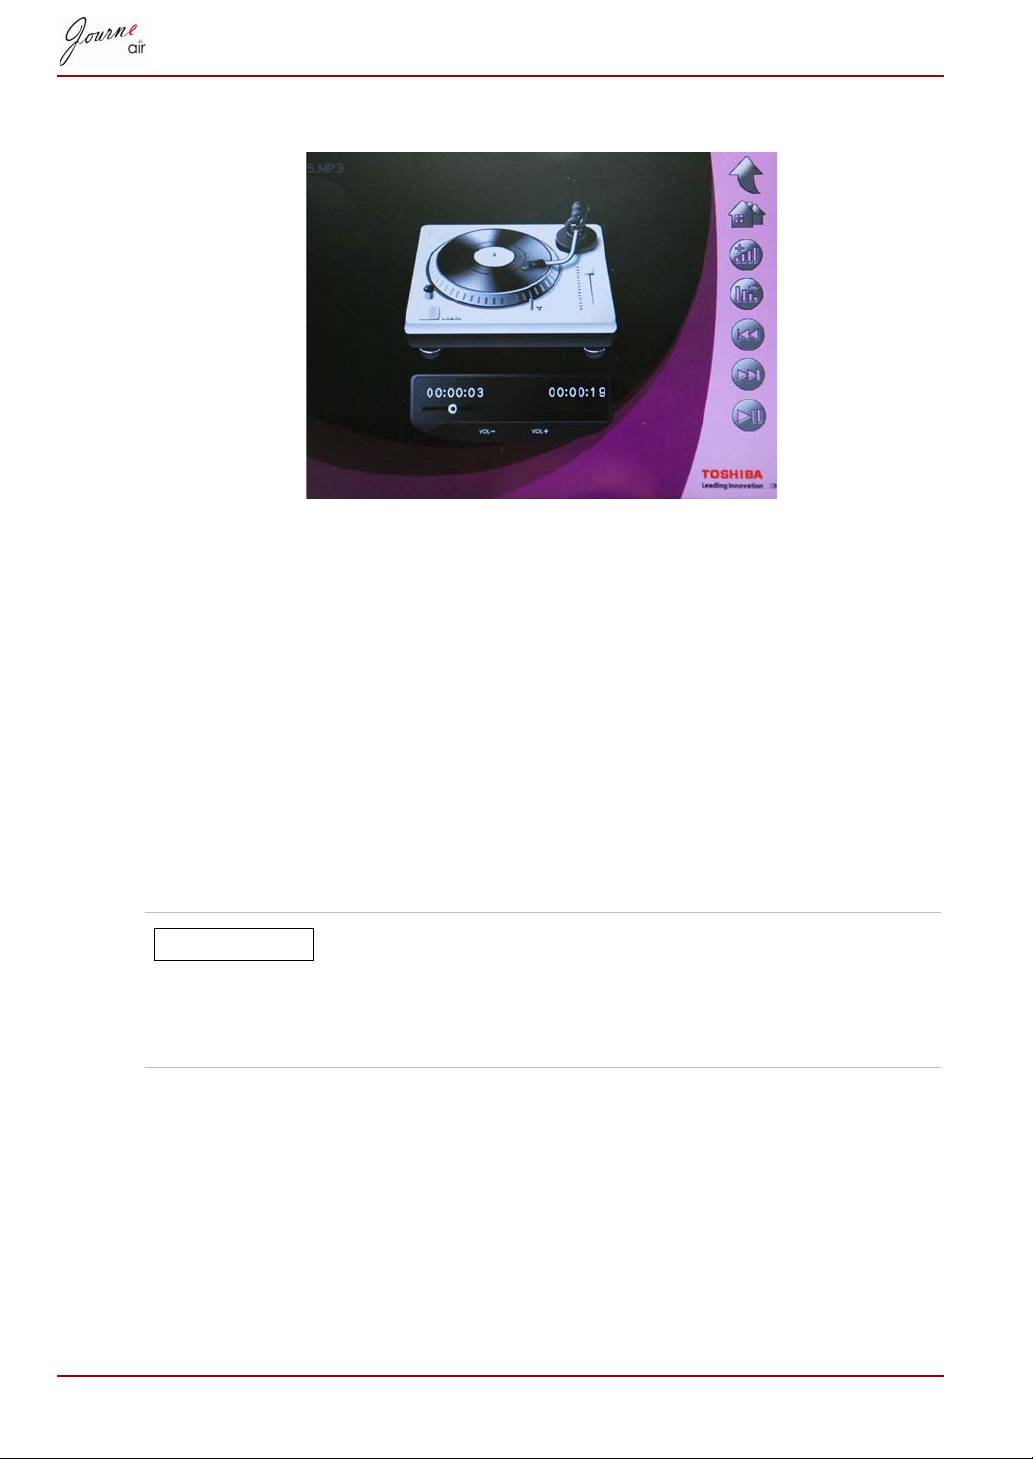
you can also:
n Press Right to play the next audio file.
n Press Left to play the previous audio file.
n Press Up to increase volume.
n Press Down to decrease volume.
n Press OK to pause/play the audio file.
One click playing
The digital frame provides a quick way to play photo slideshows or video
files by just one click. In the main menu:
n Press Up to play photo slideshows immediately.
n Press Down to play video files immediately.
The digital frame plays photo or video files in the
memory card first. If there is no memory card, the digital
frame plays photo or video files in the internal memory.
The digital frame can access only one storage device at
a time, and the memory card has priority.
EN-32 User’s Manual
NOTE
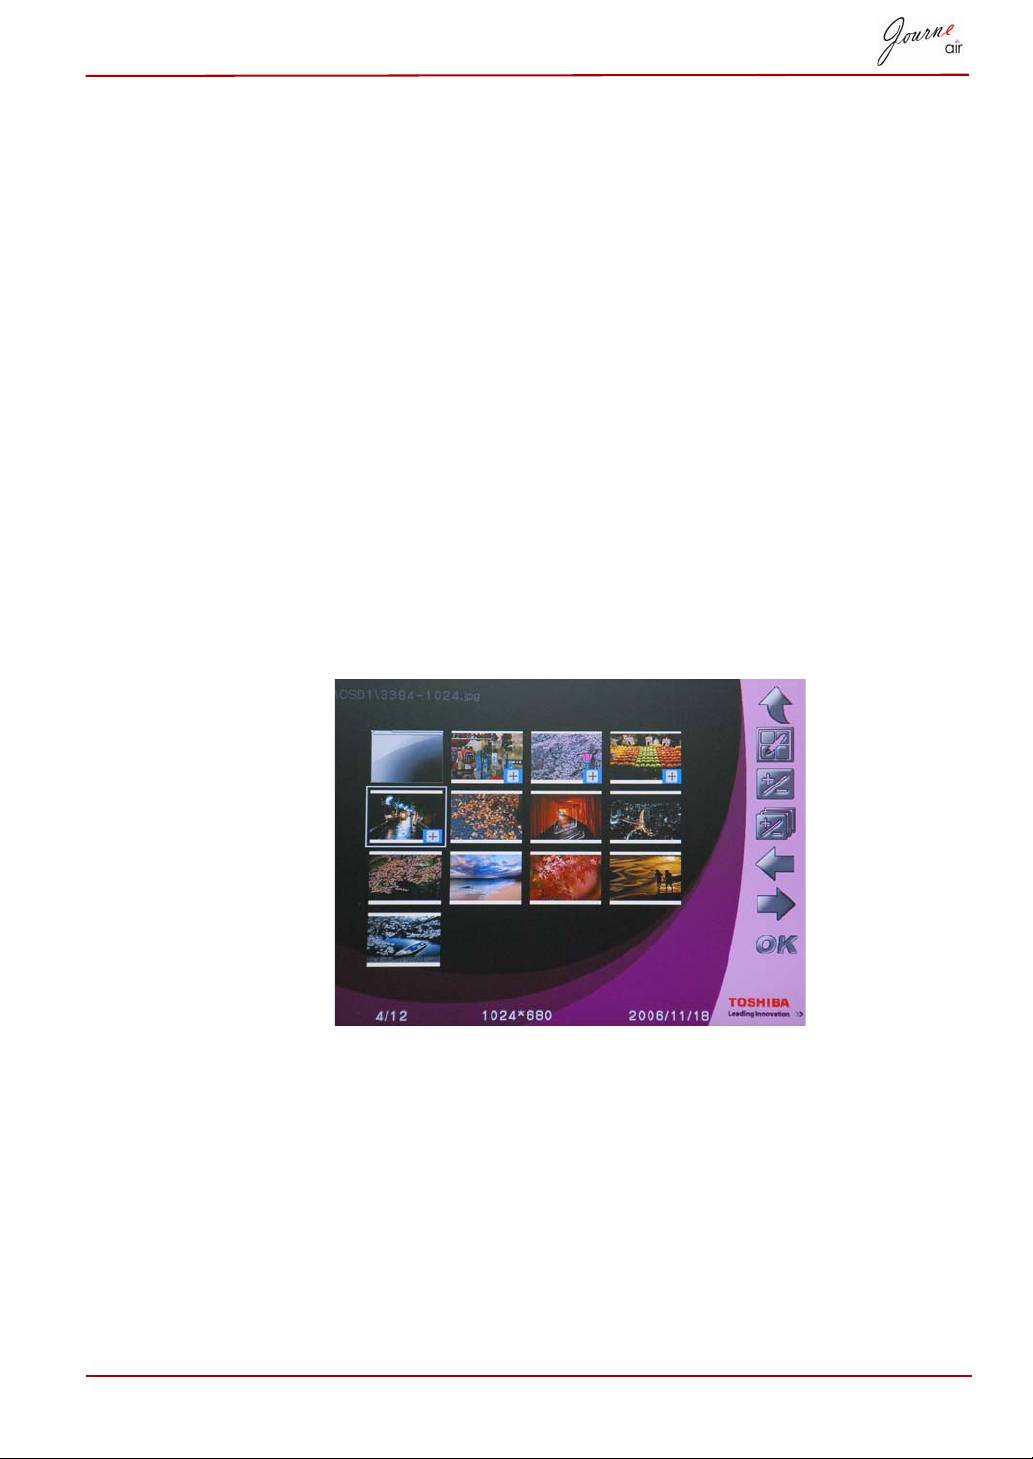
Copy and Delete Files
The digital frame can copy or delete photo, video and audio files on the
internal memory or in the memory card.
To copy or delete files:
1. In the main menu, select the corresponding mode (For example, to copy
or delete photo files, enter Photo Mode) and press OK to enter the
mode.
2. Select the storage device you want to access, and then press OK.
n In Audio Mode and Video Mode, select ALL and press OK to
display the files in the storage device.
n In Photo Mode, select Album and press OK first, then select ALL
and press OK to display the files in the storage device.
3. Select the files you want to copy or delete and press Up to mark them.
4. To select all the files in the current directory simultaneously, press
Down.
5. After all the files you want to copy or delete are selected, press Home to
enter the file management screen.
User’s Manual EN-33
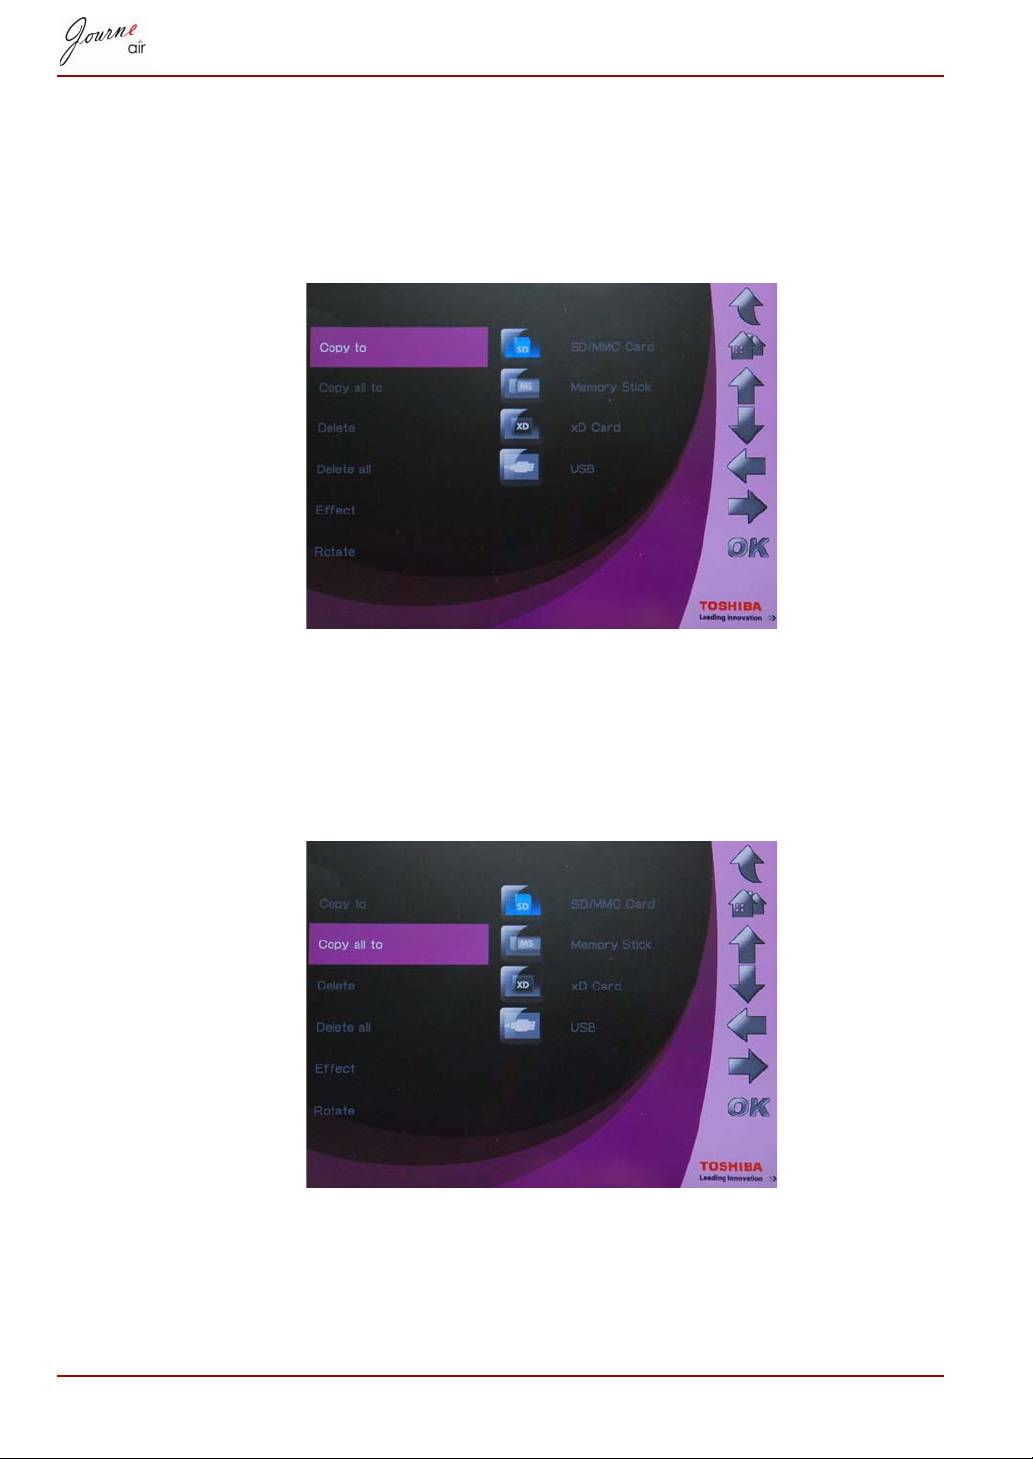
To copy files to another storage device:
1. select Copy to and press OK.
2. Select the storage device you want to copy the files to, then press OK.
3. Move to the directory you want to paste the copied files in and press
Down to begin pasting.
To copy all files in a storage device to another storage device:
1. Select Copy all to and press OK.
2. Select the storage device you want to copy the files to, then press OK.
3. Move to the directory you want to paste the copied files in and press
Down to paste the files.
EN-34 User’s Manual
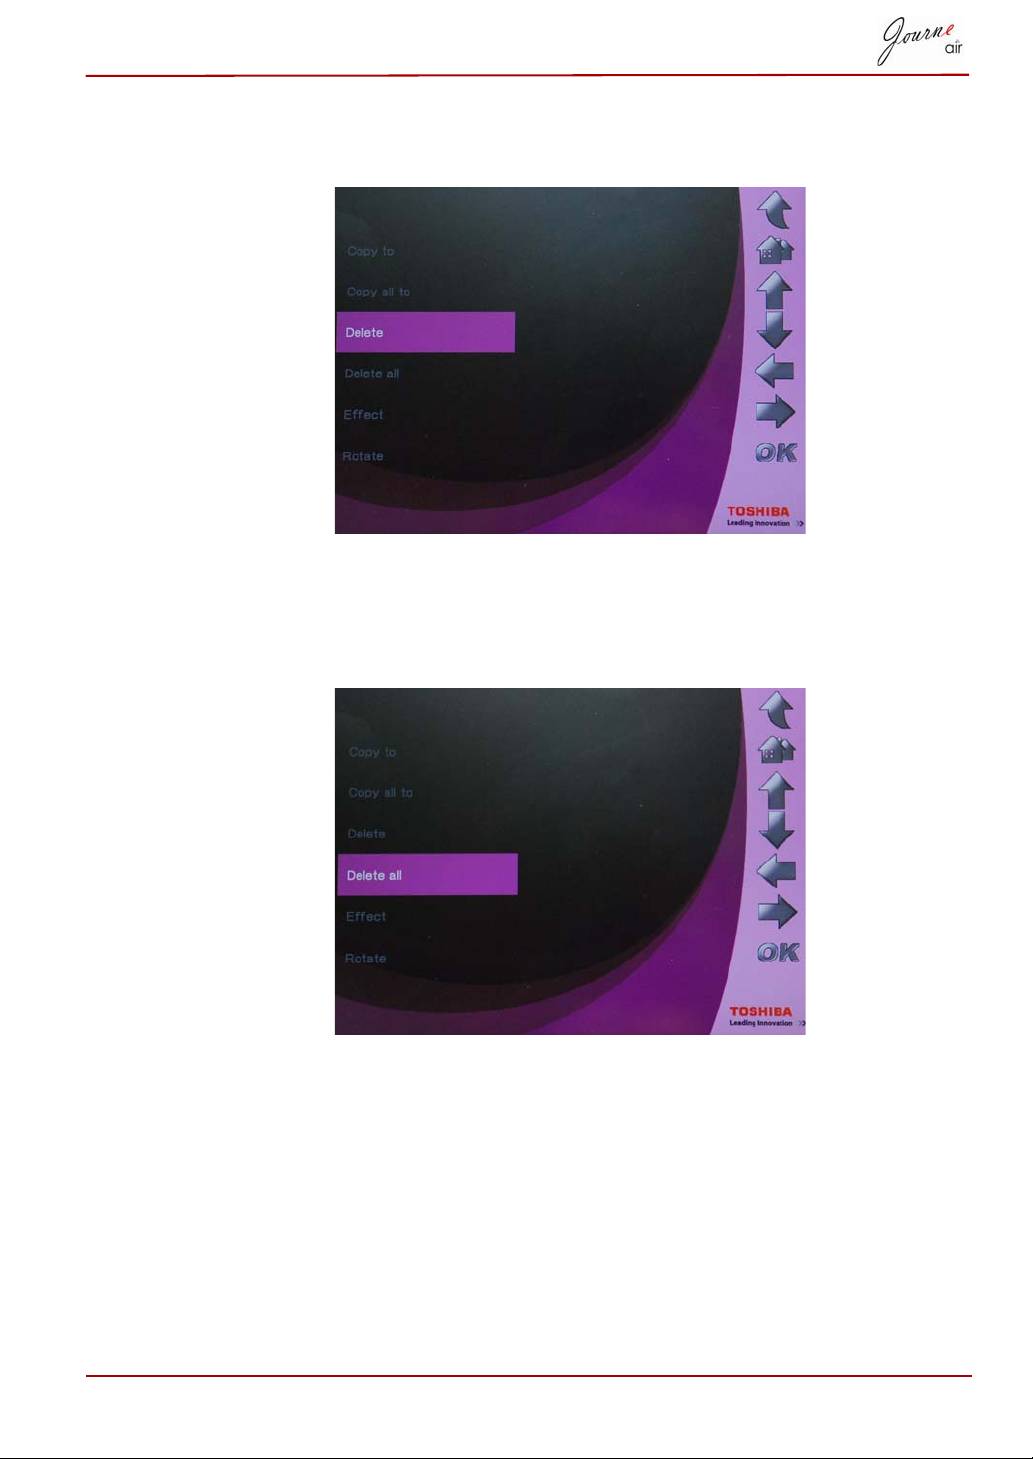
To delete files:
1. Select Delete and press OK.
2. Select Yes and press OK to confirm the deletion.
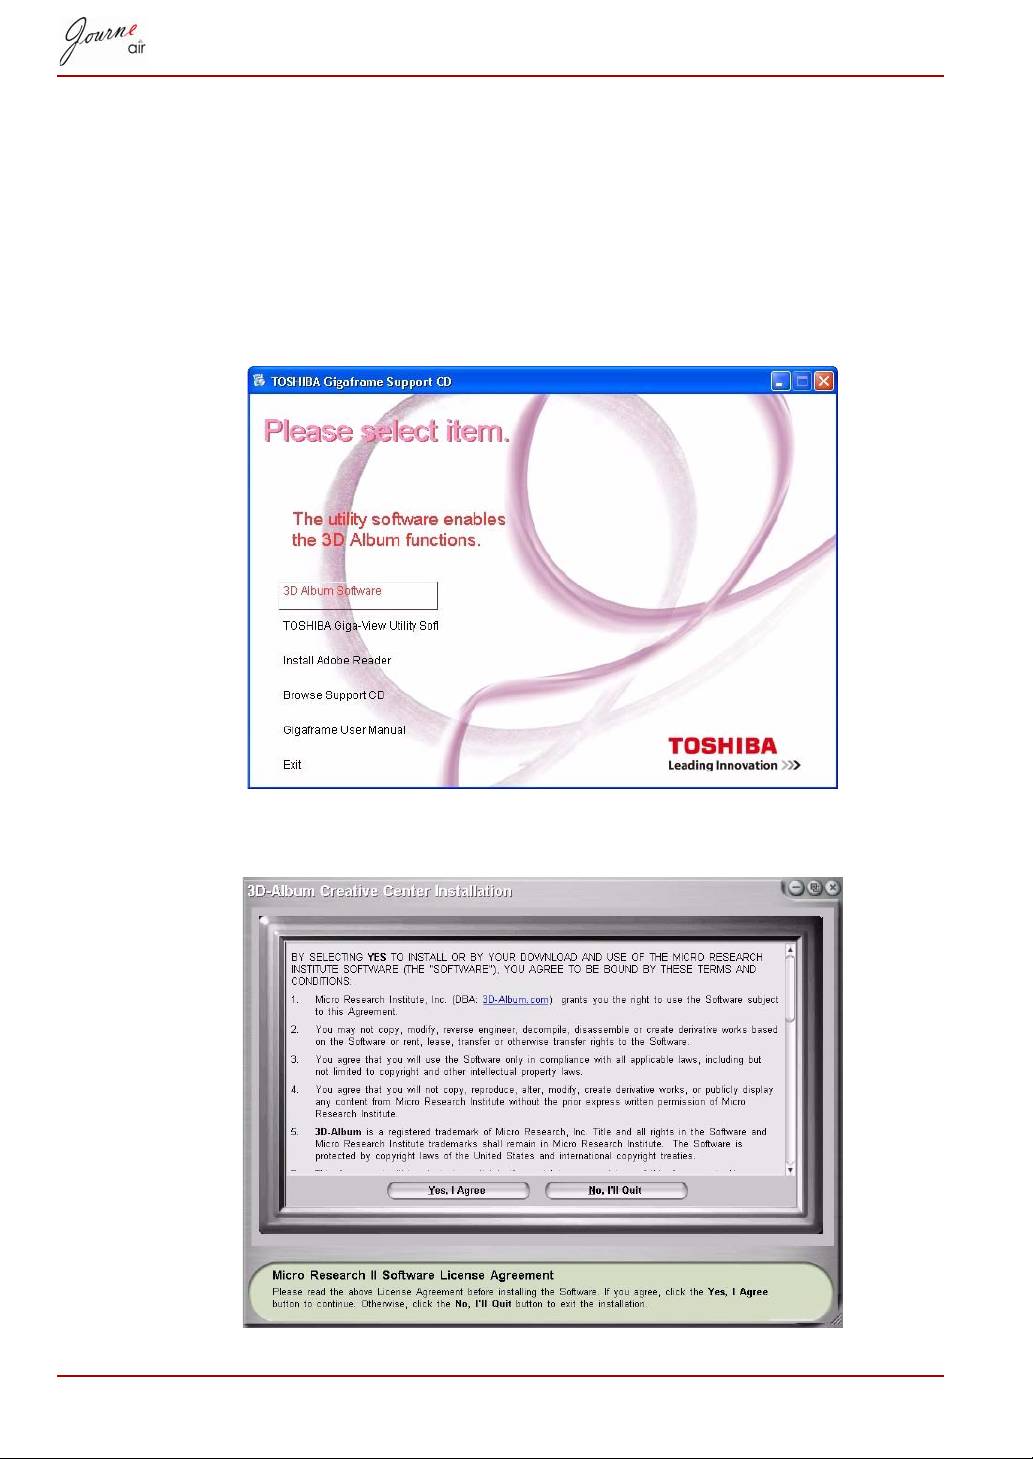
To delete all files in a storage device:
1. Select Delete all and press OK.
2. Select Yes and press OK to confirm the deletion.
User’s Manual EN-35
3D Album
3D Album allows you to easily integrate your own photos and text into an
enjoyable video with a variety of 3D showcase styles. Graphics, text,
speed, and animation are all under your control.
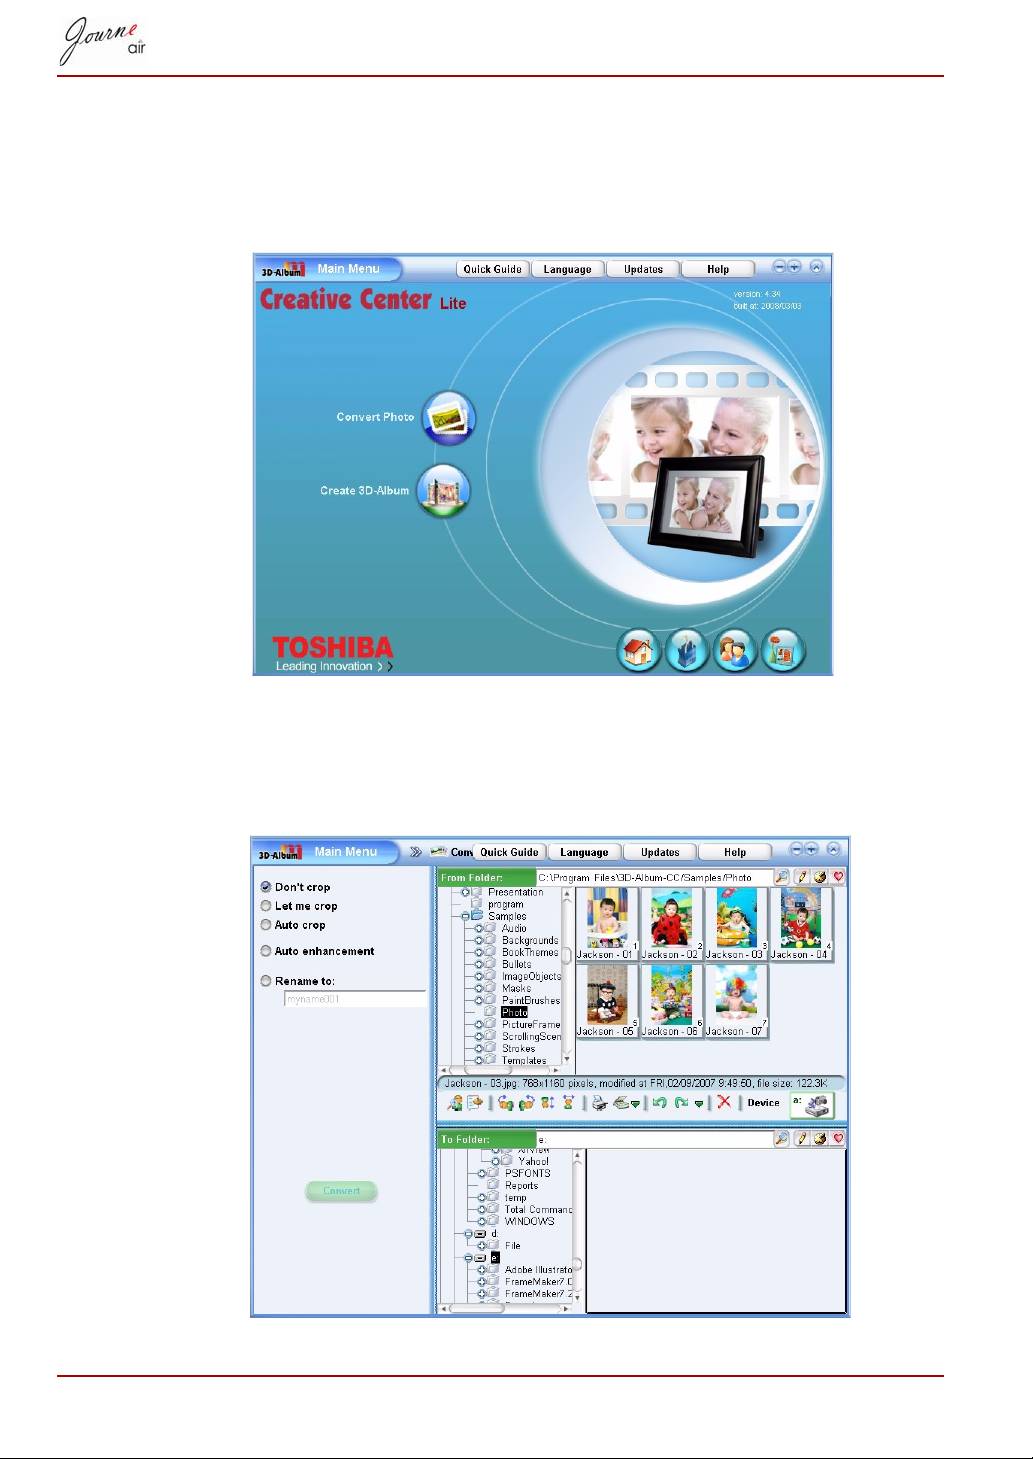
Installing 3D Album
1. Insert the Software CD and select 3D Album Software.
2. Click Yes, I agree to accept the license agreement and continue the
installation.
EN-36 User’s Manual

3. Choose a location in the install path field to install 3D Album. (Note that
the minimum disk space needed for 3D Album is 400Mb.) Then click
Continue.
4. After the installation is complete, a QuickTime install window will pop up.
3D album needs QuickTime version 7 or above. If you already have
QuickTime version 7 or above installed on your PC, skip the installation
and close the window. If not, click Install QuickTime to continue the
installation.
User’s Manual EN-37
3D Album Functions
Double click the 3D-Album creative center shortcut on the desktop to active
3D Album. There are two options in the 3D Album main menu: Convert
Photo and Create 3D-Album.
Converting Photos
This function allows you to crop and rename your photos and enhance their
quality.
EN-38 User’s Manual
1. Choose your photos’ location in the From Folder field.
2. Choose a location in the To Folder field. This is where your want to ut
your converted photos.
3. Select the photos to be converted in the From Folder section. You can
press and hold the Ctrl button to select multiple photos.
4. If you do not want to crop your photos, check Don’t crop.
5. If you want to crop your photos, check Let me crop. After selecting this
option, you have to crop manually every photo you selected during
conversion.
6. To enhance the quality of your photos, check Auto enhancement. This
option will improve the color and brightness of the photos.
7. To rename the photos, check the Rename to option and enter a name
in the field below. If there are multiple photos selected, the name of the
converted photos will be the name you entered plus a sequential
number.
8. After all the settings are done, click Convert. All the photos selected in
the From Folder will be converted and placed in the To Folder.
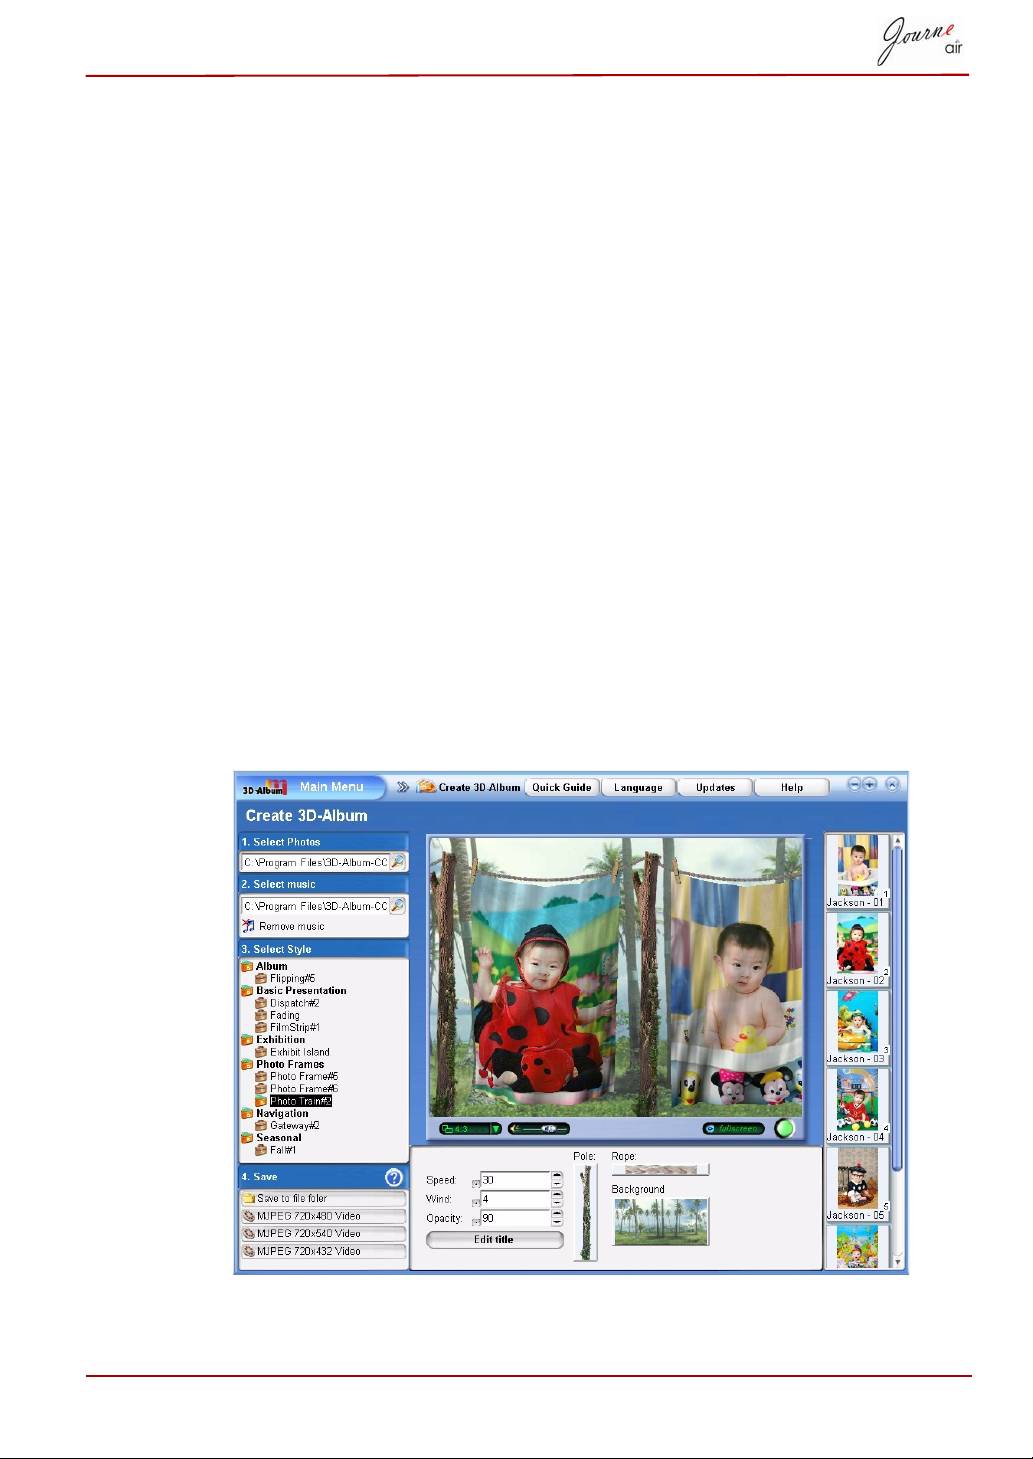
Create a 3D-Album
This function enables you to integrate your photos and text into an
enjoyable video with a variety of 3D showcase styles.
1. In the Select Photo field, select your photos’ location.
User’s Manual EN-39
2. If you would like to add some music to your video, select a music file in
the Select music field.
3. Select the album style you prefer in the Select Style field.
4. Select the output 3D album format in the Save field. You can make your
3D album into a video file or an executable file. A video file can be
played by media player software (e.g.: Windows Media Player). An
executable file can be directly played without a media player. To make
an executable file, select Save to file folder. To make a video file,
select one of the three different video resolution (720 x 480, 720 x 540
or 720 x 432) options.
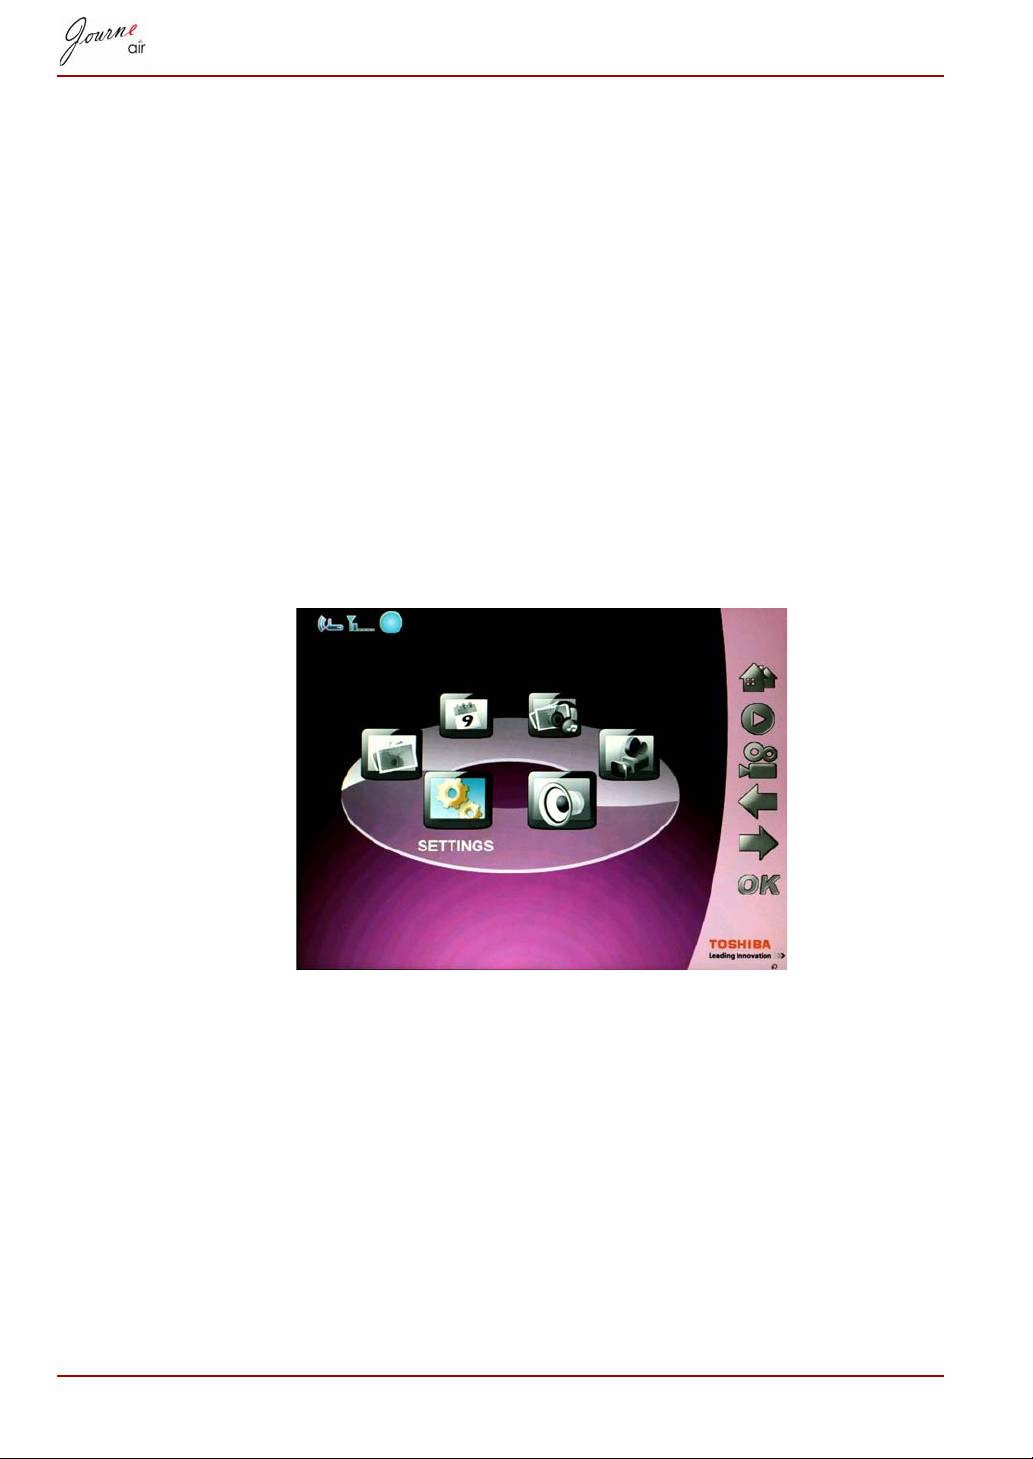
System Settings
In this section you are able to set up the brightness levels, display
language, auto turn on and off, restore default settings, and check the
status of the digital frame. To enter system settings mode, select Settings
from the main menu and press OK.
Brightness
Change the brightness settings of digital frame to achieve the best visual
effect depending on lighting conditions.
1. Select Brightness and press OK.
2. Press Up and Down to select the brightness of the screen from Level 1
to Level5.
EN-40 User’s Manual
