Dell PowerVault NX3500: Connecting the Power Cable(s)
Connecting the Power Cable(s): Dell PowerVault NX3500
Table of contents
- Notes, Cautions, Warnings, and Danger
- Installation and Configuration Unpacking the Solution Installing the Rails, the System, and the Backup Power Supply in a Rack
- Connecting the Battery in the BPS Power Module Removing the Power Module Front Cover
- Removing the Battery Rotating the Battery
- Reinserting the Battery
- Securing the Power Module Front Cover
- Inserting the Power Modules
- Cabling the Solution
- Connecting the Power Cable(s)
- Securing the Power Cable(s)
- Turning On the Solution Installing the Optional Bezel
- Other Information You May Need
- Obtaining Technical Assistance NOM Information (Mexico Only) Technical Specifications PowerVault NX3500 System Specifications Processor Expansion Bus
- Memory Drives Connectors Video
- Power Physical Environmental
- Environmental (continued) Backup Power Supply Specifications BPS Model List
- Physical (120 V and 230 V Models) Electrical Input Electrical Output
- Electrical Output (continued) Environmental and Safety
- Environmental and Safety (continued) Battery (120 V and 230 V Models)
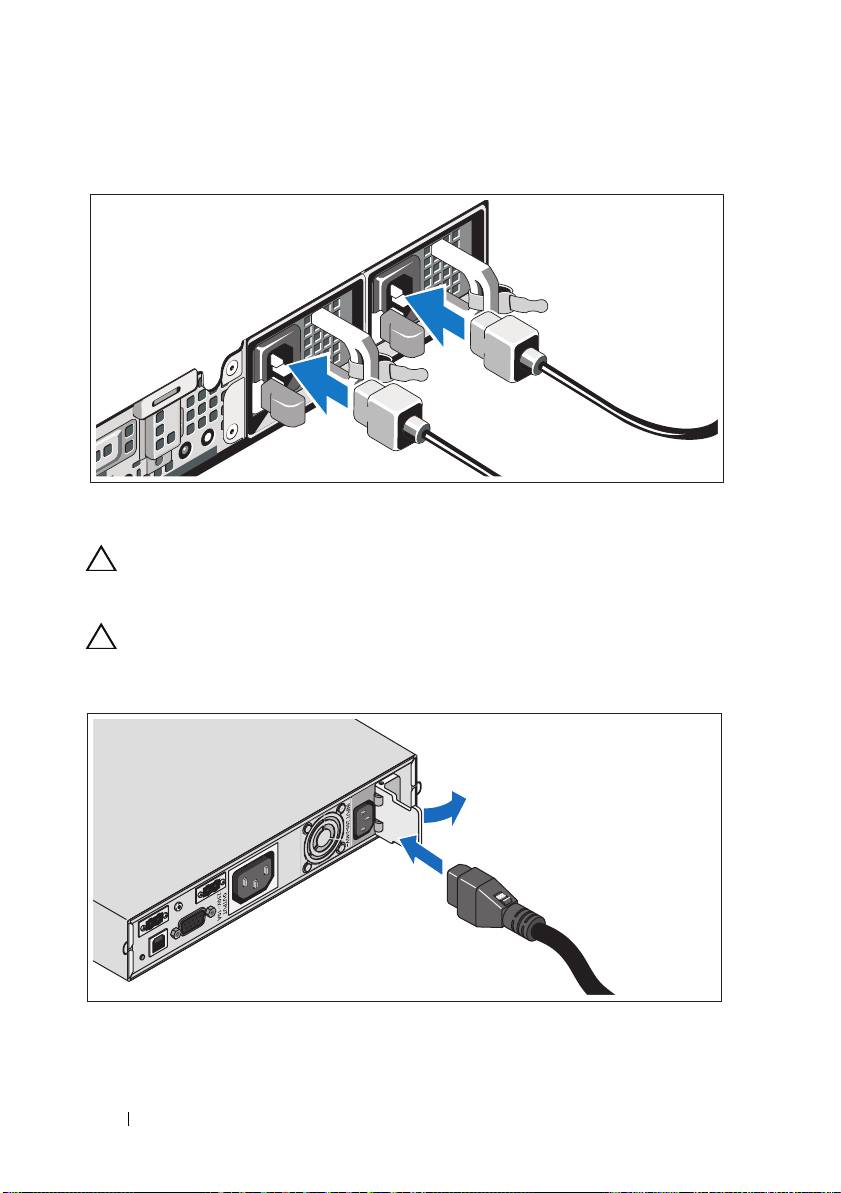
Connecting the Power Cable(s)
Connect the system’s power cable(s) to the system.
CAUTION:
Both the 120 V (LV) and the 230 V (HV) power modules provide IEC 320
C-13 output receptacles. Only use a power cord rated for the input power source
rating labeled next to the input connector on the power module back panel.
CAUTION:
You must always verify the voltage rating of the BPS. Connecting a 230
Vac into a 120 V BPS will damage the BPS.
Open the spring-loaded interlock cover for the input connector and connect the
power cable to the BPS.
10
Getting Started With Your System
Top 10 manuals
100.00
NZXT HALE90 1000W99.99
Samsung SM-R38099.97
AEG BSB 18C99.97
Dell 2700W99.97
Smeg KSEC70X99.96
Beurer HDE 4099.96
Pyramida KH 50 v.299.96
MSI CSM-H81M-P3299.96
AEG HR 562799.95
Melissa 640-048