Hotpoint-Ariston PH 750 T (AV) R-HA: Start-up and use
Start-up and use: Hotpoint-Ariston PH 750 T (AV) R-HA
Since the burner is equipped with a safety device, after
Start-up and use
lighting the burner keep the knob pressed in for about
GB
2-3 seconds to allow the device which keeps the ame lit
! The position of the corresponding gas burner or electric
automatically to heat up.
hotplate* is shown on every knob.
The selected burner can be regulated using the corresponding
knob, as follows:
Gas burners
Each burner can be adjusted to one of the following settings
● Off
using the corresponding control knob:
Maximum
● Off
Minimum
Maximum
To switch off the burner, turn the knob in a clockwise
Minimum
direction until it stops (when reaches the “●” position).
To light one of the burners, hold a lit match or lighter near
Ceramic Glass Module*
the burner and, at the same time, press down and turn the
This cooktop is tted with dual-ring radiant heating elements
corresponding knob anti-clockwise to the maximum setting.
located beneath the glass. It is possible to turn on only
Since the burner is tted with a safety device, the knob
the circular part of the elemement (identied by the letter
should be pressed for approximately 2-3 seconds to allow
“A”) or the cooking surface can be enlarged by turning on
the automatic device keeping the ame alight to heat up.
both “A” and “B”. To turn only the circular “A” element,
When using models with an ignition button, light the desired
simply turn the knob in the clockwise direction to any one
burner pressing down the corresponding knob as far as
of the 12 available settings. To add the “B” section, turn
possible and turning it anticlockwise towards the maximum
the knob to setting 12 and then click it into the setting.
setting.
Then proceed by turning the knob in the counter-clockwise
direction to one of the 12 settings.
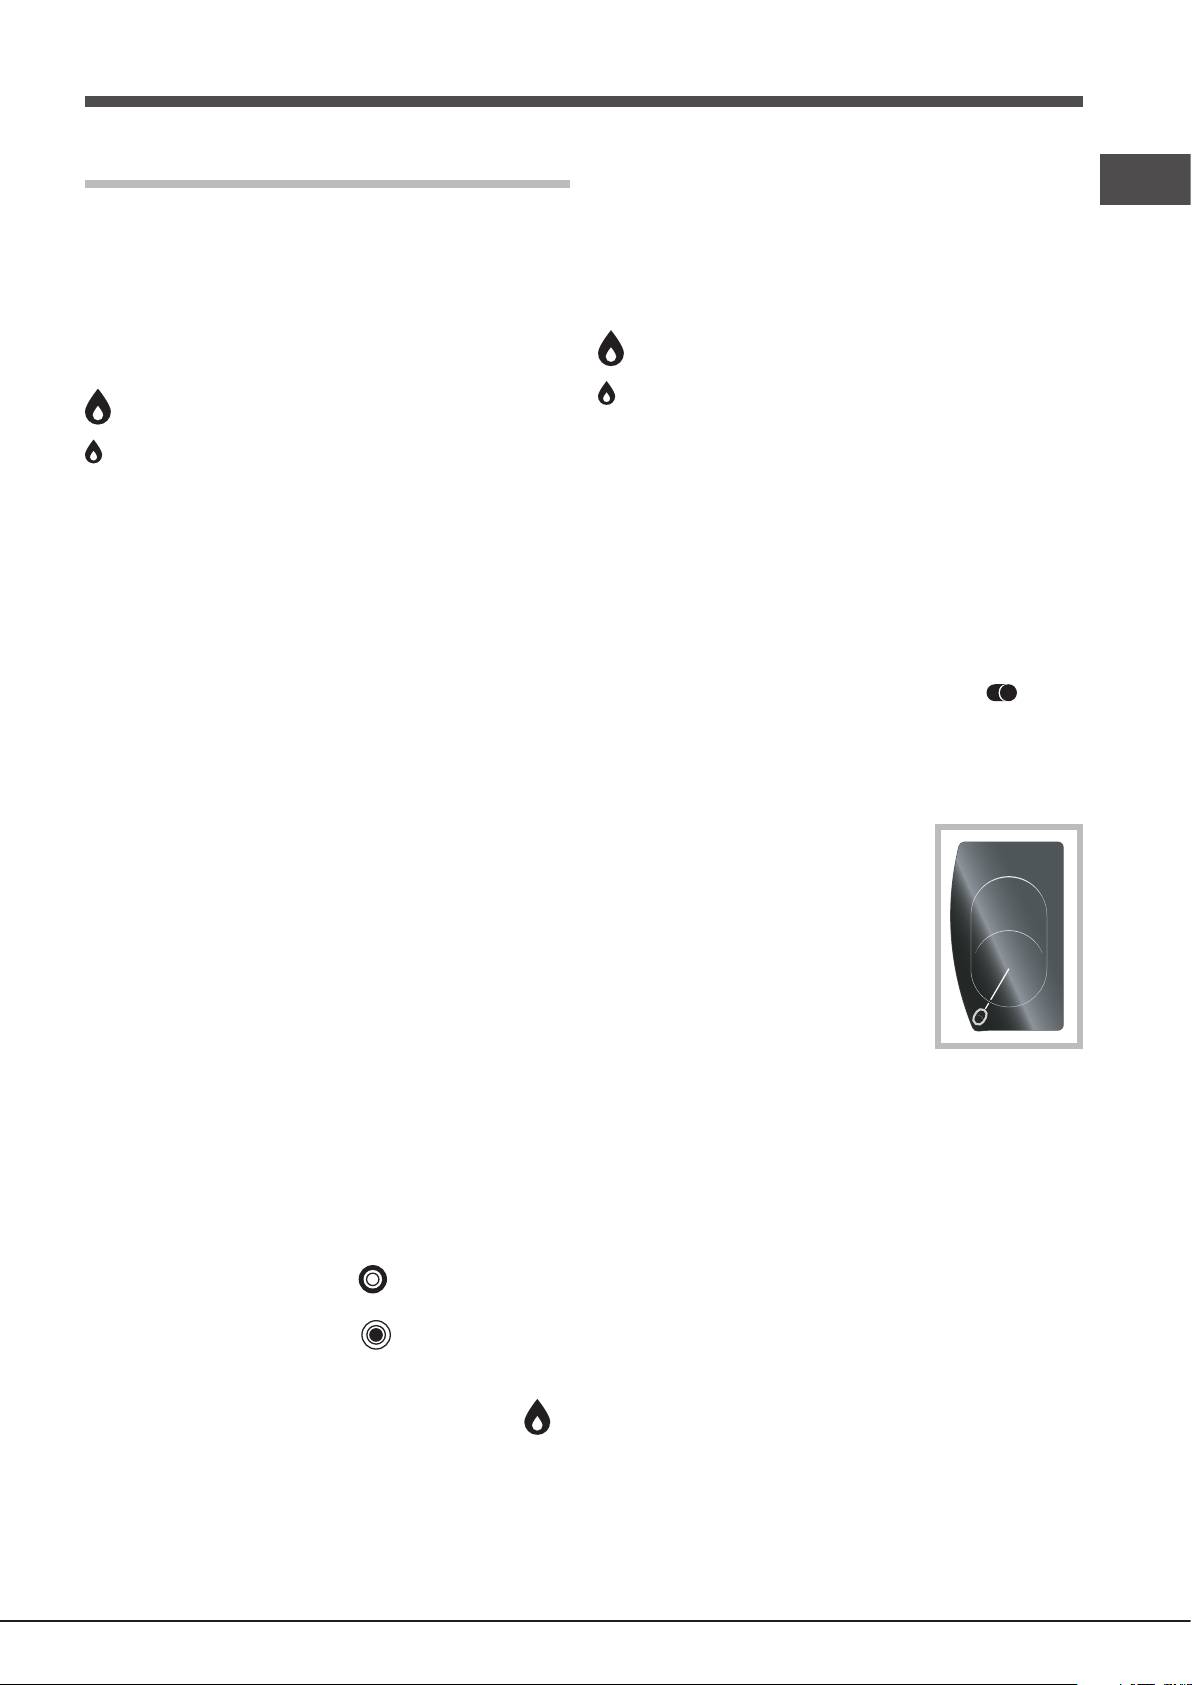
! If a ame is accidentally extinguished, turn off the control
The gure shows the heating zones, which become red
knob and wait for at least 1 minute before trying to relight it.
when the element is turned on.
To switch off the burner, turn the knob in a clockwise
A. Circular heating zone;
direction until it stops (when reaches the “●” position).
B. Extended heating zone;
C. Indicator light to show when the
The “separate double ame” burner*
cooking zone is above 60°C, even
B
This burner consists of two concentric burners which can
after the heating element has been
operate either together or separately.
turned off.
Use of the double ame on the maximum setting gives a
A
very high power which reduces cooking times with respect
to conventional burners.
C
Moreover the double ame crown provides a more uniform
distribution of heat on the bottom of the pan, when using
When the knob is on any of the settings
both burners on minimum.
other than “Off”, the Indicator Light for Ceramic Glass
To ensure that the double-ame burner is used to its
Module comes on.
full potential, never set the inside ring to minimum and
the outside ring to maximum at the same time.
Practical advice on using the burners
Pots and pans of all sizes can be used. In the case of the
To ensure the burners operate efciently:
smaller pots and pans we recommend the use of only the
internal burner.
• Use appropriate cookware for each burner (see table)
There is a separate control knob for each of the “separate
so that the ames do not extend beyond the bottom of
double ame” burners.
the cookware.
The knob marked by the symbol operates the external
burner;
• Always use cookware with a at base and a cover.
The knob marked by the symbol operates the internal
• When the contents of the pan reach boiling point, turn
burner.
the knob to minimum.
To turn on one of the rings, press the relative knob in all
the way and turn it anti-clockwise to the high setting .
The burner is fitted with an electronic igniter that
automatically starts when the knob is pressed in.
* Only available on certain models.
27
Burner
Ø Cookware Diameter (cm)
GB
Reduced Rapid (RR)
24 - 26
Semi-Rapid (S)
16 - 20
Auxiliary (A)
10 - 14
Semi-Fishburner (SP)
16 - 20
Fig. C Fig. D
Triple Crown (TC)
24 - 26
Practical Advise on Using the Ceramic
Ultra Rapid (UR)
Glass Module*
24 - 26
Set.
Radiant Burner
Double Flame (DCDR internal)
10 - 14
0
Off.
Double Flame (DCDR external)
26 - 28
1
To melt butter and chocolate.
! On the models supplied with a reducer shelf, remember
that this should be used only for the Double ame internal
2
(DCDR internal) burner when you use casserole dishes with
To heat liquids.
3
a diameter under 12 cm.
To identify the type of burner, refer to the designs in the
4
section entitled, “Burner and Nozzle Specications”.
For creams and sauces.
5
Practical Advice on Using the Half Fish-
6
Kettle Burner *
For cooking at the boiling point.
The two “Half Fish-Kettle” burners, are eliptic in form and can
7
be turned up to 90°. This makes the cooktop more exible in
8
terms of how it can be used.
For Roasts.
9
10
For boiling large pieces of meat.
11
12
For frying.
For utilising both cooking areas.
To turn the two burners 90°, proceed as follows:
• Make sure that the burners are cool;
To obtain the best results from your hob:
• Lift the burner completely out of its housing;
• Use at-bottomed pans to ensure that they adhere to the
• Replace it in its housing in the position desired;
cooking zone perfectly.
• Make sure that the burners are positioned correctly before
use.
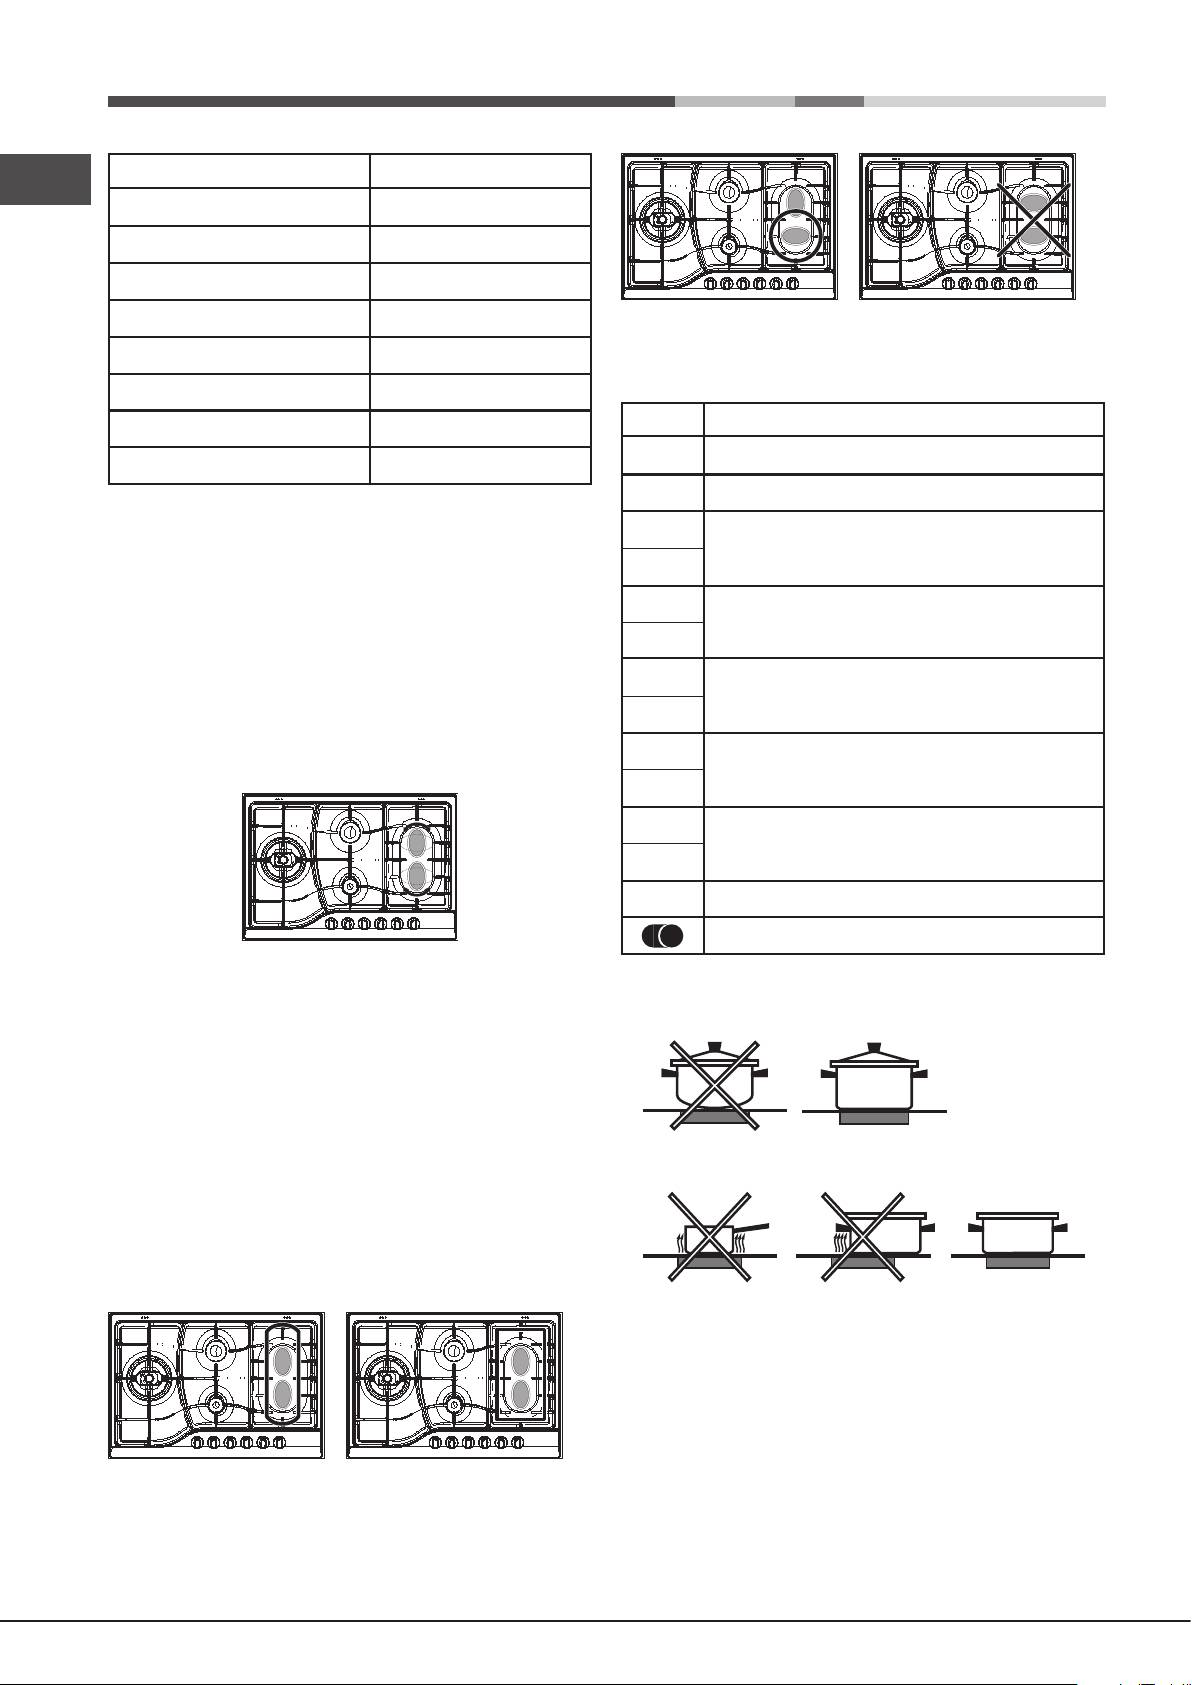
In addition, the two burners can be used in tandem or
speartely with cookware of different shapes and sizes:
• Double burner for a sh-kettle or oval cookware (Fig. A).
• Always use pans with a diameter that is large enough to
• Double burner for a griddle or rectangular/square
cover the hotplate fully, in order to use all the available heat.
cookware with minimum dimensions of 28x28 cm (Fig. B)
• Single burner for medium size cookware (diameter of
16-20 cm) (Fig. C).
• NEVER use the double burner in the conguration
represented in gure D.
• Make sure that the bottom of the cookware is always dry
and clean to guarantee correct adherence and long life, not
only for the cooking zones but also for the cookware itself.
• Avoid using the same cookware that is used on gas burners:
the heat concentration on gas burners may deform the base
of the pan, causing it not to adhere correctly.
Fig. A Fig. B
• Never leave a cooking zone on without cookware on it
because as it heats up and rapidly reaches the maximum
level, which could damage the heating elements.
* Only available on certain models.
28
Оглавление
- Mode d’emploi
- Bedienungsanleitung
- Avvertenze
- Avertissements
- Advertencias
- Hinweise
- Belangrijk
- Запобіжні заходи
- Assistenza Assistance
- Assistência
- Descrizione dell’apparecchio Description of the appliance
- Description de l’appareil Descripción del aparato
- Descrição do aparelho Beschreibung Ihres Gerätes
- Beschrijving van het apparaat Описание изделия
- Installazione
- Avvio e utilizzo
- Precauzioni e consigli
- Anomalie e rimedi
- Installation
- Start-up and use
- Precautions and tips
- Troubleshooting
- Installation
- Mise en marche et utilisation
- Précautions et conseils
- Anomalies et remèdes
- Instalación
- Puesta en funcionamiento y
- Precauciones y consejos
- Anomalías y soluciones
- Instalação
- Início e utilização
- Precauções e conselhos
- Anomalias e soluções
- Installation
- Inbetriebsetzung und Gebrauch
- Vorsichtsmaßregeln und Hinweise
- Störungen und Abhilfe
- Het installeren
- Starten en gebruik
- Voorzorgsmaatregelen en
- Storingen en oplossingen
- Установка
- Включение и эксплуатация
- Предосторожности и
- Техническое
- Неисправности и методы их устранения
