Dell PowerEdge C5220: Installing the System Into the Rack
Installing the System Into the Rack: Dell PowerEdge C5220
Table of contents
- Notes, Cautions, and Warnings
- CAUTION: Restricted Access Location Installation and Configuration Unpacking the System Installing the Tool-Less Rail Solution
- 1 2 3
- Installing the System Empty the System Chassis 1 2
- 3 4 5 6
- Installing the System Into the Rack
- Populate the System 1 2
- 3 PSU1 PSU2
- 4 Connecting the Keyboard, Mouse, and Monitor
- Connecting the Power Cables 1 2
- Complete the Operating System Setup Supported Operating Systems Other Information You May Need
- Technical Specifications Processor (Per System Board) Expansion Bus (Per System Board) Memory (Per System Board) Drives (Per System Board) Connectors (Per System Board) Video
- Power Physical Environmental
- Environmental (continued)
- Acoustics
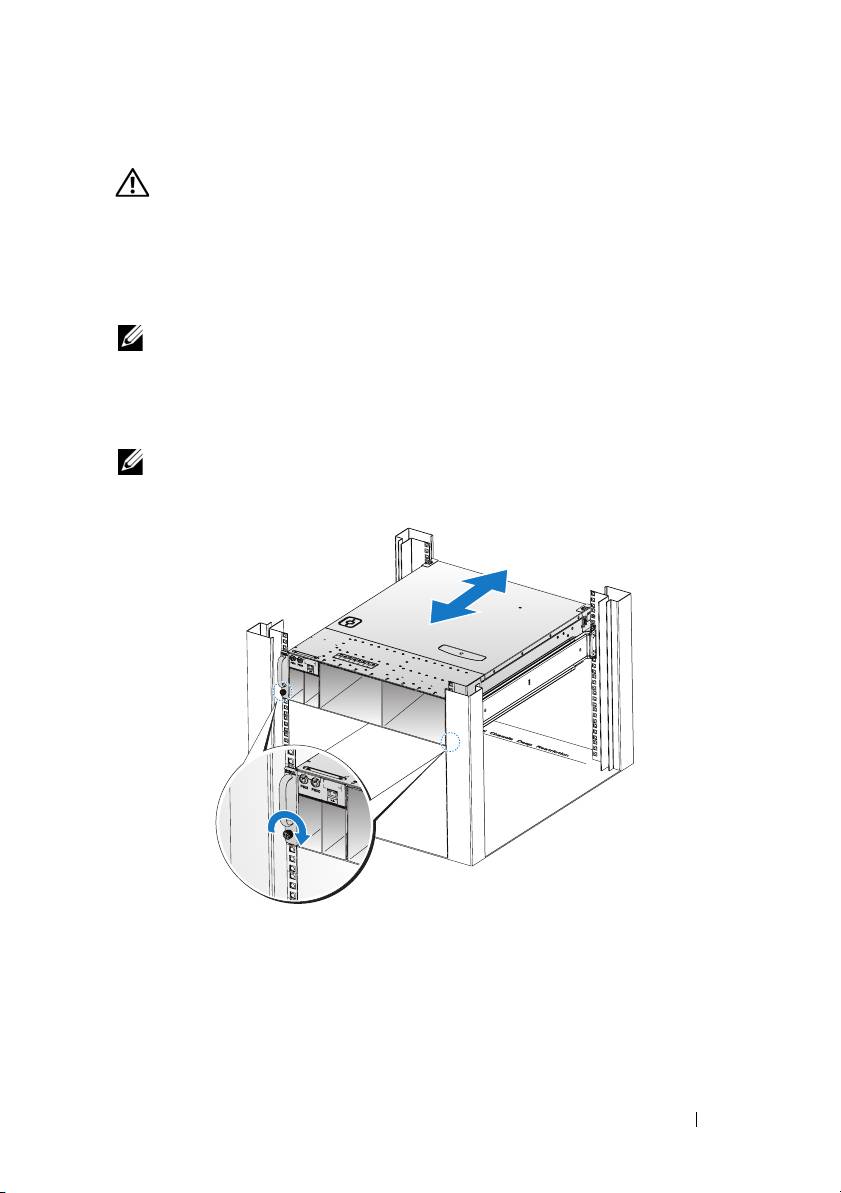
Installing the System Into the Rack
WARNING: Whenever you need to lift the system, get others to assist you.
To avoid injury, do not attempt to lift the system by yourself.
1
Slide the system into the rack.
2
If present, remove the chassis stabilizer shipping bracket (optional) from
the rack.
NOTE: To transport systems already installed in the rack, ensure that the two
chassis stabilizer shipping brackets (optional) are in place.
3
Tighten the captive thumbscrews to secure the ears of the system to the
front of the rack.
NOTE: Make sure the latch release mechanism is engaged correctly.
Installation and Configuration 7
Top 10 manuals
100.00
NZXT HALE90 1000W99.99
Samsung SM-R38099.97
AEG BSB 18C99.97
Dell 2700W99.97
Smeg KSEC70X99.96
Beurer HDE 4099.96
Pyramida KH 50 v.299.96
MSI CSM-H81M-P3299.96
AEG HR 562799.95
Melissa 640-048