Dell PowerEdge C5220: Connecting the Power Cables 1 2
Connecting the Power Cables 1 2: Dell PowerEdge C5220
Table of contents
- Notes, Cautions, and Warnings
- CAUTION: Restricted Access Location Installation and Configuration Unpacking the System Installing the Tool-Less Rail Solution
- 1 2 3
- Installing the System Empty the System Chassis 1 2
- 3 4 5 6
- Installing the System Into the Rack
- Populate the System 1 2
- 3 PSU1 PSU2
- 4 Connecting the Keyboard, Mouse, and Monitor
- Connecting the Power Cables 1 2
- Complete the Operating System Setup Supported Operating Systems Other Information You May Need
- Technical Specifications Processor (Per System Board) Expansion Bus (Per System Board) Memory (Per System Board) Drives (Per System Board) Connectors (Per System Board) Video
- Power Physical Environmental
- Environmental (continued)
- Acoustics
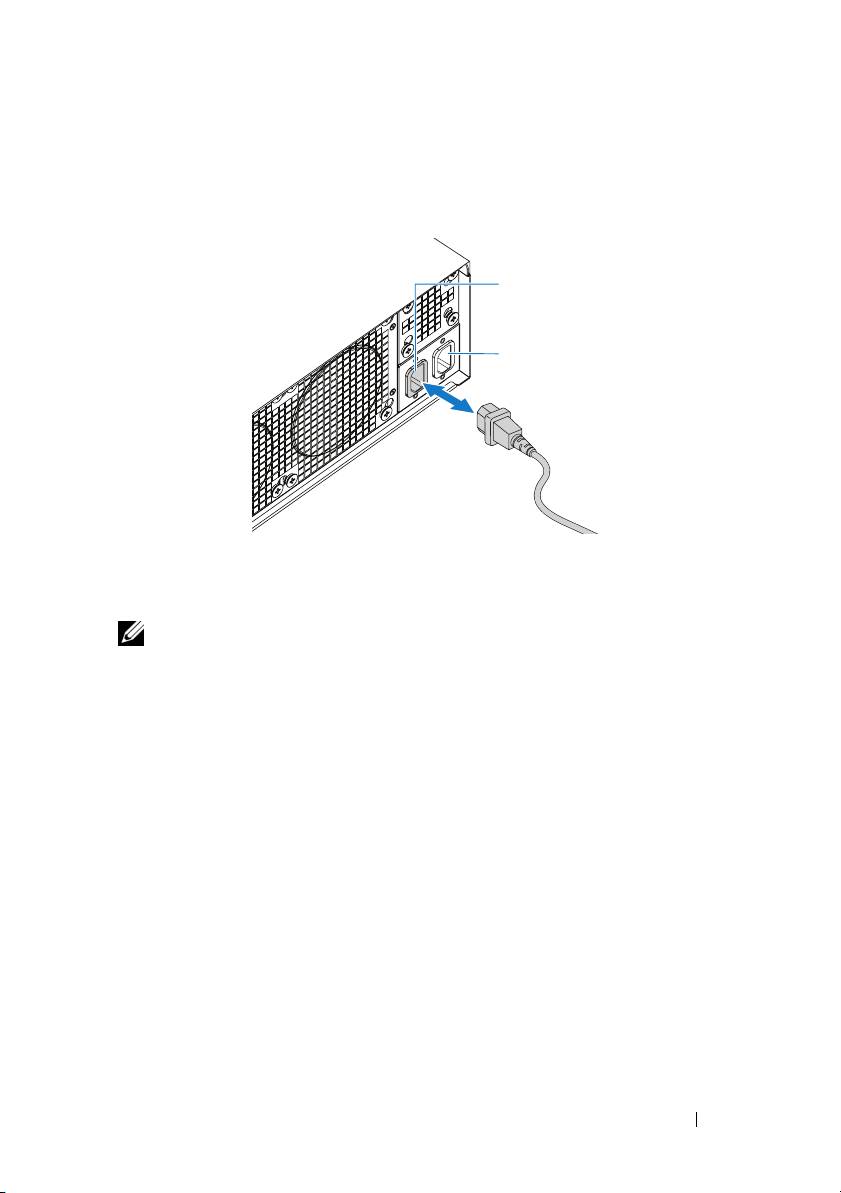
Connecting the Power Cables
1
On the back of the system, connect the mains power cable to the system’s
power socket.
AC Port 2
AC Port 1
2
Plug the other end of the power cables into a grounded electrical outlet or
a separate power source such as an uninterrupted power supply or a power
distribution unit.
NOTE:
AC Port 1 provides power to PSU1, AC Port 2 provides power to PSU2.
For more information, see step 3 of Populate the System.
Turning On the System
When connected to a power source the system automatically powers on.
See Using the Baseboard Management Controller Guide at
support.dell.com/manuals.
Installation and Configuration 11
Top 10 manuals
100.00
NZXT HALE90 1000W99.99
Samsung SM-R38099.97
AEG BSB 18C99.97
Dell 2700W99.97
Smeg KSEC70X99.96
Beurer HDE 4099.96
Pyramida KH 50 v.299.96
MSI CSM-H81M-P3299.96
AEG HR 562799.95
Melissa 640-048