Beurer BM 65: 5. Measuring blood pressure Positioning cuff
5. Measuring blood pressure Positioning cuff: Beurer BM 65
Table of contents
- 2. Important information Signs and symbols 1. Getting to know your instrument
- Advice on use
- Storage and Care Advice on batteries
- 3. Unit description Repair and disposal
- Icons in the display: System requirements for the Beurer “Health Manager” computer software 1. Supported operating systems: 2. Supported architectures: 3. Hardware requirements:
- 4. Prepare measurement Setting date and time Inserting battery Operation with the mains part
- 5. Measuring blood pressure Positioning cuff
- Correct posture Measuring blood pressure
- 6. Evaluating results Cardiac arrhythmia: WHO classification: Range of blood pressure values Systolic
- 8. Error messages/trouble-shooting 7. Saving, retrieving and deleting results
- 10. Specifications Technical alarm – description 9. Cleaning and storing the instrument
- Technical information is subject to change without notifica- tion to allow for updates.
- 11. Adapter
•
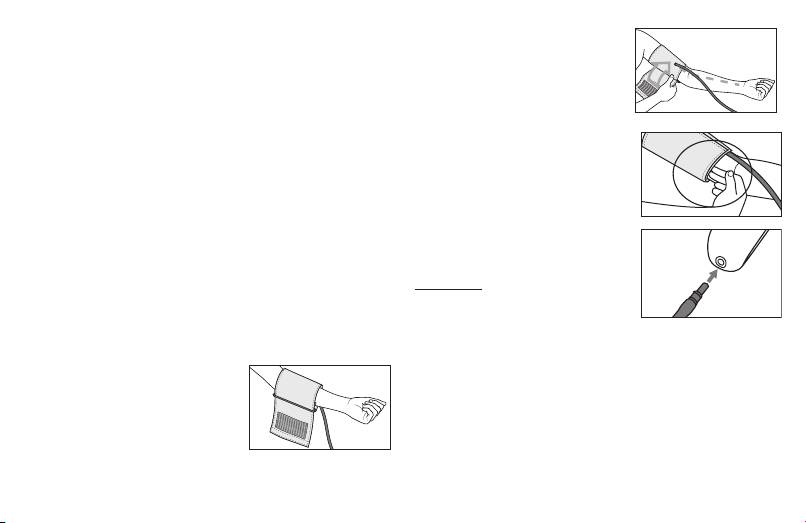
To prevent possible damage to the device, the blood
The cuff should be placed on the
pressure monitor must only be used with the mains part
upper arm so that the lower edge
described here.
is 2 to 3 cm above the bend of the
•
Insert the mains part into the connection provided for
elbow and above the artery. The
this purpose on the right-hand side of the blood pressure
tube should be in line with the
monitor. The mains part must only be connected to the
centre of the palm.
mains voltage that is specified on the type plate.
Now place the free end of the cuff
•
Then insert the mains plug of the mains part into the
snugly, but not too tightly, around
mains socket.
the arm, and fix it with the Velcro
•
After using the blood pressure monitor, unplug the mains
fastener. The cuff should be fitted
part from the mains socket first and then disconnect it
tight enough to allow just two fin-
from the blood pressure monitor. As soon as you unplug
gers to fit beneath the cuff.
the mains part, the blood pressure monitor loses the
Insert the cuff tubing into the socket
date and time setting but the saved measurements are
for the cuff attachment.
retained.
Important: The device may only be
operated with the original cuffs. The
5. Measuring blood pressure
device comes with 2 cuffs: a stand-
Please ensure the device is at room temperature before
ard cuff for arm circumferences of 22 to 30 cm and a larger
measuring.
cuff for upper arm circumferences of 30 to 42 cm.
Positioning cuff
Fit the cuff round your bare left
upper arm. Blood circulation in the
arm should not be restricted by
tight clothing or other objects.
22
