Dell PowerEdge C6220 II: Figure 4. Installing the Chassis onto the Rack.
Figure 4. Installing the Chassis onto the Rack.: Dell PowerEdge C6220 II
Table of contents
- Notes, Cautions, and Warnings
- Installation and Configuration Installing the Tool-Less Rail Solution
- Figure 1. Pushing the Latch Release Buttons
- Figure 2. Releasing the Latch Release Buttons
- Figure 3. Installing the Chassis Stabilizer Shipping Brackets
- Figure 4. Installing the Chassis onto the Rack.
- Optional—Connecting the Keyboard, Mouse, and Monitor Figure 5. Optional—Connecting the Keyboard, Mouse and Monitor
- Connecting the Power Cable(s) Figure 6. Connecting the Power Cable
- Turning on the System Figure 7. Pressing the Power Button on the Front of the System Figure 8. Pressing the Power Button on the Back of the System
- Complete the Operating System Setup Other Information You May Need NOM Information (Mexico Only)
- Technical Specifications Power AC power supply (per power supply)
- Battery (per system board) Physical Environmental Relative humidity Maximum vibration
- Maximum shock Altitude Airborne Contaminant Level
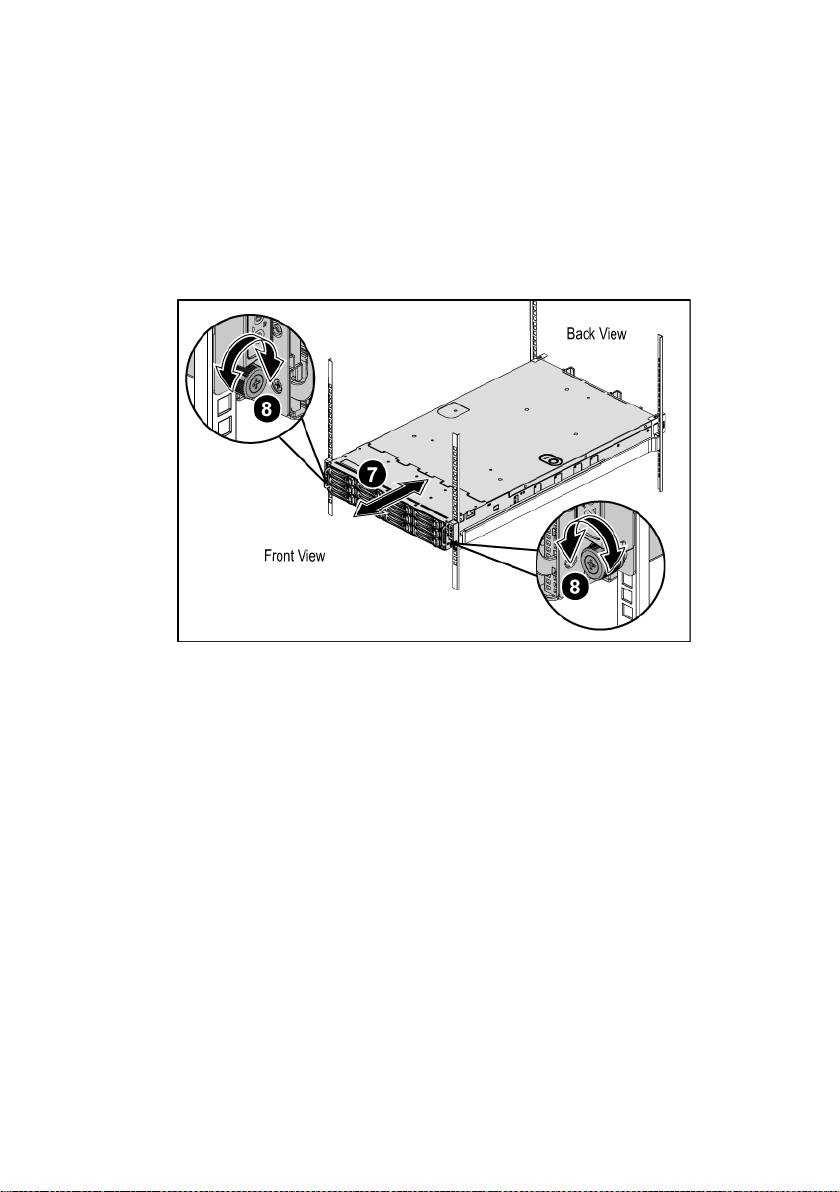
7
Slide the system into the rack. See Figure 4.
8
Tighten the thumbscrews to secure the ears of the system to the front of
the rack flanges.
Figure 4. Installing the Chassis onto the Rack.
Getting Started With Your System | 7
Top 10 manuals
100.00
NZXT HALE90 1000W99.99
Samsung SM-R38099.97
AEG BSB 18C99.97
Dell 2700W99.97
Smeg KSEC70X99.96
Beurer HDE 4099.96
Pyramida KH 50 v.299.96
MSI CSM-H81M-P3299.96
AEG HR 562799.95
Melissa 640-048