Dell PowerEdge C6220 II: Figure 3. Installing the Chassis Stabilizer Shipping Brackets
Figure 3. Installing the Chassis Stabilizer Shipping Brackets: Dell PowerEdge C6220 II
Table of contents
- Notes, Cautions, and Warnings
- Installation and Configuration Installing the Tool-Less Rail Solution
- Figure 1. Pushing the Latch Release Buttons
- Figure 2. Releasing the Latch Release Buttons
- Figure 3. Installing the Chassis Stabilizer Shipping Brackets
- Figure 4. Installing the Chassis onto the Rack.
- Optional—Connecting the Keyboard, Mouse, and Monitor Figure 5. Optional—Connecting the Keyboard, Mouse and Monitor
- Connecting the Power Cable(s) Figure 6. Connecting the Power Cable
- Turning on the System Figure 7. Pressing the Power Button on the Front of the System Figure 8. Pressing the Power Button on the Back of the System
- Complete the Operating System Setup Other Information You May Need NOM Information (Mexico Only)
- Technical Specifications Power AC power supply (per power supply)
- Battery (per system board) Physical Environmental Relative humidity Maximum vibration
- Maximum shock Altitude Airborne Contaminant Level
4
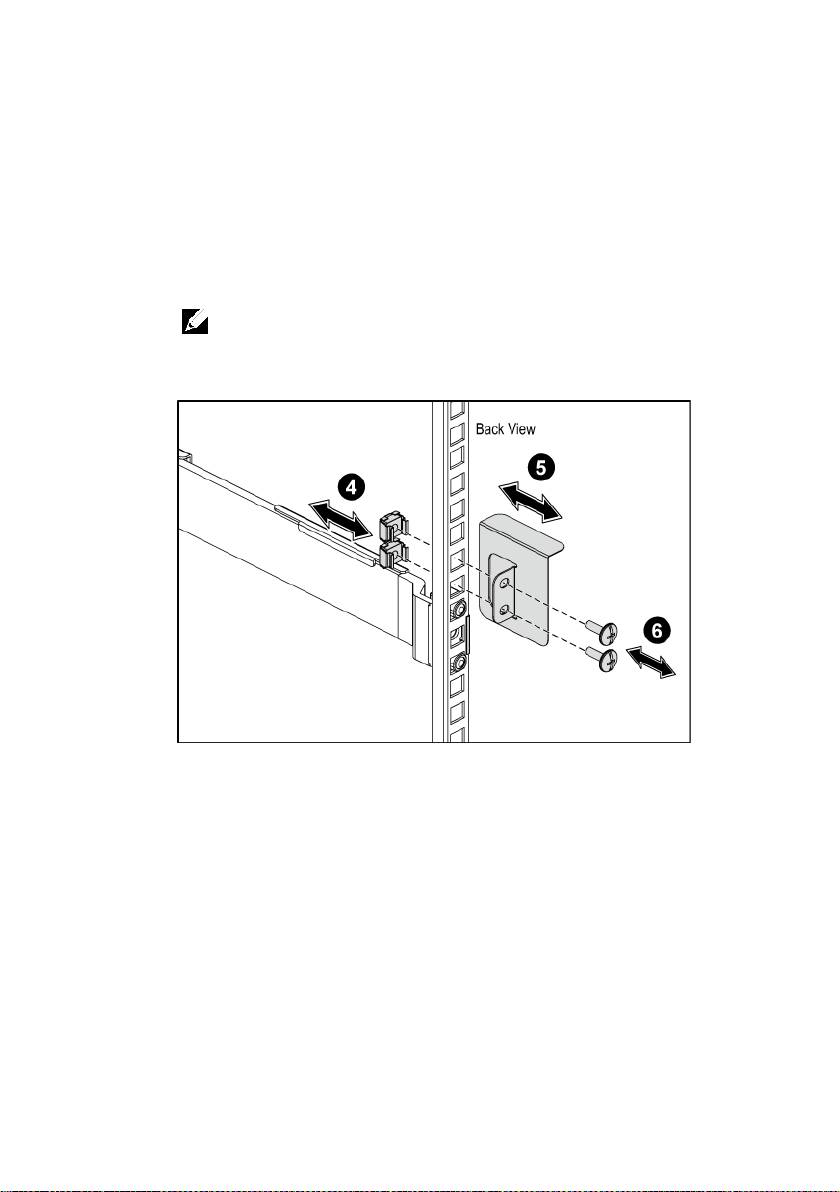
On each vertical rack flange on the back, put two screw bases into the
two square holes right above the rail. See Figure 3.
5
Install the chassis stabilizer shipping brackets (optional) on the back
rack flanges.
6
Install and tighten the screws.
NOTE:
To transport systems already installed in the rack, ensure that the two
chassis stabilizer shipping brackets (optional) are in place.
Figure 3. Installing the Chassis Stabilizer Shipping Brackets
Getting Started With Your System | 6
Top 10 manuals
100.00
NZXT HALE90 1000W99.99
Samsung SM-R38099.97
AEG BSB 18C99.97
Dell 2700W99.97
Smeg KSEC70X99.96
Beurer HDE 4099.96
Pyramida KH 50 v.299.96
MSI CSM-H81M-P3299.96
AEG HR 562799.95
Melissa 640-048