Beurer BY 77: Delete camera View camera Alternating camera image Energy-saving mode
Delete camera View camera Alternating camera image Energy-saving mode: Beurer BY 77
Table of contents
- ENGLISH
- 1. Getting to know your instrument 2. Explanation of symbols 3. Intended use
- 4. Notes
- 5. Unit description Camera “Baby”
- Parent unit “Monitor” Display description
- 6. Initial use Initial use of camera Initial use of parent unit with battery Initial use of parent unit with mains part plug
- 7. Operation 7.1 Infrared night vision 7.2 Set the volume 7.3 Set the brightness 7.4 Intercom function 7.5 Settings menu Zoom function
- Lullabies Alarm Temperature unit Add camera
- Delete camera View camera Alternating camera image Energy-saving mode
- 8. Useful information about the baby monitor 9. Maintenance and cleaning
- 10. What if there are problems?
- 11. Disposal 12. Technical data
Note
•
You can obtain additional cameras from Beurer Customer Services under item no.
163.569.
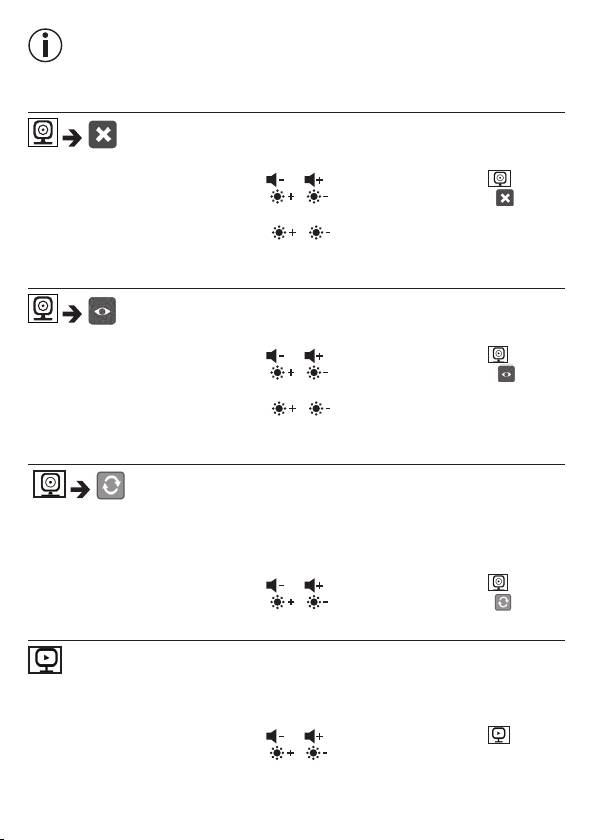
Delete camera
If you wish to delete the connection to a camera, proceed as follows:
•
Use the left/right direction arrows ( / ) to select the menu item .
•
Use the up/down direction arrows ( / ) to select the menu item .
•
Confi rm using the (
OK
)button. 1,2,3,4 appears on the screen.
•
Use the up/down direction arrows ( / ) to select the number of the camera
that you wish to delete.
•
Confi rm using the (
OK
) button.
View camera
If you wish to select the transmission image from a camera, proceed as follows:
•
Use the left/right direction arrows ( / ) to select the menu item .
•
Use the up/down direction arrows ( / ) to select the menu item .
•
Confi rm using the (
OK
)button. 1,2,3,4 appears on the screen.
•
Use the up/down direction arrows ( / ) to select the number of the camera
that you wish to view.
•
Confi rm using the (
OK
)button.
Alternating camera image
If you have multiple cameras registered, the “Alternating camera image” function is
available. When this function is activated, the transmission images from the registered
cameras appear on the screen in the form of a loop that changes every 12 seconds.
To activate this function, proceed as follows:
•
Use the left/right direction arrows ( / ) to select the menu item .
•
Use the up/down direction arrows ( / ) to select the menu item .
•
Confi rm using the (
OK
)button.
Energy-saving mode
The parent unit has a energy-saving mode. When you activate the energy-saving
mode, the screen switches o automatically after 5, 15 or 60 minutes, as you choose.
•
Use the left/right direction arrows ( / ) to select the menu item .
•
Use the up/down direction arrows ( / ) to select the time period after which
the screen should switch o automatically (5 mins, 15 mins or 60 mins).
•
Confi rm using the (
OK
) button.
23
