Beurer BM 85: Performing the blood pressure measurement Adopting the correct posture
Performing the blood pressure measurement Adopting the correct posture: Beurer BM 85
Table of contents
- 1. Getting to know your instrument 2. Important notes Signs and symbols
- Notes on use
- Notes on batteries Instructions for repairs and disposal Instructions for storage and maintenance
- 3. Unit description
- Information on the display: USB interface System requirements for the Beurer “HealthManager” PC software.
- 4. Preparing for the measurement Press and hold the START/STOP button
- 5. Measuring blood pressure Attaching the cuff
- Performing the blood pressure measurement Adopting the correct posture
- 6. Evaluating results Cardiac arrhythmia: WHO classification:
- Resting indicator measurement (using HSD diagnostics) GREEN: haemodynamically stable RED: lack of haemodynamic stability
- 7. Displaying and deleting measurements
- Average values Individual measured values Deleting measured values
- 8. Transferring measurements Transfers using the USB interface
- 9. Cleaning and storing the unit 0. Error messages/trouble-shooting 11. Battery
- 12. Technical specifications
- Technical information is subject to change without notification 3. Mains part to allow for updates.
A larger cuff for upper-arm circumferences of 35 to 44 cm
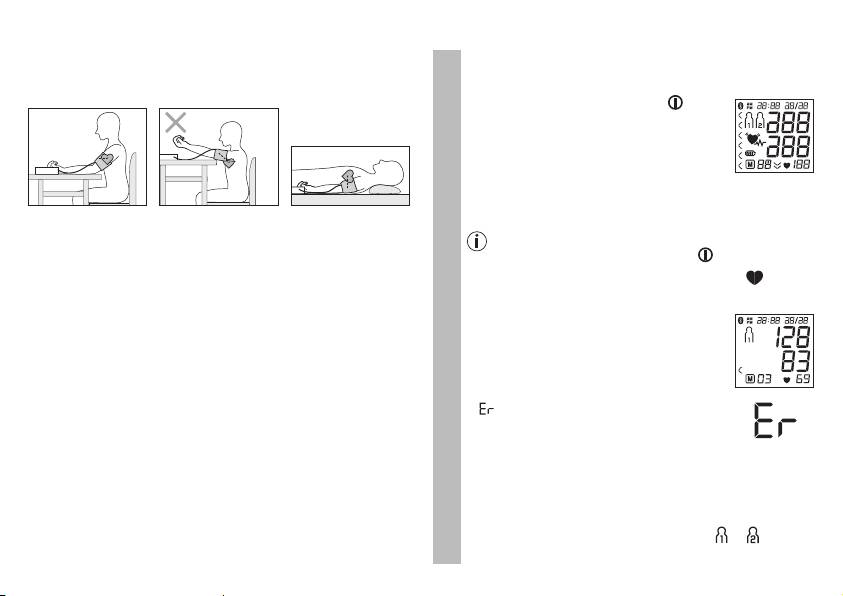
Performing the blood pressure measurement
can be obtained from specialist retailers or from the service
As described above, attach the cuff and adopt the po-
address using order number 163.387.
sture in which you want to perform the measurement.
Adopting the correct posture
•
Press the
START/STOP button to start
the blood pressure monitor.
All display elements are briefly displayed.
The blood pressure monitor will begin the
measurement automatically after 3 se-
conds. The measurement is taken during
the inflation phase.
•
Before every measurement, relax for about five minutes. Oth-
erwise deviations can occur.
You can cancel the measurement at any time by
•
You can take the measurement while sitting or lying. Make
pressing the START/STOP button .
sure that the cuff is at heart level.
As soon as a pulse is found, the pulse symbol
is
•
To take your blood pressure, make sure you are sitting com-
displayed.
fortably with your arms and back leaning on something. Do
•
Systolic pressure, diastolic pressure and
not cross your legs. Place your feet flat on the ground.
pulse readings are displayed. The resting
•
To avoid falsifying the measurement, it is important to remain
Measurement
indicator display (see section 6) illumi-
still during the measurement and not to speak.
nates in accordance with the positive or
negative classification.
•
appears if the measurement could not
be performed properly (see section 10
“Error messages/troubleshooting”). Re-
peat the measurement.
•
Now select the desired user memory by pressing the
M1 or M2 memory buttons. If you do not select a user
memory, the measurement is stored in the most re-
cently used user memory. The relevant or symbol
appears on the display.
26
